React에서 이미지를 업로드하는 방법
클라이언트에서 이미지를 선택하면 Multer 모듈을 사용하여 서버의 uploads 폴더에 이미지를 저장하고 클라이언트에서는 서버로 응답받은 이미지의 url로 view 페이지에 보여주는 방식으로 이미지를 업로드합니다. 이미지의 데이터가 아닌 이미지의 주소를 사용합니다.
React 클라이언트
- view 페이지에 input과 staet 추가
import React, { useState } from 'react';
import './App.css';

function App() {
  const [img, setImage] = useState(null);

  const onChange = (e) => { }

  const onClick = () => { }

  return (
    <div className="App">
      <input type="img" onChange={onChange}/>
      <button onClick={onClick}>제출</button>
    </div>
  );
}

export default App;
- onChange, onClick 이벤트 함수 작성
  const onChange = (e) => {
    setImage(e.target.files[0]);
  }

  const onClick = async () => {
    const formData = new FormData();
    formData.append('file', img);
    // 서버의 upload API 호출
    const res = await axios.post("/api/upload", formData);
    console.log(res);
  }
onChange
input에서 선택한 파일로 setImage를 통해 img 상태를 업데이트합니다.
onClick
formData를 만들어 img라는 이름의 객체로 현재 img 상태를 express 서버로 post 요청을 합니다.
- express 서버 연동을 위해 proxy 설정
// package.json
"proxy": "http://localhost:4000/"
express 서버
- server.js 작성
const express = require('express');
const imgRouter = require('./routes/img');

const app = express();

app.use('/api', imgRouter);

app.listen(4000, () =>{
    console.log('4000번 포트 서버 실행');
})- multer 설치
$ yarn add multer- routes/img.js 작성
const express = require('express');
const multer = require('multer');
const fs = require('fs');
const path = require('path');

const router = express.Router();

fs.readdir('uploads', (error) => {
    // uploads 폴더 없으면 생성
    if (error) {
        fs.mkdirSync('uploads');
    }
})

const upload = multer({
    storage: multer.diskStorage({
        destination(req, file, cb) {
            cb(null, 'uploads/');
        },
        filename(req, file, cb) {
            const ext = path.extname(file.originalname);
            cb(null, path.basename(file.originalname, ext) + Date.now() + ext);
        },
    }),
    limits: { fileSize: 5 * 1024 * 1024 },
})
// 이미지 업로드를 위한 API
// upload의 single 메서드는 하나의 이미지를 업로드할 때 사용
router.post('/upload', upload.single('img'), (req, res) => {
    console.log(req.file);
    res.json({ url : `/img/${req.file.filename}`});
})

module.exports = router;
Multer 모듈의 옵션
storage에는 파일 저장 방식과 경로, 파일명 등을 설정
diskStorage 사용해 이미지가 서버 디스크에 저장되도록하고, diskStorage의 destination 메서드로 저장 경로를 uploads/ 폴더로 지정했습니다. 파일명은 filename 메서드를 사용하여 기존 이름(file.originalname) + 업로드 날짜(Date.now()) + 기존 확장자(path.extname)를 붙여 설정했습니다.
limit은 최대 이미지 파일 용량 허용치를 의미함.
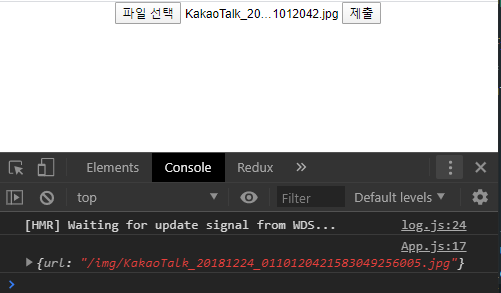
이미지를 등록하고 버튼을 클릭하여 upload API를 서버에 요청하고
서버로부터 응답을 받았습니다.
이미지를 포함한 게시글을 작성할 경우 아래와 같이..
// routes/img.js
const upload2 = multer();

//write api
router.post('/write', upload2.none(), async(req, res, next) => {
    try{
        // DB 생성
    }catch(e){
        //오류 처리
    }
})
이미지 파일과 경로는 저장되었는데 프론트에서
<img src="http://localhost:5000/[object Object]">으로 읽어 오는데 어떻게 하면 좋을까요?