1. Docker
- 가상 머신에서 돌렸으면:
가상 머신의 IP 주소:port number로 접속!

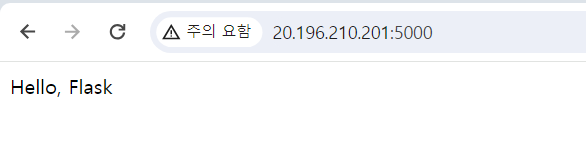
- ex) docker run -p 3000:5000 으로 컨테이너를 가동
-> 사용자는 localhost:3000으로 접속
-> 로컬의 3000번 포트는 컨테이너의 5000번 포트와 연결되어 있는 것
-> 도커는? Port forwarding
: 동일한 포트의 컨테이너여도 연결되어 있는 도커의 Port number가 다르면 동시 사용 가능!
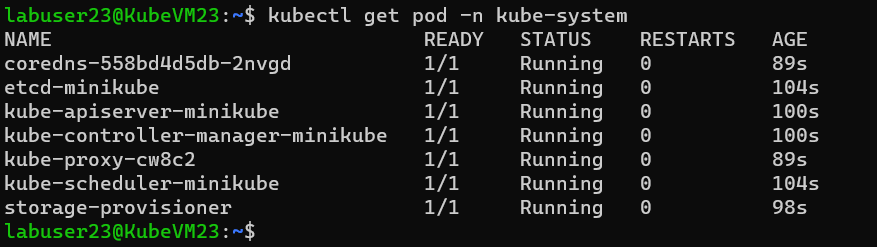
2. Kubernetes
컨테이너를 관리할 수 있는 기술
- 노드, 컨테이너가 여러개인 경우에 사용
- docker desktop에서 Kubernetes 설치
- 가상 머신 들어가서 설치 코드
curl -LO https://storage.googleapis.com/minikube/releases/v1.22.0/minikube-linux-amd64

sudo install minikube-linux-amd64 /usr/local/bin/minikube

minikube --help

curl -LO https://dl.k8s.io/release/v1.22.1/bin/linux/amd64/kubectl

sudo install -o root -g root -m 0755 kubectl /usr/local/bin/kubectl

minikube version

kubectl version

minikube start --driver=docker

# 상태 확인
minikube status
Pod: container를 감싼 개념(네트워크 자원 공유 -> container 여러개 사용 가능)
- 웹 서버 실행
kubectl run nginx --image nginx --port=80

kubectl get pod

kubectl port-forward nginx 5000:80 # 임시(개발 테스트용)
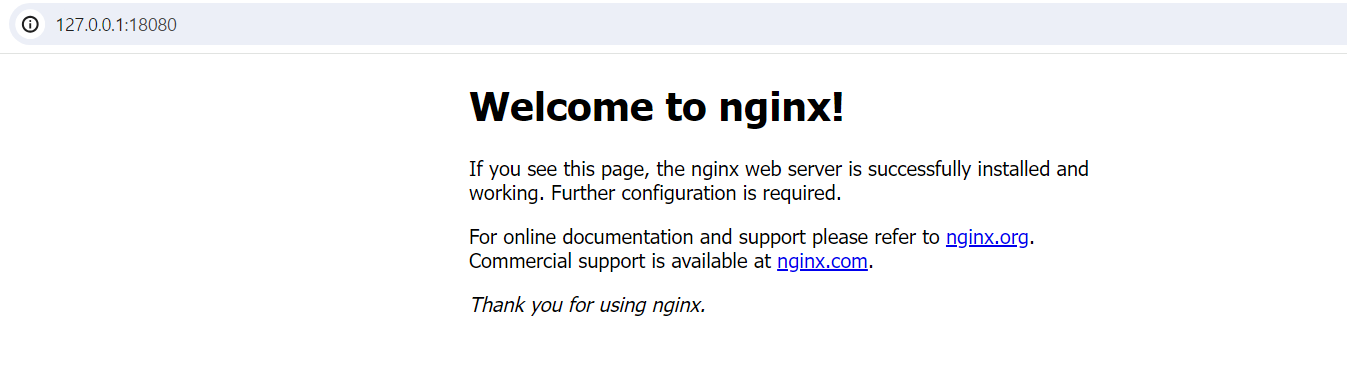
- 로컬에서 실행
kubectl run nginx --image nginx --port=80

kubectl port-forward nginx 18080:80- vi pod.yaml
# i 눌러서 INSERT 모드로 바꾸고

apiVersion: v1 # kubernetes resource 의 API Version
kind: Pod # kubernetes resource name
metadata: # 메타데이터 : name, namespace, labels, annotations 등을 포함
  name: counter
spec: # 메인 파트 : resource 의 desired state 를 명시
  containers:
  - name: count # container 의 이름
    image: busybox # container 의 image
    args: [/bin/sh, -c, 'i=0; while true; do echo "$i: $(date)"; i=$((i+1)); sleep 1; done'] # 해당 image 의 entrypoint 의 args 로 입력하고 싶은 부분

# ESC -> :wq로 빠져나오기
kubectl apply -f pod.yaml
kubectl get pod # 상태 보기
kubectl get pod -o wide # 더 자세한 상태
kubectl get pod -w # 상태 자동 업데이트, 확인 가능
kubectl logs counter # 로그 확인
kubectl delete pod counter # 삭제- Error message가 뜬다면?
# 이 명령어로 확인
kubectl describe pod counter # counter: pod name-
서비스 배포 방법: 순차적으로 하나씩 네트워크 연결을 끊으면서 모니터링 -> Pod 교체
-
사용자가 많아져서 한 번에 처리를 못 하는 경우
-> load balancer 이용: 부하 분산, TCP와 UDP 구분 가능
3. 실습
vi deploy.yamlapiVersion: apps/v1 # kubernetes resource 의 API Version
kind: Deployment # kubernetes resource name
metadata: # 메타데이터 : name, namespace, labels, annotations 등을 포함
name: nginx-deployment
labels:
app: nginx
spec: # 메인 파트 : resource 의 desired state 를 명시
replicas: 3 # 동일한 template 의 pod 을 3 개 복제본으로 생성합니다.
selector:
matchLabels:
app: nginx
template: # Pod 의 template 을 의미합니다.
metadata:
labels:
app: nginx
spec:
containers:
- name: nginx # container 의 이름
image: nginx:1.14.2 # container 의 image
ports:
- containerPort: 80 # container 의 내부 Port 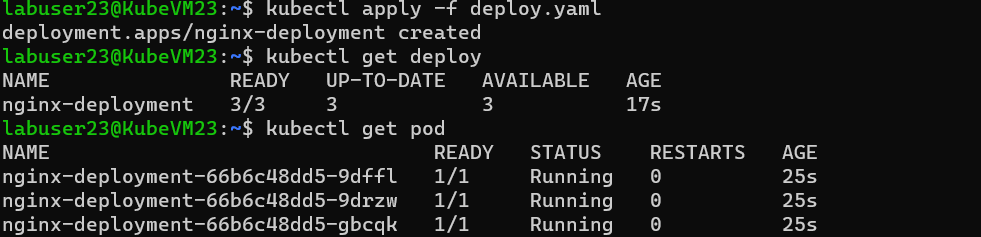
- 조회
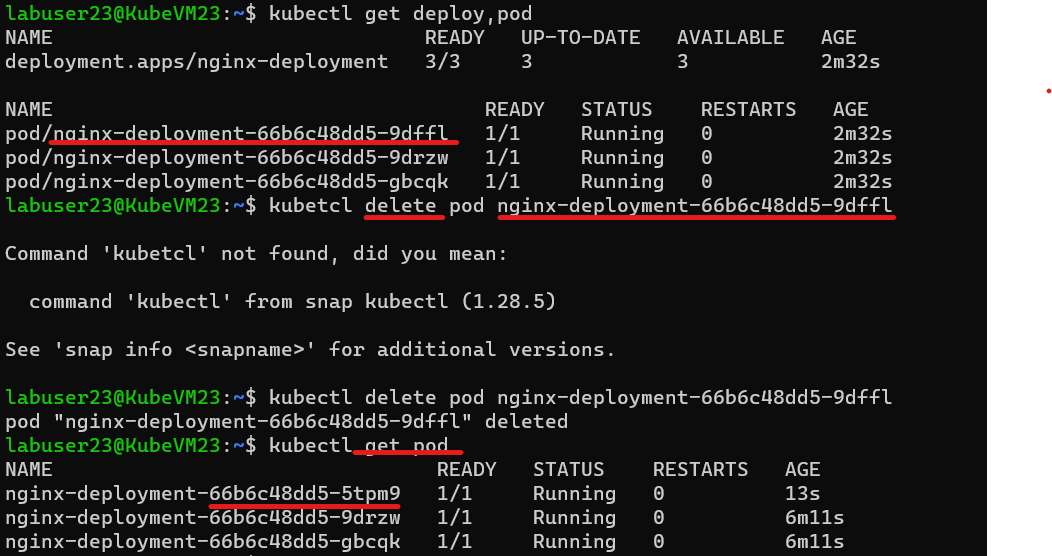
kubectl get deploy,pod-
3개로 지정한 경우, 하나를 delete해도 새로운 것이 생성됨
-
replica 개수 변경
# 5개로 변경
kubectl scale deployment/nginx-deployment --replicas=5

# replica set 확인
kubectl get replicaset- 삭제
kubectl delete deploy nginx-deployment- 서비스
kubectl apply -f deploy.yaml

# 아래 두 명령어는 실행 X
curl -X GET <POD-IP> -vvv
ping <POD-IP>- minikube 들어가서 다시 실행
minikube ssh-> Pod: 외부로 노출되지 X
- 서비스 생성
vi svc.yaml

apiVersion: v1
kind: Service
metadata:
  name: my-nginx
  labels:
    run: my-nginx
spec:
  type: NodePort # Service 의 Type 을 명시
  ports:
  - port: 80
    protocol: TCP
  selector: # 아래 label 을 가진 Pod 을 매핑
    app: nginx

- 파일 제거: rm -f [파일명]
kubectl get svc # svc: service 약자
kubectl get svc

minikube ip # minikube ip 확인

curl -X GET $(minikube ip):32000
4. PVC
- 생성
vi pvc.yaml

apiVersion: v1
kind: PersistentVolumeClaim
metadata:
  name: myclaim
spec: # pvc 의 정보를 입력하는 파트입니다.
  accessModes:
    - ReadWriteMany # ReadWriteOnce, ReadWriteMany 옵션을 선택할 수 있습니다.
  volumeMode: Filesystem
  resources:
    requests:
      storage: 10Mi # storage 용량을 설정합니다.
  storageClassName: standard # 방금 전에 확인한 storageclass 의 name 을 입력합니다.
kubectl apply -f pvc.yaml

kubectl get pvc,pv
# pvc 와 동시에 pv 까지 방금 함께 생성된 것을 확인 가능- Pod에서 PVC 사용
# Pod 생성
vi pod-pvc.yaml

apiVersion: v1
kind: Pod
metadata:
  name: mypod
spec:
  containers:
    - name: myfrontend
      image: nginx
      volumeMounts:
      - mountPath: "/var/www/html" # mount 할 pvc 를 mount 할 pod 의 경로를 적습니다.
        name: mypd # 어떤 이름이든 상관없으나, 아래 volumes[0].name 과 일치해야 합니다.
  volumes:
    - name: mypd # 어떤 이름이든 상관없으나, 위의 volumeMounts[0].name 과 일치해야 합니다.
      persistentVolumeClaim:
        claimName: myclaim # mount 할 pvc 의 name 을 적습니다.
vi pod-pvc.yaml

kubectl apply -f pod-pvc.yaml- pod 에 접속하여 mount 한 경로와 그 외의 경로에 파일 생성
kubectl exec -it mypod -- bash
touch hello1
cd /var/www/html
touch hello2- pod 삭제
kubectl delete pod mypod- pvc는 남아있나?
kubectl get pvc,pv- 해당 pvc 를 mount 하는 pod 을 다시 생성
kubectl apply -f pod-pvc.yaml- pod 에 접속하여 아까 작성한 파일들이 그대로 있는지 확인
kubectl exec -it mypod -- bash
ls
# hello1 파일이 사라진 것을 확인할 수 있습니다.
cd /var/www/html
ls
# hello2 파일이 그대로 보존되는 것을 확인할 수 있습니다.