
Hashcorp에서 개발한 Infrastructure as Code로, Kubernetes와 같이 선언형 방식을 사용한다. AWS, Azure, GCP, Kubernetes 등 왠만한 Infra는 다 호환이 된다.
*참조: https://registry.terraform.io/browse/providers
1. Installation
# Homebrew on OS X
$ brew tap hashicorp/tap

$ brew install hashicorp/tap/terraform

# Verify the installation

$ terraform -help
Usage: terraform [-version] [-help] <command> [args]

The available commands for execution are listed below.
The most common, useful commands are shown first, followed by
less common or more advanced commands. If you're just getting
started with Terraform, stick with the common commands. For the
other commands, please read the help and docs before usage.
2.terraform 실습파일 생성
이번 실습에서는 main.tf와 variable.tf 파일을 작성하여, aws에 ec2와 security group을 배포해보겠다. 먼저 코드를 보고 배포한 후 하나씩 살펴보자.
(실습에서는 로컬PC의 터미널에서 AWS와 연동되어있음을 가정한다.)
main.tf
provider "aws" {
  region = "ap-northeast-2"
}

resource "aws_instance" "example" {
  ami                    = "ami-0e9bfdb247cc8de84"
  instance_type          = "t2.micro"
  vpc_security_group_ids = [aws_security_group.instance.id]

  user_data = <<-EOF
              #!/bin/bash
              echo "My GAPJAGI Server - var test" > index.html
              nohup busybox httpd -f -p ${var.server_port} &
              EOF

  user_data_replace_on_change = true

  tags = {
    Name = "Single-MyWebSrv"
  }
}

resource "aws_security_group" "instance" {
  name = var.security_group_name

  ingress {
    from_port   = var.server_port
    to_port     = var.server_port
    protocol    = "tcp"
    cidr_blocks = ["0.0.0.0/0"]
  }
}

variable "security_group_name" {
  description = "The name of the security group"
  type        = string
  default     = "terraform-my-instance"
}

output "public_ip" {
  value       = aws_instance.example.public_ip
  description = "The public IP of the Instance"
}
variable.tf
variable "server_port" {
  description = "The port the server will use for HTTP requests"
  type        = number
  default     = 8080
}
처음보면 당연히 생소한 코드겠지만, 하나씩 살펴보면 상당히 직관적이다.
그럼 코드를 하나씩 보면서 어떤 의미인지 공부해보자.
Providers
provider block에서는 aws, azure, gcp 등과 같이 어떤 인프라 환경에 코드를 배포할 것인지 선언해준다. 필요에 따라서 multiple provider로 세팅이 가능하다.
Resources
resource block에서는 provider에서 제공하는 컴포넌트들을 정의한다. 위 예제에서는 aws provider를 사용하고,aws_instance(ec2)와 aws_security_group 컴포넌트를 생성해준다.
Variables
공통된 값들을 정의하기 위해 main.tf 파일에서 variable block으로 세팅할 수 도 있고, variable.tf 파일처럼 따로 빼서 변수 세팅이 가능하다.
output
terraform으로 infra를 생성하고 나서, 보여주는 결과 값들을 정의한다.
3. terraform 실행하기
# 초기화
$ terraform init
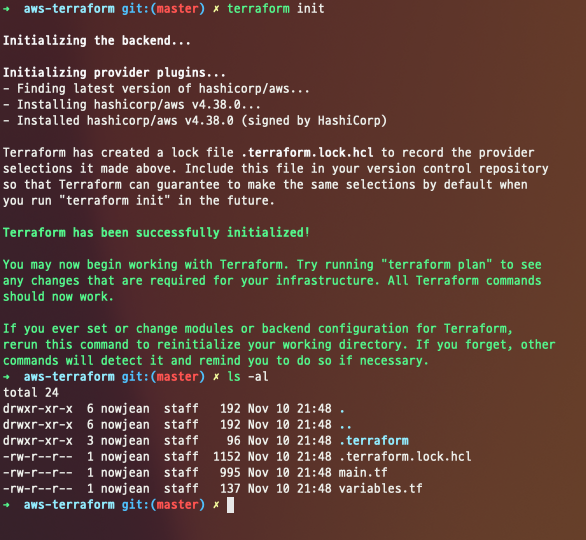
terraform 초기화가 되면 .terraform, .terraform.lock.hcl이 생긴다. 각각의 의미는 천천히 알아보도록 하고, 다음단계로 넘어 가자
# plan
$ terraform plan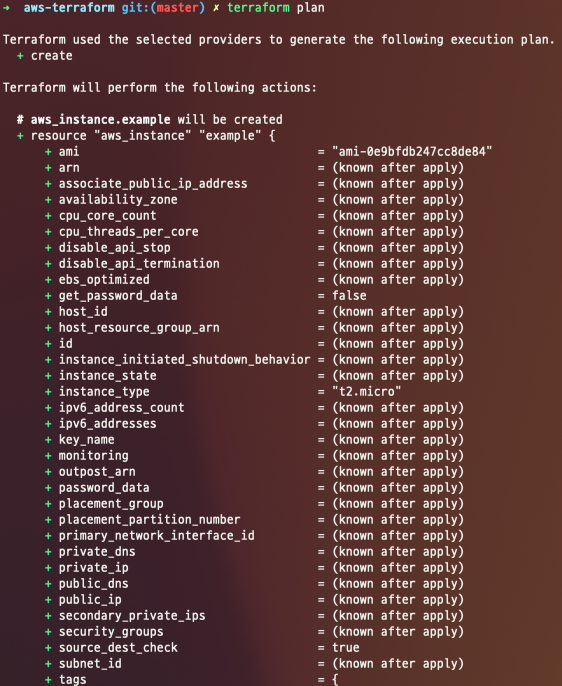
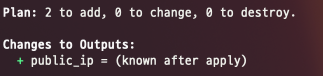
terraform plan을 하게되면, 현재 위치에서 terraform을 적용했을 때, 잘 수행이 되는지, 어떤결과가 나오는지 확인 할 수 있다. 생성되는 리소스들이 '+' 로 표기가된다.
# apply
$ terraform apply
AWS 세팅과 terraform을 잘 세팅했다면, 문제없이 ec2, publicIP, security group이 생성될 것이다.
4. terraform 리소스 정리
# destroy
$ terraform destroy
위에서 생성된 리소스들이 모두 삭제가 된다.
5. Wrap up
이번 포스팅에서는 terraform 기초 실습을 진행했다.
왜 IaC가 필요할까? 이렇게 간단한 리소스 생성은 그냥 포털에서도 쉽게 가능하다. 그런데 실제로 처음 프로젝트에 참여해서 AWS, Azure와 같은 클라우드 플랫폼을 사용할 때, EC2 뿐 만 아니라, Loadbalancer, Firewall, RDB, PUB/SUB... 등등 여러 자원 생성이 필요할 것이다.
Stage, Production 환경 각각 수많은 리소스들을 포털에서 생성하려면 실수할 수 도 있고, 하나하나 GUI에서 찾아서 하는게 꽤나 불편한 일이 될 수도 있을 것이다.
이럴 때 IaC가 가져다주는 편리함과 안정성이 있기 때문에 terraform을 쓰는게 아닐까? 라는 생각이 든다. 그럼 하나씩 더 공부해 나가면서 어떤점이 좋고 나쁜지 직접 체험해보자.