Recursive
🍀재귀
어떤 함수가 자신과 완전히 동일한 함수를 내부에서 다시 실행하는 것을 재귀함수라고 부른다.
void Test(int& _Data) {
	++_Data;
	Test(_Data);
}
int main() {
	int Value = 0;
	Test(Value);

	return 0;
}
→ 스택 오버플로우 발생
- 스택 오버플로우가 발생하지 않으려면 종료 조건이 있어야 한다.
#include <iostream>

void Test(int& _Data)
{
    if (100 <= _Data)
    {
        // 종료되는 시점을 정해주고 return을 시켜야 한다.
        return;
    }

    std::cout << _Data << std::endl;
    ++_Data;
    Test(_Data);
}

int main()
{
    int Value = 0;

    Test(Value);
}
재귀로 스택메모리의 한계 보기
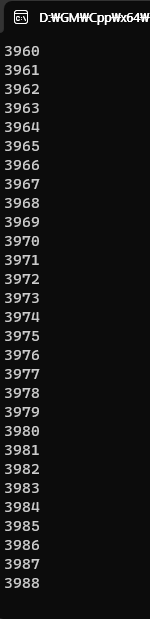
- 아래 코드를 실행시키면 _Data가 3988번 증가하고 스택 오버플로우가 발생한다.
#include <iostream>

void Test(int& _Data)
{
    std::cout << _Data << std::endl;
    ++_Data;

    Test(_Data);
}

int main()
{
    int Value = 0;
    Test(Value);
}
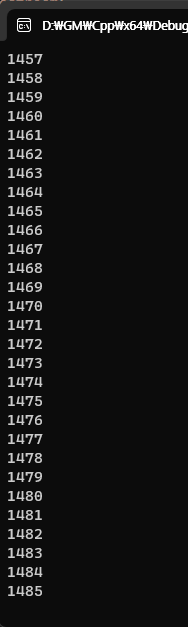
- 배열을 넣어서 스택 메모리를 더 차지해서 실행시켜보면 _Data가 1485까지만 커지고 스택 오버플로우가 발생한다. 간접적으로 스택 메모리의 한계를 느껴볼 수 있다.
#include <iostream>

void Test(int& _Data)
{
    int Arr[100];
    Arr[0] = _Data;

    std::cout << _Data << std::endl;
    ++_Data;

    Test(_Data);
}

int main()
{
    int Value = 0;

    Test(Value);
}
🍀꼬리 재귀
리턴과 동시에 재귀하는 것을 꼬리 재귀라고 한다.
컴파일러가 (가능하다면) while문 형식으로 바꿔버린다.
inline과 비슷하게 생각하면 된다. 효율적이다.
bool containsNode(const KeyType& _Key)
{
	if (this->Pair.Key == _Key)
	{
		return true;
	}

	if (this->Pair.Key > _Key)
	{
		if (nullptr != this->LeftChild)
		{
			// 리턴과 동시에 재귀를 하는것을 꼬리 재귀라고 합니다.
			// 컴파일러가 가능하다면 while문 형식으로 바꿔버립니다.
			// inline이랑 비슷하게 생각해라.
			return this->LeftChild->containsNode(_Key);
		}
	}

	if (this->Pair.Key < _Key)
	{
		if (nullptr != this->RightChild)
		{
			return this->RightChild->containsNode(_Key);
		}
	}


	return false;
}
STL 자료구조
🍀Map
std::map<타입, 타입> 템플릿이 두 개다.
Map은 자동으로 오름차순 정렬이 된다. 알고리즘은 '키-값' 쌍 중에 키에만 적용된다.
키 중복이 안 된다.
Map에 자료를 추가하는 방법이 5가지 된다. (4가지만 봄)
- Pair로 하는 방법
NewMap.insert(std::pair<int, int>(1, 123));
- make_pair 사용
NewMap.insert(std::make_pair(1, 123));
- 배열 연산자 식
NewMap[3] = 1;
- vlaue_type
NewMap.insert(std::map<int, int>::value_type(7, 10));
map을 순회하는 것은 효율적이지 않다. 개수 많아질수록 비효율적.
NewMap.contains(15); : 키 중에 15가 있는지 bool로 알려줌. (C++ 20버전에서 사용 가능)
map은 자료가 무작위일때 효율을 발휘한다.
자료가 특정 기준으로 이미 정렬된 상태로 들어간다면 대부분 모두 map보다 빠르다.
🍀MyMap
부모, 왼쪽자식, 오른쪽자식을 갖는 노드로 구현했다.
루트 노드는 부모 노드가 없다.
MyMap 전체 코드 보기
insert()
	void insert(const MyPair& _Value)
	{
		MapNode* NewNode = new MapNode();
		NewNode->Pair = _Value;

		// 트리의 기본은 뿌리
		// 최초의 노드는 무조건 뿌리 노드가 될수밖에 없다.
		// 최초에는 root가 nullptr이라면
		if (nullptr == Root)
		{
			Root = NewNode;
			return;
		}

		Root->insertNode(/*Root, */NewNode);
	}
contains()
	bool contains(const KeyType& _Key)
	{
		if (nullptr == Root)
		{
			return false;
		}

		// 안될수도 있다.
		return Root->containsNode(_Key);
	}
find()
	iterator find(const KeyType& _Key)
	{
		if (nullptr == Root)
		{
			return end();
		}

		// 안될수도 있다.
		return iterator(Root->findNode(_Key));
	}
erase()
맵의 삭제의 핵심은 어떤 노드가 삭제될 때 대체할 노드를 찾아야 한다는 점이다.
- 상황 1.
리프노드이면 대체 노드를 찾을 필요가 없다.- 부모노드한테 끊긴 것을 알려야 한다.
- 상황 2. 자식이 있는 노드일 때 왼쪽이 올라가든 오른쪽이 올라가든 상관은 없다.
- 대체할 노드를 찾고 부모와 자식쪽에 새로 연결해줘야한다.
- erase 함수는 지운 노드의 다음 노드를 리턴.
	iterator erase(iterator& _Iter)
	{
		iterator Return;

		if (nullptr == _Iter.CurNode)
		{
			MsgBoxAssert("유효하지 않은 원소를 삭제하려고 했습니다.");
			return Return;
		}

		// 지울 원소의 다음 노드를 리턴값으로 미리 저장.
		MapNode* NextNode = _Iter.CurNode->NextNode();
		Return.CurNode = NextNode;

		// 상황 1. 지울 노드가 리프노드라면 바로 지우고 끝나면 된다.
		if (true == _Iter.CurNode->IsLeaf())
		{
			// ParentNode 확인하려고 쓴 코드인듯!?
			MapNode* ParentNode = _Iter.CurNode->Parent;
			//  Release()는 부모와의 연을 끊어줌.(?)
			_Iter.CurNode->Release();
			delete _Iter.CurNode;
			return Return;
		}

		// 이 곳에 도달한 노드는 자식이 하나라도 있는 노드이다.
		// 상황 2. 자식이 있는 노드는 지우는 것이 끝이 아니고 자식 노드를 올려줘야 한다.
		// 왼쪽 자식, 오른쪽 자식 상관 없다. RightChild의 minnode나 LeftChild의 maxnode가 오면 된다.
		MapNode* ChangeNode = nullptr;
		MapNode* CurNode = _Iter.CurNode;

		ChangeNode = CurNode->RightChild->minnode();
		if (nullptr == ChangeNode)
		{
			ChangeNode = CurNode->LeftChild->maxnode();
		}

		if (nullptr == ChangeNode)
		{
			MsgBoxAssert("체인지 노드 에러.");
			return Return;
		}
		// 바꿀 자식 노드와 지울 노드의 연결을 끊는다.
		ChangeNode->Release();

		// 지울 노드의 왼쪽 오른쪽 자식들을 끊어줌.
		MapNode* LeftChild = CurNode->LeftChild;
		MapNode* RightChild = CurNode->RightChild;

		if (nullptr != LeftChild)
		{
			LeftChild->Parent = nullptr;
		}

		if (nullptr != RightChild)
		{
			RightChild->Parent = nullptr;
		}

		// 바뀌어야 할 ChangeNode와 나의 이전 자식들끼리 연결해준다.
		if (nullptr != LeftChild)
		{
			LeftChild->Parent = ChangeNode;
			if (CurNode->LeftChild != ChangeNode)
			{
				ChangeNode->LeftChild = LeftChild;
			}
		}

		if (nullptr != RightChild)
		{
			RightChild->Parent = ChangeNode;
			if (CurNode->RightChild != ChangeNode)
			{
				ChangeNode->RightChild = RightChild;
			}
		}
		// ChangeNode에게 내 부모와 서로 연결시키기
		ChangeNode->Parent = CurNode->Parent;
		MapNode* Parent = ChangeNode->Parent;
		if (nullptr != Parent && Parent->LeftChild == CurNode)
		{
			Parent->LeftChild = ChangeNode;
		}

		if (nullptr != Parent && Parent->RightChild == CurNode)
		{
			Parent->RightChild = ChangeNode;
		}

		if (Root == CurNode)
		{
			Root = ChangeNode;
		}

		delete CurNode;

		return Return;

	}
begin()
	iterator begin()
	{
		if (nullptr == Root)
		{
			return end();
		}

		// 안될수도 있다.
		return iterator(Root->minnode());
	}
end()
	iterator end()
	{
		return iterator(nullptr);
	}
(map에는 존재하지 X) 트리를 순회하는 방법이 있음
모든 노드를 순회하는 방법 3가지
전위순회
루트먼저
firstOrderPrint
	void firstOrderPrint()
	{
		// 할일을 맨 앞에서 함.
		std::cout << Pair.Key << std::endl;
		if (nullptr != LeftChild)
		{
			LeftChild->firstOrderPrint();
		}
		if (nullptr != RightChild)
		{
			RightChild->firstOrderPrint();
		}

		return;
	}
중위순회
minOrderPrint
	void midOrderPrint()
	{
		if (nullptr != LeftChild)
		{
			LeftChild->midOrderPrint();
		}
		std::cout << Pair.Key << std::endl;
		if (nullptr != RightChild)
		{
			RightChild->midOrderPrint();
		}
		return;
	}
후위순회
latOrderPrint
	void lastOrderPrint()
	{
		if (nullptr != LeftChild)
		{
			LeftChild->lastOrderPrint();
		}
		if (nullptr != RightChild)
		{
			RightChild->lastOrderPrint();
		}
		std::cout << Pair.Key << std::endl;
		return;
	}
과제
🍀MyMap에서 leak 없애기
MyMap 전체 코드 보기
후위순회하면서 지우면 자식부터 부모 순으로 모든 노드를 지울 수 있다.
후위순회 코드를 복붙해서 delete this만 추가했다.
소멸자에서 실행
- MyMap::MapNode::lastOrderDeleteLeak()
		void lastOrderDeleteLeak()
		{
			if (nullptr != LeftChild)
			{
				LeftChild->lastOrderDeleteLeak();
			}
			if (nullptr != RightChild)
			{
				RightChild->lastOrderDeleteLeak();
			}
			delete this;
			return;
}- MyMap::lastOrderDeleteLeak()
	void lastOrderDeleteLeak()
	{
		Root->lastOrderDeleteLeak();
		return;
}- MyMap::~MyMap()
	~MyMap() {
		lastOrderDeleteLeak();
	}
일단 시작해보자