
해커톤에서 모바일 서비스를 만들기로 했는데 앱스토어 등록 절차를 진행할 시간이 없다고 판단해 PWA (Progressive Web Apps) 형태로 만들기로 했다.
앱스토어에 배포를 안하는 대신 검색 엔진에 잘 노출될 수 있도록 해야하기 때문에 Next.js를 사용하기로 했고 page router에 getServersideProps나 getStaticProps를 사용하는 대신 @tanstack/react-query를 사용하는 방식을 선택했다.
언어는 TypeScript, CSS는 styled-components, 상태 관리 라이브러리는 필요하다면 zustand를 쓰기로 했다!
1. Next.js 세팅
먼저 공식 문서에서 권장하는 자동 설치 방식으로 진행하기 위해 create-next-app@latest을 사용했다.
npx create-next-app@latest설치 과정에서 나온 프롬프터에서 선택한 옵션은 아래와 같다.
What is your project named?
2024_beotkkotthon_team_24_fe
Would you like to use TypeScript? No /Yes
Would you like to use ESLint? No /Yes
Would you like to use Tailwind CSS?No/ Yes
Would you like to usesrc/directory? No /Yes
Would you like to use App Router? (recommended)No/ Yes
Would you like to customize the default import alias (@/*)? No /Yes
What import alias would you like configured?@/*
2. PWA 적용
1. next-pwa 패키지 설치
Next.js 환경에서 PWA를 적용하기 위해 먼저 next-pwa 패키지를 설치했다.
npm install next-pwa2. next config 설정
next-pwa에서 설명하고 있는 것처럼 프로젝트에서는 Next.js 9 버전 이상을 사용하고 있기 때문에 next.config.mjs 파일을 다음과 같이 수정해주었다.
import withPWA from 'next-pwa';

/** @type {import('next').NextConfig} */
const nextConfig = {
  // reactStrictMode: true,
};

export default withPWA({
  ...nextConfig,
  dest: 'build',
});
작성하고 pnpm build 하면 /public 내부에 workbox-*.js과 sw.js 파일이 자동으로 생성되는 것을 볼 수 있다.
3. manifest 파일 생성
PWA의 설치와 앱의 구성 정보를 담고 있는 json 설정 파일인 manifest 파일을 만들어야 하는데 manifest-generator에서 쉽게 만들 수 있다.
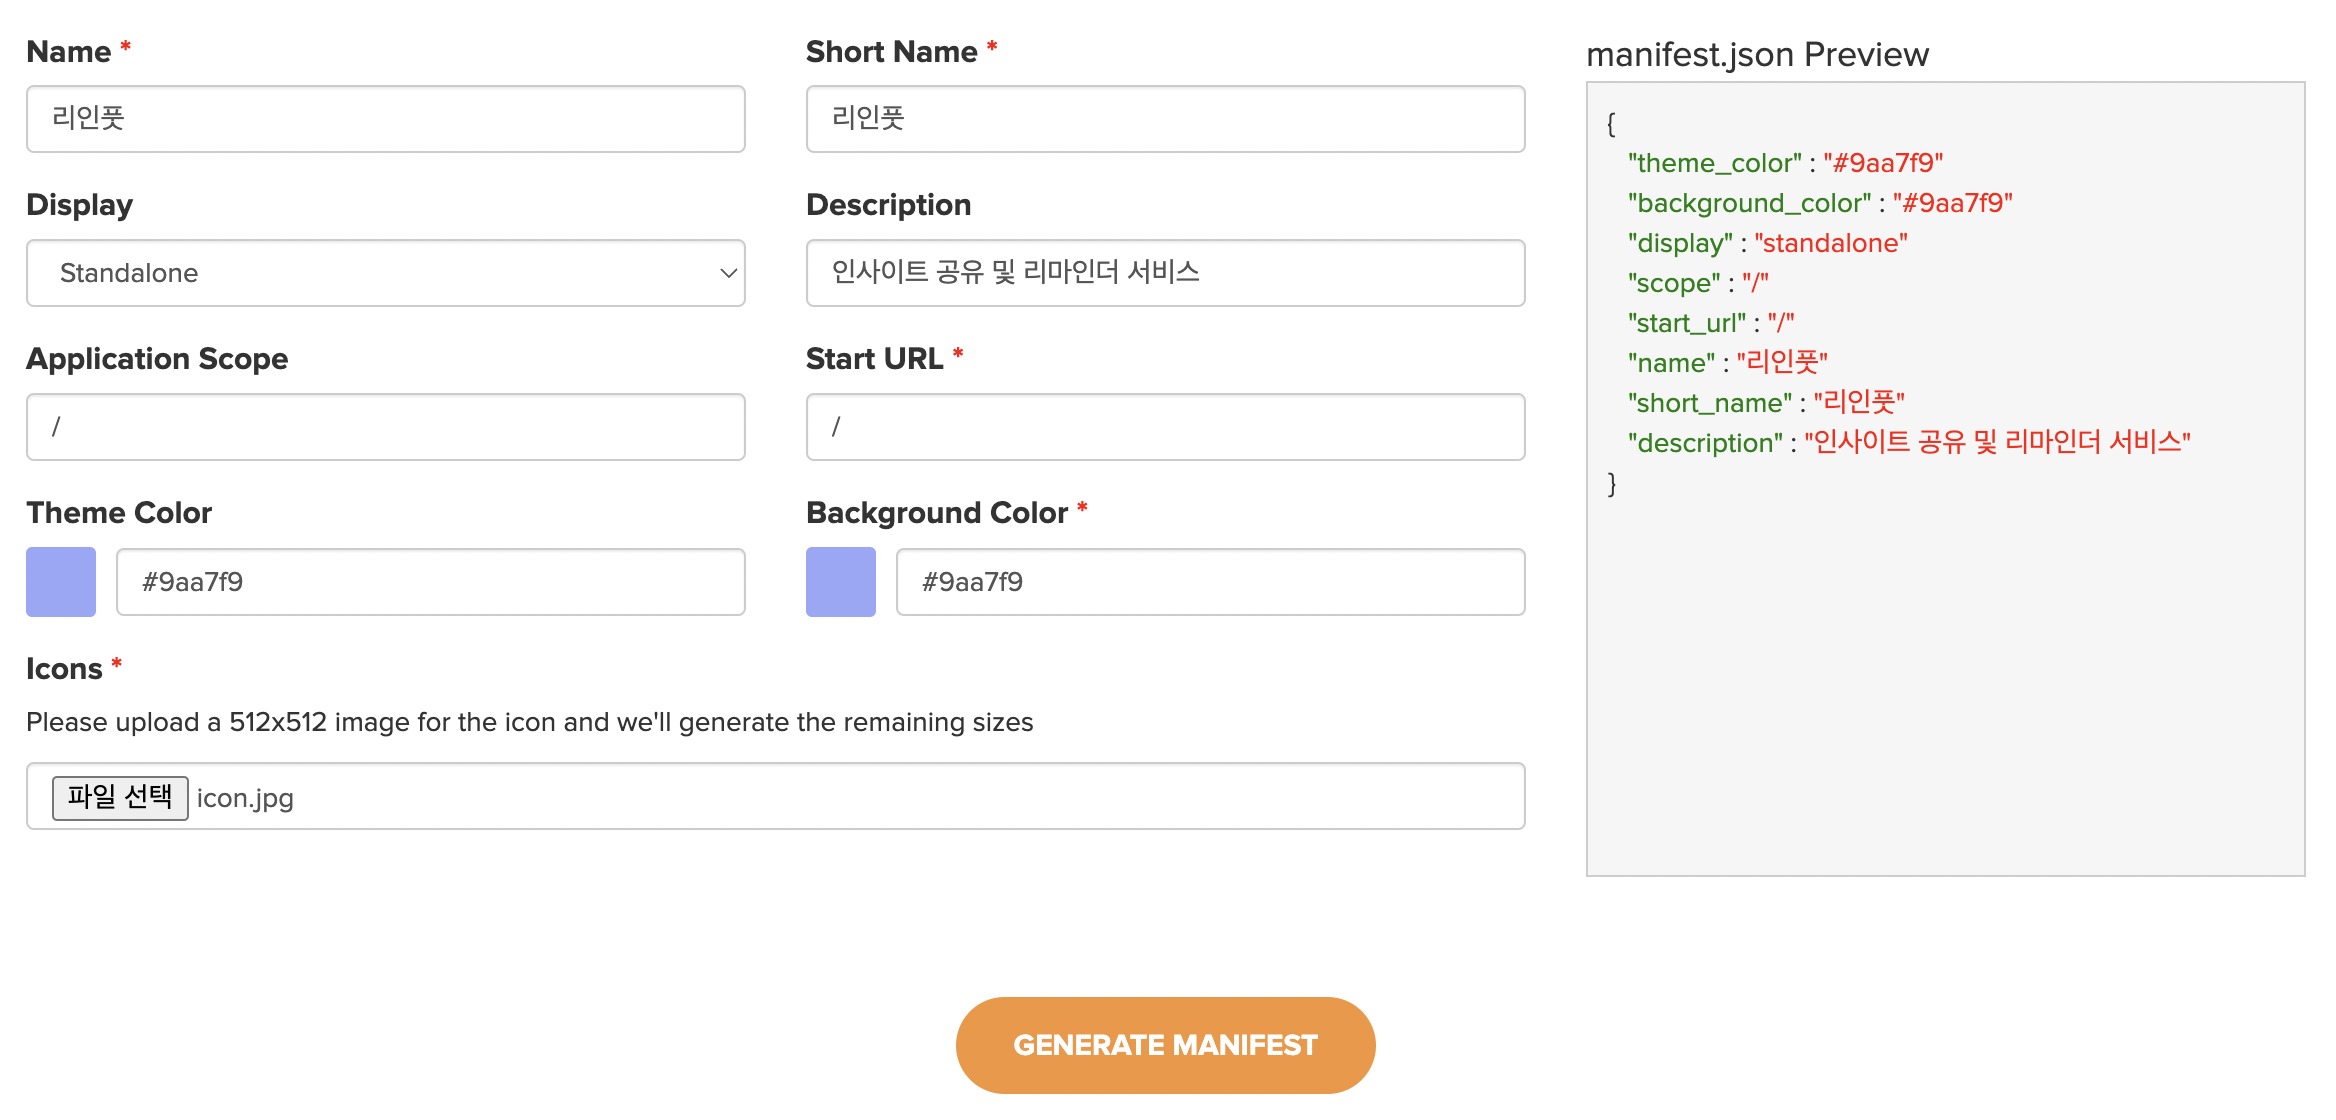
정보를 입력하고 GENERATE MANIFEST를 클릭하면 manifest.webmanifest 파일과 아이콘들이 담긴 파일이 다운로드 된다. webmanifest 파일을 json으로 바꾸고 manifest 파일은 /public 아래에, 아이콘들은 /public/icons에 저장했다.
{
  "theme_color": "#9aa7f9",
  "background_color": "#9aa7f9",
  "display": "standalone",
  "scope": "/",
  "start_url": "/",
  "name": "리인풋",
  "short_name": "리인풋",
  "description": "인사이트 공유 및 리마인더 서비스",
  "icons": [
    {
      "src": "/icons/icon-192x192.png",
      "sizes": "192x192",
      "type": "image/png"
    },
    {
      "src": "/icons/icon-256x256.png",
      "sizes": "256x256",
      "type": "image/png"
    },
    {
      "src": "/icons/icon-384x384.png",
      "sizes": "384x384",
      "type": "image/png"
    },
    {
      "src": "/icons/icon-512x512.png",
      "sizes": "512x512",
      "type": "image/png",
      "purpose": "any maskable"
    }
  ]
}
4. Metadata 적용
위에서 작성한 manifest와 같은 메타 데이터가 제공될 수 있도록 관련 태그를 작성해야 한다. _document.tsx 파일의 Head 태그 안에 <link rel="manifest" href="/manifest.json" />를 넣어주었다.
import { Html, Head, Main, NextScript } from 'next/document';

export default function Document() {
  return (
    <Html lang="en">
      <Head>
        <link rel="manifest" href="/manifest.json" />
        <meta name="theme-color" content="#9aa7f9" />
      </Head>
      <body>
        <Main />
        <NextScript />
      </body>
    </Html>
  );
}
5. 빌드 & 실행
pnpm build
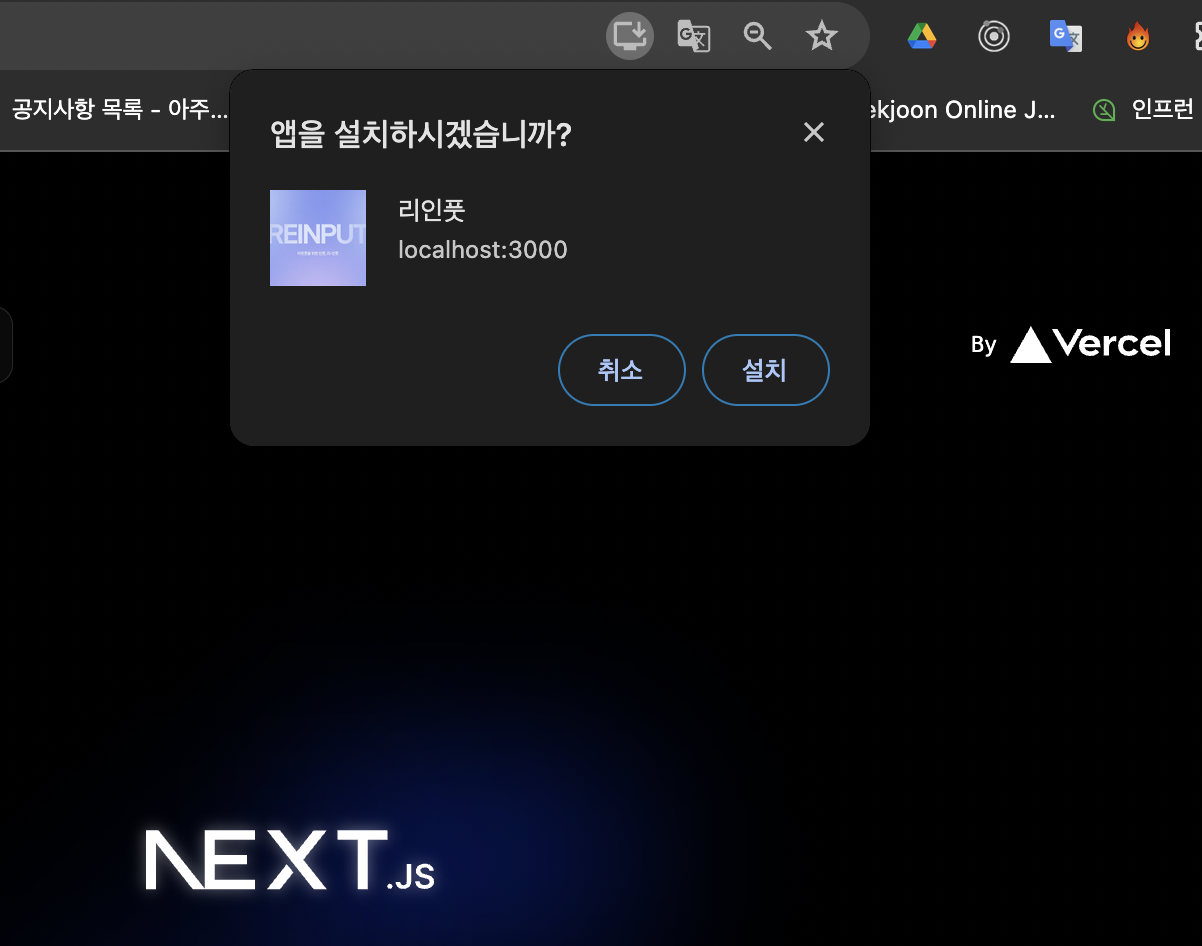
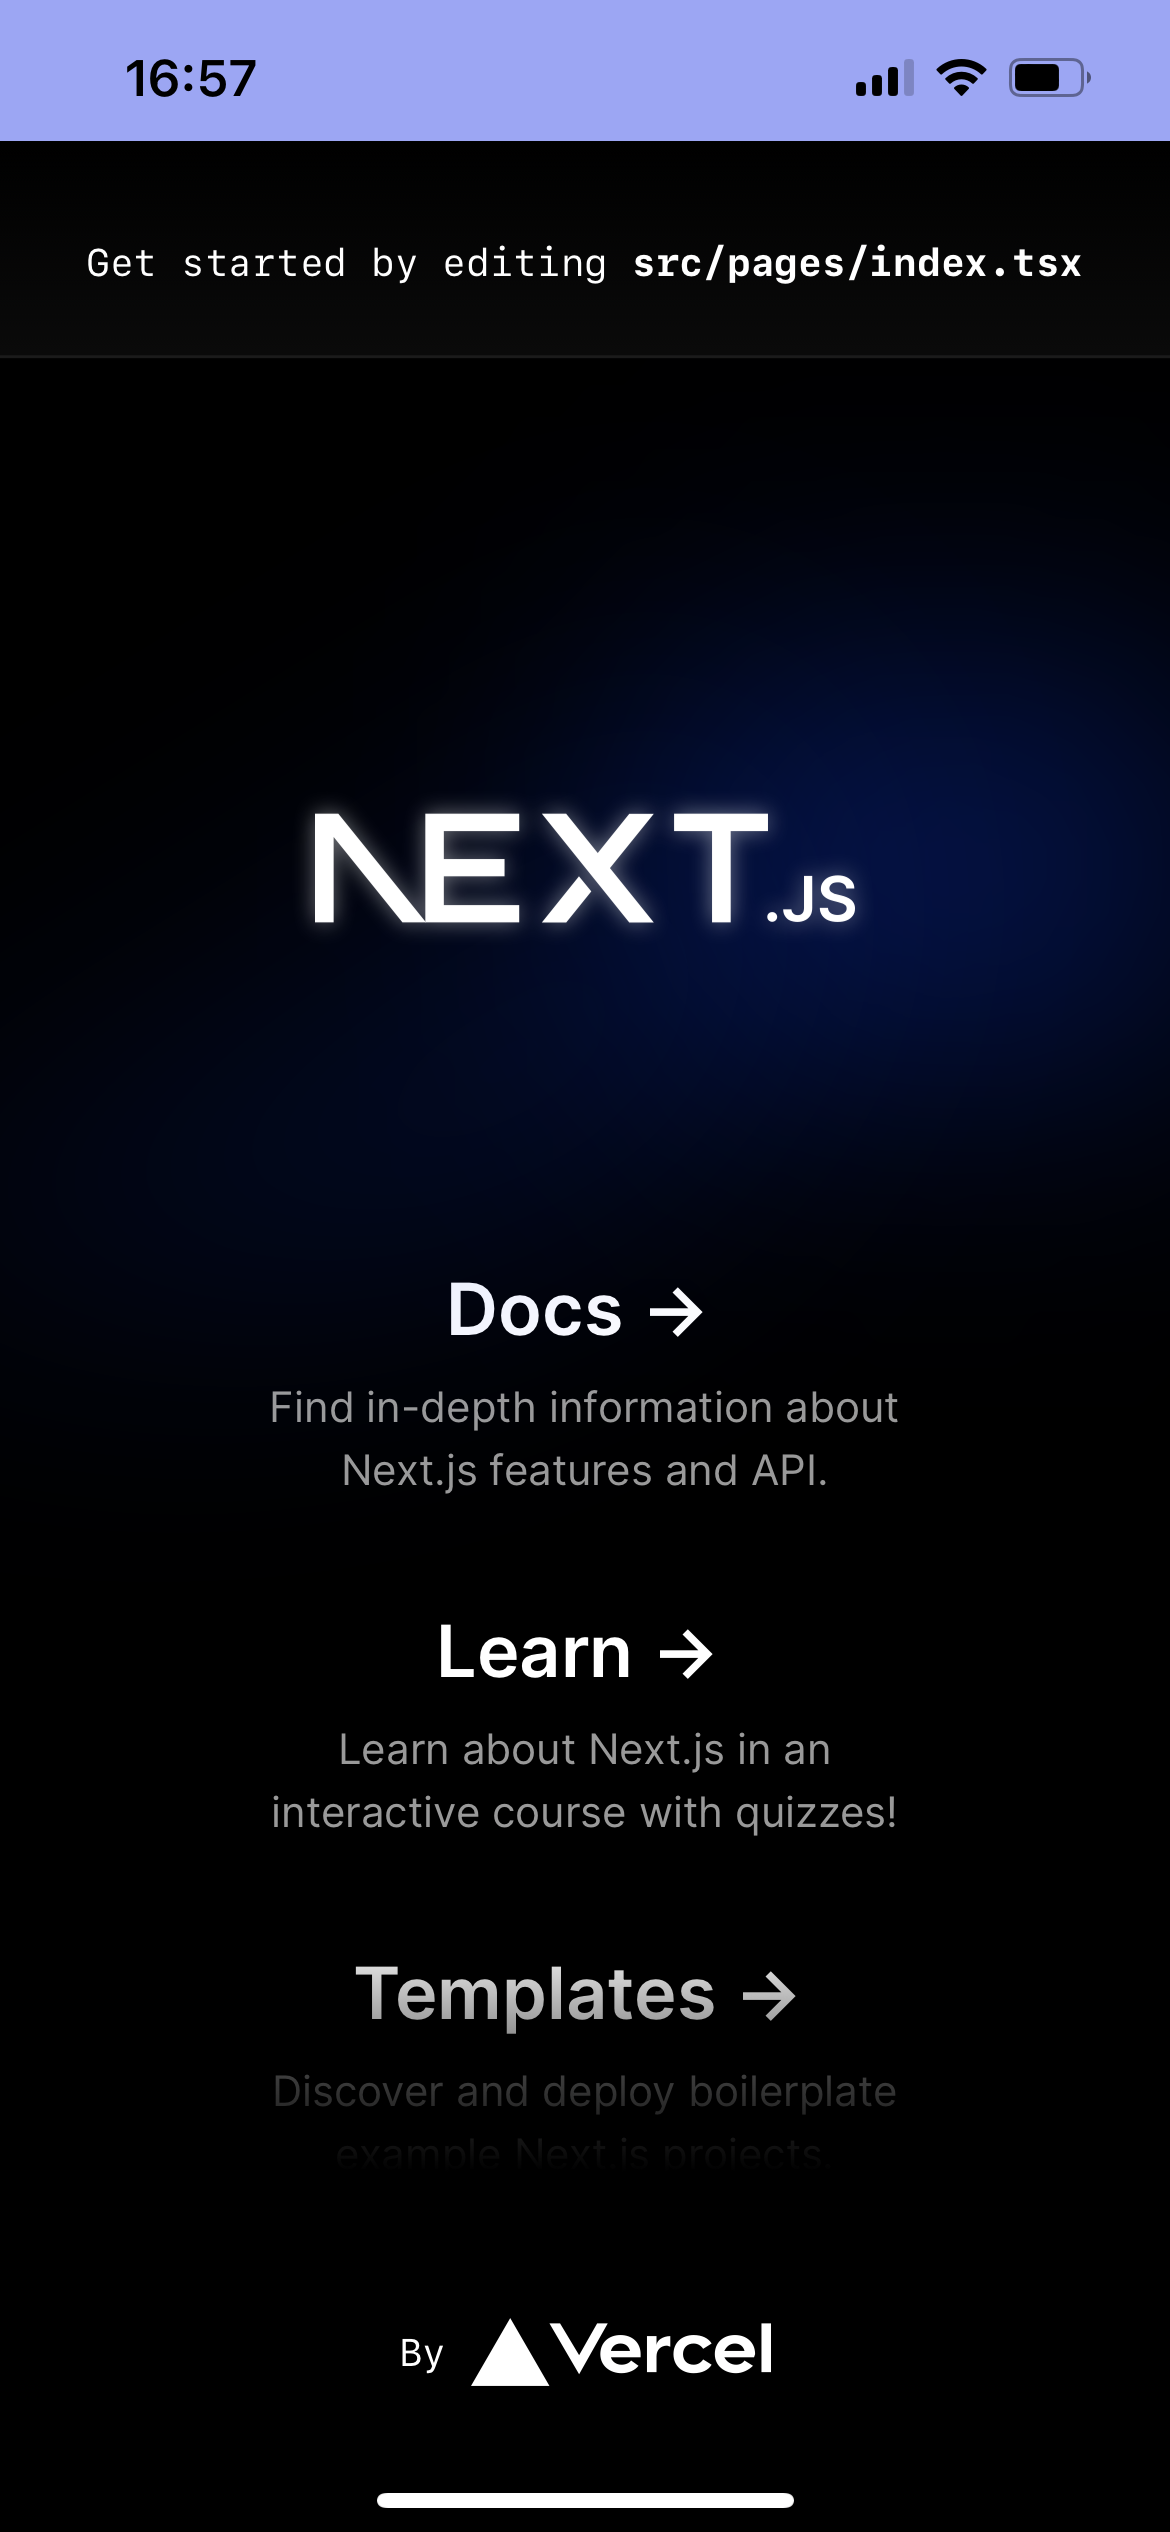
pnpm run dev프로젝트를 다시 빌드하고 실행시켜보면 다음과 같이 앱을 설치할 수 있는 아이콘이 url 표시줄에 보인다.
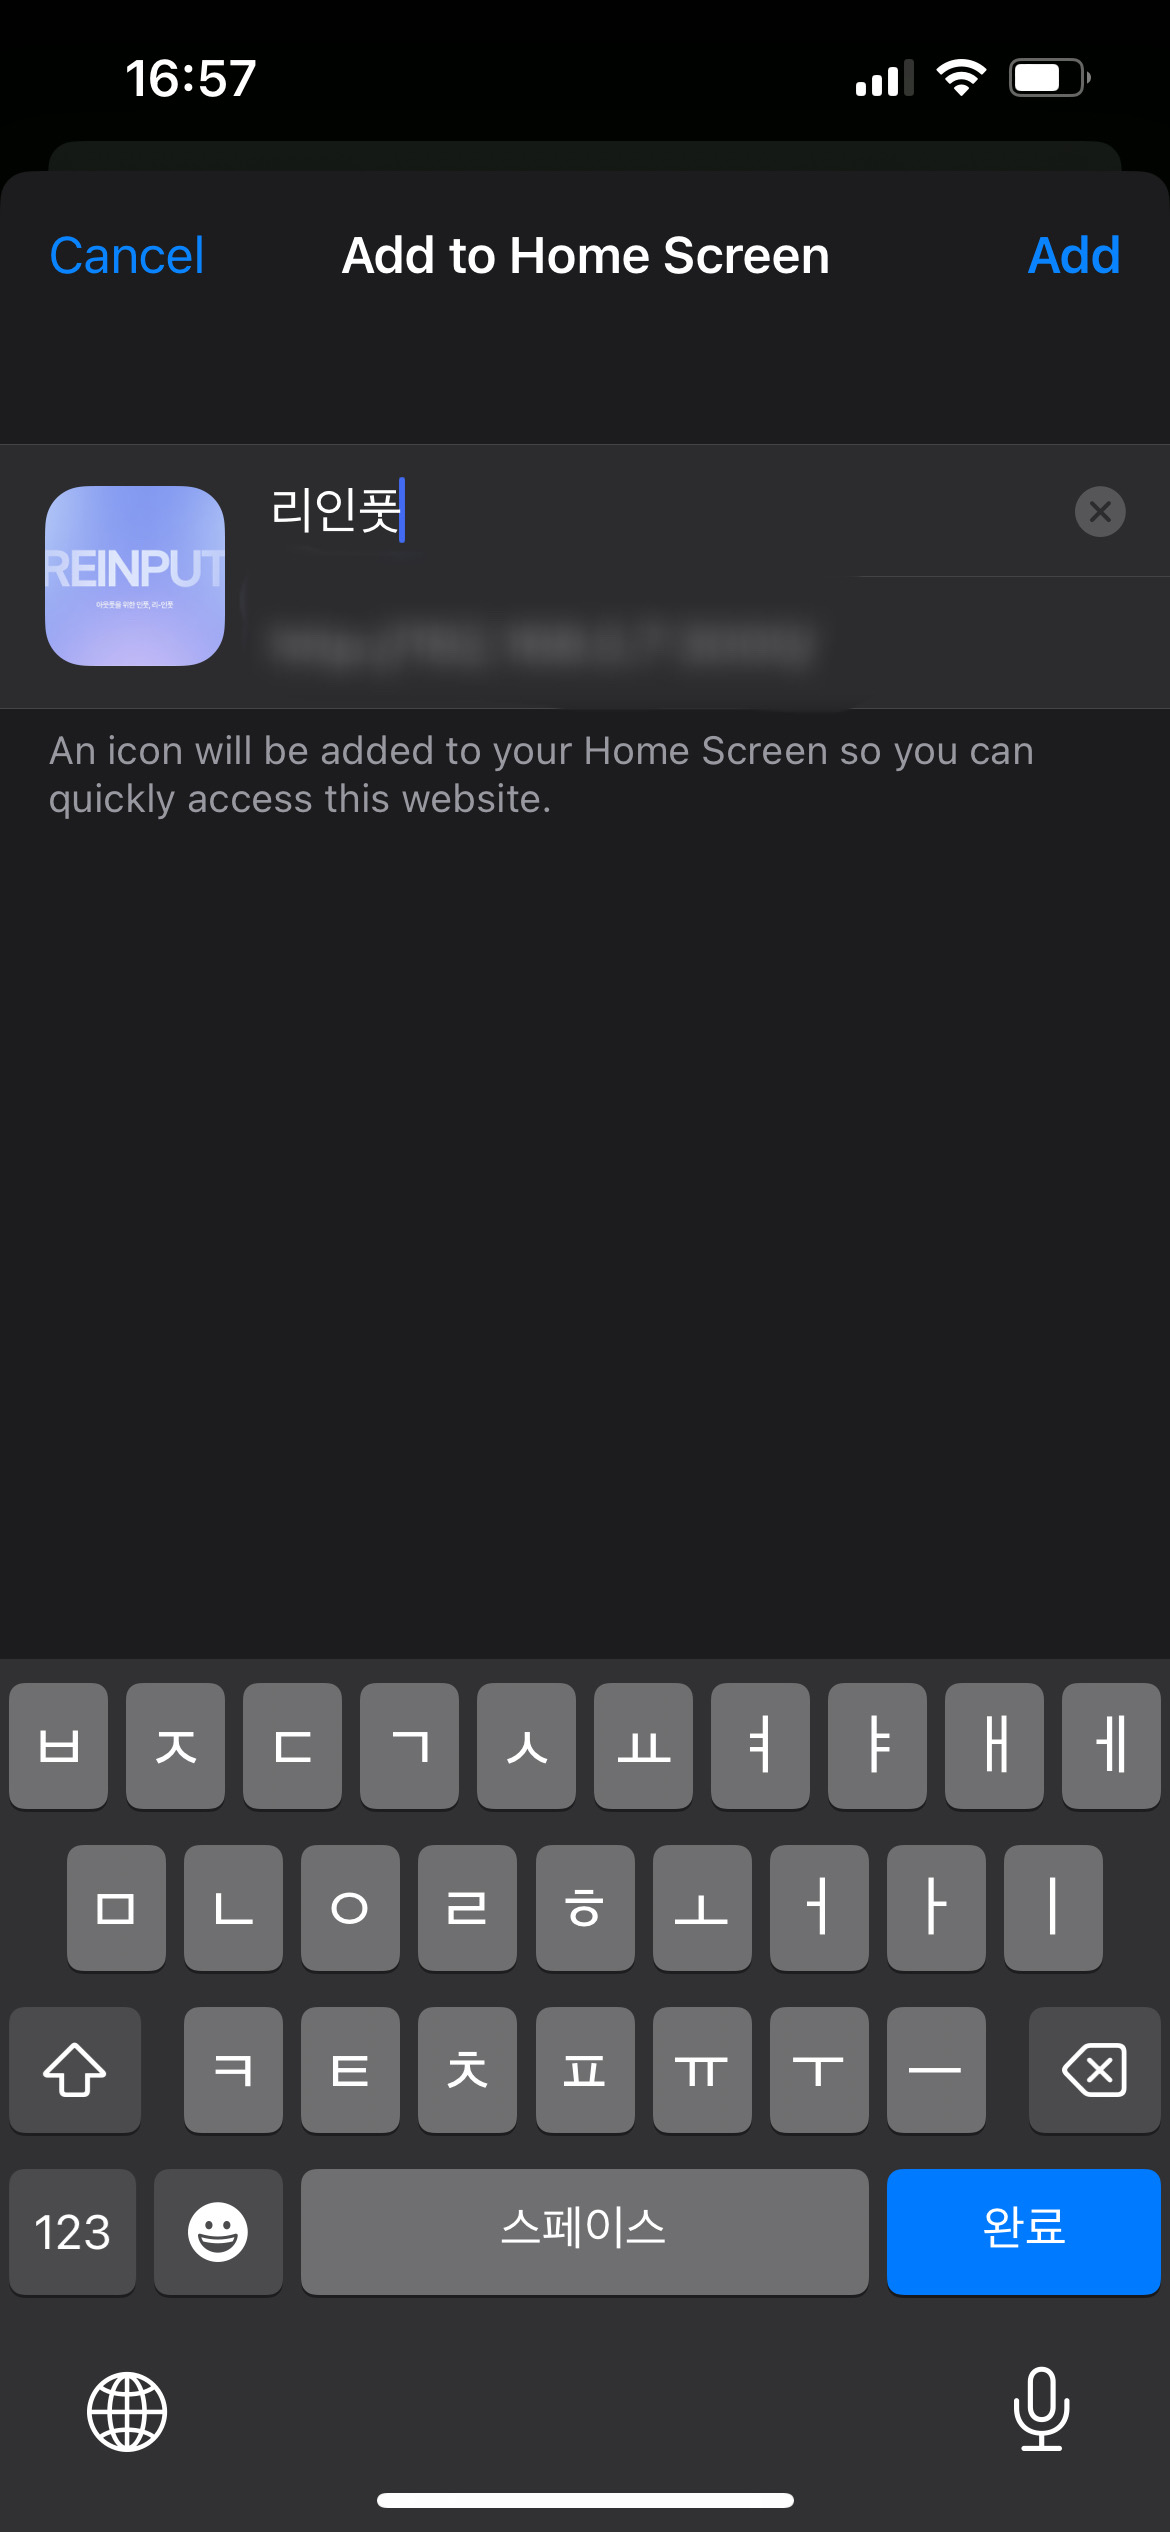
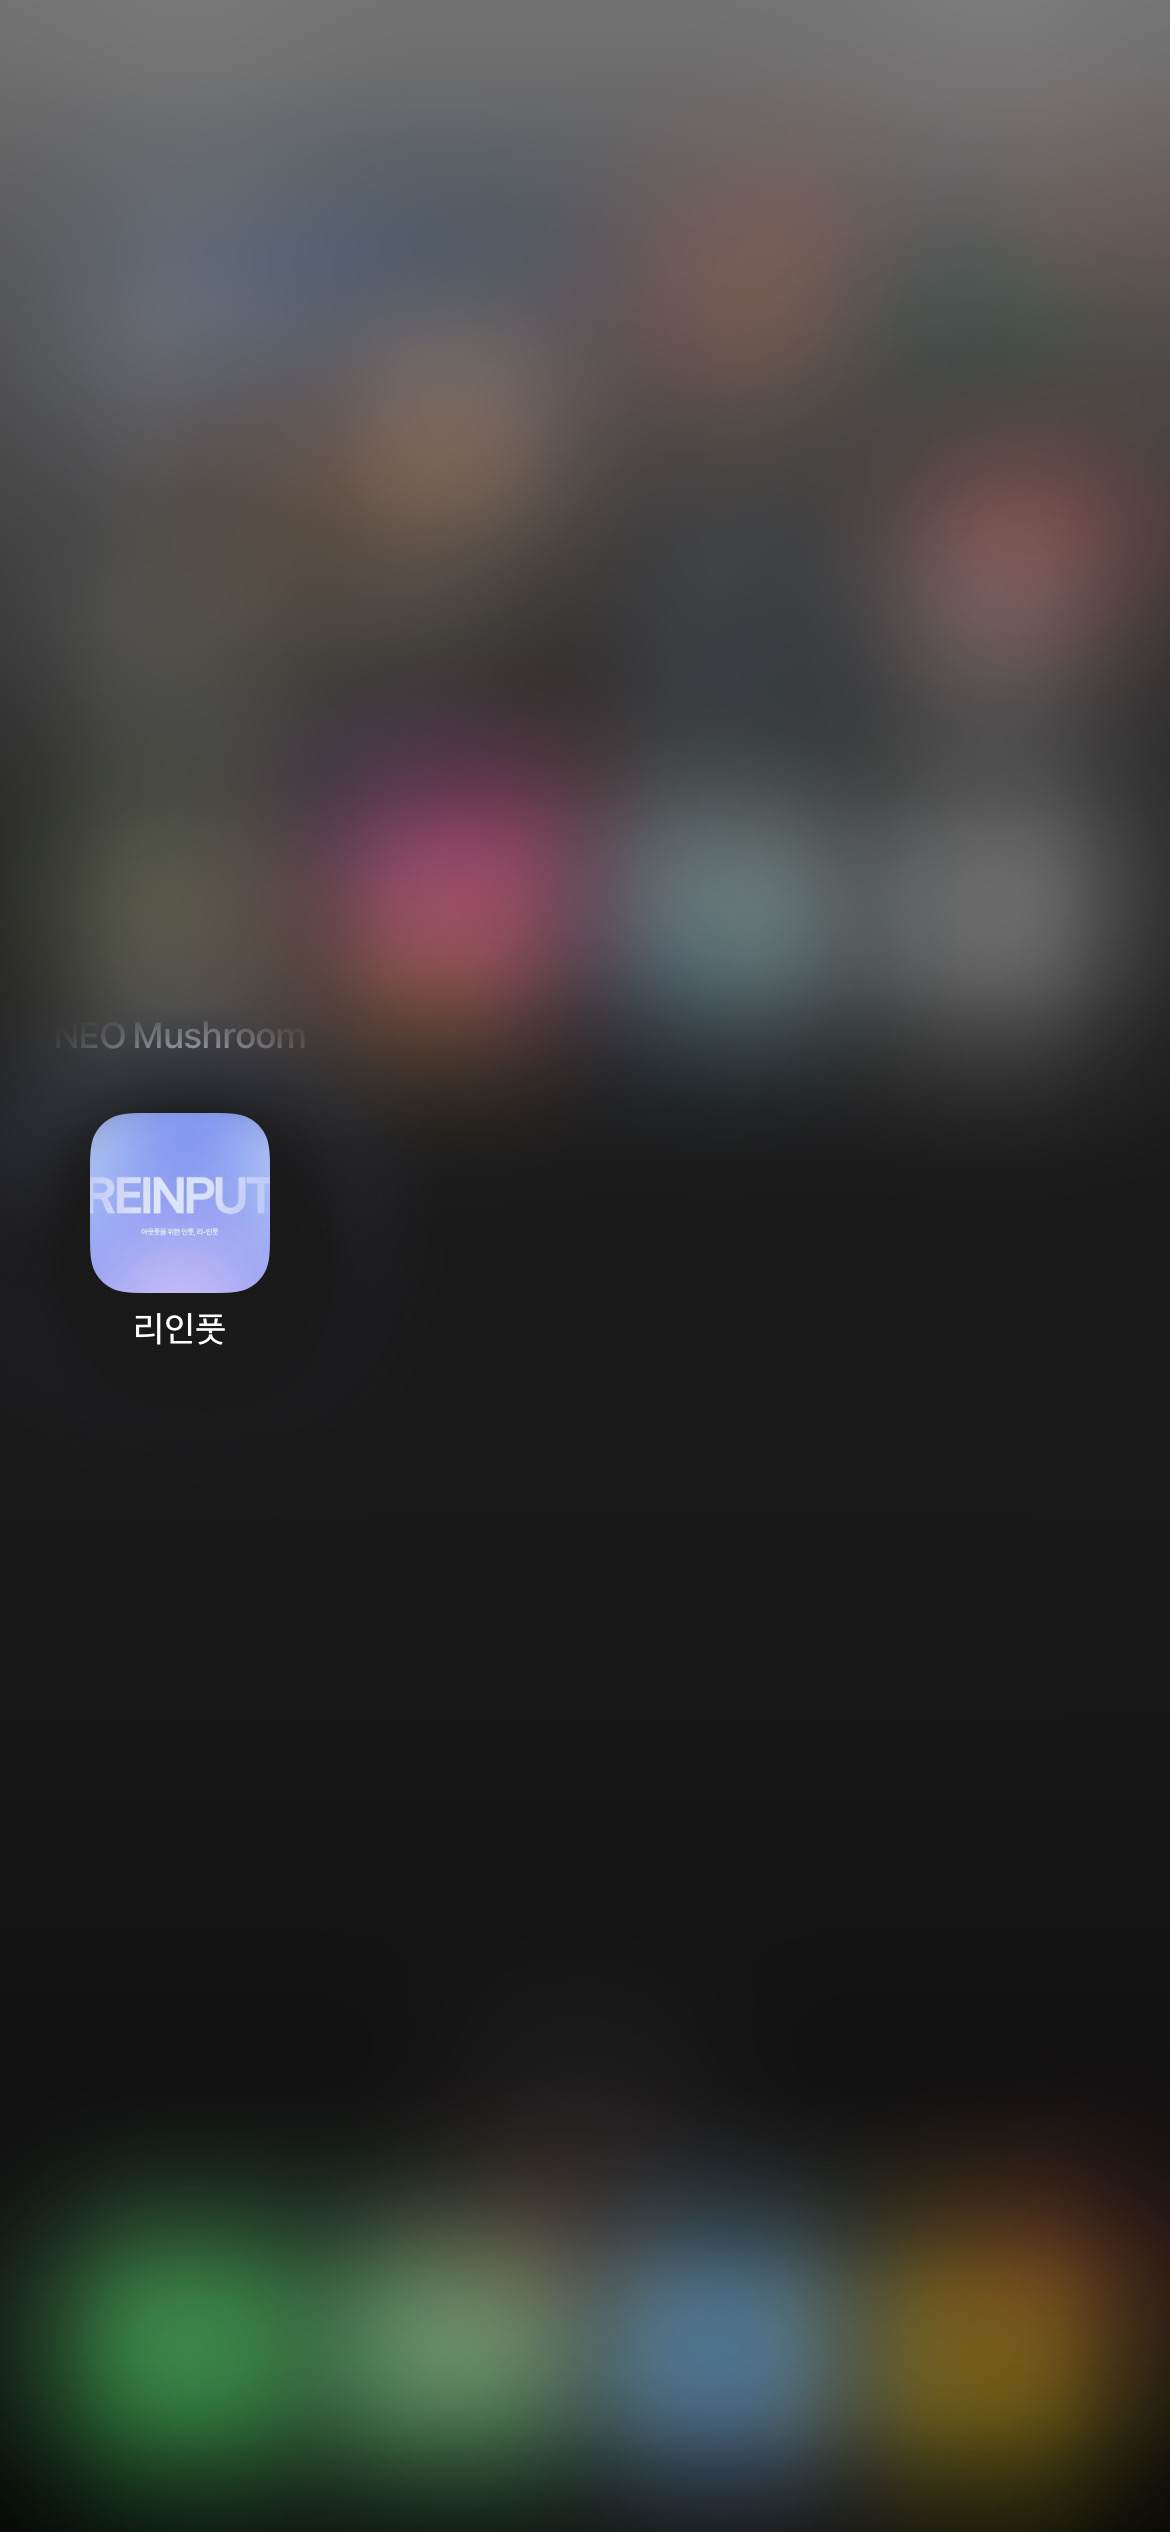
핸드폰으로 localhost에 접속해서 확인해봤는데 잘 동작한다.
 |  |  |
|---|
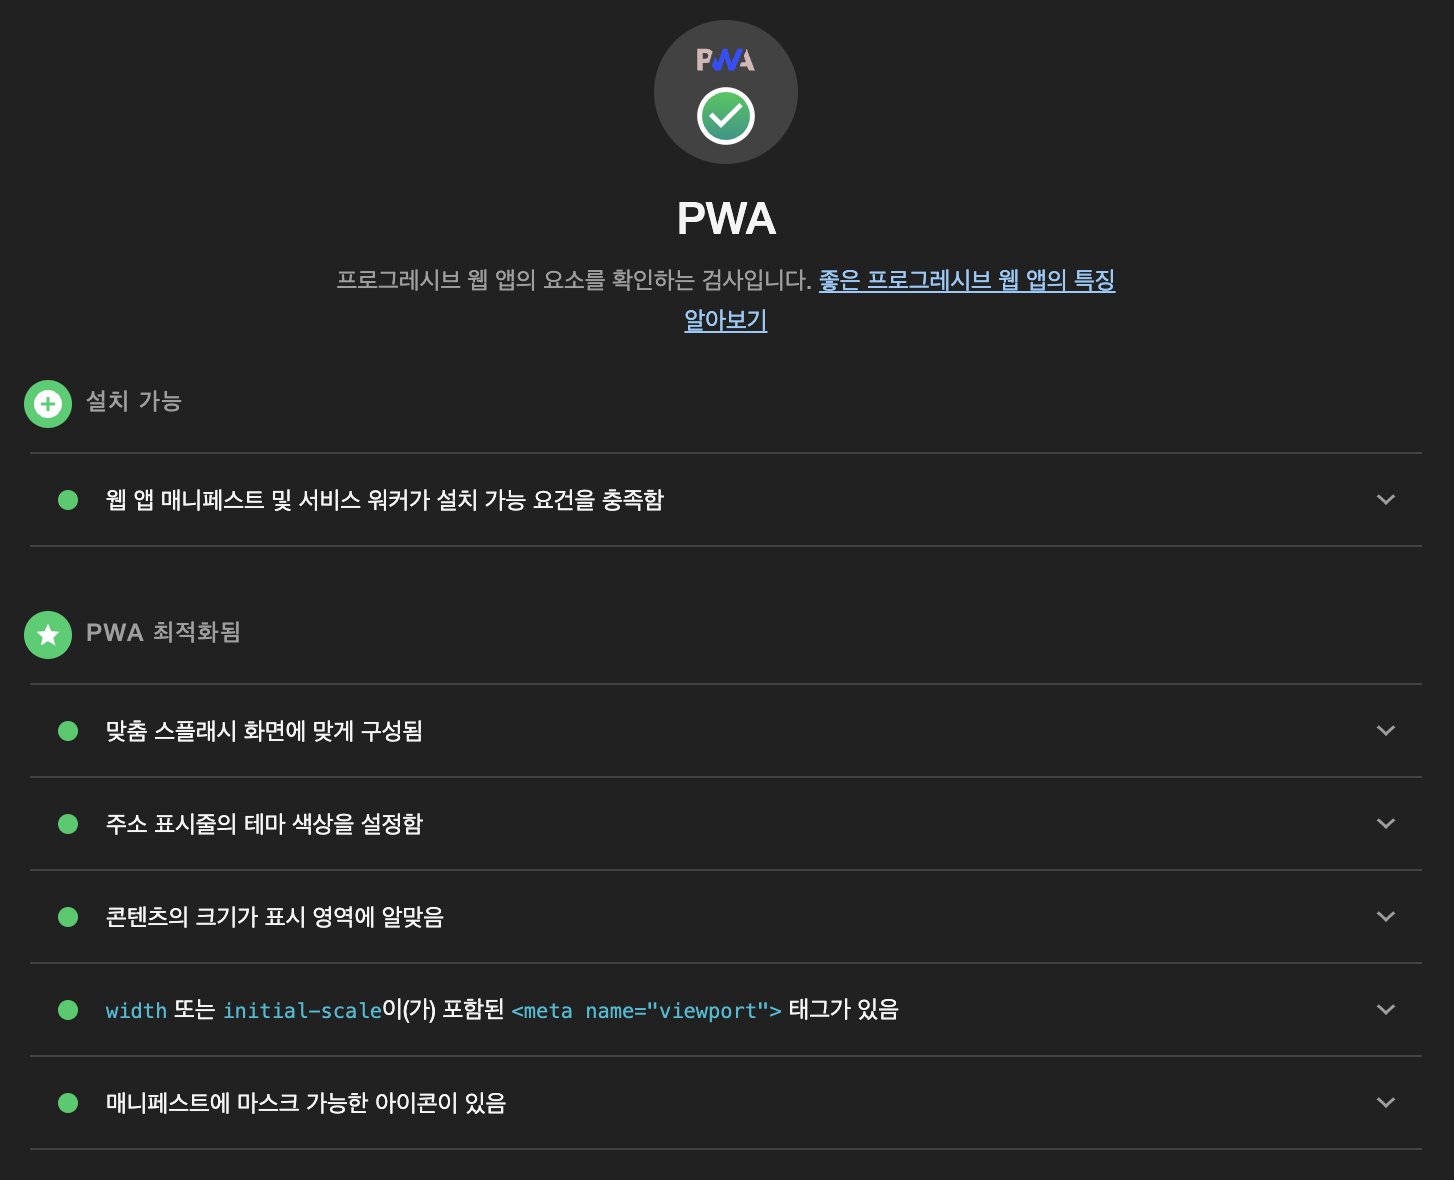
6. Lighthouse
마지막으로 개발자 도구 - Lighthouse 탭에서 PWA 항목을 만족하는지도 확인하였다.
3. 라이브러리 설치 & 폴더 구조
추가적으로 필요한 라이브러리를 설치하고, 아래와 같이 폴더 만들어서 index.ts 빈 파일들을 넣어두었다.
npm install -g pnpm
pnpm i axios @tanstack/react-query styled-components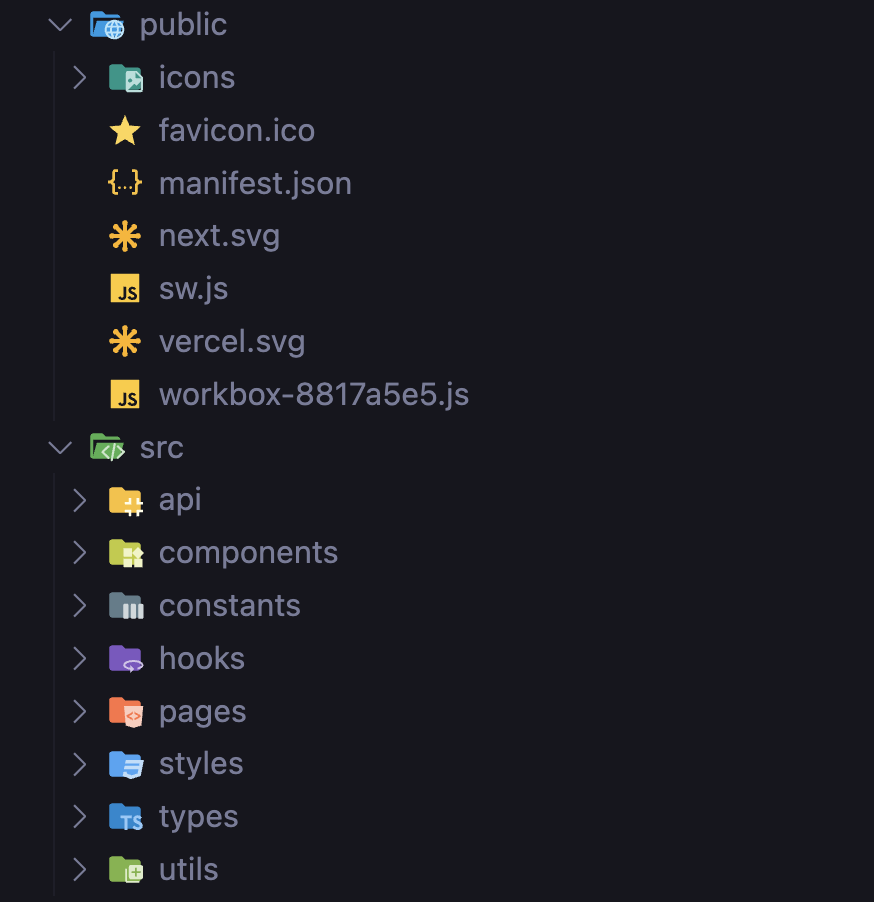
4. Vercel 자동 배포
팀원이 Vercel로 main branch 자동 배포 연결해줬다!
2024-beotkkotthon-team-24-fe 에서 확인할 수 있다.
빨리 디자인 나와서 개발하고 싶다! 끗 😺