[React Native] 컴포넌트 구성 react-navigation
미뤄뒀던 React Native 공부 다시시작
서버실행
서버 실행을 하게되면 메트로서버가 켜짐과 동시에 에뮬레이터가 켜진다
에뮬레이터에서 내가만들고 있는 앱을 실제로 확인하면서 개발이 가능하다(핫리로딩)
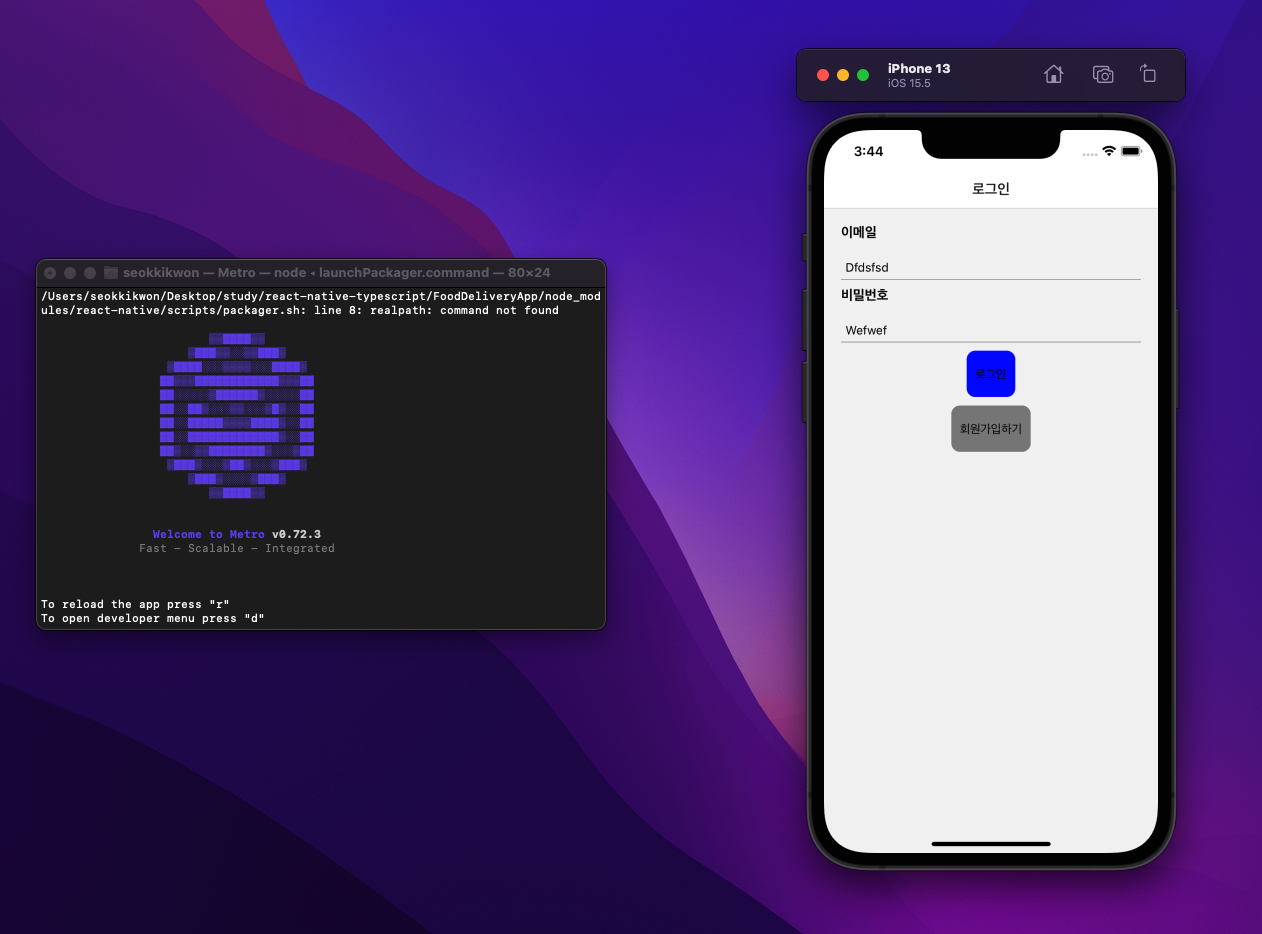
좌측이 메트로서버 콘솔의 내용 새로고침 등 서버의 실행상태를 나타낸다.
우측이 에뮬레이터 실제로 개발반영사항을 가상기기를 통해서 확인이 가능
컴포넌트 구성
리액트 네이티브는 일반적인 html 태그 사용이 불가능
// src/components/SignIn.tsx
import {
  View,
  Text,
  TextInput,
  Pressable,
  Alert,
  StyleSheet,
} from 'react-native';

function SignIn() {
return (
    <View style={styles.inputWrapper}>
      <View>
        <Text style={styles.label}>이메일</Text>
        <TextInput
          style={styles.input}
          placeholder="이메일을 입력해주세요."
          onChange={onChangeEmail}
        />
      </View>
      <View>
        <Text style={styles.label}>비밀번호</Text>
        <TextInput
          style={styles.input}
          placeholder="비밀번호를 입력해주세요."
          onChange={onChangePassword}
        />
      </View>
      <View style={styles.buttonZone}>
        <Pressable
          style={
            !canGoNext
              ? styles.loginButton
              : StyleSheet.compose(styles.loginButton, styles.loginButtonActive)
          }
          onPress={onSubmit}
          disabled={!canGoNext}>
          <Text style={styles.loginButtonText}>로그인</Text>
        </Pressable>
        <Pressable style={styles.loginButton} onPress={onSubmit}>
          <Text style={styles.loginButtonText}>회원가입하기</Text>
        </Pressable>
      </View>
    </View>
  );
}
쉽게 생각해서 View 는 일반적으로 요소들을 담는 곳
Text 는 텍스트 같은 것들을 담는 요소이다
그외에도 preassable 과 같은 요소들도 존재한다.
style
일반적인 리액트앱 처럼 클래스 부여가 불가능하다 인라인태그를 적용하거나
stylesheet 자체를 객체형식으로 정의한뒤 style 적용이 가능하다
const styles = StyleSheet.create({
  loginButton: {
    backgroundColor: 'gray',
    paddingHorizontal: 10,
    paddingVertical: 20,
    borderRadius: 10,
    marginBottom: 10,
  },
  loginButtonActive: {
    backgroundColor: 'blue',
  },
  loginButtonText: {},
  buttonZone: {alignItems: 'center'},
  inputWrapper: {padding: 20},
  label: {fontWeight: 'bold', fontSize: 16, marginBottom: 20},
  input: {
    padding: 5,
    borderBottomWidth: StyleSheet.hairlineWidth,
    marginBottom: 10,
  },
});
paddingHorizontal: 좌우 padding
paddingVertical: 상하 padding
px 사용이 불가능하며 모든 단위들은 DIP 기준이다
React-Navigation
우리가 앱을 만들거나 설계할떄 중요한것중 하나는 라우터 구성요소를 설계하는것이 아닐까한다
React-Navigation, React-Router 대표적으로 두개의 라이브러리를 이용하여 앱을 구성하며
해당 강좌에서는 React-Navigation 을 사용한다고한다.
설치
npm i @react-navigation/native @react-navigation/native-stack @react-navigation/bottom-tabs// src/App.tsx
import * as React from 'react';
import {NavigationContainer} from '@react-navigation/native';
import {createNativeStackNavigator} from '@react-navigation/native-stack';
import {createBottomTabNavigator} from '@react-navigation/bottom-tabs';
import Settings from './src/pages/Settings'; //
import Orders from './src/pages/Orders';
import Delivery from './src/pages/Deliverys';
import {useState} from 'react';
import SignIn from './src/pages/SignIn';
import SignUp from './src/pages/SignUp';
// 로그인 했을떄
export type LoggedInParamList = {
Orders: undefined;
Settings: undefined;
Delivery: undefined;
Complete: {orderId: string};
};
// 로그인 안했을떄
export type RootStackParamList = {
SignIn: undefined;
SignUp: undefined;
};
const Tab = createBottomTabNavigator();
const Stack = createNativeStackNavigator();
function App() {
const [isLoggedIn, setLoggedIn] = useState(false);
return (
<NavigationContainer>
{isLoggedIn ? (
<Tab.Navigator>
<Tab.Screen
name="Orders"
component={Orders}
options={{title: '오더 목록'}}
/>
<Tab.Screen
name="Delivery"
component={Delivery}
options={{headerShown: false}}
/>
<Tab.Screen
name="Settings"
component={Settings}
options={{title: '내 정보'}}
/>
</Tab.Navigator>
) : (
<Stack.Navigator>
<Stack.Screen
name="SignIn"
component={SignIn}
options={{title: '로그인'}}
/>
<Stack.Screen
name="SignUp"
component={SignUp}
options={{title: '회원가입'}}
/>
</Stack.Navigator>
)}
</NavigationContainer>
);
}
export default App;

웹 & 앱개발 기록