
Vue TIL
- Scoped속성을 가진 style 태그
<style scoped>
: style태그에 선언된 CSS의 범위를 현재 컴포넌트로 제한한다.
: https://vue-loader-v14.vuejs.org/kr/features/scoped-css.html

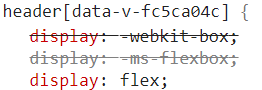
scoped style이 적용된 모습
- router-link-exact-active
: 현재 라우트 경로와 정확하게 일치하는 링크가 활성화 되었을 때 적용될 CSS를 지정한다.
a.router-link-exact-active {
  //속성
}
😊 로그인 이후의 처리
- 로그인 이후 메인 페이지로 이동하기
: https://router.vuejs.org/kr/guide/essentials/navigation.html
await this.login();
// 메인 페이지로 이동
this.$router.push('/main');
위와 같은 방식을 뷰의 프로그래밍적 네비게이션이라고 한다.
this.$router를 통해서 라우터 객체에 접근할 수 있고,this.$router.push()에 경로를 파라미터로 전달해서 라우트를 변경할 수 있다.
<router-link to="">로 이동한 것과 같은 효과를 가진다.
😊 Vuex
-
컴포넌트 간 데이터를 전달하는 방법
: props, event를 이용한 통신
: 이벤트 버스
: Vuex 저장소 -
설치
npm install vuex- 연결
//src/store/index.js
import Vue from 'vue';
import Vuex from 'vuex';

Vue.use(Vuex);

export default new Vuex.Store({});

//main.js
import store from '@/store';

new Vue({
  render: h => h(App),
  store,	//store 전달
}).$mount('#app');
Vuex store는 뷰 컴포넌트에서 this.$store를 통해서 접근할 수 있다.
- 로그인한 유저이름 header에 표시하기
const store = {
	state: {
		username: '',
	},
	mutations: {
		setUsername(state, username) {
			state.username = username;
		}
	}
}

//LoginForm.vue
const {data} = await this.login();
//로그인한 사용자의 username값을 setUsername의 인자로 전달ㄴ
this.$store.commit('setUsername', data.username);
// Header.vue 사용자 이름 헤더에 표시
<header>{{ $store.state.username }}</header>: store에 state는 항상 mutations를 이용해서 값을 변경해줘야 한다.
: mutations를 호출할 때는this.$store.commit()을 통해 호출해야 하고, mutation는 항상 첫번째 인자로 state를 전달받는다.
: state는this.$store.state를 통해서 접근할 수 있다.
- Tip: ✨ package.json의 dependencies vs devDependencies (배포용 라이브러리 vs 개발용 라이브러리)
: dependencies에 있는 라이브러리들은 npm run build의 결과물에 포함된다. ex) vuex, axios, vue-router, vue ... => 애플리케이션을 동작하는데 필요한 라이브러리들!
: devDependencies에 있는 라이브러리들은 npm run build의 결과물에 포함되지 않는다. ex) babel, eslint, prettier ...
: https://joshua1988.github.io/webpack-guide/build/npm-module-install.html#%EA%B0%9C%EB%B0%9C%EC%9A%A9-%EB%9D%BC%EC%9D%B4%EB%B8%8C%EB%9F%AC%EB%A6%AC%EC%99%80-%EB%B0%B0%ED%8F%AC%EC%

사람들에게 좋은 경험을 선사하고 싶은 주니어 프론트엔드 개발자