[NestJS] 로그인 후 유저 정보 업데이트 (GraphQL / MongoDB / JWT / Headers에 유저 정보 보내기)
NestJS + GraphQL + Mongoose
목록 보기
3/3
들어가기 전
지난 포스팅에서 로그인 기능을 구현하고 JWT 토큰까지 발급했다.
이번에는 유저 정보를 수정해보고자 한다.
그러기 위해선느 몇 가지 조건이 필요하다.
- 로그인 한 회원일 것
- 로그인 한 회원과 정보를 수정하고자 하는 유저가 일치할 것
이를 위해 context 정보를 이용할 예정이다.
NestJS에서 GraphQL의 context 정보를 어떻게 사용하는 지 알아보자
Context 정보 가져오기
src/app.modules.ts
...

@Module({
  imports: [
    ConfigModule.forRoot({
      envFilePath: ".env",
      isGlobal: true
    }),
    GraphQLModule.forRoot<ApolloDriverConfig>({
      driver: ApolloDriver,
      autoSchemaFile: "schema.gql",
      context: ({ req, connection }) => {
        if (req) {
          const user = req.headers.authorization;
          return { ...req, user };
        } else {
          return connection;
        }
      }
    }),
    UsersModule,
    AuthModule],
  controllers: [],
  providers: []
})
export class AppModule {
}
💡 지난 포스팅에 작성한 코드를 보면 headers에 authorization 키를 context 정보를 저장하고 있다.
발급받은 JWT access_token을 headers에 전송하면 앱이 실행될 때 자동으로 context 정보를 저장한다.
그렇다면 login 해서 얻은 access_token을 헤더에 전송해보자.
GraphQL Playground에서 login() 하기
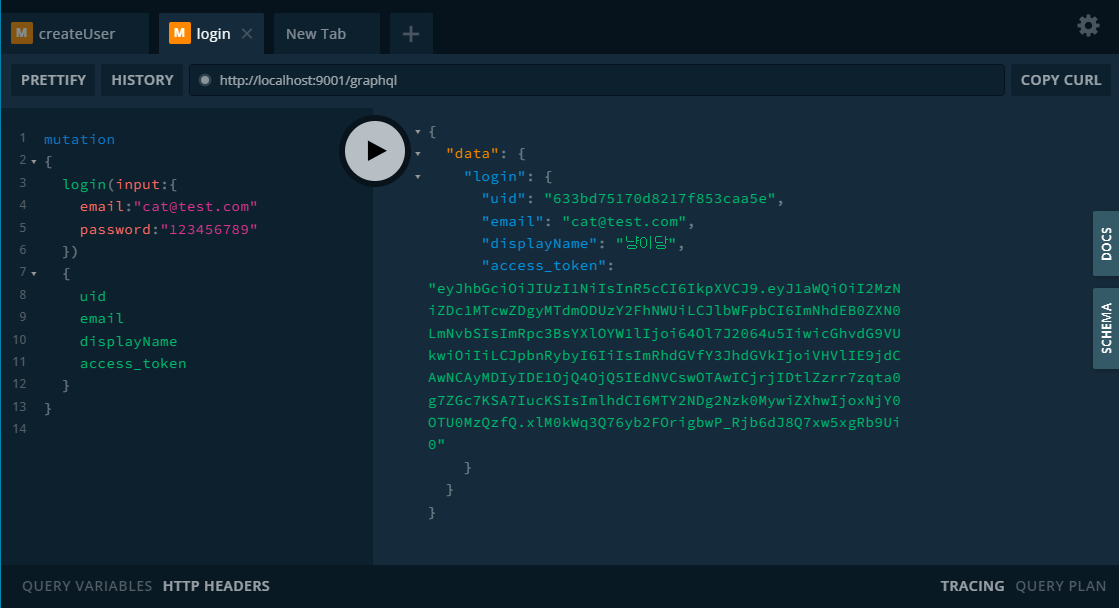
💡 발급받은 access_token은 나중에 헤더에 전송할 예정이다.
유저 정보 수정하기
1. updateUser API 만들기
src/schemas/user.schema.ts
import { Field, ID, ObjectType, ArgsType, InputType } from "@nestjs/graphql";
import * as mongoose from "mongoose";
import { Document } from "mongoose";


export const UserSchema = new mongoose.Schema({
  _id: { type: mongoose.Schema.Types.ObjectId, auto: true },
  displayName: String,
  email: String,
  photoURL: String,
  password: String,
  intro: String,
  date_crated: String,
  date_update: String // 추가
});

@ObjectType()
export class User extends Document {
  @Field(() => ID)
  uid: string;

  @Field(() => String)
  email: string;

  @Field(() => String)
  displayName: string;

  @Field(() => String, { nullable: true })
  photoURL: string;

  @Field(() => String, { nullable: true })
  intro: string;

  @Field(() => String, { nullable: true })
  date_crated: string;

  @Field(() => String, { nullable: true }) // 추가
  date_updated: string;

  @Field(() => String, { nullable: true })
  access_token: string;

  password: string;
}

@ArgsType()
@InputType()
export class UserInputType {
  @Field()
  email: string;

  @Field()
  displayName: string;

  @Field({ nullable: true })
  photoURL: string;

  @Field({ nullable: true })
  intro: string;

  @Field()
  password: string;
}

@ArgsType()
@InputType()
export class LoginInputType {
  @Field()
  email: string;

  @Field()
  password: string;
}

// 추가
@ArgsType()
@InputType()
export class UserUpdateType {
  @Field({ nullable: true })
  displayName: string;

  @Field({ nullable: true })
  photoURL: string;

  @Field({ nullable: true })
  intro: string;
}
src/user.decorator.ts
import { createParamDecorator, ExecutionContext } from '@nestjs/common';
import { GqlExecutionContext } from '@nestjs/graphql';

export const CurrentUser = createParamDecorator(
  (data: unknown, context: ExecutionContext) => {
    const ctx = GqlExecutionContext.create(context);
    return ctx.getContext().req.user;
  },
);
💡 현재 앱에 접속한 회원이 누군지 판단하여 context 정보를 사용할 수 있도록 만들어준다.
해당 코드가 없으면 앱이 제대로 작동 안 할 수 있으니 추가하도록 하자.
2. 로그인 한 유저만 updateUser API에 접근할 수 있도록 하기
src/users/users.resolver.ts
import { UseGuards } from "@nestjs/common"; //추가
import { Query, Resolver, Args, Mutation, ID } from "@nestjs/graphql"; // ID 추가
import { LoginInputType, User, UserInputType, UserUpdateType } from "../schemas/user.schema"; // UserUpdateType 추가
import { UsersService } from "./users.service";
import { ApolloError } from "apollo-server-express";
import { JwtAuthGuard } from "../auth/jwt-auth.guard"; // 추가
import { CurrentUser } from "../user.decorator"; // 추가

...

  @UseGuards(JwtAuthGuard)
  @Mutation(() => User)
  async updateUser(
    @CurrentUser() user: User,
    @Args("uid", { type: () => ID }) uid: string,
    @Args("input") input: UserUpdateType) {
    try {
      return await this.usersService.updateUser(user, uid, input);
    } catch (e) {
      throw new ApolloError(e);
    }
  }
💡 @UseGuards(JwtAuthGuard) 데코레이터를 설정 하여 토큰이 있는 유저만 접근할 수 있도록 설정한다.
필요한 패키지 설치
- 코드를 작성하기 전에 시간 타입을 설정하기 위헤
moment-timezone을 먼저 설치하겠다.
npm install moment-timezonesrc/users/users.service.ts
import { Injectable, Inject } from "@nestjs/common";
import { LoginInputType, User, UserInputType, UserUpdateType } from "../schemas/user.schema"; // UserUpdateType 추가
import { Model } from "mongoose";
import * as bcrypt from "bcrypt";
import { AuthService } from "../auth/auth.service";
import { ApolloError } from "apollo-server-express";
import * as moment from "moment-timezone"; //추가


...


  async updateUser(user: User, uid: string, input: UserUpdateType) {
    try {
    // NOTE - 1
      if (user.uid !== uid) throw new ApolloError("You don't have to access.");
      const check_user = await this.userModel.findById({ _id: uid }).exec();
      if (!check_user) throw new ApolloError("There are no user information.");


      const data = {
        ...input,
        date_updated: moment().local().format()
      };

      await this.userModel.findOneAndUpdate(
        { _id: uid }, { ...data }, { new: true }
      );

      const result = {
        uid: uid,
        email: check_user.email,
        displayName: input.displayName ? input.displayName : check_user.displayName,
        ...data
      };
      return result;
    } catch (e) {
      throw new ApolloError(e);
    }
  }
💡 Note - 1
현재 접속한 유저의 uid와 aggs로 받은 uid 값이 일치하는 지 확인한다.
유저 정보가 일치하는 유저만 정보를 수정할 수 있다.
3. GrphalQL Playground에서 확인하기
하단에 있는 GTTP HEADERS 를 클릭하여 아래의 내용 입력하기
{"Authorization": "Bearer ${access_token}"}예)
{"Authorization": "Bearer eyJhbGciOiJIUzI1NiIsInR5cCI6IkpXVCJ9.eyJ1aWQiOiI2MzNiZDc1MTcwZDgyMTdmODUzY2FhNWUiLCJlbWFpbCI6ImNhdEB0ZXN0LmNvbSIsImRpc3BsYXlOYW1lIjoi64Ol7J2064u5IiwicGhvdG9VUkwiOiIiLCJpbnRybyI6IiIsImRhdGVfY3JhdGVkIjoiVHVlIE9jdCAwNCAyMDIyIDE1OjQ4OjQ5IEdNVCswOTAwICjrjIDtlZzrr7zqta0g7ZGc7KSA7IucKSIsImlhdCI6MTY2NDkyNjI1MSwiZXhwIjoxNjY1MDEyNjUxfQ.LujFDvLHMzbvFEL_sGJoEdjVgADkWpFREFOmRAdUCD4"}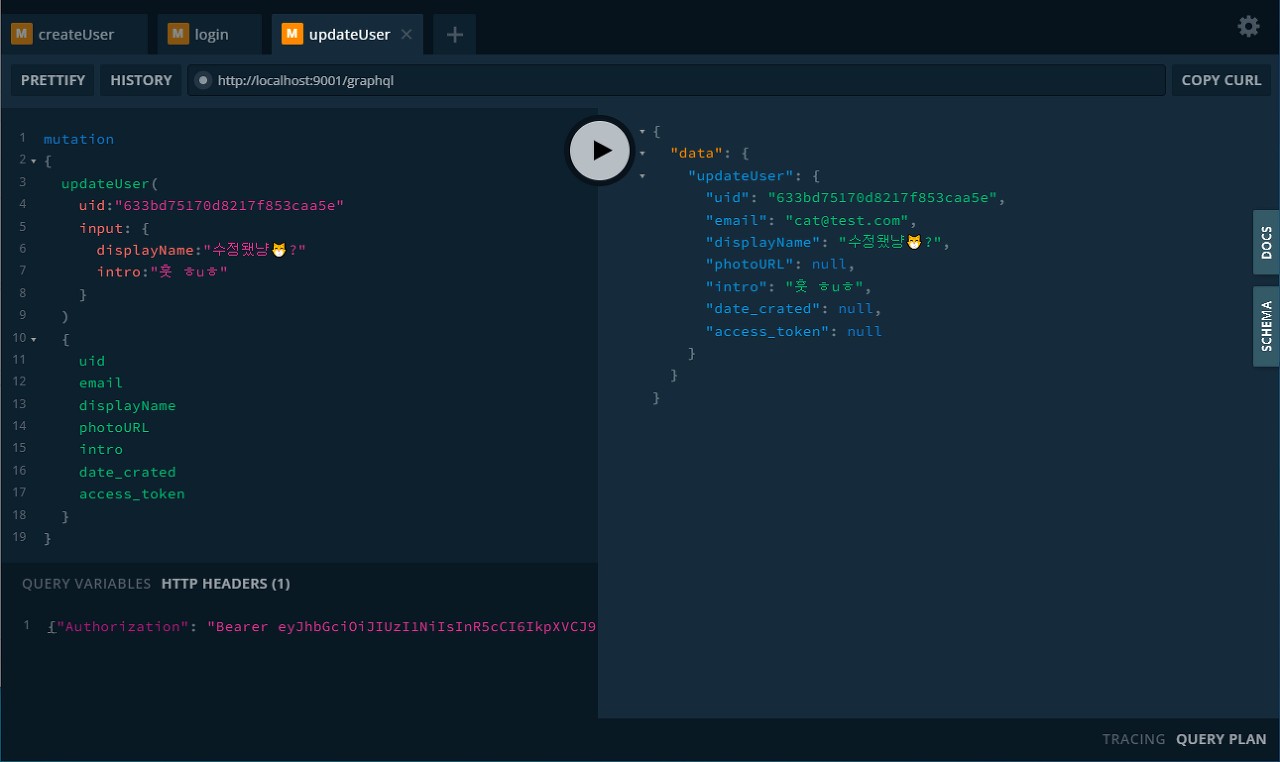
4. 몽고 DB에서 확인
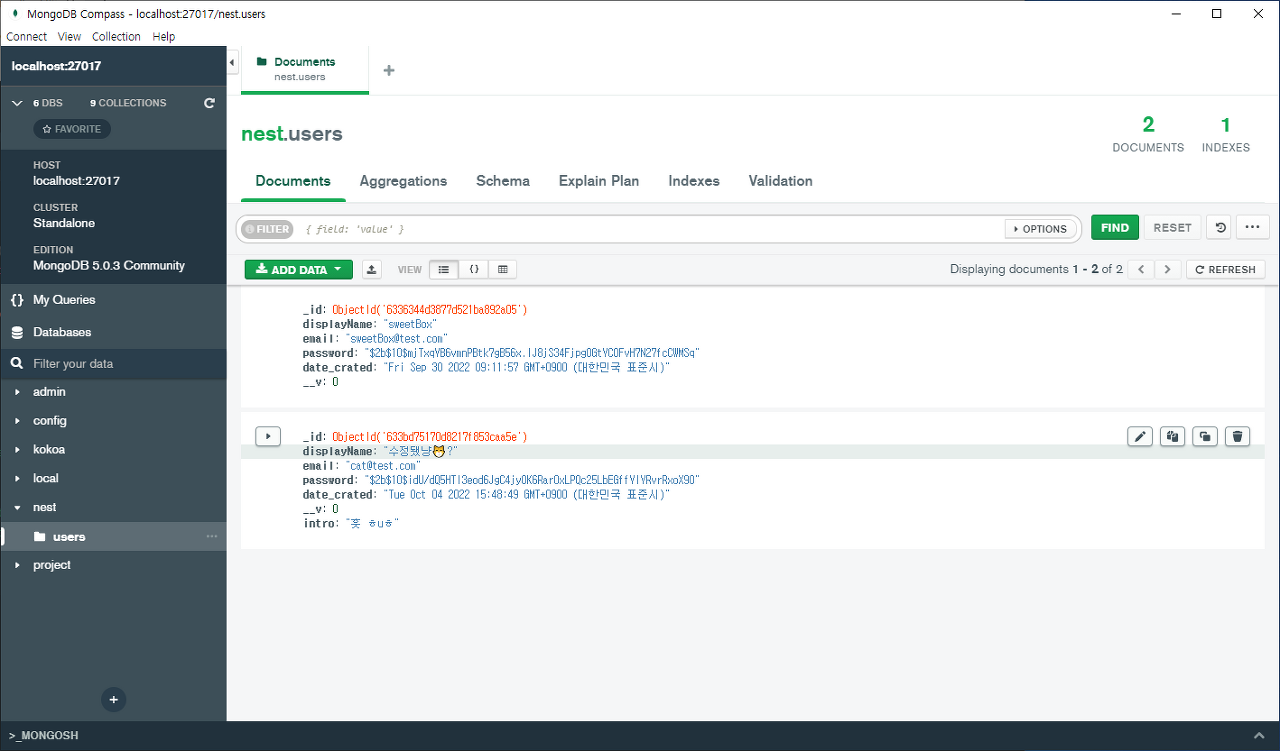

올해보단 낫겠지....