1. window 객체의 메소드
-
브라우저 환경
-
자바스크립트가 돌아가는 플랫폼은 호스트(host) 라고 불린다.
-
호스트 환경이 웹 브라우저일 때 사용하는 할 수 있는 기능은 개괄적으로 아래와 같다.
-
window
- DOM (document, ...)
- BOM (location, navigator, screen, history, ...)
- JavaScript (Object, Array, Function, ...)
-
최상단의 window 객체는 자바스크립트 코드의 전역 객체이자 브라우저 창(browser window)을 대변하고 이를 제어할 수 있는 메서드를 제공한다.
-
window 객체는 전역 객체이므로 메서드 호출 시 생략할 수 있다.
-
open
- window.open(url, name, params) 메서드로 새 창을 열 수 있다.
- url : 새 창에 로드할 URL이다.
- name : 새 창의 이름으로 해당 이름을 가진 창이 이미 있으면 그 안에서 열리고, 그렇지 않으면 새 창이 열린다.
- params : 새 창의 설정을 쉼표로 구분하여 문자열로 전달한다.
-
alert
- window.alert(message) 메서드는 확인 버튼을 가지며 메시지를 지정할 수 있는 경고 대화 상자를 띄운다.
-
confirm
- window.confirm(message) 메서드는 확인과 취소 두 버튼을 가지며 메시지를 지정할 수 있는 모달 대화 상자를 띄운다.
- 반환 값은 확인을 누를 시 true, 취소를 누르거나 ESC 키를 누르면 false이다.
-
prompt
- window.prompt(message, default) 메서드는 사용자가 텍스트를 입력할 수 있도록 안내하는 선택적 메세지를 갖고 있는 대화 상자를 띄운다.
- default : 텍스트 입력 필드에 기본으로 채워 넣을 문자열이다.
- 반환 값은 확인을 누를 시 사용자가 입력한 문자열이며 취소를 누르거나 ESC 키를 누르면 null이다.
-
관련 코드
<!DOCTYPE html>
<html lang="ko">
<head>
    <meta charset="UTF-8">
    <meta http-equiv="X-UA-Compatible" content="IE=edge">
    <meta name="viewport" content="width=device-width, initial-scale=1.0">
    <title>01_open-alert-confirm-prompt</title>
</head>
<body>
    <h1>01. open, alert, confirm, prompt 메소드</h1>

    <h3>브라우저 환경</h3>

    <p>자바스크립트가 돌아가는 플랫폼을 호스트(host)라고 부른다.<br>
        호스트 환경이 웹 브라우저일 때 사용하며 할 수 있는 기능은 개괄적으로 아래와 같다.<br>

        window<br>
            └ DOM (document, ...)<br>
            └ BOM (location, navigator, screen, history, ...)<br>
            └ JavaScript (Object, Array, Function, ...)<br>

        최상단의 window 객체는 자바스크립트 코드의 전역 객체이자<br>
        브라우저 창(browser window)을 대변하고 이를 제어할 수 있는 메소드(API)를 제공한다.<br>
        window 객체는 전역 객체이므로 메소드 호출 시 생략할 수 있다.
    </p>

    <h3>open</h3>
    <p>window.open(url, name, params) 메소드로 새 창을 열 수 있다.<br>
        url: 새 창에 로드할 URL이다.<br>
        name: 새 창의 이름으로 해당 이름을 가진 창이 이미 있으면 그 안에서 열리고, 그렇지 않으면 새 창이 열린다.<br>
        params: 새 창의 설정을 쉼표로 구분하여 문자열로 전달한다.
    </p>

    <button id="btn1">새로운 창 열기</button>
    <button id="btn2">새로운 창 열기</button>

    <script>
        document.getElementById('btn1').onclick = () => window.open('https://www.google.com', 'popup1', 'width=1080, height=800');
        document.getElementById('btn2').onclick = () => window.open('https://www.naver.com', 'popup1');
    </script>

    <h3>alert</h3>
    <p>window.alert(message) 메소드는 확인 버튼을 가지며 메시지를 지정할 수 있는 경고 대화 상자를 띄운다.</p>

    <script>
        // window.alert('alert창 입니다!');
    </script>

    <h3>confirm</h3>
    <p>window.confirm(message) 메소드는 확인과 취소 두 버튼을 가지며 메시지를 지정할 수 있는 대화 상자를 띄운다.<br>
        반환 값은 확인을 누를 시 true, 취소를 누르거나 ESC 키를 누르면 false이다.
    </p>

    <script>
        // const answer = window.confirm('계속하시겠습니까?');

        // if(answer) {
        //     console.log('잘 선택하셨어요! 가보자고요~');
        // } else {
        //     console.log('아쉽네요... 다음에 또 만나요~');
        // }
    </script>

    <h4>prompt</h4>
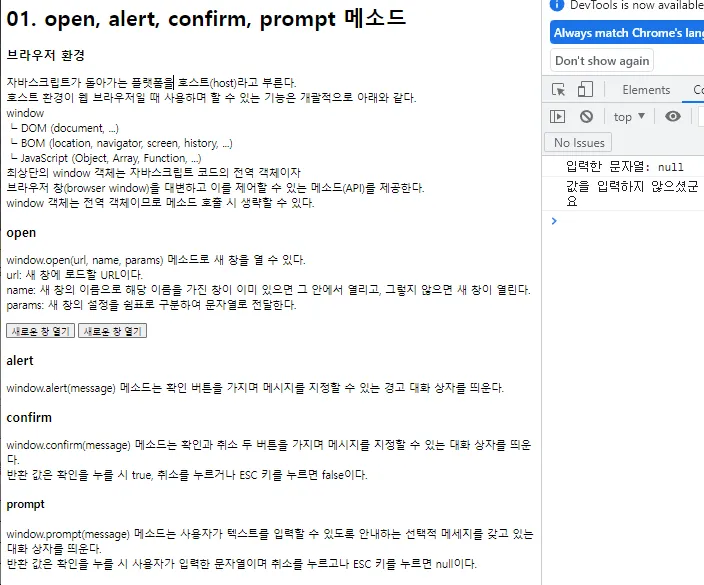
    <p>window.prompt(message) 메소드는 사용자가 텍스트를 입력할 수 있도록 안내하는 선택적 메세지를 갖고 있는 대화
        상자를 띄운다.<br>
        반환 값은 확인을 누를 시 사용자가 입력한 문자열이며 취소를 누르고나 ESC 키를 누르면 null이다.
    </p>

    <script>
        const likeNumber = window.prompt('좋아하는 숫자를 입력하세요');

        console.log(`입력한 문자열: ${likeNumber}`);

        if(likeNumber) {
            console.log(`당신이 좋아하는 숫자는 ${likeNumber}이군요`);
        } else {
            console.log(`값을 입력하지 않으셨군요`);
        }
    </script>
</body>
</html>
- 결과 화면
2. BOM 객체들
- 브라우저 객체 모델은 문서 이외의 모든 것을 제어하기 위해 브라우저(호스트 환경)가 제공하는 추가 객체를 나타낸다.
2-1. location
-
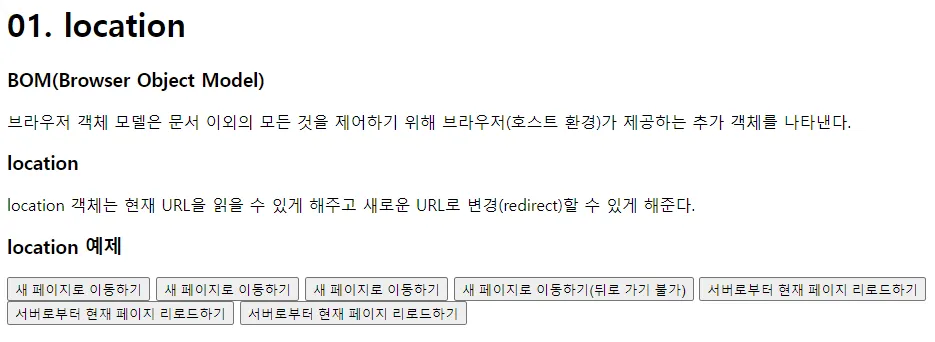
location 객체는 현재 URL을 읽을 수 있게 해주고 새로운 URL로 변경(redirect)할 수 있게 해준다.
-
관련 코드
<!DOCTYPE html>
<html lang="ko">
<head>
    <meta charset="UTF-8">
    <meta http-equiv="X-UA-Compatible" content="IE=edge">
    <meta name="viewport" content="width=device-width, initial-scale=1.0">
    <title>01_location</title>
</head>
<body>
    <h1>01. location</h1>

    <h3>BOM(Browser Object Model)</h3>
    <p>
    브라우저 객체 모델은 문서 이외의 모든 것을 제어하기 위해 브라우저(호스트 환경)가 제공하는 추가 객체를 나타낸다.
    </p>

    <h3>location</h3>
    <p>
    location 객체는 현재 URL을 읽을 수 있게 해주고 새로운 URL로 변경(redirect)할 수 있게 해준다.
    </p>

    <h3>location 예제</h3>

    <button id="btn1">새 페이지로 이동하기</button>
    <button id="btn2">새 페이지로 이동하기</button>
    <button id="btn3">새 페이지로 이동하기</button>
    <button id="btn4">새 페이지로 이동하기(뒤로 가기 불가)</button>
    <button id="btn5">서버로부터 현재 페이지 리로드하기</button>
    <button id="btn6">서버로부터 현재 페이지 리로드하기</button>
    <button id="btn7">서버로부터 현재 페이지 리로드하기</button>

    <script>
        document.getElementById('btn1').onclick = () => window.location.assign("https://www.google.com");
        document.getElementById('btn2').onclick = () => window.location = "https://www.google.com";
        document.getElementById('btn3').onclick = () => window.location.href = "https://www.google.com";
        document.getElementById('btn4').onclick = () => window.location.replace("https://www.google.com");     // 뒤로가기 활성화 안됨
        document.getElementById('btn5').onclick = () => window.location.reload();                              // 새로고침 하되 스크롤은 초기화 되지 않음
        document.getElementById('btn6').onclick = () => window.location = location;
        document.getElementById('btn7').onclick = () => window.location.href = location.href;
    </script>
</body>
</html>
- 결과 화면
2-2. navigator
-
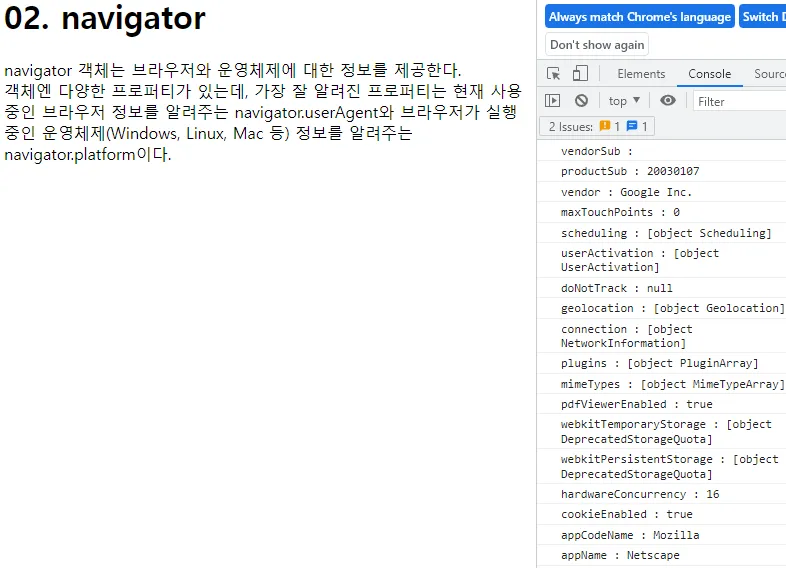
navigator 객체는 브라우저와 운영체제에 대한 정보를 제공한다.
-
객체엔 다양한 프로퍼티가 있는데, 가장 잘 알려진 프로퍼티는 현재 사용 중인 브라우저 정보를 알려주는 navigator.userAgent와 브라우저가 실행 중인 운영체제(Windows, Linux, Mac 등) 정보를 알려주는 navigator.platform이다.
-
관련 코드
<!DOCTYPE html>
<html lang="ko">
<head>
    <meta charset="UTF-8">
    <meta http-equiv="X-UA-Compatible" content="IE=edge">
    <meta name="viewport" content="width=device-width, initial-scale=1.0">
    <title>02_navigator</title>
</head>
<body>
    <h1>02. navigator</h1>
    <p>
    navigator 객체는 브라우저와 운영체제에 대한 정보를 제공한다.<br>
    객체엔 다양한 프로퍼티가 있는데, 가장 잘 알려진 프로퍼티는 현재 사용 중인 브라우저 정보를 알려주는 navigator.userAgent와 브라우저가 실행 중인 운영체제(Windows, Linux, Mac 등) 정보를 알려주는 navigator.platform이다.
    </p>
    <script>
        for(prop in navigator) {
            console.log(`${prop} : ${navigator[prop]}`);
        }
        console.log(navigator.userAgent);       // 실제로는 "Mozilla/version" 기반이 아니었지만 다른 브라우저 벤더들은 자사 제품이 Netscape 브라우저의 특정 버전과 호환된다는 의미로 사용
        console.log(navigator.platform);
    </script>
</body>
</html>
- 결과 화면
2-3. screen
-
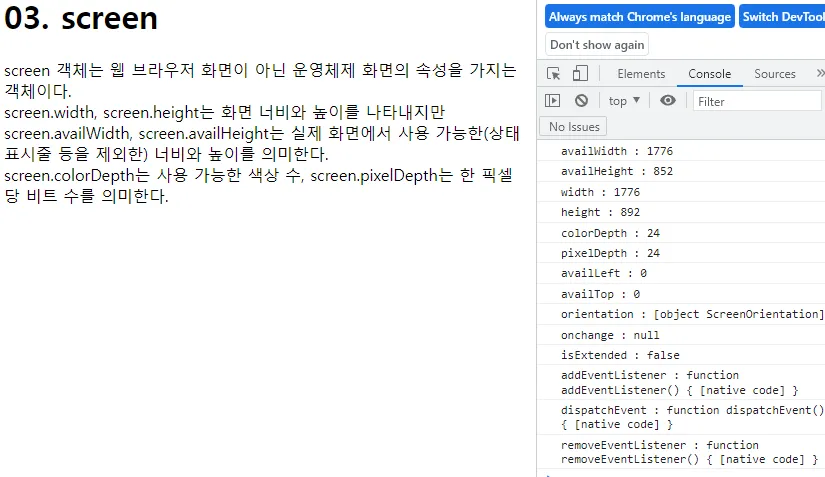
screen 객체는 웹 브라우저 화면이 아닌 운영체제 화면의 속성을 가지는 객체이다.
-
screen.width, screen.height는 화면 너비와 높이를 나타내지만 screen.availWidth, screen.availHeight는 실제 화면에서 사용 가능한(상태 표시줄 등을 제외한) 너비와 높이를 의미한다.
-
screen.colorDepth는 사용 가능한 색상 수, screen.pixelDepth는 한 픽셀 당 비트 수를 의미한다.
-
관련 코드
<!DOCTYPE html>
<html lang="ko">
<head>
    <meta charset="UTF-8">
    <meta http-equiv="X-UA-Compatible" content="IE=edge">
    <meta name="viewport" content="width=device-width, initial-scale=1.0">
    <title>03_screen</title>
</head>
<body>
    <h1>03. screen</h1>
    <p>
    screen 객체는 웹 브라우저 화면이 아닌 운영체제 화면의 속성을 가지는 객체이다.<br>
    screen.width, screen.height는 화면 너비와 높이를 나타내지만<br>
    screen.availWidth, screen.availHeight는 실제 화면에서 사용 가능한(상태 표시줄 등을 제외한) 너비와 높이를 의미한다.<br>
    screen.colorDepth는 사용 가능한 색상 수, screen.pixelDepth는 한 픽셀 당 비트 수를 의미한다.
    </p>
    <script>
        for(prop in screen) {
            console.log(`${prop} : ${screen[prop]}`);
        }
    </script>

</body>
</html>
- 결과 화면
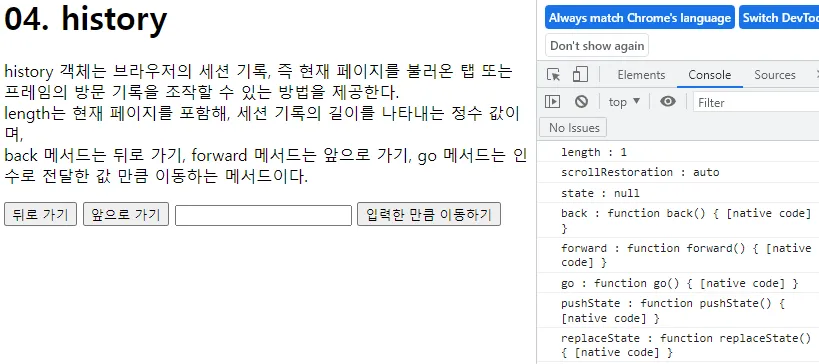
2-4. history
-
history 객체는 브라우저의 세션 기록, 즉 현재 페이지를 불러온 탭 또는 프레임의 방문 기록을 조작할 수 있는 방법을 제공한다.
-
length는 현재 페이지를 포함해, 세션 기록의 길이를 나타내는 정수 값이며, back 메서드는 뒤로 가기, forward 메서드는 앞으로 가기, go 메서드는 인수로 전달한 값 만큼 이동하는 메서드이다.
-
관련 코드
<!DOCTYPE html>
<html lang="ko">
<head>
    <meta charset="UTF-8">
    <meta http-equiv="X-UA-Compatible" content="IE=edge">
    <meta name="viewport" content="width=device-width, initial-scale=1.0">
    <title>04_history</title>
</head>
<body>
    <h1>04. history</h1>
    <p>
    history 객체는 브라우저의 세션 기록, 즉 현재 페이지를 불러온 탭 또는 프레임의 방문 기록을 조작할 수 있는 방법을 제공한다.<br>
    length는 현재 페이지를 포함해, 세션 기록의 길이를 나타내는 정수 값이며,<br>
    back 메서드는 뒤로 가기, forward 메서드는 앞으로 가기, go 메서드는 인수로 전달한 값 만큼 이동하는 메서드이다.
    </p>

    <button id="btn1">뒤로 가기</button>
    <button id="btn2">앞으로 가기</button>
    <input type="number" name="page">
    <button id="btn3">입력한 만큼 이동하기</button>
    <script>
        for(prop in history) {
            console.log(`${prop} : ${history[prop]}`);
        }

        document.getElementById('btn1').onclick = () => history.back();
        document.getElementById('btn2').onclick = () => history.forward();
        document.getElementById('btn3').onclick = function() {
            let page = document.querySelector('input[name=page]').value;
            history.go(page);
        };
    </script>
</body>
</html>
- 결과 화면