react.ts로 naver map api를 사용한 과정을 적는 글이다.
1. 어플리케이션 등록하기
1-1. 회원가입 및 로그인
먼저 naver dev 홈페이지 로 들어가서 로그인을 한다(회원이 아니라면 회원가입 후 카드등록 정보까지 작성해주어야한다.)
1-2. 등록하기
- 우측 상단에 console이라는 버튼을 누른다.
- 좌측에 Products & Services를 클릭한다.
- AI-Application Service의 AI·NAVER API를 클릭한다.
- Application등록을 클릭한다.
- Application 이름, service선택, url작성후 등록을 누른다.(개발테스트여서 http://localhost:3000라고 작성했다.)
2. NAVER 지도 API v3 로드하기
naver tutorial로 들어가서 예제를 보면서 연습하여야한다.

1.먼저 위 코드와 같이 html파일에 script를 작성해야하고 가장 끝에 등록한 application의 client id를 넣어준다.
이제 모든준비는 끝났다.
2. 타입스크립트를 사용할것이기때문에 먼저 typescript버전을 설치해준다.
yarn add -D @types/navermaps
//App.tsx

const { naver } = window;

function App() {
  const mapOptions = {
    center: new naver.maps.LatLng(37.3595704, 127.105399),
    zoom: 10,
  };
  const map = new naver.maps.Map("map", mapOptions);

  return <div id='map' style={{ width: "100%", height: "500px" }} />;
}

export default App;
localhost:3000을 확인해보면 지도화면이 나왔을것이다.
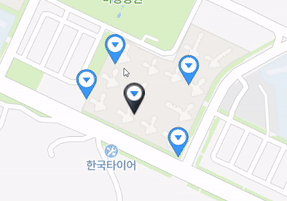
3. 내위치에 마커 올리기
3-1. 내위치 확인하기
function App() {
  const [myLocation, setMyLocation] = useState<
    { latitude: number; longitude: number } | string
  >("");

  // get current position
  useEffect(() => {
    if (navigator.geolocation) {
      navigator.geolocation.getCurrentPosition((position) => {
        setMyLocation({
          latitude: position.coords.latitude,
          longitude: position.coords.longitude,
        });
      });
    } else {
      window.alert("현재위치를 알수 없습니다.");
    }
  }, []);

  return <div id='map' style={{ width: "100%", height: "500px" }} />;
}
1.javascript의 navigator를 사용하여 내위치를 먼저 확인할수 있다.
2. 확인한 나의 경도와 위도를 useState안에 넣어준다.
3-2. 지도에 내위치에 맞는 지도화면 나타내기
const { naver } = window;

function App() {
  const [myLocation, setMyLocation] = useState<
    { latitude: number; longitude: number } | string
  >("");

  // get current position
  useEffect(() => {
    if (navigator.geolocation) {
      navigator.geolocation.getCurrentPosition((position) => {
        setMyLocation({
          latitude: position.coords.latitude,
          longitude: position.coords.longitude,
        });
      });
    } else {
      window.alert("현재위치를 알수 없습니다.");
    }
  }, []);

  useEffect(() => {
    if (typeof myLocation !== "string") {
      const currentPosition = [myLocation.latitude, myLocation.longitude];

      const map = new naver.maps.Map("map", {
        center: new naver.maps.LatLng(currentPosition[0], currentPosition[1]),
        zoomControl: true,
      });
    }
  }, [myLocation]);

  return <div id='map' style={{ width: "100%", height: "500px" }} />;
}- 내위치가 확인되는 시점에useEffect를 적용하여 현재 위치에맞는 지도화면을 나타낼수있다.
3-3. 내위치 마커 표시하기
useEffect(() => {
    if (typeof myLocation !== "string") {
      const currentPosition = [myLocation.latitude, myLocation.longitude];

      const map = new naver.maps.Map("map", {
        center: new naver.maps.LatLng(currentPosition[0], currentPosition[1]),
        zoomControl: true,
      });

      const currentMarker = new naver.maps.Marker({
        position: new naver.maps.LatLng(currentPosition[0], currentPosition[1]),
        map,
        icon: {
          url: pinImage,
          size: new naver.maps.Size(50, 52),
          origin: new naver.maps.Point(0, 0),
          anchor: new naver.maps.Point(25, 26),
        },
      });
    }
  }, [myLocation]);
기존 useEffect안에 currentMarker코드를 작성한다.(marker의 url에 새 이미지를 넣지 않으면 가장 기본 이미지로 나타난다.)
4. 주변 마커 나타내기
const otherLatLngs = [
        { lat: 37.6859, lng: 126.597865 },
        { lat: 37.68528, lng: 126.597227 },
        { lat: 37.685535, lng: 126.599528 },
        { lat: 37.684234, lng: 126.599292 },
      ];

useEffect(() => {
    if (typeof myLocation !== "string") {
      const currentPosition = [myLocation.latitude, myLocation.longitude];

      const map = new naver.maps.Map("map", {
        center: new naver.maps.LatLng(currentPosition[0], currentPosition[1]),
        zoomControl: true,
      });

      const currentMarker = new naver.maps.Marker({
        position: new naver.maps.LatLng(currentPosition[0], currentPosition[1]),
        map,
        icon: {
          url: pinImage,
          size: new naver.maps.Size(50, 52),
          origin: new naver.maps.Point(0, 0),
          anchor: new naver.maps.Point(25, 26),
        },
      });

      // 주변 마커 나타내기
      for (let i = 0; i < otherLatLngs.length; i++) {
        const otherMarkers = new naver.maps.Marker({
          position: new naver.maps.LatLng(
            otherLatLngs[i].lat,
            otherLatLngs[i].lng
          ),
          map,
        });
      }
    }
  }, [myLocation]);
주변 마커의 위도와경도가 있는 array만큼 반복문을 돌리고 그안에 marker문법을 넣어준다.
4. 주변마커 오버레이 클릭 이벤트 적용하기
useEffect(() => {
    if (typeof myLocation !== "string") {
      const currentPosition = [myLocation.latitude, myLocation.longitude];

      const map = new naver.maps.Map("map", {
        center: new naver.maps.LatLng(currentPosition[0], currentPosition[1]),
        zoomControl: true,
      });

      const currentMarker = new naver.maps.Marker({
        position: new naver.maps.LatLng(currentPosition[0], currentPosition[1]),
        map,
        icon: {
          url: pinImage,
          size: new naver.maps.Size(50, 52),
          origin: new naver.maps.Point(0, 0),
          anchor: new naver.maps.Point(25, 26),
        },
      });

      // 주변 마커 나타내기
      const markers: naver.maps.Marker[] = [];
      const infowindows: naver.maps.InfoWindow[] = [];
      const contentTags =
        '<div class="naver-container"><p class="ptag">여깁니다</p><span class="spantag">맞아요</span></div>';

      // show other markers
      for (let i = 0; i < otherLatLngs.length; i += 1) {
        const otherMarkers = new naver.maps.Marker({
          position: new naver.maps.LatLng(
            otherLatLngs[i].lat,
            otherLatLngs[i].lng
          ),
          map,
        });

        const infowindow = new naver.maps.InfoWindow({
          content: contentTags,
          borderWidth: 1,
          anchorSize: new naver.maps.Size(10, 10),
          pixelOffset: new naver.maps.Point(10, -10),
        });

        markers.push(otherMarkers);
        infowindows.push(infowindow);
      }

      naver.maps.Event.addListener(map, "idle", () => {
        updateMarkers(map, markers);
      });

      const updateMarkers = (
        isMap: naver.maps.Map,
        isMarkers: naver.maps.Marker[]
      ) => {
        const mapBounds: any = isMap.getBounds();
        let marker;
        let position;

        for (let i = 0; i < isMarkers.length; i += 1) {
          marker = isMarkers[i];
          position = marker.getPosition();

          if (mapBounds.hasLatLng(position)) {
            showMarker(isMap, marker);
          } else {
            hideMarker(marker);
          }
        }
      };

      const showMarker = (isMap: naver.maps.Map, marker: naver.maps.Marker) => {
        marker.setMap(isMap);
      };

      const hideMarker = (marker: naver.maps.Marker) => {
        marker.setMap(null);
      };

      const getClickHandler = (seq: number) => {
        return () => {
          const marker = markers[seq];
          const infoWindow = infowindows[seq];

          if (infoWindow.getMap()) {
            infoWindow.close();
          } else {
            infoWindow.open(map, marker);
          }
        };
      };

      for (let i = 0; i < markers.length; i += 1) {
        naver.maps.Event.addListener(markers[i], "click", getClickHandler(i));
      }
    }
  }, [myLocation]);
내가 기억하기위한 블로그
안녕하세요~ 네이버 지도 구현하다가 중간에 막혀서 힘들었는데 덕분에 잘 구현했습니다. 감사합니다!