📌 영상 링크
1. Node.js?
파이썬과 달리 자바스크립트가 별다른 설치 없이 사용가능한 이유는 브라우저에서 실행되기 때문임, 브라우저 자체에 인터프리터가 존재
이런 자바스크립트를 서버 즉, 백엔드에서 실행시키기 위해서 node.js가 필요
2. Npm
Node package manager의 약자
자바스크립트로 구현된 다양한 모듈들을 npm에서 다운받아서 사용할 수 있음
[NPM](<https://www.npmjs.com/)
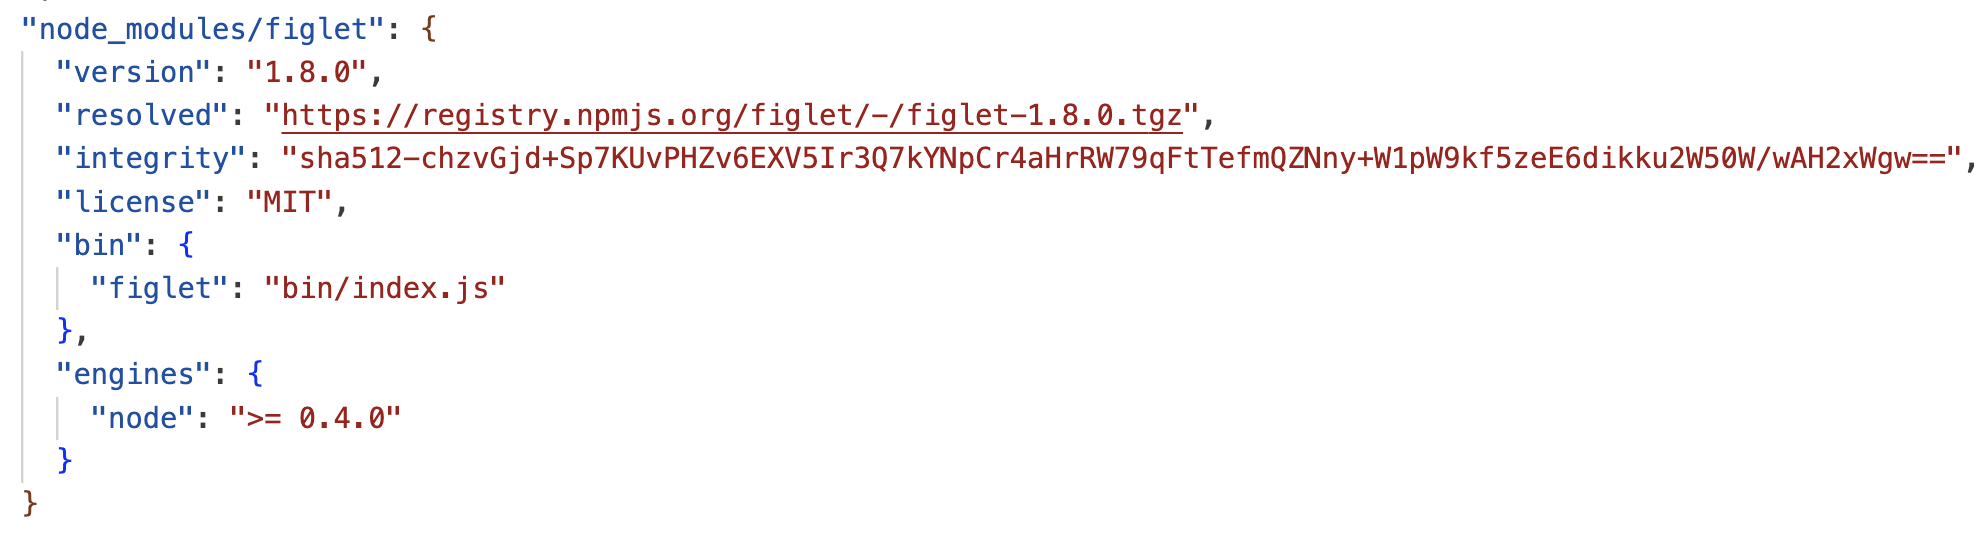
Figlet 사용해보기
모듈 설치 전 꿀팁
- 터미널에서 npm init 실행하면, package.json이란 파일이 생성됨
- 실제 모듈까지 설치하면 package-lock.json까지도 생성됨- 둘의 차이는 package.json은 내용을 대략적으로 확인하는 용도이고, package-lock.json은 내용을 상세하게 확인하기 위함임
- 여기서 설치된 모듈들을 메모장처럼 정리해둘 수 있음
- 어떤 모듈 설치할 때, 명령어에서
npm install module name -g처럼 -g를 붙여주면 내가 현재있는 폴더에서뿐만 아니라, 내 컴퓨터 전체에서 이 모듈을 사용할 수 있게 됨 - 하지만 전역으로 설치 시, 나중에 충돌 문제 생길 수 있으므로 프로젝트 단위로 모듈 설치가 낫다
Figlet
아스키 아트 자동으로 생성해주는 모듈
- official doc의 example
var figlet = require("figlet");

figlet("Hello World!!", function (err, data) {
  if (err) {
    console.log("Something went wrong...");
    console.dir(err);
    return;
  }
  console.log(data);
});
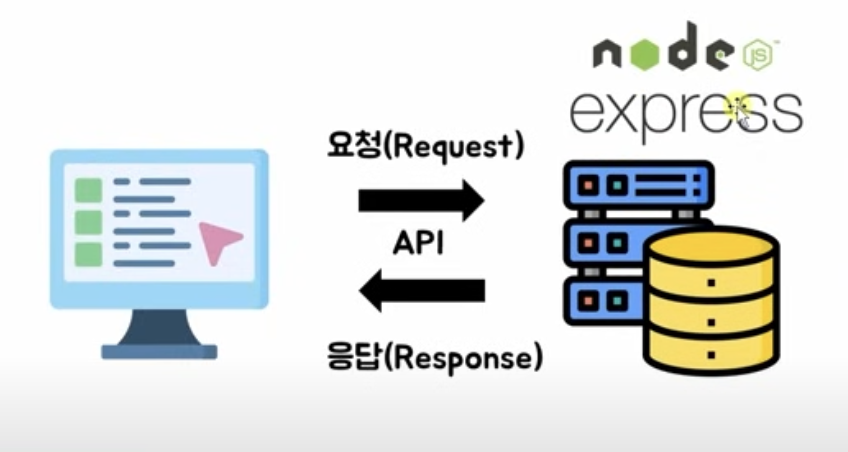
3. Express
Express란?
node.js기반의 웹프레임워크
- npm의 example
const express = require('express')
const app = express()

app.get('/', function (req, res) {
  res.send('Hello World')
})

app.listen(3000)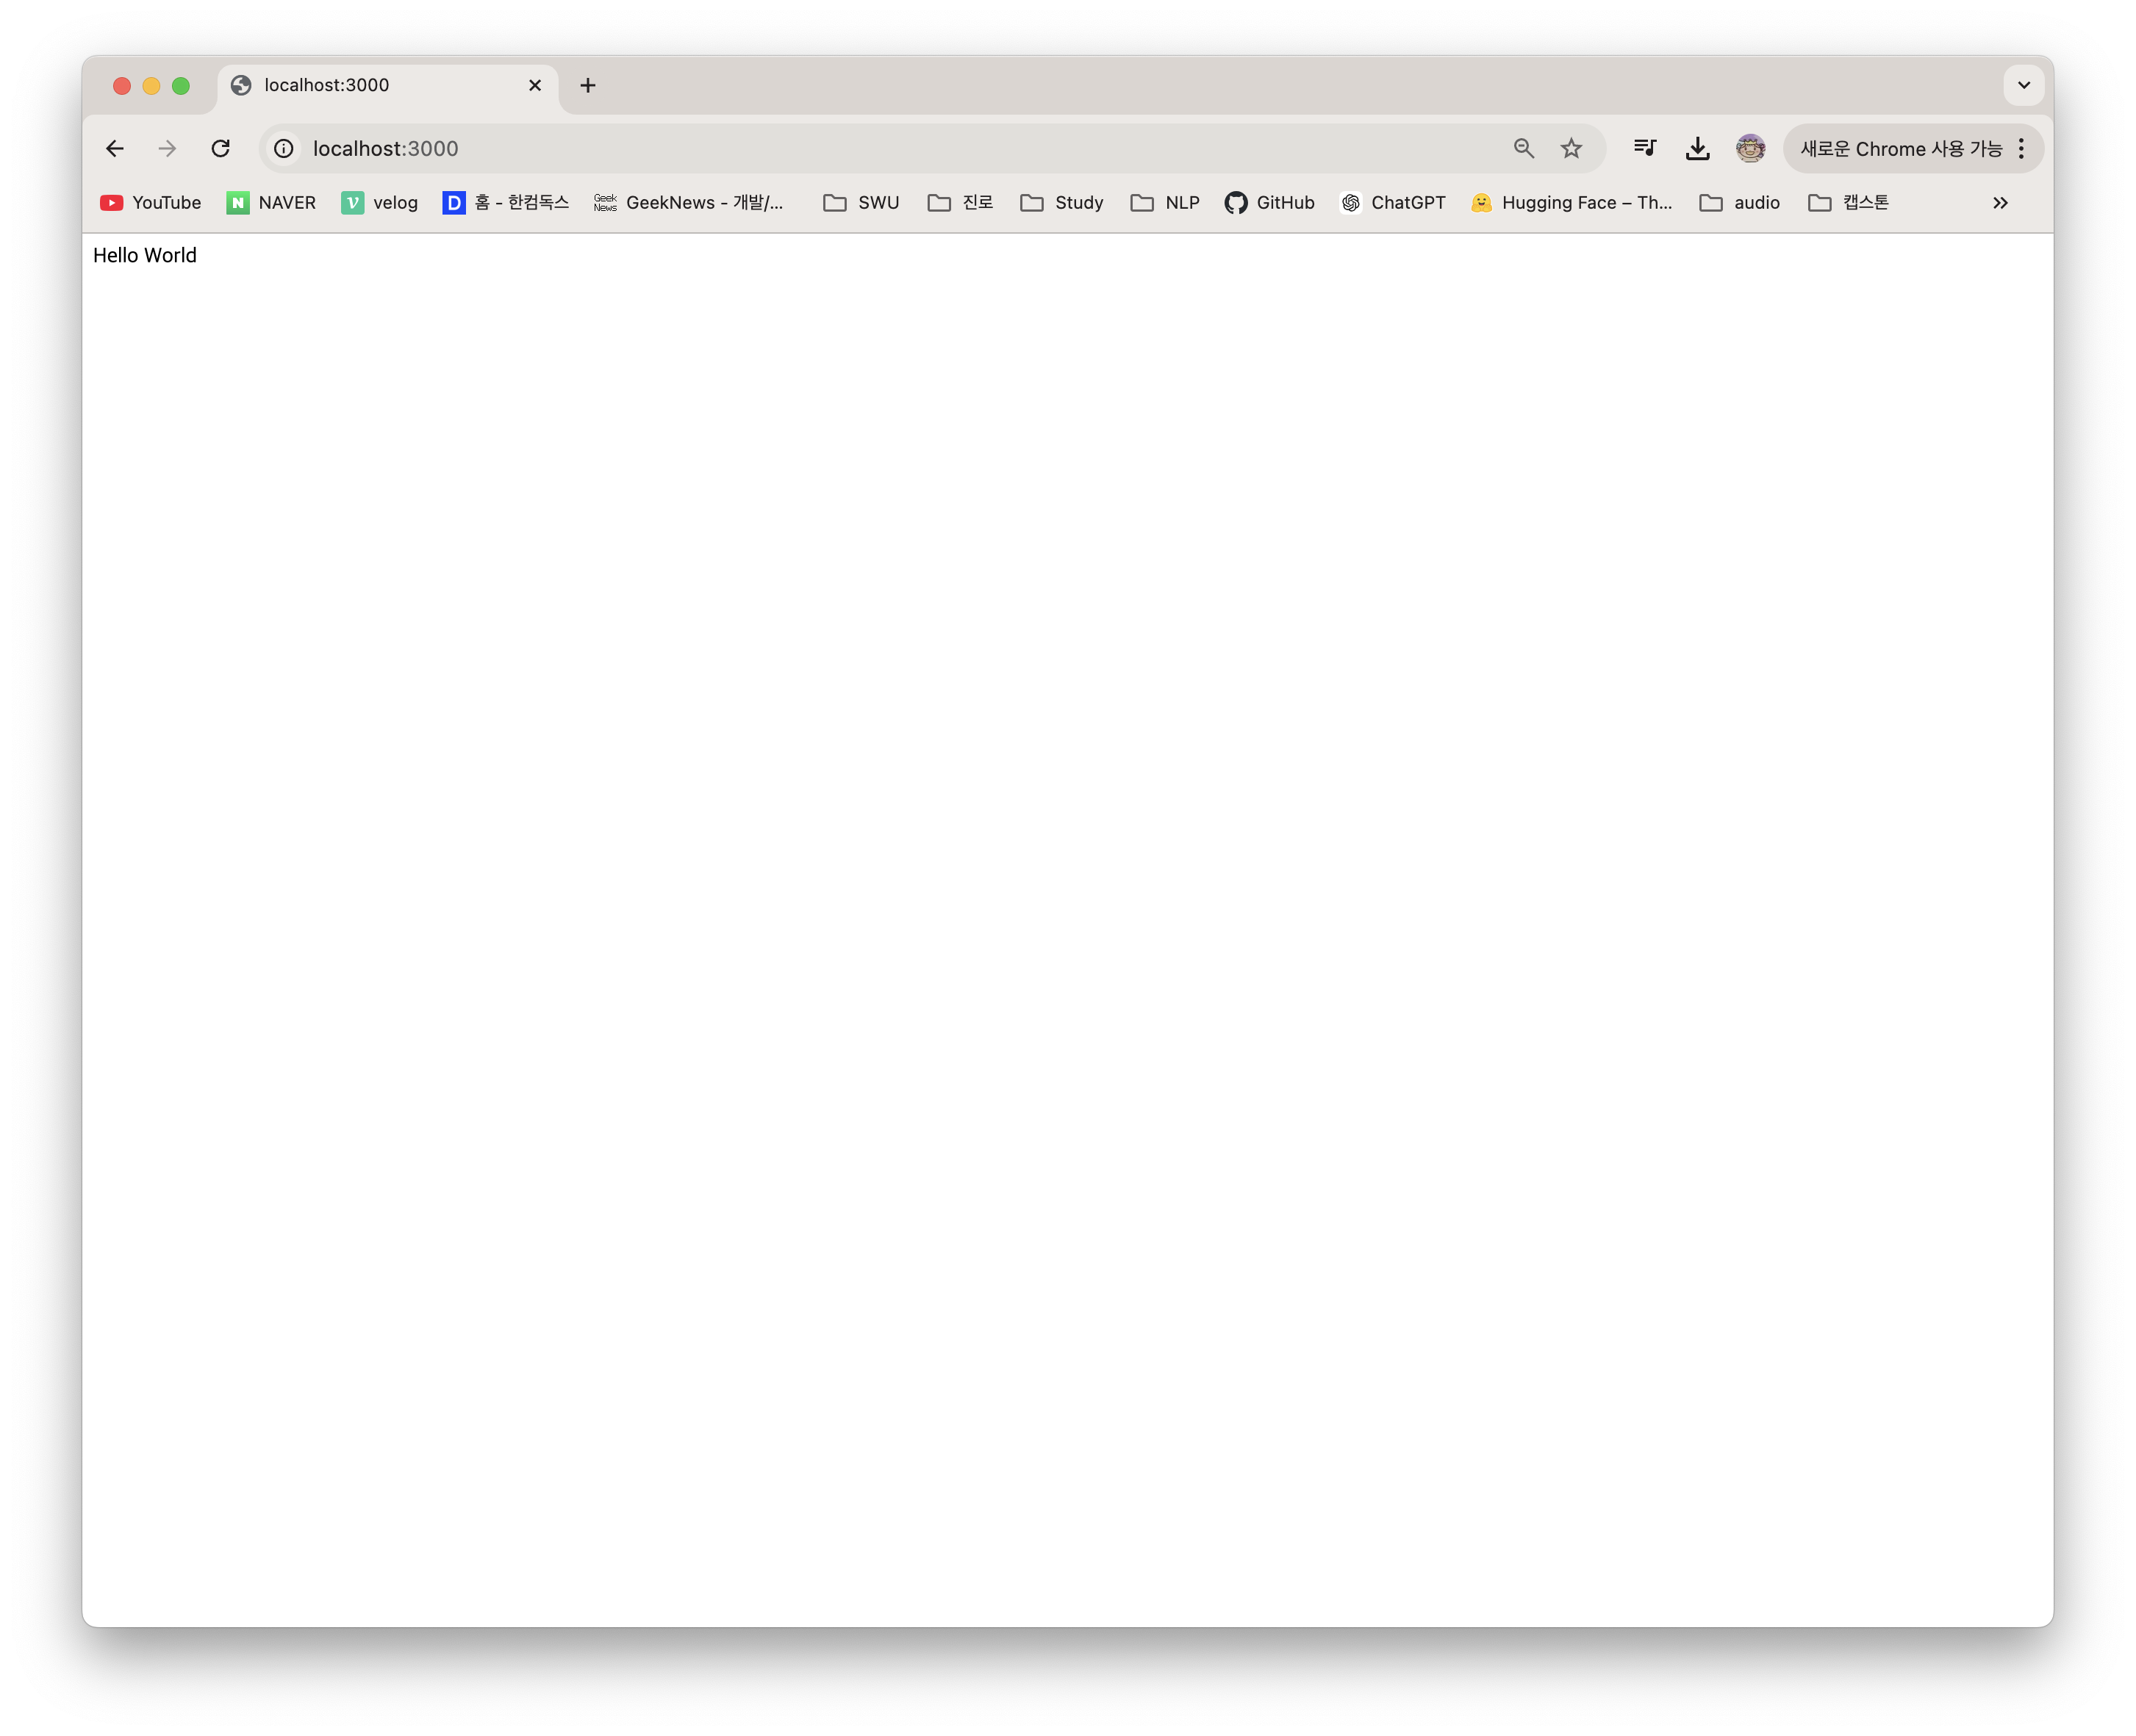
- official의 example
const express = require('express')
const app = express()
const port = 3000

app.get('/', (req,res) => {
  res.send('Hello world!")
 })

 app.listen(port, () => {
   console.log('Example app listening on port ${port}')
 })
port?
- 들어올 수 있는 입구
- 서버에서 port마다 번호가 있음
- 서버에 들어갈 때, 특정 포트(입구)로 들어갈 수 있는 것
- 포트마다 정해진 규격 존재
- 겉으론 보이진 않아도 내부적으로 각 포트 존재
- 포트마다 다른 프로그램 실행 가능
localhost
- 내 컴퓨터로 접속하는 것
app.get('/', () => {})
get: HTTP 메소드'/': 라우팅()=>{}: 콜백 함수
HTTP 메소드
- 요청의 목적, 종류를 알리는 수단
- 프론트엔드에서 백엔드로 요청할 때 사용하는 메소드
Get - 주소창: 주소창에서 데이터 전달Post - 주소창: 주소창이 아니라 내부적으로 body에 데이터 전달
라우팅(routing)
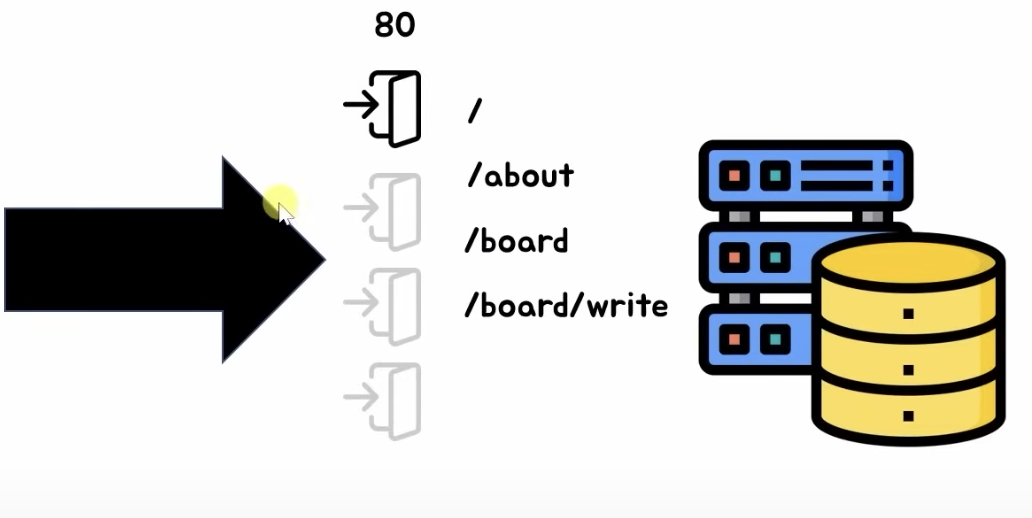
- 웹주소에서 뒤에서 사용자의 이동에 따라 변동되는 주소(?)
- ex) default : https://www.youtube.com / https://www.youtube.com**/feed/you**
콜백함수
- 함수(끝나고 실행할 함수) 처럼 다른 코드의 인수로서 넘겨주는 실행가능한 코드
(req, res) => { res.send('Hello World!') })- 이부분 자체가 화살표 함수로 쉽게 쓴 콜백 함수임
- 간단한 콜백함수 예시
setTimeout(()=>{console.log("1초 지남")},1000);
setTimeout(()=>{console.log("5초 지남")},5000);
req,res
- req : request
- 요청에 대한 정보를 담고 있는 변수 - res : response
- 응답에 대한 정보를 담고 있는 변수
4.API 서버 만들기
예제1
const express = require('express')
const app = express()
const port = 3000

app.get('/', (req,res) => {
  res.send('Hello world!')
 })

 app.get('/dog', (req,res) => {
  res.send('강아지')
 })

 app.get('/cat', (req,res) => {
  res.send('야옹이')
 })

 app.listen(port, () => {
   console.log('Example app listening on port ${port}')
 })
get으로 html도 보낼 수 있음!
// 글씨 크게
 app.get('/dog', (req,res) => {
  res.send('<h1>강아지</h1>')
 })
//링크 보내기
app.get('/dog', (req,res) => {
  res.send("<a href='https://www.youtube.com/'>유튜브 바로가기</a>")
 })
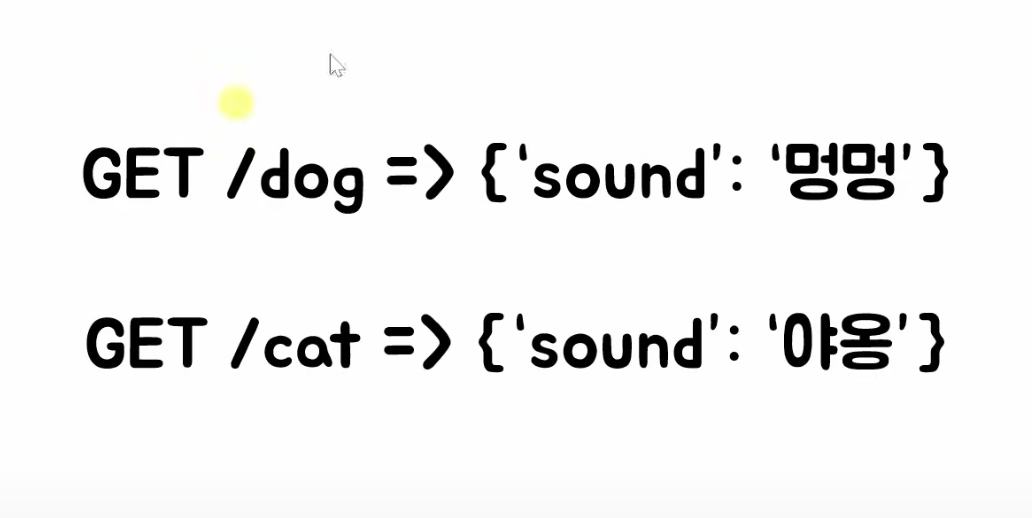
//json 객체 보내기
 app.get('/dog', (req,res) => {
  res.send({'sound' : '멍멍'})
 })
//좀 더 명시적으로 보내기
app.get('/dog', (req,res) => {
  res.json({'sound' : '멍멍'})
 })

 app.get('/cat', (req,res) => {
  res.send({'sound' : '야옹'})
 })
방법1 - 파라미터 값으로 라우팅하기
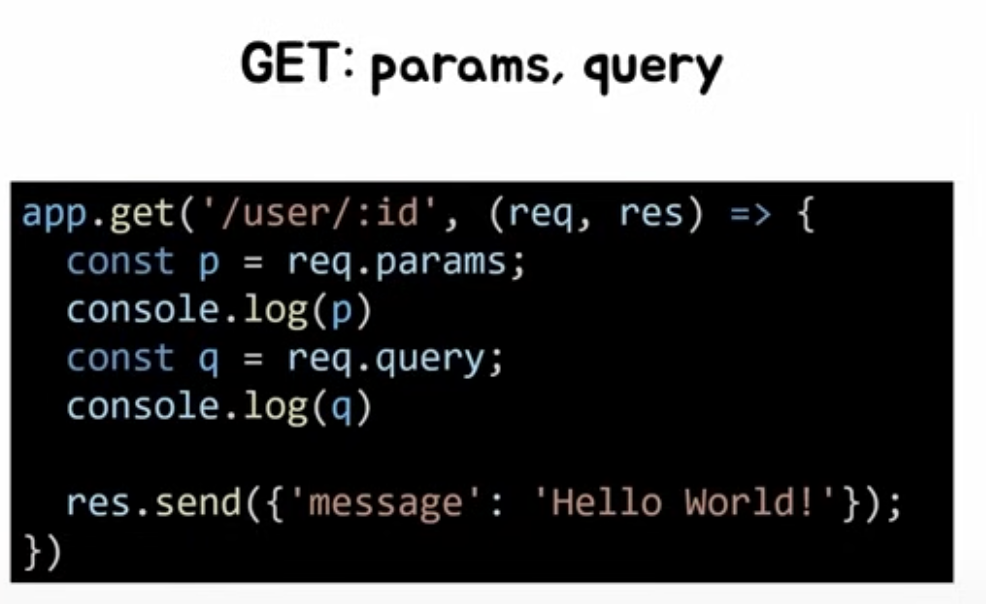
app.get('/user/:id', (req,res) => {
  const q = req.params
  console.log(q)

  res.json({'user id' : q.id})
})- :변수명
방법2 - 쿼리 값 받는 방법
app.get('/user/:id', (req,res) => {
  const q = req.query
  console.log(q)

  res.json({'user id' : q.id})
})- localhost:3000/user/asdf?q=kyuri&name=kyu&age=23

// query에서의 값 반환하기
app.get('/user/:id', (req,res) => {
  const q = req.query
  console.log(q)
  console.log(q.name)

  res.json({'user id' : q.name})
})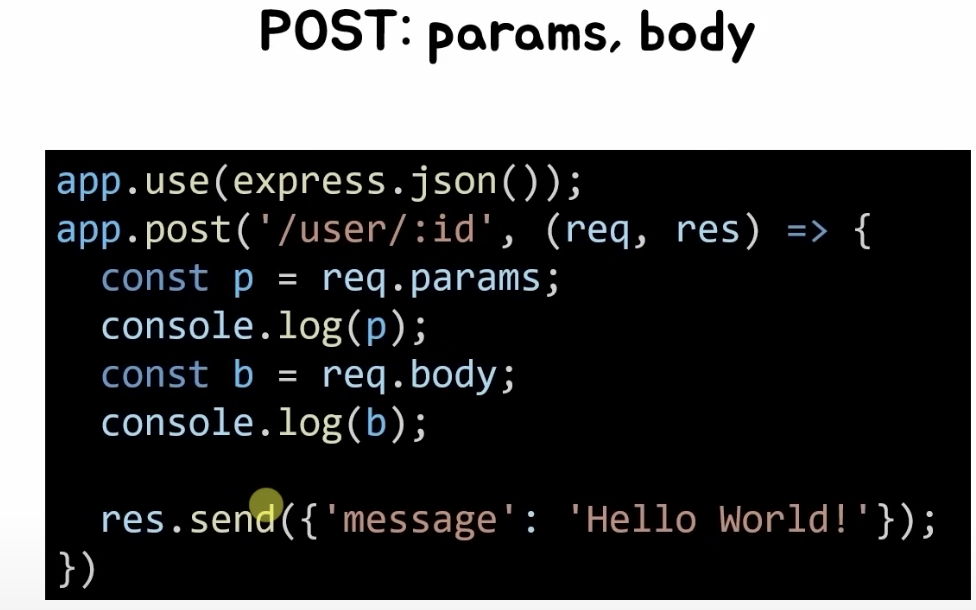
- post 방식으로 요청할 때는 body에 값이 담겨야함
예제2 : 동물소리 API 서버 만들기
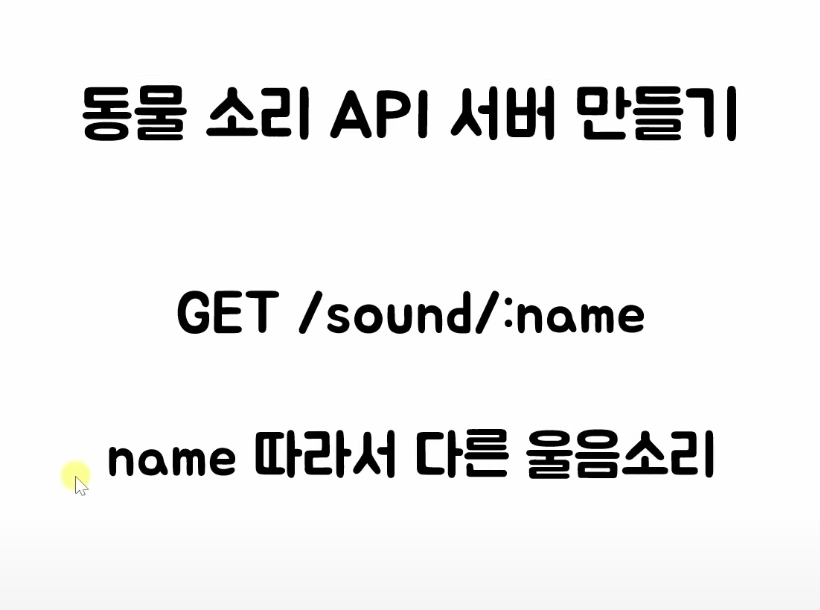
- name이라는 변수에 따라 response가 달라짐
const express = require('express')
const app = express()
const port = 3000

app.get('/sound/:name', (req,res) => {
  const{ name } = req.params

  if(name == "dog"){
  	res.json({'sound':'멍멍'})
  } else if(name =="cat"){
    res.json({'sound':'야옹'})
  } else if(name =='pig'){
    res.json({'sound':'꿀꿀'})
  } else{
    res.json({'sound':'알수없음'})
  }
 })


 app.listen(port, () => {
   console.log('Example app listening on port ${port}')
 })
cors 이슈
- html 파일에서 어떤 서버로 요청 했을 때, 보안상 이슈로 cors 설정 안해주면 기본적으로 차단됨
- cors의 역할
- html의 요청을 응답이 잘 되도록 만들어줌 - 모듈 설치 필요
const express = require('express')
var cors = require('cors')
const app = express()
const port = 3000

app.use(cors())

app.get('/sound/:name', (req,res) => {
  const{ name } = req.params

  if(name == "dog"){
  	res.json({'sound':'멍멍'})
  } else if(name =="cat"){
    res.json({'sound':'야옹'})
  } else if(name =='pig'){
    res.json({'sound':'꿀꿀'})
  } else{
    res.json({'sound':'알수없음'})
  }
 })

 app.listen(port, () => {
   console.log('Example app listening on port ${port}')
})- 어디 요청에 허락해줄지 설정도 가능

📝 데이터사이언스 학부생의 기록장!