Installation
이 튜토리얼은 리버트론에서 교육하는 Vitis-AI 튜토리얼을 진행하며 작성하였습니다.
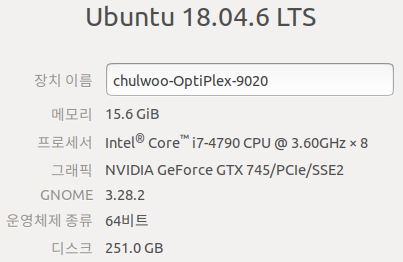
1. 개발 환경
OS: Ubuntu 18.04
Vitis-AI Version: 1.2.1(https://github.com/Xilinx/Vitis-AI/tree/1.2.1)
Board: Zynq XC7Z020-FCLG484C
Board OS: Petalinux 2019.2
2. 환경 구축
Docker 설치
https://docs.docker.com/engine/install/ubuntu/#installation-methods
https://www.xilinx.com/support/documentation/sw_manuals/vitis_ai/1_2/ug1414-vitis-ai.pdf
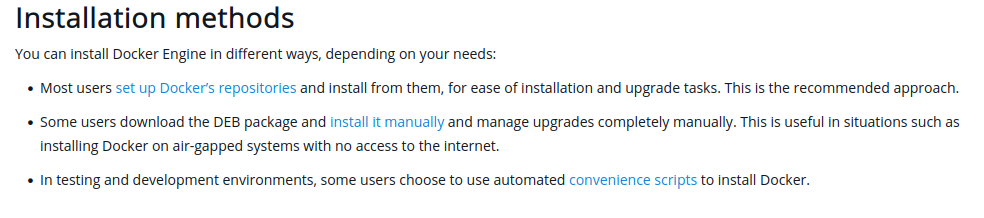
세 방법중 Using Repository 방법으로 설치.
Repo에 Docker 추가.
sudo apt-get update

sudo apt-get install \
    ca-certificates \
    curl \
    gnupg \
    lsb-release

curl -fsSL https://download.docker.com/linux/ubuntu/gpg | sudo gpg --dearmor -o /usr/share/keyrings/docker-archive-keyring.gpg

echo \
  "deb [arch=$(dpkg --print-architecture) signed-by=/usr/share/keyrings/docker-archive-keyring.gpg] https://download.docker.com/linux/ubuntu \
  $(lsb_release -cs) stable" | sudo tee /etc/apt/sources.list.d/docker.list > /dev/null
가장 최신버전의 Docker 설치 후 Hello-World 이미지 실행해보며 설치 검증.
sudo apt-get update
sudo apt-get install docker-ce docker-ce-cli containerd.io
sudo docker run hello-world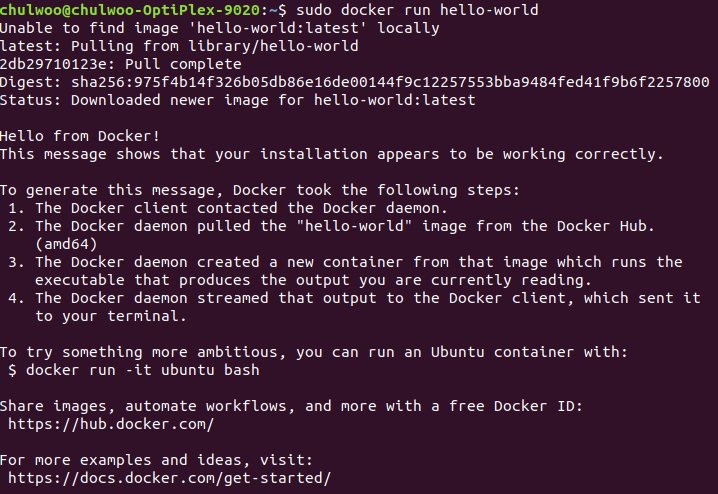
Docker 그룹 생성하고 유저를 그룹에 추가하기
https://docs.docker.com/engine/install/linux-postinstall/
groupadd는 Docker 설치 후 이미 Docker 그룹이 추가되어 있어 할 필요 없었음.
sudo groupadd docker
sudo usermod -aG docker $USER
가상환경 사용한다면 재부팅이 필요하고, 아니라면 아래 명령어로 로그아웃하고 로그인한 효과를 볼 수 있다. 재부팅을 하거나 newgrp을 하고나면 sudo 명령어 없이도 docker를 실행할 수 있다.
newgrp docker
docker run hello-world
Nvidia Container Runtime 설치
https://nvidia.github.io/nvidia-container-runtime/
Docker Container 내부에서 GPU 자원을 사용하기 위해서 nvidia-container-runtime이 필요하다. Vitis-AI GPU 버전의 경우에 설치 필요.
curl -s -L https://nvidia.github.io/nvidia-container-runtime/gpgkey | \
  sudo apt-key add -
distribution=$(. /etc/os-release;echo $ID$VERSION_ID)
curl -s -L https://nvidia.github.io/nvidia-container-runtime/$distribution/nvidia-container-runtime.list | \
  sudo tee /etc/apt/sources.list.d/nvidia-container-runtime.list
sudo apt-get update
sudo apt-get install nvidia-container-runtime
이렇게 까지 하면 Nvidia Container Runtime이 설치가 되었지만, docker config 파일을 수정해줘야한다. 아래 링크의 블로그에서 도움을 받았다.
https://verilog-119b.tistory.com/15
sudo systemctl edit docker
(편집기가 열리면 아래 코드 추가 후 저장)
[Service]
ExecStart=
ExecStart=/usr/bin/dockerd --group docker -H unix:///var/run/docker.sock --add-runtime=nvidia=/usr/bin/nvidia-container-runtime
수정을 마쳤으면 도커를 restart 해준다.
sudo systemctl daemon-reload
sudo systemctl restart docker
Clone Vitis-AI
튜토리얼은 1.2.1 버전으로 진행한다.
git clone -b 1.2.1 https://github.com/Xilinx/Vitis-AI.git
cd Vitis-AI
Docker Image 빌드
두 종류의 이미지가 존재한다.
1. Training시 CPU를 사용하는 환경
2. Training시 GPU를 사용하는 환경
Docker Image 빌드 (CPU 버전)
cd docker
./docker_build_cpu.sh
# After build finished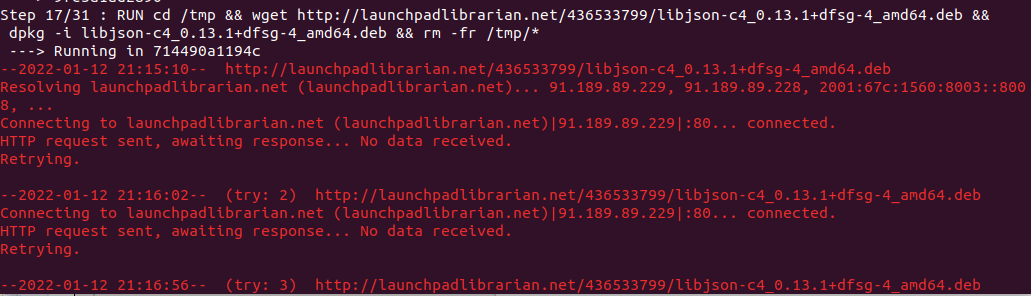
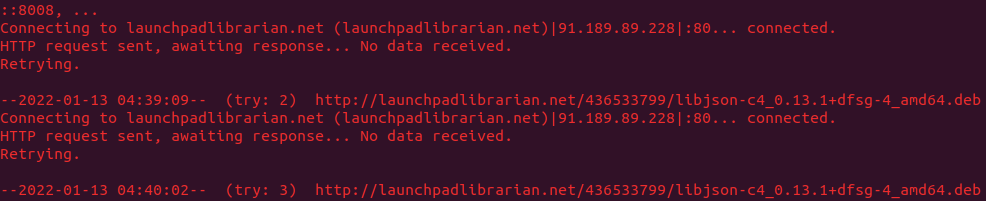
빌드 중 step17 에서 다음과 같이 wget을 하지 못하고 더이상 진행되지 않았다.
해결하기 위해 수동으로 해당 링크에서 파일을 받아와 dpkg 해주었다.
http://launchpadlibrarian.net/436533799/libjson-c4_0.13.1+dfsg-4_amd64.deb
위 링크에서 받은 파일 dpkg -i로 설치한다.
cd ~/Downloads/
sudo dpkg -i libjson-c4_0.13.1+dfsg-4_amd64.deb
sudo rm -fr /tmp/*
해당 step17은 따로 실행해주었으므로 스크립트에서 주석 처리해준다.
/Vitis-AI/docker/DockerfileCPU 파일을 편집기로 열어 아래 부분을 주석 처리해준다.

이후에 아래와 같이 conda 패키지 매니저가 environment를 solving하는 과정에서 꽤 오래걸리는데, 20분정도 후에 진행되었다.
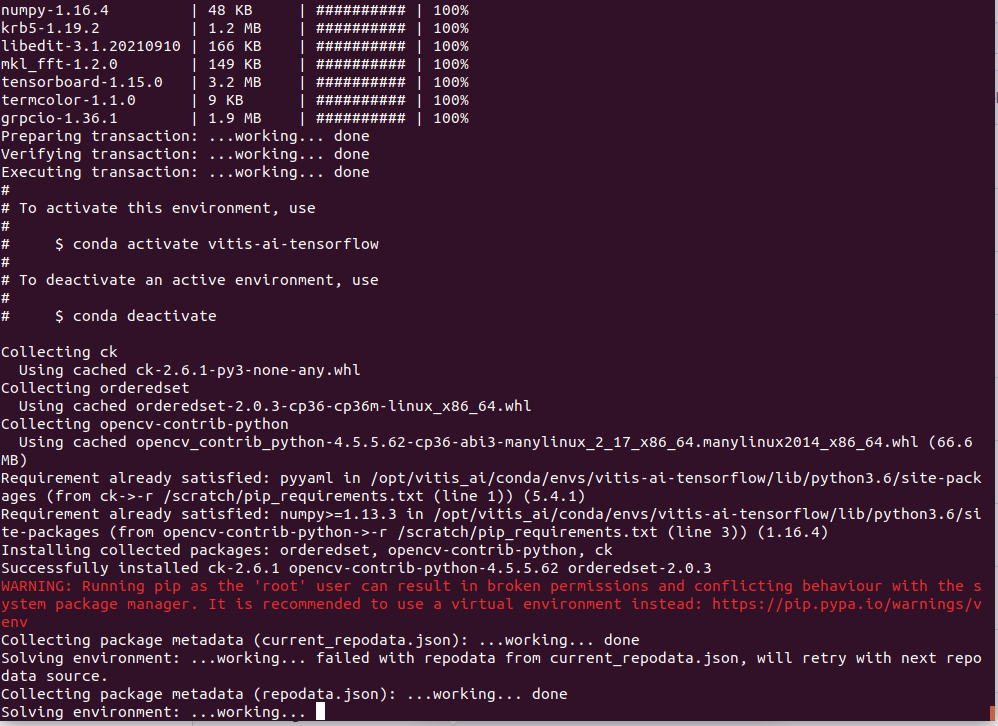
아래와 같이 성공적으로 설치된 것을 확인했다.
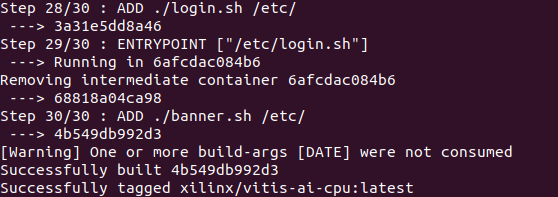
실행하여 CPU 버전 컨테이너에 진입한다.
cd ..
./docker_run.sh xilinx/vitis-ai-cpu:latest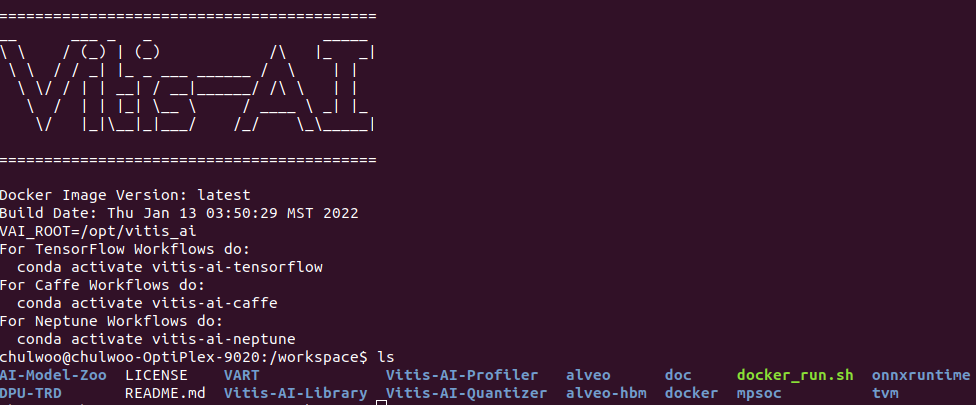
Docker Image 빌드 (GPU 버전)
cd docker
./docker_build_gpu.sh
CPU 버전과 마찬가지로 step17에서 wget을 하지못한다.
위에서처럼 직접 링크에서 다운받은 후, dpkg -i 명령어로 설치한다.
https://launchpadlibrarian.net/436533799/libjson-c4_0.13.1+dfsg-4_amd64.deb
cd ~/Downloads
sudo dpkg -i libjson-c4_0.13.1+dfsg-4_amd64.deb
rm -r *
그 후, Vitis-AI/docker/DockerfileGPU 파일을 편집기로 열어 아래와 같이 주석처리한다.

다시 ./docker_build_gpu.sh를 실행한다.
설치가 완료되면 아래 명령어로 Vitis-AI GPU버전 컨테이너에 진입한다.
cd ..
./docker_run.sh xilinx/vitis-ai-gpu:latest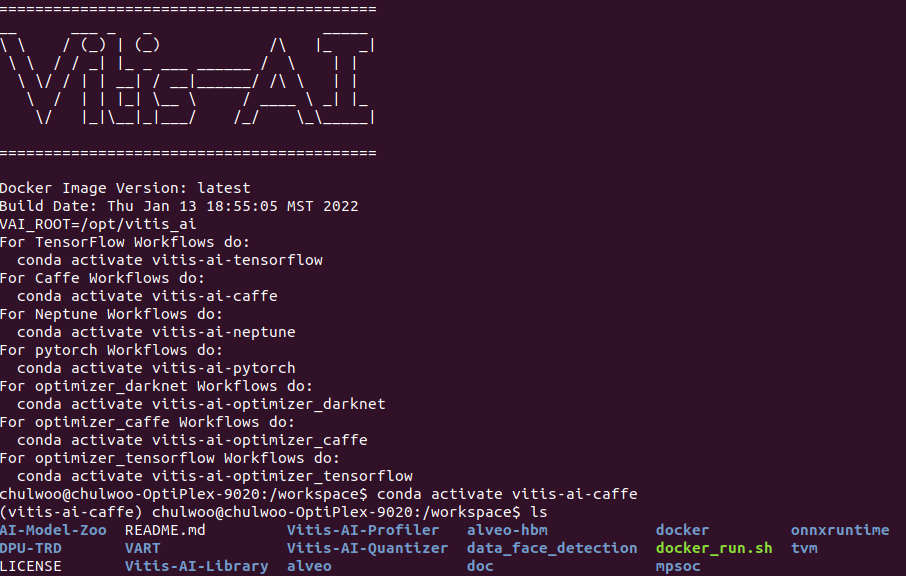
CPU 버전보다 conda 가상환경의 수가 많아졌다.
3. 학습 Data 다운로드
http://mmlab.ie.cuhk.edu.hk/projects/CelebA.html
위 링크에서 Align&Cropped Images -> CelebA -> Img ->img_celeba.7z 을 다운받아 압축을 푼다. Vitis-AI 컨테이너에 접속하여 사용할 데이터이므로 Vitis-AI 폴더 안에 따로 데이터를 저장할 폴더를 생성하고 그 안에 압축을 해제한다.

mkdir data_face_detection
cd data_face_detection
sudo apt-get install p7zip
7zr x img_celba.7z.001
압축을 풀면 20만개가 넘는 이미지 파일을 확인할 수 있다.

다음으로 링크의 구글드라이브에서 Celeba -> Anno -> list_bbox_celeba.txt 파일을 다운받는다. 해당 파일은 위에서 받은 이미지 파일들로부터 얼굴 좌표값을 라벨링한 파일이다.
다운받은 이미지 데이터와 라벨 데이터는 Vitis-AI 폴더 안에 하나의 폴더에 저장한다.
