오늘은 목표
React와 Express PostSQL을 연결하여 데이터를 저장하고 조회해보자 !!!
Express와 pg 패키지 설치
npm install express pgReact 설치
npx create-react-app my-react-appPostgreSQL 세팅
- NodeTest 데이터베이스 생성
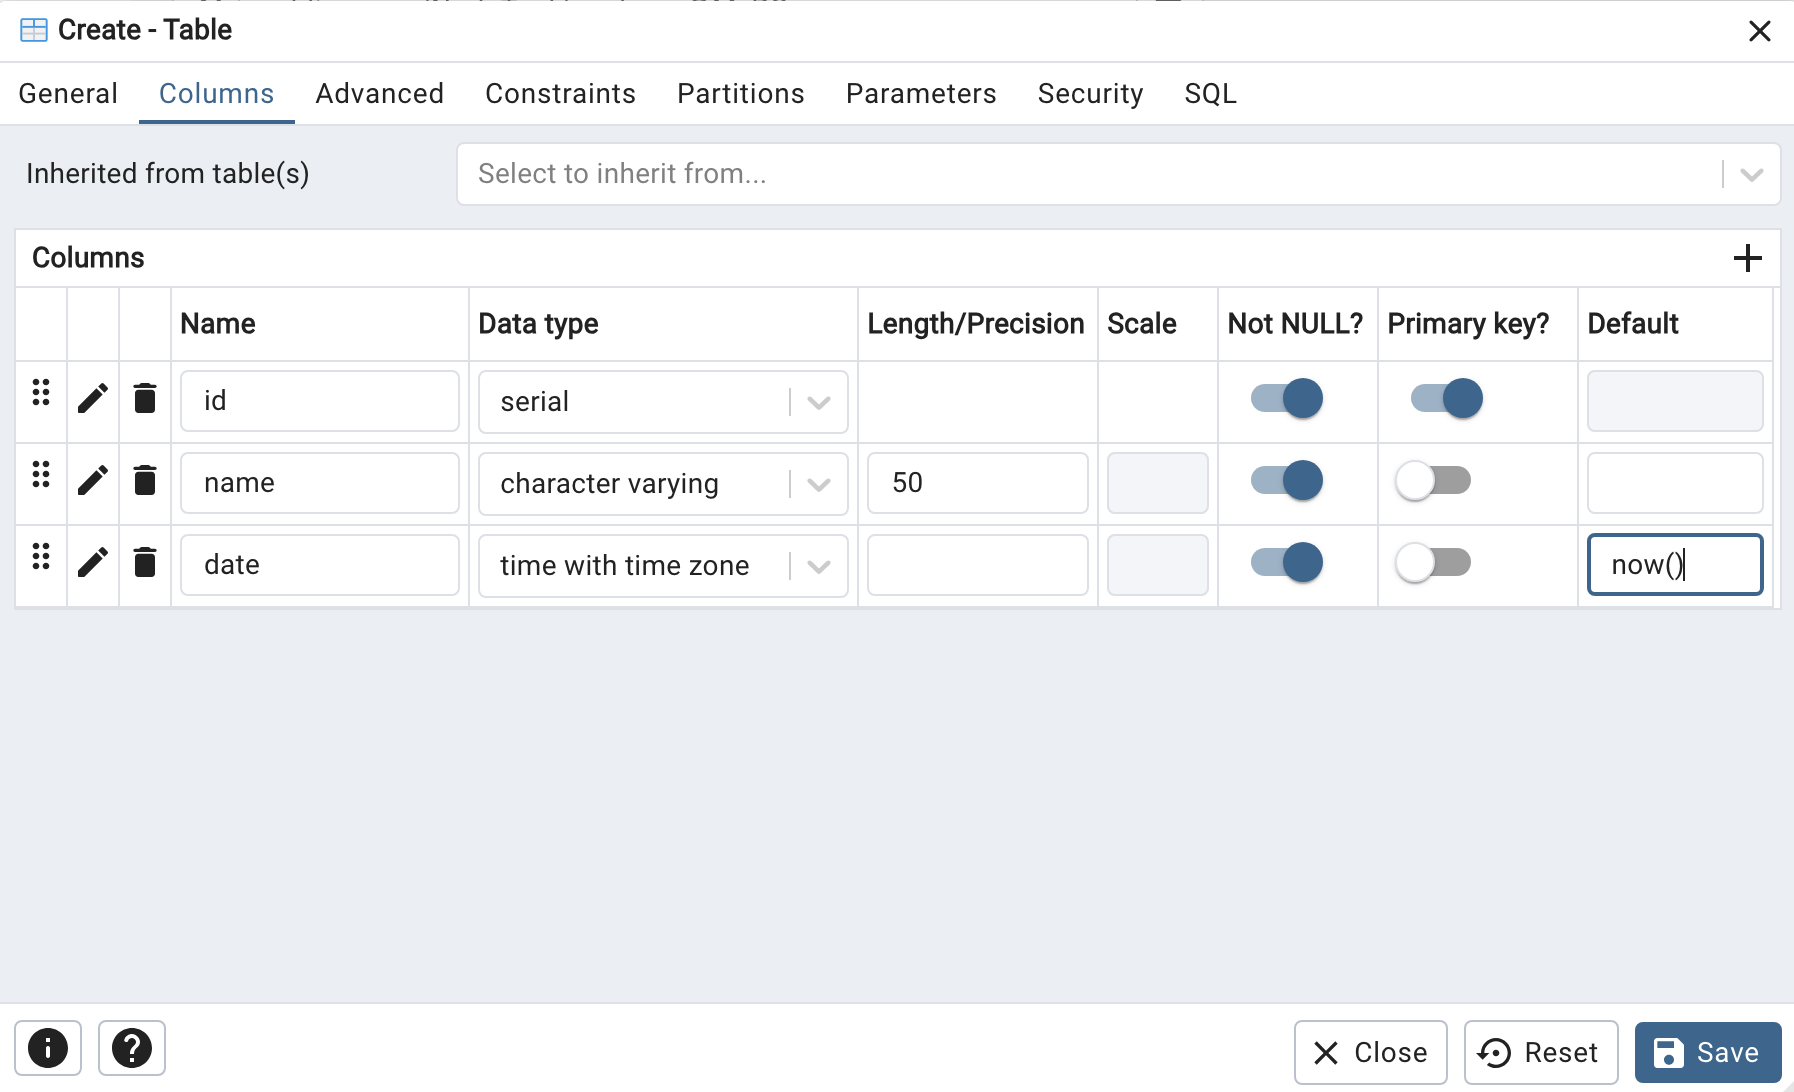
- users 테이블 생성
- colum추가
users안에는 id, name, date가 있고 id는 PK, Not Null로 자동생성 한다. name은 VARCHAR, date는 현재시간을 자동생성하게 만들거다.
Express 세팅
- index.js라는 파일을 만들어준다.
- PostgreSQL 연결
- Cors 설치
- API EndPoint 설계
// PostgreSQL 연결 설정
const pool = new Pool({
    user: 'postgres',      // PostgreSQL 사용자명
    host: 'localhost',          // 호스트
    database: 'NodeTest',  // 데이터베이스 이름
    password: '사용자 비밀번호',  // 사용자 비밀번호
    port: 5432,                 // PostgreSQL 포트 (기본값: 5432)
});
// cors
npm install cors
const cors = require('cors');
app.use(cors());// 데이터 삽입 라우트 (CREATE)
app.post('/insert', async (req, res) => {
const { name } = req.body;
try {
const result = await pool.query('INSERT INTO users (name) VALUES ($1) RETURNING *', [name]);
res.json(result.rows[0]);
} catch (err) {
console.error(err);
res.status(500).send('Server Error');
}
});
// 데이터 조회 라우트 (READ)
app.get('/select', async (req, res) => {
try {
const result = await pool.query('SELECT * FROM users');
res.json(result.rows);
} catch (err) {
console.error(err);
res.status(500).send('Server Error');
}
});
// 데이터 업데이트 라우트 (UPDATE)
app.put('/update/:id', async (req, res) => {
const { id } = req.params;
const { name } = req.body;
try {
const result = await pool.query('UPDATE users SET name = $1 WHERE id = $2 RETURNING *', [name, id]);
res.json(result.rows[0]);
} catch (err) {
console.error(err);
res.status(500).send('Server Error');
}
});
// 데이터 삭제 라우트 (DELETE)
app.delete('/delete/:id', async (req, res) => {
const { id } = req.params;
try {
const result = await pool.query('DELETE FROM users WHERE id = $1 RETURNING *', [id]);
res.json(result.rows[0]);
} catch (err) {
console.error(err);
res.status(500).send('Server Error');
}
});React 세팅
- 이름을 받을 수 있는 Input 박스 구현
- 정보를 불러오는 부분 구현
- 삭제 및 수정 구현
import React, { useState, useEffect } from 'react';
import './App.css';
function App() {
const [name, setName] = useState('');
const [users, setUsers] = useState([]);
const [editId, setEditId] = useState(null);
useEffect(() => {
fetchUsers();
}, []);
const fetchUsers = async () => {
try {
const response = await fetch('http://localhost:3060/select');
const data = await response.json();
setUsers(data);
} catch (error) {
console.error('Error:', error);
}
};
const handleSubmit = async (e) => {
e.preventDefault();
if (editId) {
await handleUpdate();
} else {
await handleInsert();
}
};
const handleInsert = async () => {
try {
const response = await fetch('http://localhost:3060/insert', {
method: 'POST',
headers: {
'Content-Type': 'application/json',
},
body: JSON.stringify({ name }),
});
const data = await response.json();
setUsers([...users, data]);
setName('');
} catch (error) {
console.error('Error:', error);
}
};
const handleUpdate = async () => {
try {
const response = await fetch(`http://localhost:3060/update/${editId}`, {
method: 'PUT',
headers: {
'Content-Type': 'application/json',
},
body: JSON.stringify({ name }),
});
const data = await response.json();
setUsers(users.map(user => (user.id === editId ? data : user)));
setName('');
setEditId(null);
} catch (error) {
console.error('Error:', error);
}
};
const handleDelete = async (id) => {
try {
const response = await fetch(`http://localhost:3060/delete/${id}`, {
method: 'DELETE',
});
const data = await response.json();
setUsers(users.filter(user => user.id !== id));
} catch (error) {
console.error('Error:', error);
}
};
const handleEdit = (user) => {
setName(user.name);
setEditId(user.id);
};
return (
<div className="App">
<header className="App-header">
<form onSubmit={handleSubmit}>
<input
type="text"
placeholder="Enter your name"
value={name}
onChange={(e) => setName(e.target.value)}
/>
<button type="submit">{editId ? 'Update' : 'Submit'}</button>
</form>
<ul>
{users.map(user => (
<li key={user.id}>
{user.name}
<button onClick={() => handleEdit(user)}>Edit</button>
<button onClick={() => handleDelete(user.id)}>Delete</button>
</li>
))}
</ul>
</header>
</div>
);
}
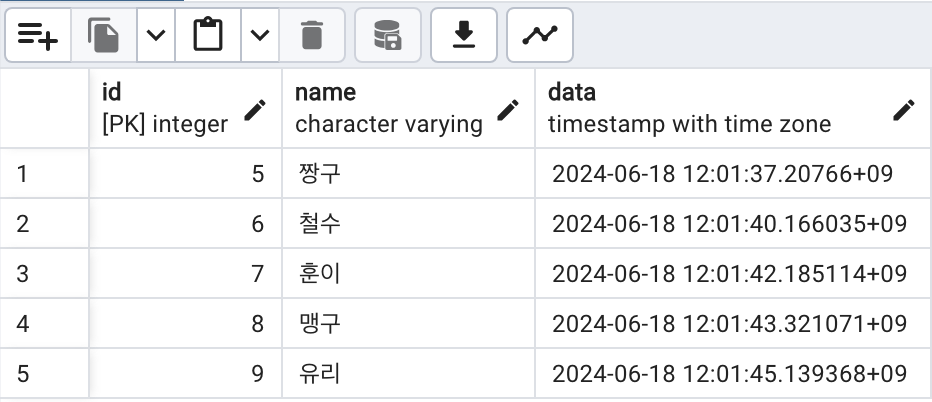
export default App;성공적인 결과
느낀점
오늘은 3가지를 연결하여 기초적인 연습을 해봤다. 앞으로는 Mock server를 만들더라도 Dummy Data를 만들지 않고 직접 데이터베이스를 연결하여 사용해 봐야겠다. 오늘도 성장한 기분 럭키비키잖아~~!!🍀!!🍀

laonlaon