폼 화면 매핑
    @GetMapping("/customers/new")
    public String viewNewCustomerPage() {
        return "views/new-customers";
    }
폼 화면 페이지
<!doctype html>
<html lang="en">
<head>
    <meta charset="UTF-8">
    <meta name="viewport"
          content="width=device-width, user-scalable=no, initial-scale=1.0, maximum-scale=1.0, minimum-scale=1.0">
    <meta http-equiv="X-UA-Compatible" content="ie=edge">
    <link href="https://cdn.jsdelivr.net/npm/bootstrap@5.3.0-alpha1/dist/css/bootstrap.min.css"
          rel="stylesheet"
          integrity="sha384-GLhlTQ8iRABdZLl6O3oVMWSktQOp6b7In1Zl3/Jr59b6EGGoI1aFkw7cmDA6j6gD"
          crossorigin="anonymous">
    <title>KDT - New Customer</title>
</head>
<body class="container-fluid">
<h1>KDT Spring App</h1>
<img th:src="@{/resources/bg.jpeg}" class="img-fluid">
<h2>New Customer</h2>
<form th:action="@{/customers/new}" method="post">
    <div class="mb-3">
        <label for="exampleInputEmail1" class="form-label">Email address</label>
        <input type="email" name="email" class="form-control" id="exampleInputEmail1" aria-describedby="emailHelp">
    </div>
    <div class="mb-3">
        <label for="exampleInputPassword1" class="form-label">Name</label>
        <input type="text" name="name" class="form-control" id="exampleInputPassword1">
    </div>
    <button type="submit" class="btn btn-primary">Submit</button>
</form>
</body>
이메일과 이름을 입력받아 submit버튼을 누르면 customers/new url에 post방식으로 요청이 보내집니다.
중요한 것은 <input> 엘리먼트의 속성으로 반드시 name을 정해야합니다.
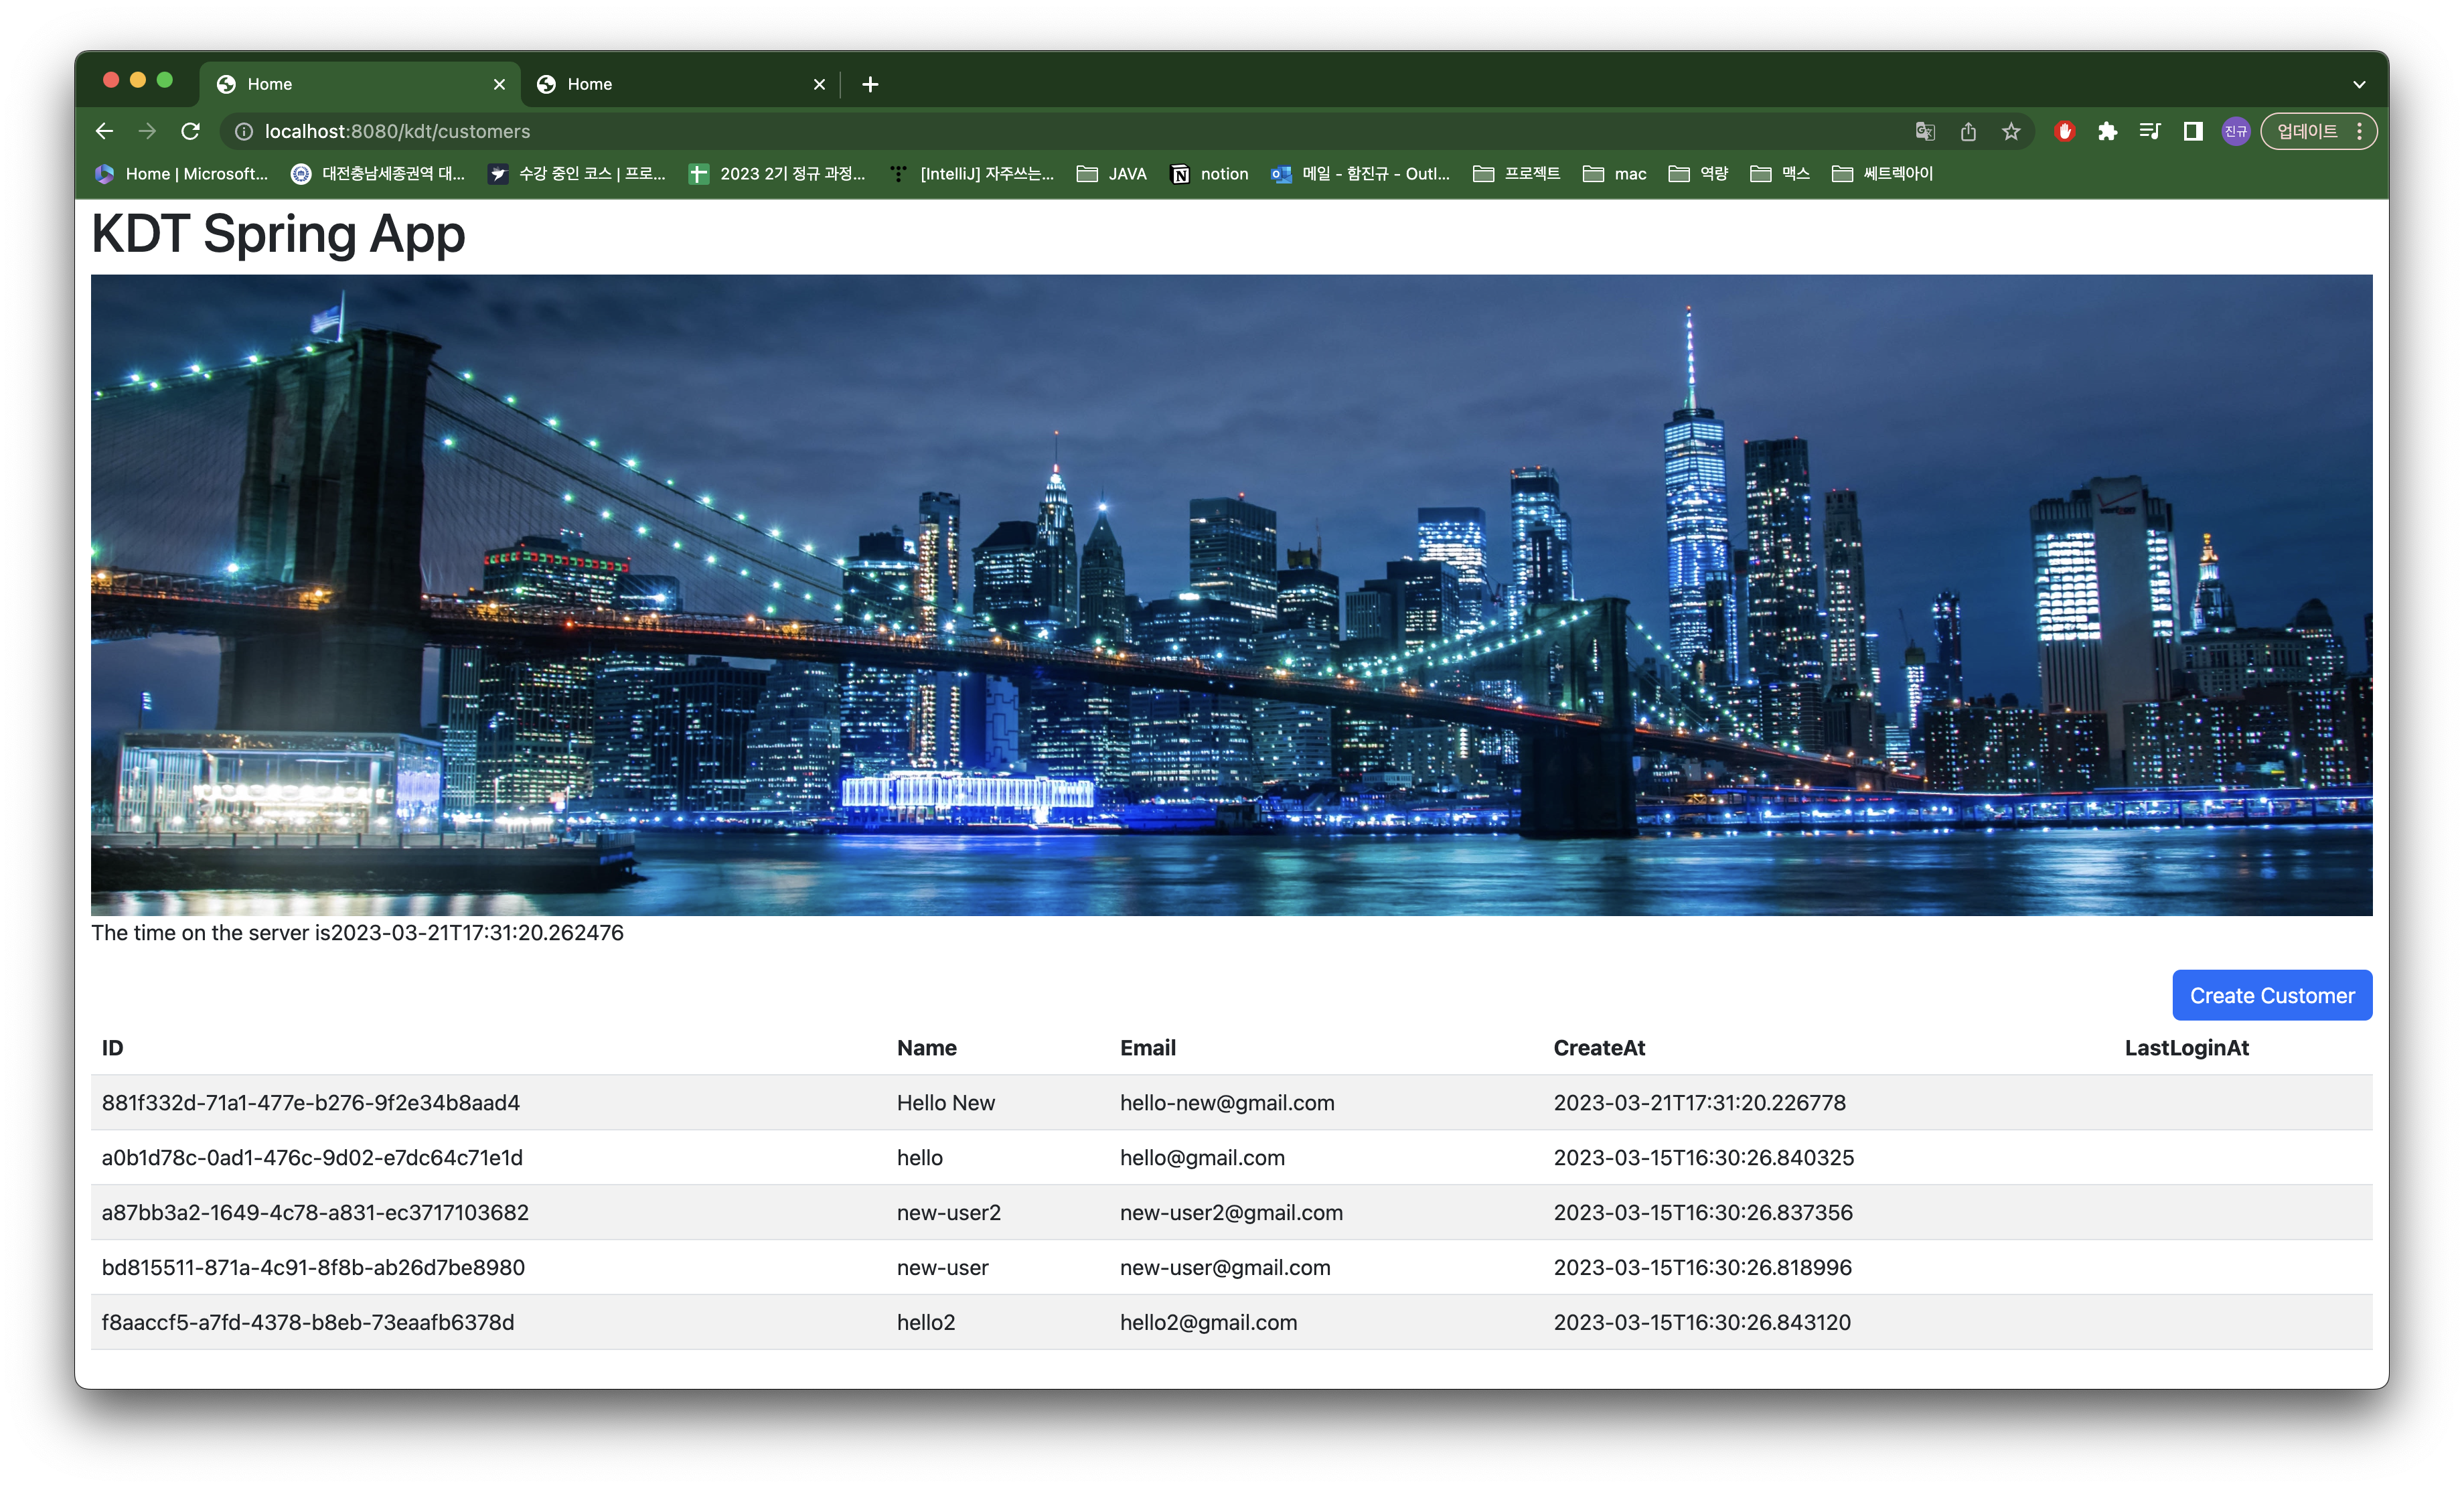
customers 페이지에 버튼 추가
<div class="d-grid gap-2 d-md-flex justify-content-md-end">
    <a th:href="@{/customers/new}" class="btn btn-primary" type="button">Create Customer</a>
</div>
고객을 추가하는 버튼을 추가합니다.
new-customers에서 만들어진 폼 데이터를 매핑
    @PostMapping("/customers/new")
    public String addNewCustomer(CreateCustomerRequest createCustomerRequest) {
        customerService.createCustomer(createCustomerRequest.name(), createCustomerRequest.email());
        return "redirect:/customers";
}- new-customers에서 만들어진 폼 데이터를 컨트롤러에서 받아야합니다.
- viewNewCustomerPage와 url은 동일하지만 http 메소드에 따라 다르게 매핑됩니다.
- form데이터를 매핑하는 클래스(CreateCustomerRequest)가 있어야 합니다.
- Spring MVC에서 form데이터를 CreateCustomerRequest로 객체화를 해줍니다.
- 객체화가 되기 위해서는 폼 데이터의
name과 필드명이 일치해야합니다.
- 객체화가 되기 위해서는 폼 데이터의
- 서비스에서 새로운 고객 생성 요청이 끝나면 customers페이지로 리다이렉트합니다.
CreateCustomerRequest (DTO)
public record CreateCustomerRequest(String email, String name) {
}
Java - jdk 14 record(레코드) 란?! Data class(데이터 클래스)
CustomerService
인터페이스에 createCustomer 메소드를 추가
public interface CustomerService {
  void createCustomers(List<Customer> customers);

  Customer createCustomer(String name, String email);

  List<Customer> getAllCustomers();
}
CustomerServiceImpl
    @Override
    public Customer createCustomer(String name, String email) {
        var customer = new Customer(UUID.randomUUID(), name, email, LocalDateTime.now());
        return customerRepository.insert(customer);
    }
이름과 이메일로 고객을 생성하고 이를 레포지터리에 저장합니다.
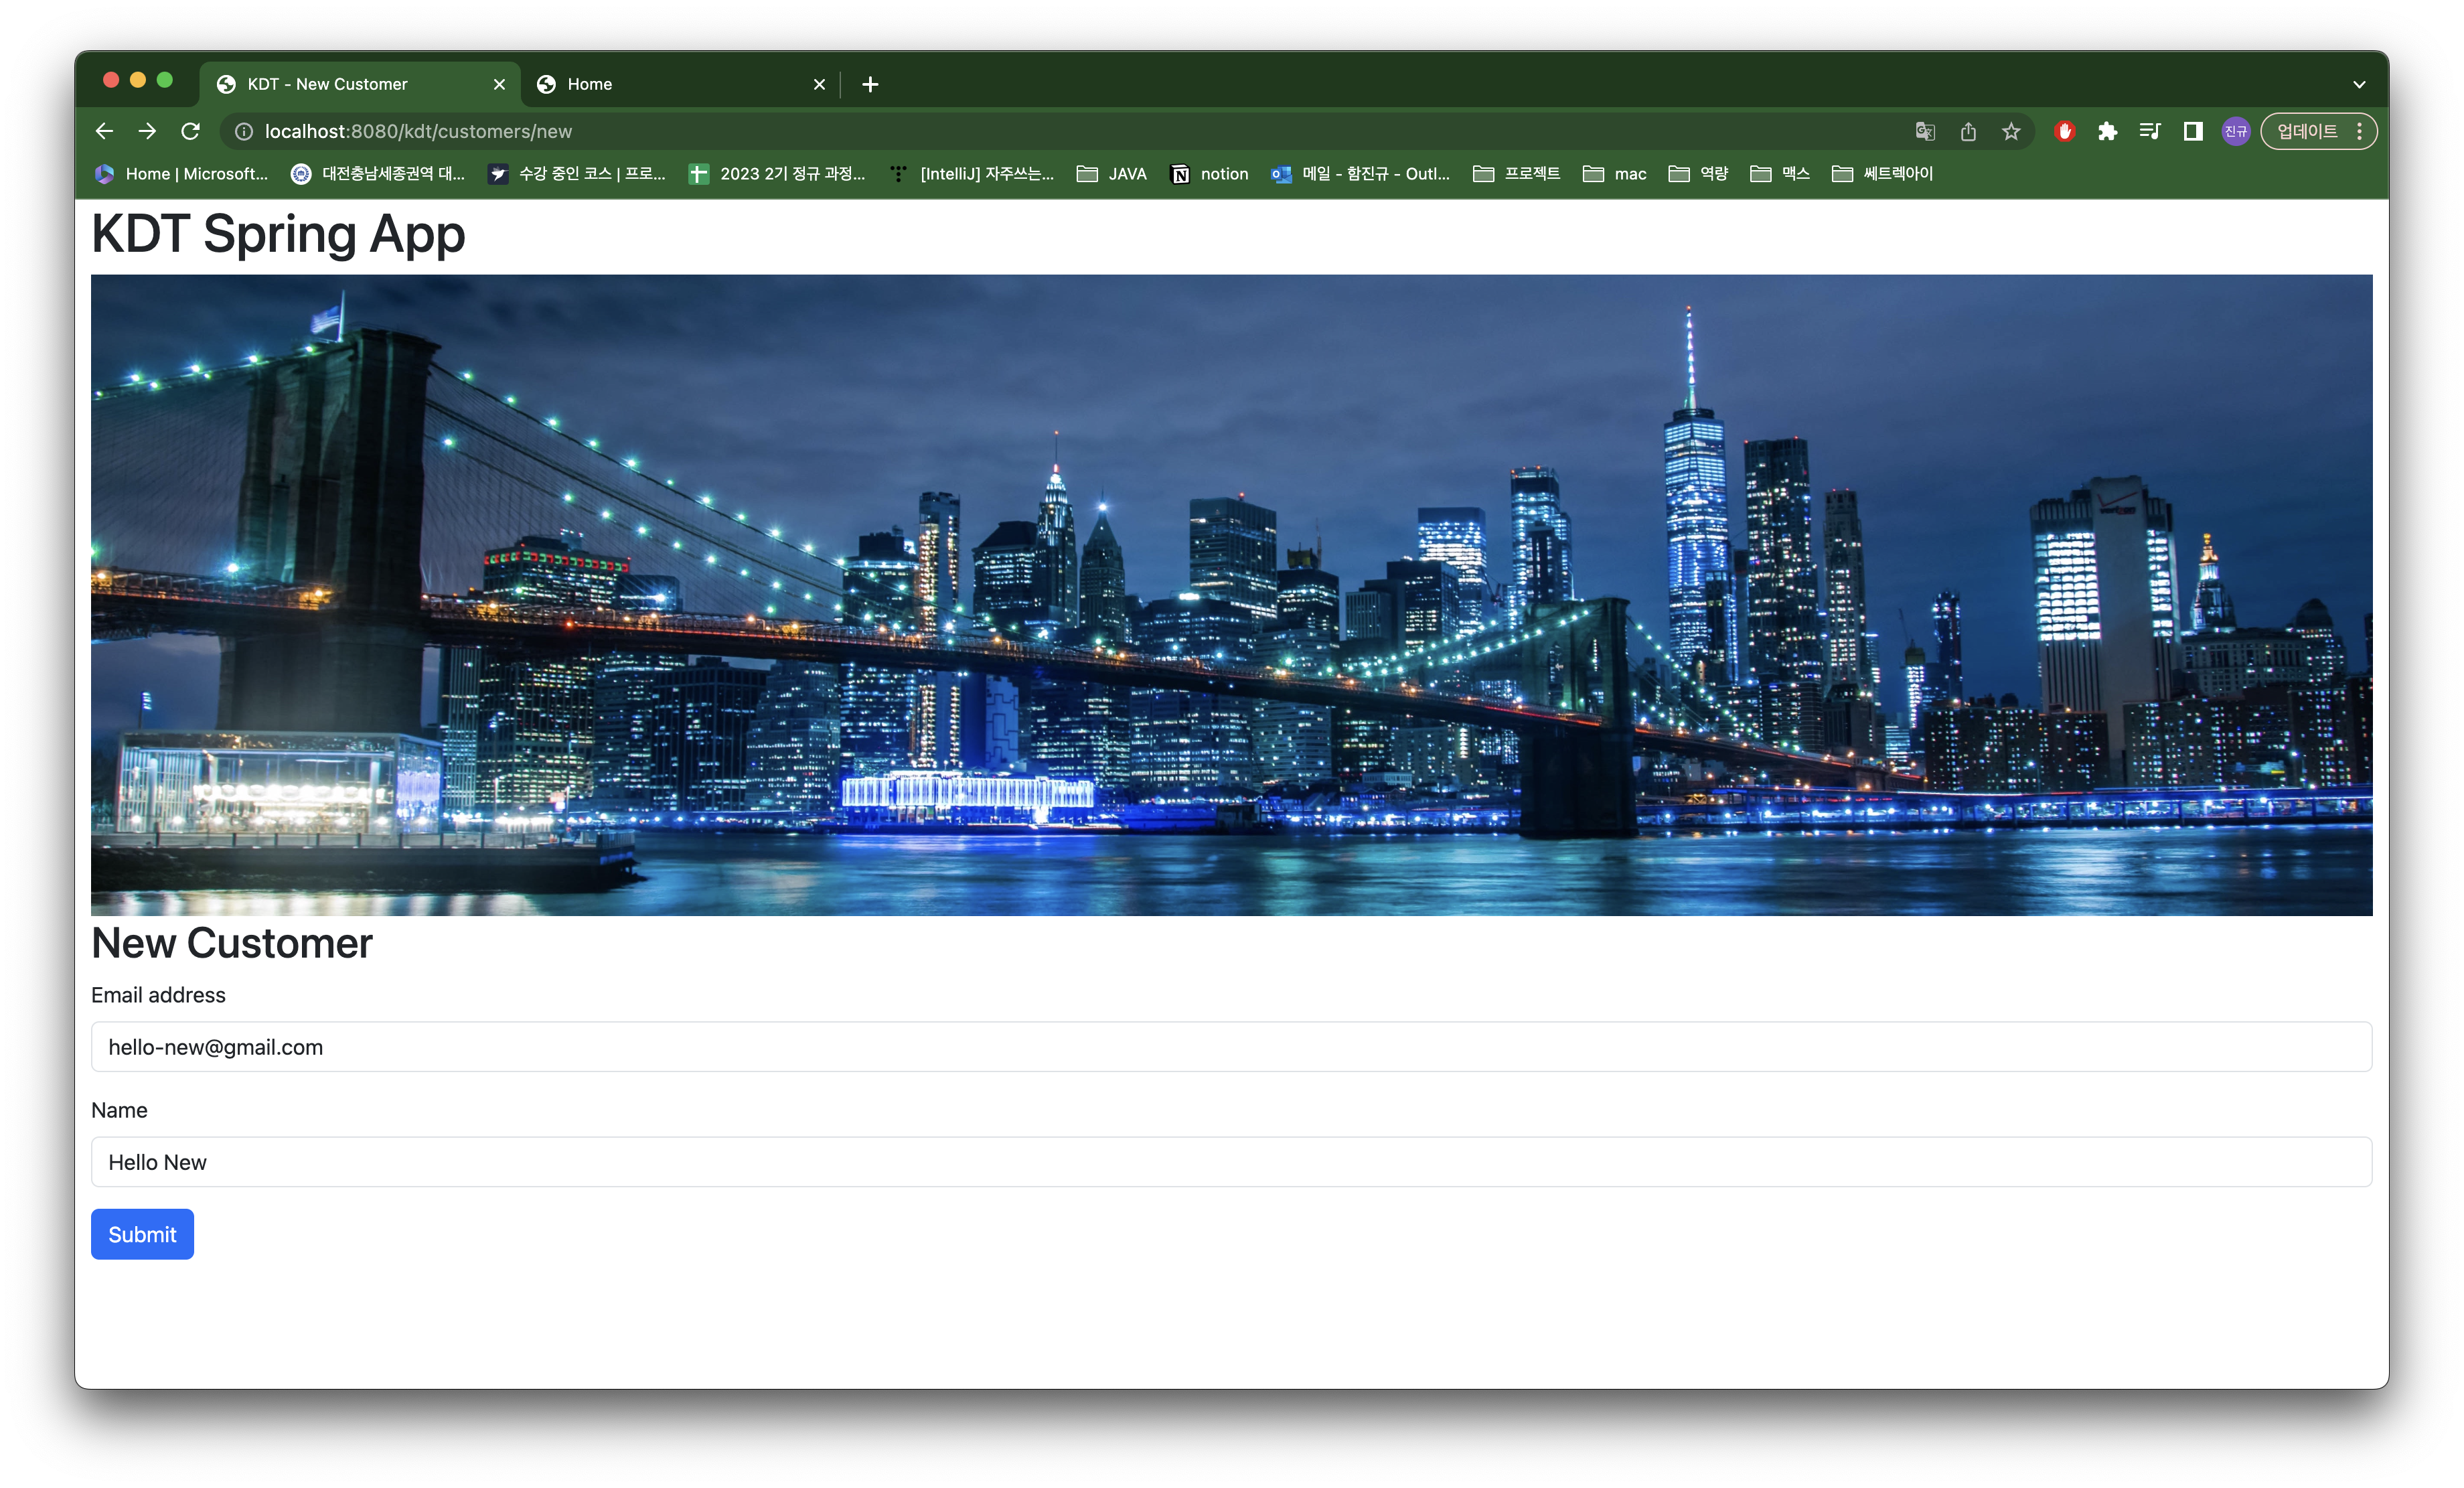
폼 화면 결과
입력화면
입력 이후 화면
고객 상세페이지
customers
<tr th:each="customer: ${customers}" th:object="${customer}" th:onclick="|location.href='@{/customers/{customerId}(customerId=${customer.customerId})}'|">customers에서 보여지는 테이블의 각 행에서 onclick 이벤트처리합니다.
행을 클릭하면 행에 해당하는 고객의 id에 맞춰 customer/customerId url로 보내집니다.
CustomerController
    @GetMapping("/customers/{customerId}")
    public String findCustomer(@PathVariable("customerId") UUID customerId, Model model) {
        var maybeCustomer = customerService.getCustomer(customerId);
        if (maybeCustomer.isPresent()) {
            model.addAttribute("customer", maybeCustomer.get());
            return "views/customer-details";
        } else {
            return "views/404";
        }
    }
url 경로의 일부분을 변수화할 수 있습니다.
@PathVariable로 {customerId}와 customerId를 매핑시켜줄 수 있으며 이때 UUID형으로 형변환됩니다.
찾는 고객이 존재하면 모델에 객체를 담아줍니다.
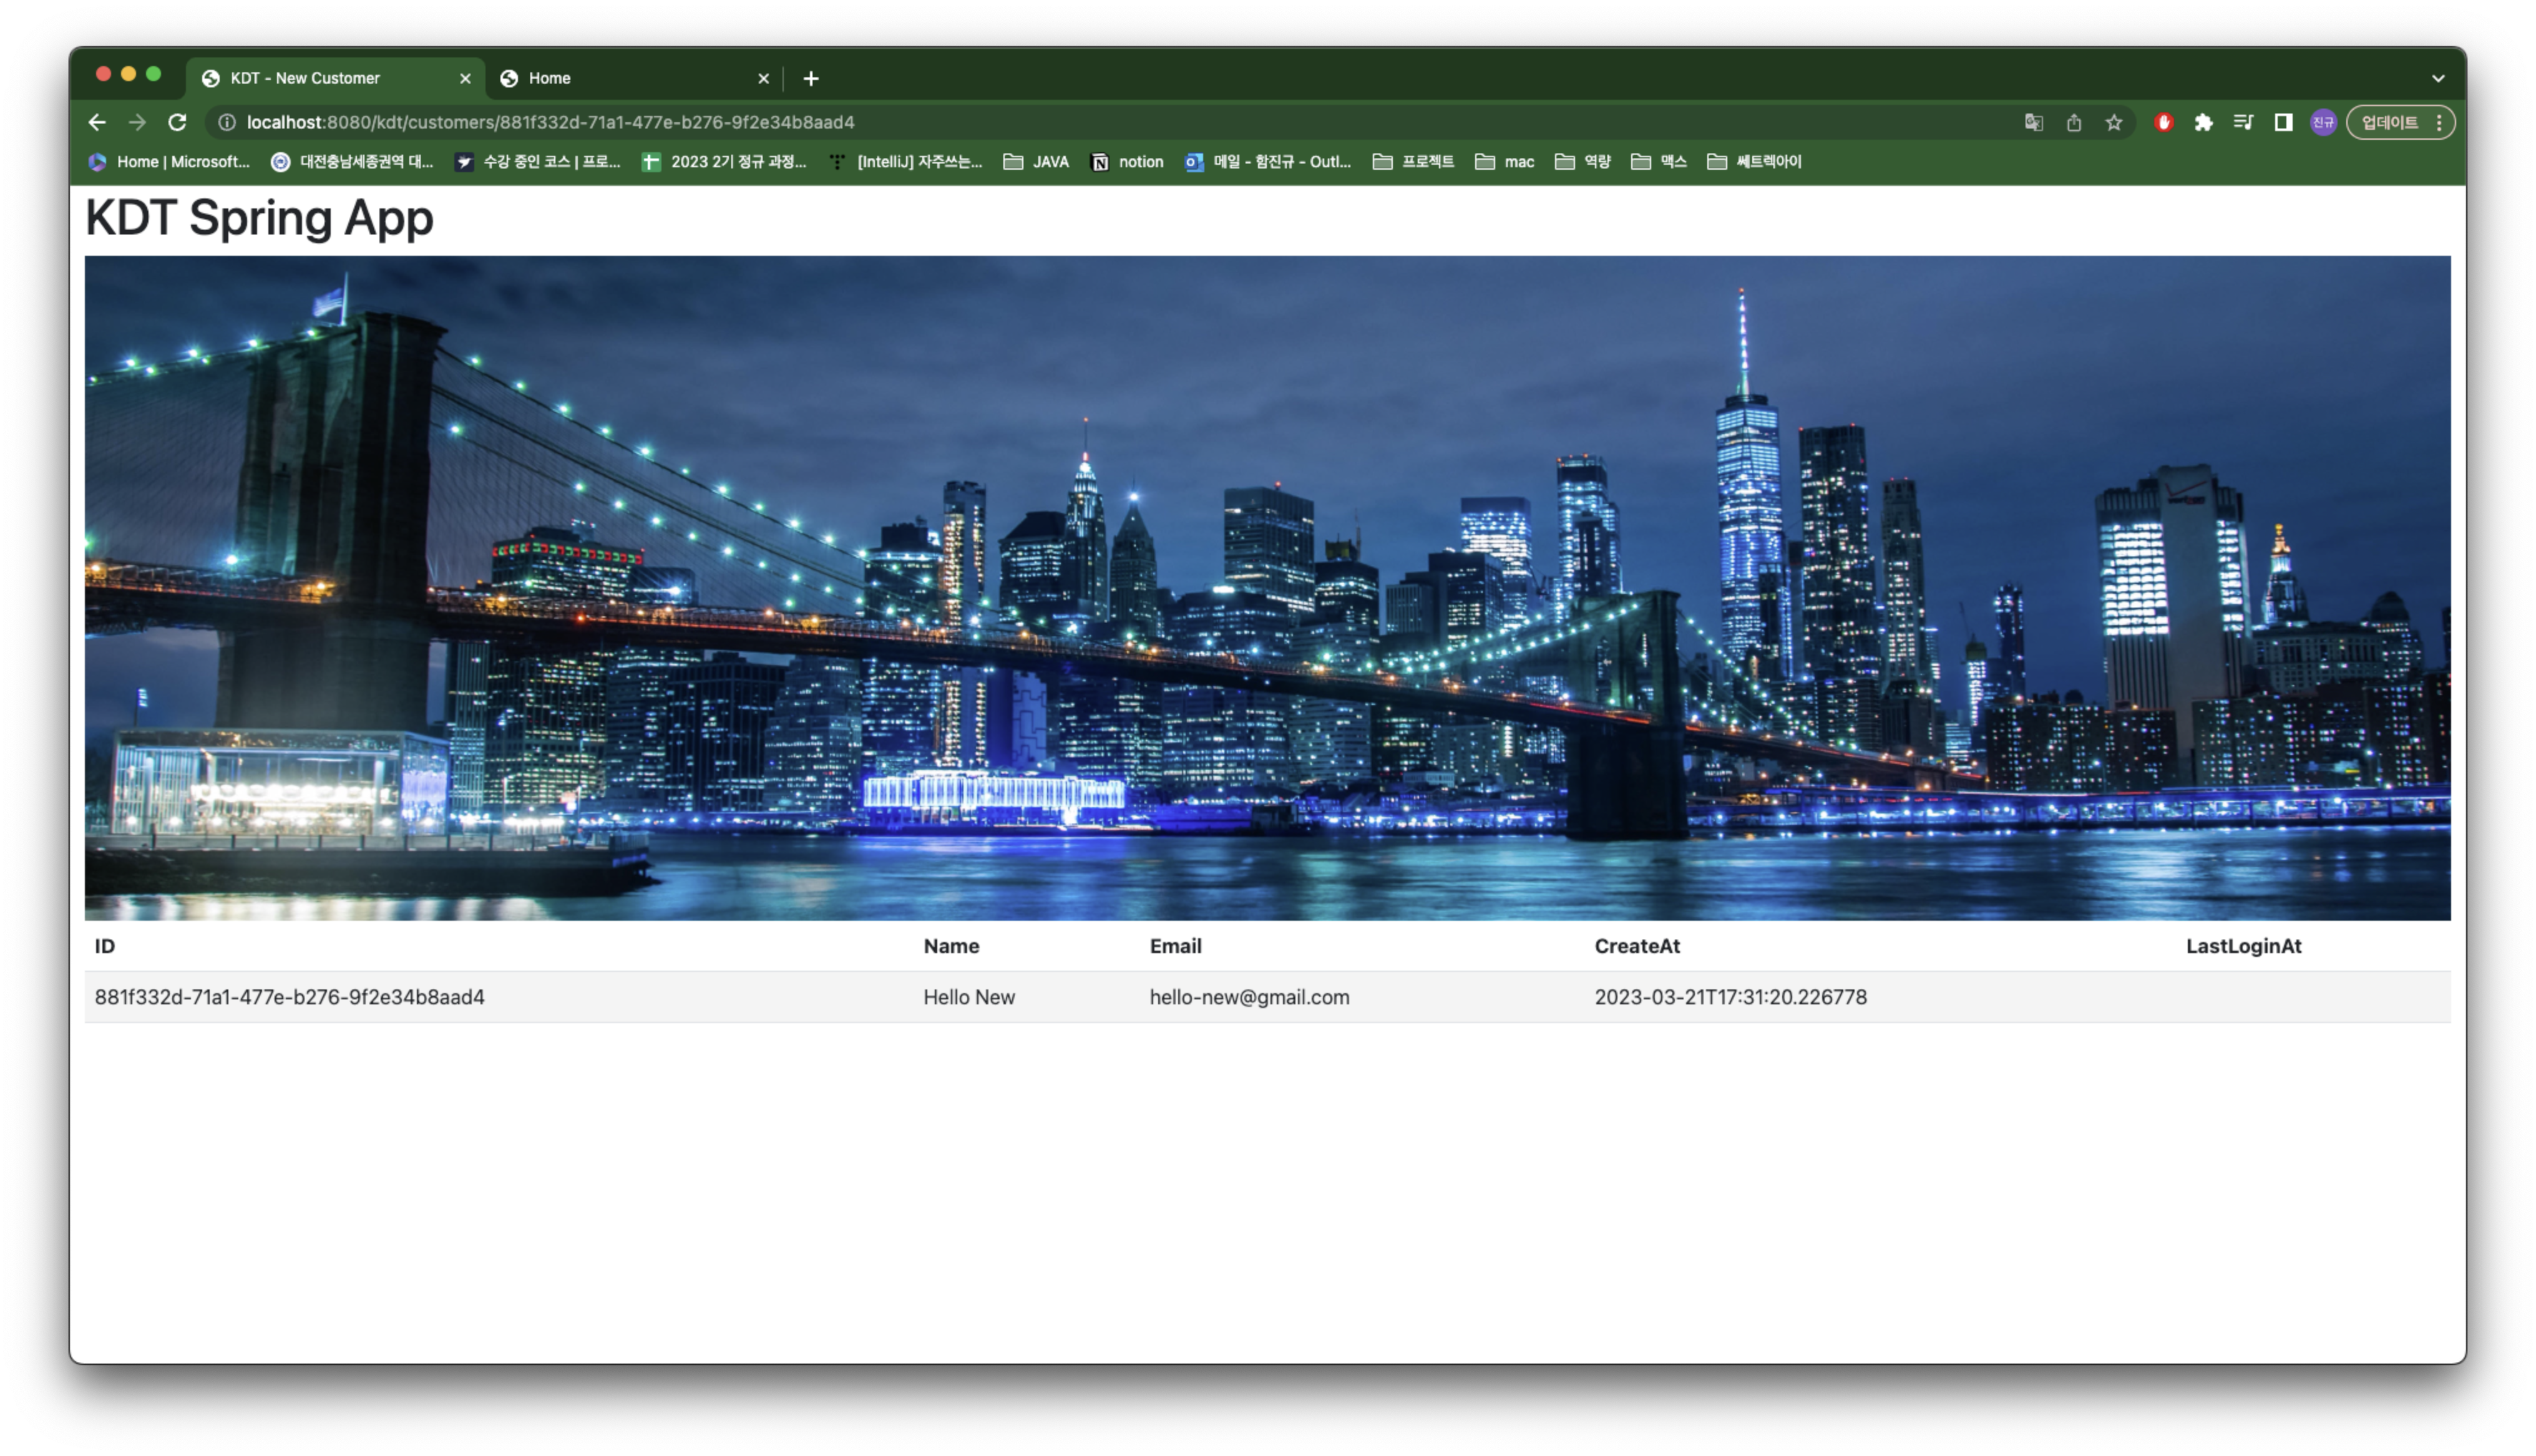
customer-details
<!doctype html>
<html lang="en">
<head>
    <meta charset="UTF-8">
    <meta name="viewport"
          content="width=device-width, user-scalable=no, initial-scale=1.0, maximum-scale=1.0, minimum-scale=1.0">
    <meta http-equiv="X-UA-Compatible" content="ie=edge">
    <link href="https://cdn.jsdelivr.net/npm/bootstrap@5.3.0-alpha1/dist/css/bootstrap.min.css"
          rel="stylesheet"
          integrity="sha384-GLhlTQ8iRABdZLl6O3oVMWSktQOp6b7In1Zl3/Jr59b6EGGoI1aFkw7cmDA6j6gD"
          crossorigin="anonymous">
    <title>KDT - New Customer</title>
</head>
<body class="container-fluid">
<h1>KDT Spring App</h1>
<img th:src="@{/resources/bg.jpeg}" class="img-fluid">
<table class="table table-striped table-hover">
    <thead>
    <tr>
        <th scope="col">ID</th>
        <th scope="col">Name</th>
        <th scope="col">Email</th>
        <th scope="col">CreateAt</th>
        <th scope="col">LastLoginAt</th>
    </tr>
    </thead>
    <tbody>
    <tr th:object="${customer}">
        <td th:text="${customer.customerId}"></td>
        <td th:text="*{name}"></td>
        <td th:text="*{email}"></td>
        <td th:text="*{createdAt}"></td>
        <td th:text="*{lastLoginAt}"></td>
    </tr>
    </tbody>
</table>
</body>
고객의 상세페이지에서 해당 고객의 정보가 테이블로 보여집니다.
고객 상세페이지 결과

개발자가 되어가는 중...