
Day 5
toDoList에서 으깨진 멘탈을 붙잡고 마무리를 해봅시다..!!
오늘은 배경 이미지 삽입, API를 이용한 날씨 구하기, CSS 디자인까지 끝내고 마무리하겠습니다.
가보죠!!
backgroundImage
배경 이미지를 먼저 넣어봐요.
우리는 3개의 이미지를 다운받아서 새로고침 시마다 임의의 사진이 나올 수 있도록 만들겁니다.
이미지는 이쪽에서 받았어요!! 1.jpg, 2.jpg, 3.jpg로 저장했습니다.
bg.js 파일을 만들고, 이미지는 body 안에 들어가야 하니깐 body 태그를 불러올게요.
또, 파일명의 숫자(1 ~ 3)를 임의로 불러올 수 있도록 난수를 생성해봅시다.
const body = document.querySelector("body");

const IMG_NUMBER = 3;

function getNumber() {
  const number = Math.floor(Math.random() * IMG_NUMBER);
  return number;
}

function init() {
  const randomNumer = getNumber();
  paintImage(randomNumber);
}

init();Math.random()은 0에서 1 사이의 소수를 임의로 생성합니다.
Math.floor()는 내림으로, 소숫점을 다 버려요.
때문에 여기선 0에서 2까지의 랜덤값이 생성돼요.
이제 이미지를 뿌려봅시다.
function paintImage(imgNumber) {
  const image = new Image();
  image.src = `img/${imgNumber + 1}.jpg`;
  image.classList.add("bgImage");
  body.appendChild(image);
}
이미지 하나를 생성해주고, 불러오는 코드에요.
bgImage엔 바로 css를 먹여 배경처럼 동작하도록 합시다.
.bgImage {
  position: absolute;
  top: 0;
  left: 0;
  width: 100%;
  height: 100%;
  z-index: -1;
}
weather
이제 사용자의 현재 위치를 알아내서 날씨를 불러오는 작업을 할 거에요.
이것만 완성하면 momentum 클론코딩은 끝입니다!!
HTML 문서에서 span 태그를 하나 만들겠습니다.
<span class="js-weather"></span>이 곳에 날씨와 위치 정보가 들어가겠죠?
먼저 위치를 얻기 위해 navigator.geolocation 객체의 getCurrentPosition()을 사용하겠습니다.
이 친구는 사용자의 현재 위치를 position 객체로 반환해줘요.
두 개의 인자를 받는데, 첫 번째는 위치 획득 성공 시 실행되는 함수이고 두 번째는 위치 획득 실패 시 실행되는 함수입니다.
먼저 weather.js를 작성해볼게요.
const weather = document.querySelector(".js-weather");

const COORDS = "coords";

function loadCoords() {
  const loadedCoords = localStorage.getItem(COORDS);
  if (loadedCoords === null) {
    askForCoords();
  }
  else {
    // 나중에 작성!
  }
}

function init() {
  loadCoords();
}

init();
로컬 스토리지에 위치 정보가 없을 때를 먼저 만들어봅시다.
askForCoords() 함수는 getCurrentPosition()을 호출해요.
위치 정보를 알아내면 handleGeoSuccess()를, 실패하면 handleGeoErroe()를 호출합니다.
handleGeoSuccess()의 첫 번째 인자에는 자동으로 이벤트 객체가 할당돼요.
function handleGeoSuccess(position) {
  console.log(position); //뭐가 있나 봅시다!
}

function askForCoords() {
  console.log("Can't access location!");
}
  navigator.geolocation.getCurrentPosition(handleGeoSuccess, handleGeoError);
}
이벤트 객체는 다음과 같은 내용을 담고 있습니다.
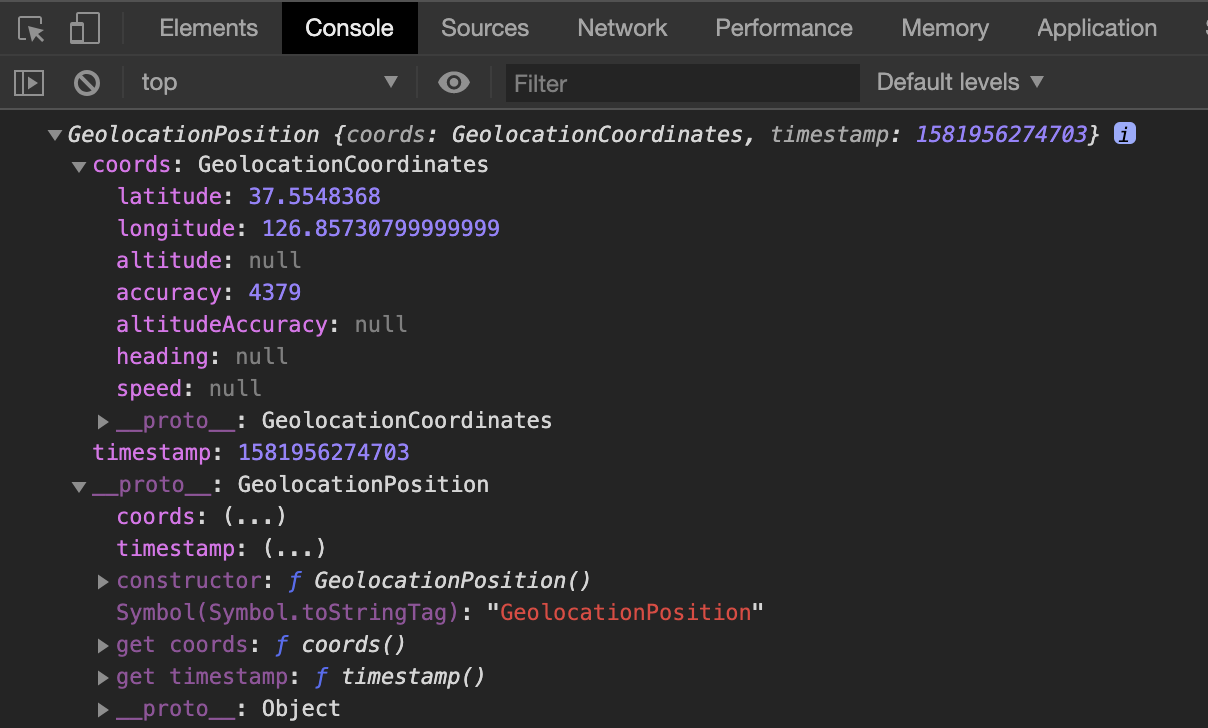
위도, 경도값이 잘 나와있네요. 코드를 조금 수정하고, 저장하는 함수도 구현하겠습니다.
function saveCoords(coordsObj) {
  localStorage.setItem(COORDS, JSON.stringfy(coordsObj));
}

function handleGeoSuccess(position) {
  const latitude = position.coords.latitude;
  const longitude = position.coords.longitude;
  const coordsObj = {
    latitude: latitude,
    longitude: longitude
  };
  saveCoords(coordsObj);
  getWeather(latitude, longitude);
}

function askForCoords() {
  console.log("Can't access location!");
}
  navigator.geolocation.getCurrentPosition(handleGeoSuccess, handleGeoError);
}toDoList에서 했던 것과 같이 객체를 만들어서 로컬 스토리지에 저장했습니다.
이제 우리의 웹브라우저는 경도, 위도값을 저장하고 있어요.
얘를 이용해서 날씨를 얻어옵시다. openweathermap의 API를 사용할 거에요.
현재 위치의 날씨를 얻어오려면 이렇게 쓰라고 합니다.
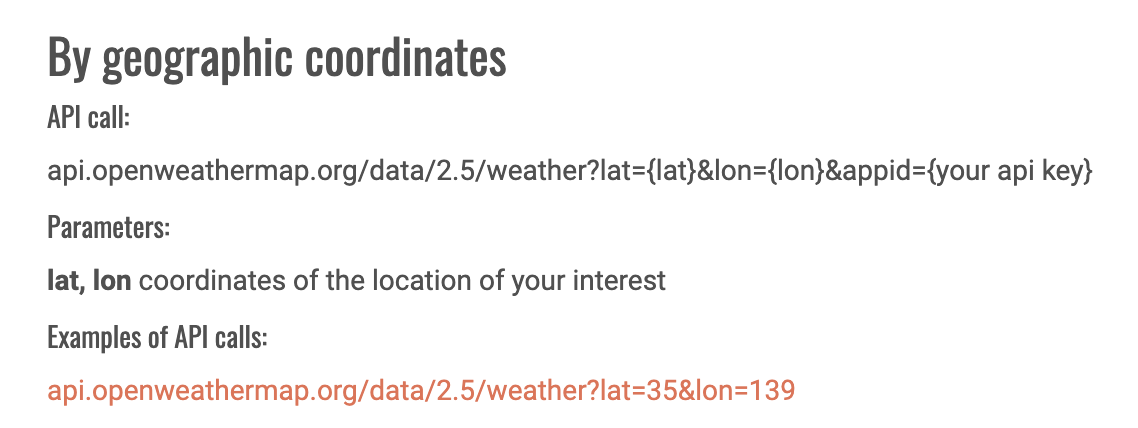
위의 URL을 통해 API를 call할 수 있어요.
JS에서 어떻게 URL을 붙이냐!! 바로 fetch()를 이용합니다.
사용법은 Using Fetch - MDN에 자세히 나와있어요.
function getWeather(lat, lng) {
  fetch(`https://api.openweathermap.org/data/2.5/weather?lat=${lat}&lon=${lng}&appid=${API_KEY}&units=metric`)
  .then(function (response) {
    console.log(response);
    return response.json();
  }).then(function (json) {
    console.log(json);
  });
}
코드의 흐름은 다음과 같아요.
- fetch()를 통해 해당 URL에서 자원을 받아옵니다. 반환값은 단순한 HTTP Response에요.
json()메서드를 사용해서 자바스크립트에서 활용 가능한 자원으로 바꿔줍니다.
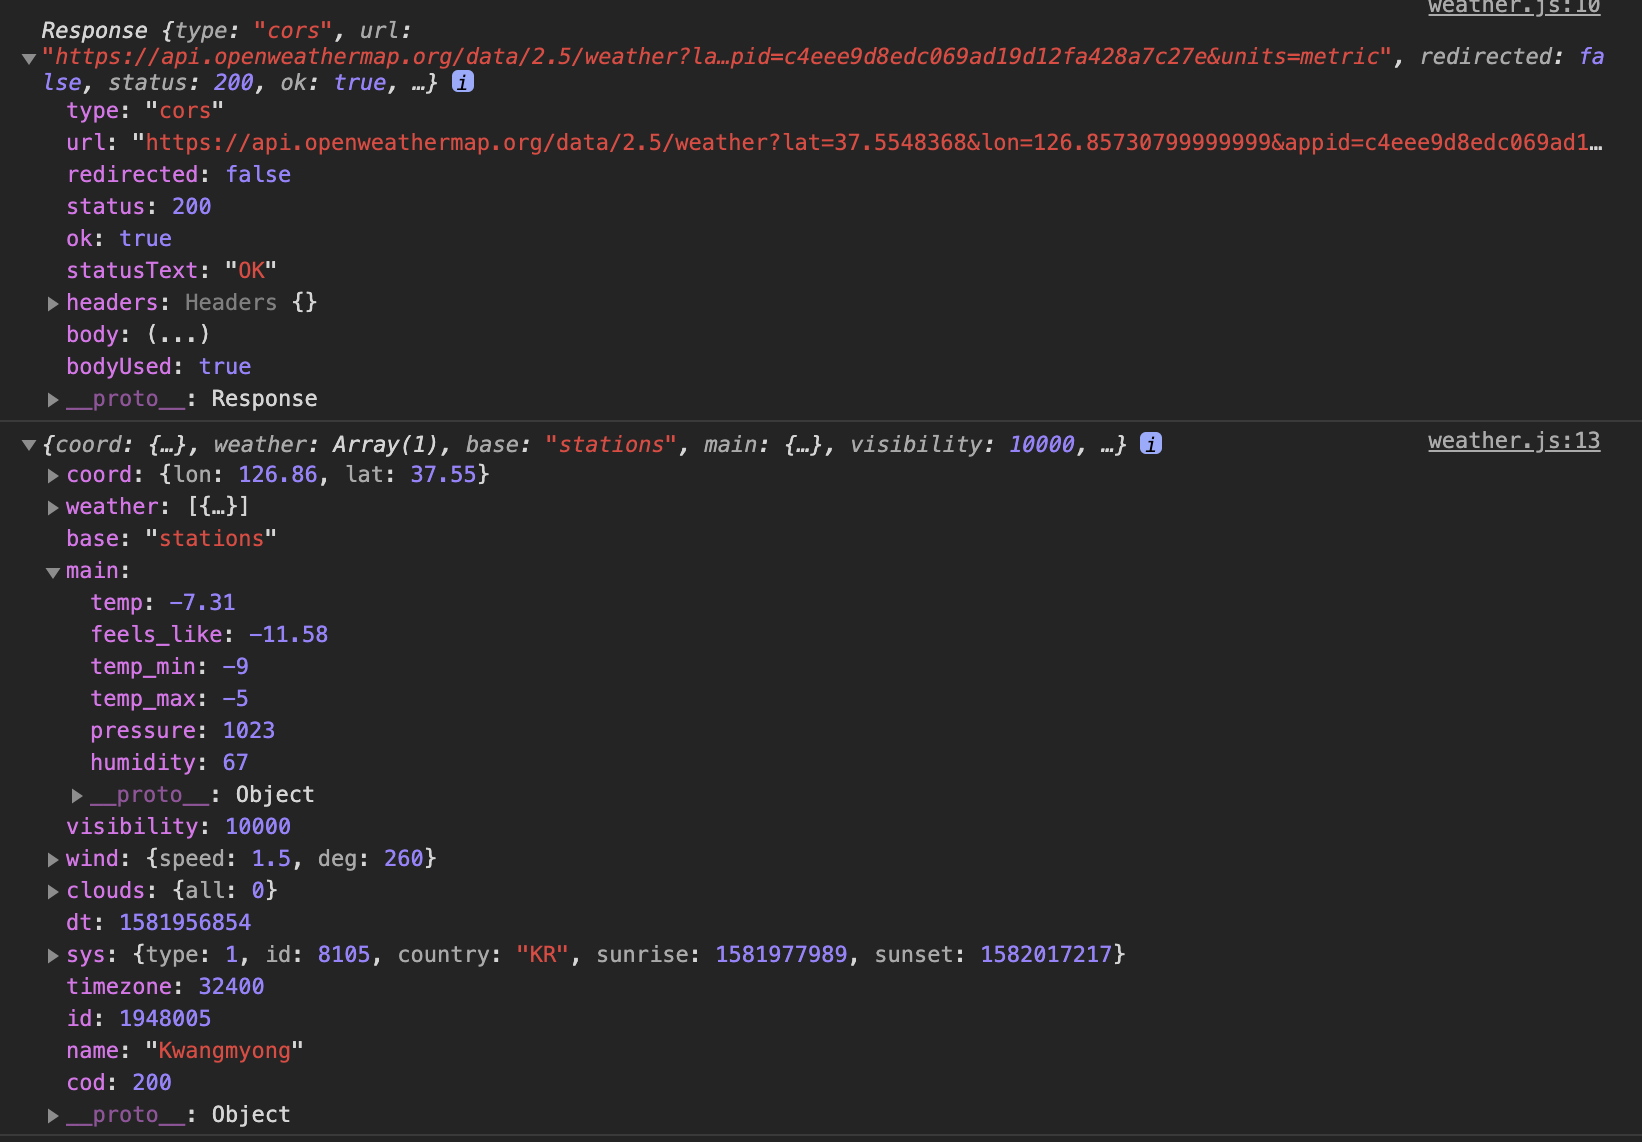
위에가 HTTP response, 밑에가 json으로 바꾼 값입니다.
이제 다 왔네요!! json으로 현재 온도, 지역명을 얻어냈습니다.
function getWeather(lat, lng) {
fetch(`https://api.openweathermap.org/data/2.5/weather?lat=${lat}&lon=${lng}&appid=${API_KEY}&units=metric`)
.then(function (response) {
return response.json();
}).then(function (json) {
const temperature = json.main.temp;
const place = json.main.name;
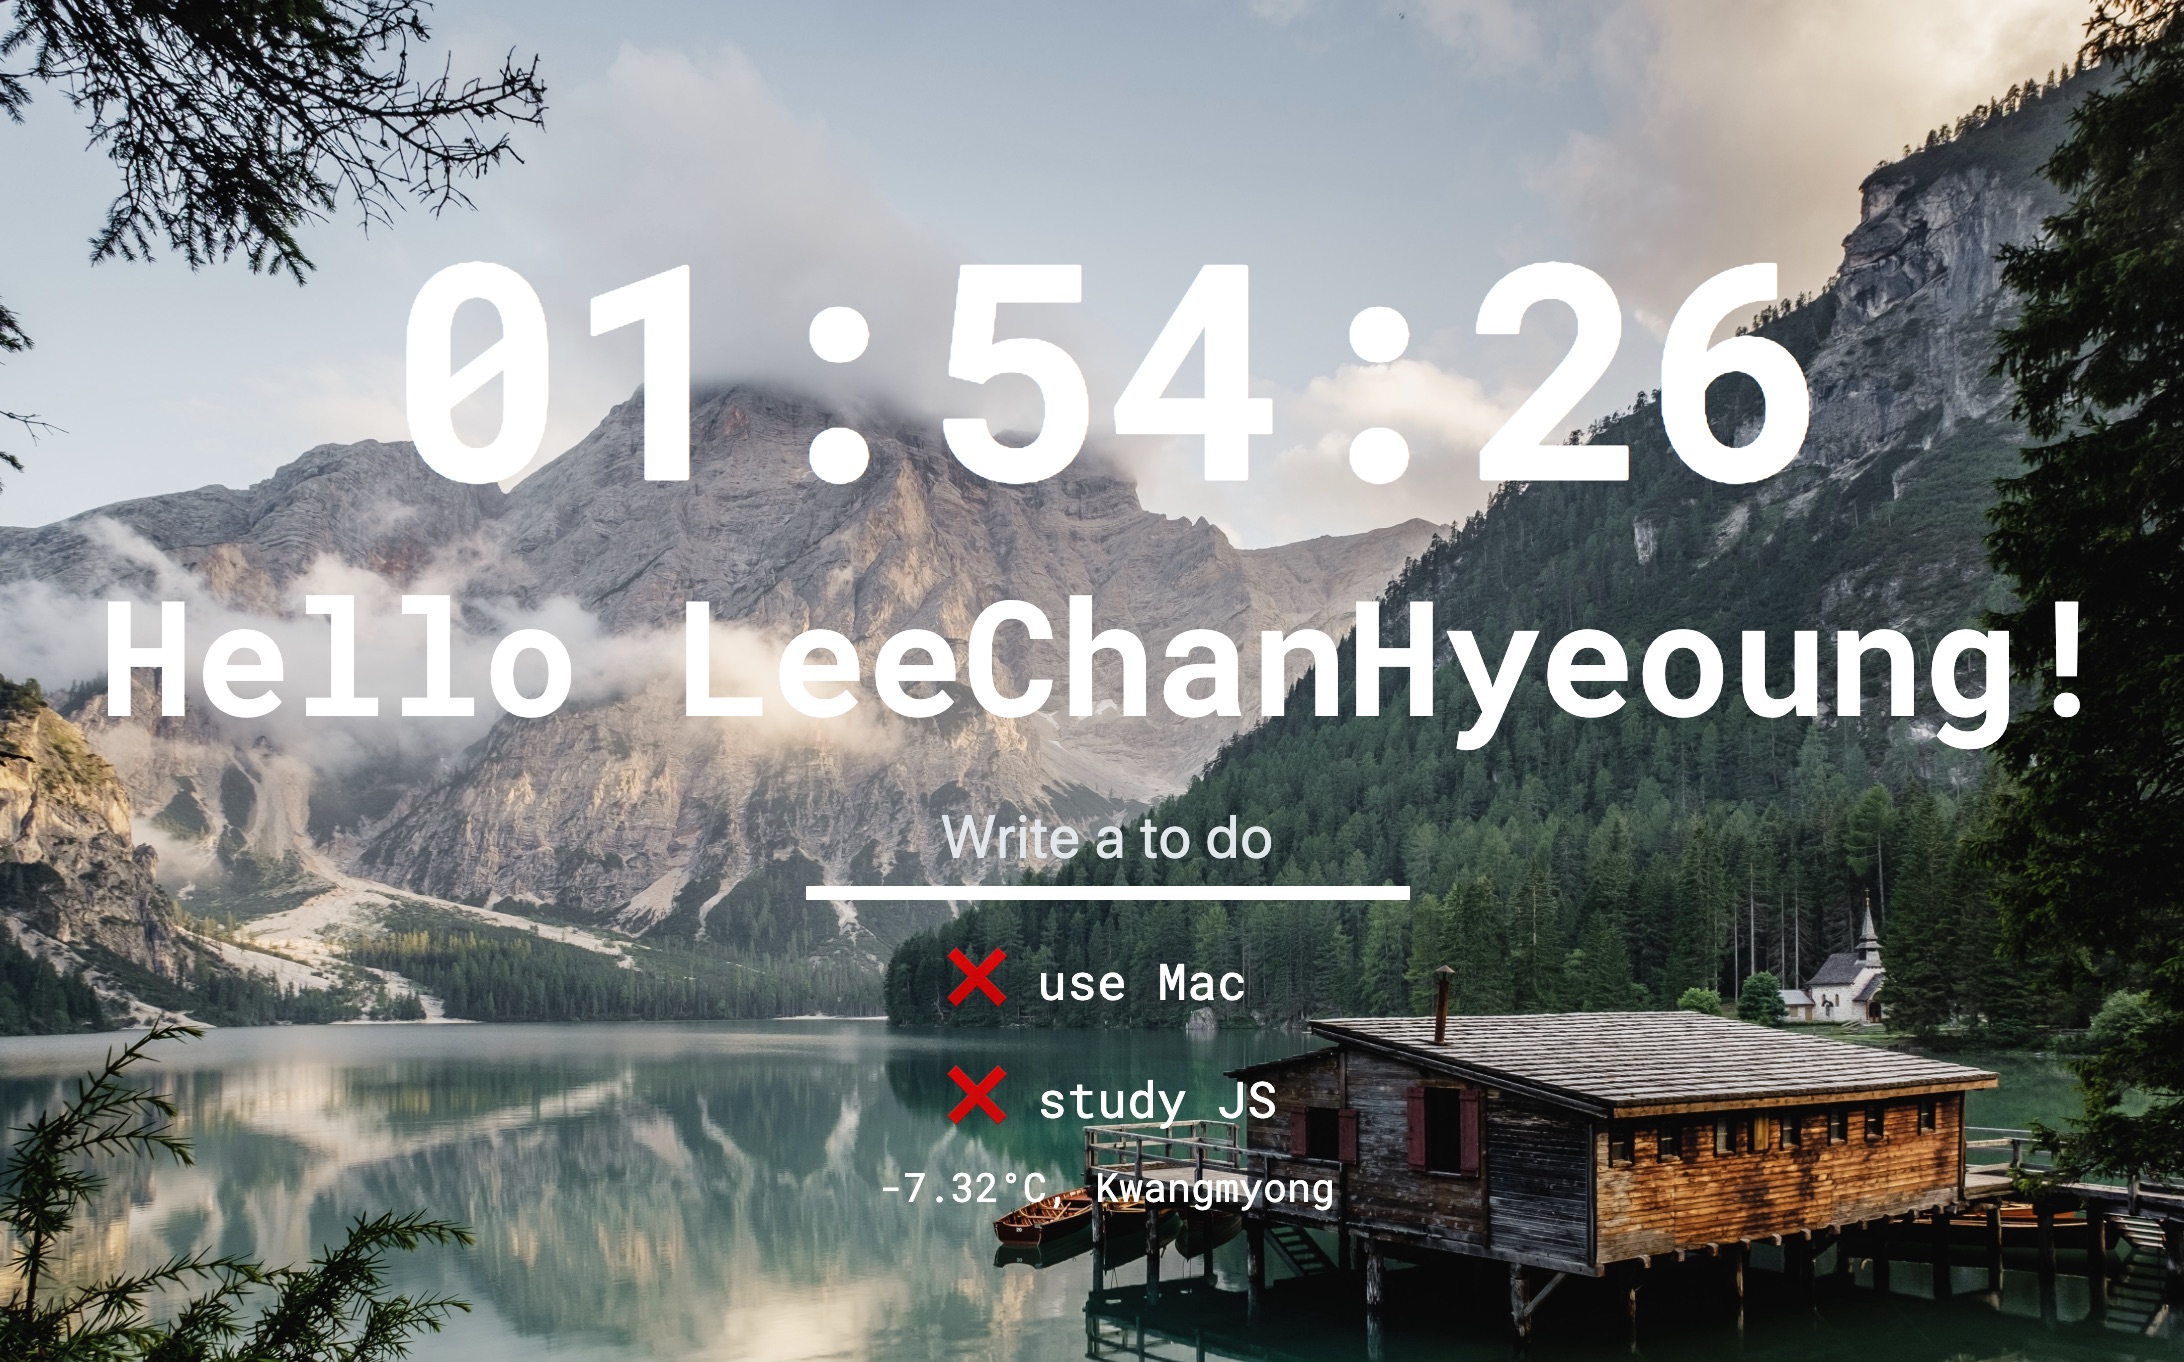
weather.innerText = `${temperature}, ${place}`
});
}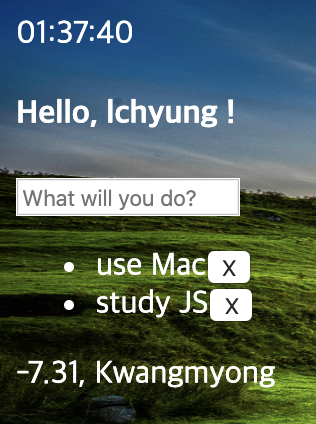
완벽하네요. 영하 7도.. 춥습니다...
이제 처음에 완성하지 못한 loadCoords()를 마무리합시다.
로컬 스토리지에 있는 값을 받아와서 JSON으로 처리한 후, getWeather()에 똑같이 던져주면 돼요.
function loadCoords() {
  const loadedCoords = localStorage.getItem(COORDS);
  if (loadedCoords === null) {
    askForCoords();
  }
  else {
    const parseCoords = JSON.parse(loadedCoords);
    getWeather(parseCoords.latitude, parseCoords.longitude);
  }
}
끝!! 기능 구현이 끝났습니다!!!! 아래는 전체 코드에요.
const weather = document.querySelector(".js-weather");
const API_KEY = "c4eee9d8edc069ad19d12fa428a7c27e";

const COORDS = "coords";

function getWeather(lat, lng) {
    fetch(
    `https://api.openweathermap.org/data/2.5/weather?lat=${lat}&lon=${lng}&appid=${API_KEY}&units=metric`
  ).then(function(response) {
        console.log(response);
        return response.json();
    }).then(function(json) {
        console.log(json);
        const temperature = json.main.temp;
        const place = json.name;
        weather.innerText = `${temperature}, ${place}`;
    });
}

function saveCoords(coordsObj) {
    localStorage.setItem(COORDS, JSON.stringify(coordsObj));
}

function handleGeoSuccess(position) {
    console.log(position);
    const latitude = position.coords.latitude;
    const longitude = position.coords.longitude;
    const coordsObj = {
        latitude: latitude,
        longitude: longitude
    };
    saveCoords(coordsObj);
    getWeather(latitude, longitude);
}

function handleGeoError() {
    console.log("Can't access location!");
}

function askForCoords() {
    navigator.geolocation.getCurrentPosition(handleGeoSuccess, handleGeoError);
}

function loadCoords() {
    const loadedCoords = localStorage.getItem(COORDS);
    if (loadedCoords == null) {
        askForCoords();
    }
    else {
        const parseCoords = JSON.parse(loadedCoords);
        getWeather(parseCoords.latitude, parseCoords.longitude);
    }
}

function init() {
    loadCoords();
}

init();
완성!
CSS까지 빠르게 먹여봤습니다.
자바스크립트란 언어를 하나도 몰랐었는데.. 이렇게까지 많은 것을 배울 줄 몰랐어요.
이제 할 수 있는 것들!!
- HTML에서 태그를 선택, 객체로 불러와 속성을 바꿀 수 있다.
- 1초마다 움직이는 시계를 만들 수 있다.
- 이벤트 리스너를 추가해 상태 변화를 감지할 수 있다.
- 로컬 스토리지를 사용해서 간단한 정보를 저장할 수 있다.
- HTML 태그를 생성, 제거할 수 있다.
- API를 사용해서 현재 위치, 날씨 정보를 가져올 수 있다.
이것들을 응용해서 간단한 프로젝트를 하나 만들어보려구요.
좋은 강의를 제공해주신 Nomad Coders의 니꼬쌤, 감사합니다 😊
다음엔 무슨 공부를 할 지 고민이에요. 아마 유튜브 클론코딩 또는 React 강의를 듣지 않을까 싶습니다.
감사합니다!!