Mask Info
코로나인포 클론코딩에 이어서, 내 주변 약국의 마스크 재고를 보여주는 마스크인포를 만들기로 했어요.
정부에서 공적 마스크 재고 현황을 제공해주기 때문에 얘를 잘 다듬어보도록 하겠습니다!!
계획
우선 api를 확인할게요.

필요한 정보는 이름, 주소, 위도 / 경도, 재고상태, 데이터 생성일자 정도 되겠네요.
얘네들을 div 태그에 담아 그냥 뿌려줄 수 있겠지만, 지도에 마커를 찍어서 보여준다면 더욱 보기 편해질 것 같아요.
따라서 네이버지도를 로드한 후 약국의 위도, 경도값을 바탕으로 마커를 생성하겠습니다.
약국 정보
위에서 언급했던 정보들을 먼저 얻어야겠죠?
현재 위치를 기준으로 데이터를 주기 때문에 내 위치에 대한 위도, 경도값을 알아야해요.
momentum 클론코딩할 때 geolocation의 getCurrentPosition을 이용해서 내 위치를 알아왔던 것이 떠올랐습니다.
 handleGeoSuccess = location => {
    this.setState({
      latitude: location.coords.latitude,
      longitude: location.coords.longitude
    });
  };

  componentDidMount = () => {
    navigator.geolocation.getCurrentPosition(
      this.handleGeoSuccess,
      this.handleGeoError
    );
};componentDidMount를 이용해 render 후 바로 위치정보를 얻어왔어요.
얻어온 정보는 state에 넣어주었습니다.
    componentDidUpdate = async () => {
    const { latitude, longitude, isLoading } = this.state;
    if (isLoading) {
      try {
        const {
          data: { stores }
        } = await axios.get(
          "https://8oi9s0nnth.apigw.ntruss.com/corona19-masks/v1/storesByGeo/json?",
          { params: { lat: latitude, lng: longitude, m: 1000 } }
        );
        this.setState({ storeData: stores });
      } catch {
        this.setState({ error: "Can't find data." });
      } finally {
        this.setState({ isLoading: false });
      }
    }
};handleGeoSuccess에 의해 state가 업데이트 될 것이고, componentDidUpdate가 실행됩니다.
state 안에 있는 loading 값이 true이면 위도, 경도 값을 이용해 공적 마스크 api를 비동기로 호출해요.
(이번엔 try catch문 썼어요!!!!)
값을 잘 받았다면 프레젠터에 뿌려줍시다.
프레젠터는 받은 값을 뿌려주기만 하니깐 생략할게요.
네이버 지도
네이버 지도를 먼저 로드해봅시다.
네이버 클라우드 플랫폼에 가입을 하고 애플리케이션 등록, localhost:3000에서 API를 사용할 수 있게 설정했어요.
그리고 리액트 문법에 맞게 돌아갈 수 있도록 react-naver-maps를 import 했습니다.
import React from "react";
import styled from "styled-components";
import { RenderAfterNavermapsLoaded, NaverMap, Marker } from "react-naver-maps";

const NaverMapApi = ({ lat, lng, stores }) => {
  const navermaps = window.naver.maps;
  return (
    <NaverMap
      mapDivId={"maps-getting-started-uncontrolled"}
      style={{ width: "100%", height: "500px" }}
      defaultCenter={{ lat: lat, lng: lng }}
      defaultZoon={13}
    />
  );
};

class Map extends React.Component {
  render() {
    const { lat, lng, stores } = this.props;
    return (
      <RenderAfterNavermapsLoaded
        ncpClientId={"비 밀 입 니 당 ㅎ"}
        error={<p>Maps Load Error</p>}
        loading={<p>Maps Loading...</p>}
      >
        <NaverMapApi lat={lat} lng={lng} stores={stores} />
      </RenderAfterNavermapsLoaded>
    );
  }
}
컴포넌트에서 Map으로 받아온 위도, 경도를 NaverMapApi에 넘겨줬어요.
NaverMapApi에선 띄울 지도에 대한 기본적인 정보를 줍니다.
Map에선 RenderAfterNavermapsLoaded 컴포넌트 안에 NaverMapApi를 넣어주면서 지도를 불러와요.
여기에 마커를 찍어보죠!!
NaverMapApi에서 NaverMap 컴포넌트 안에 Marker 컴포넌트를 추가하면 돼요.
<Marker
  key={1}
  position={new navermaps.LatLng(37.551229, 126.988205)}
  animation={2}
  onClick={() => {alert("약국!!");}}
  />
이렇게요.
우리는 받아온 모든 약국 정보에 대한 마커가 필요하니깐 map을 사용해서 뿌려줄게요.
const NaverMapApi = ({ lat, lng, stores }) => {
  const navermaps = window.naver.maps;
  return (
    <NaverMap
      mapDivId={"maps-getting-started-uncontrolled"}
      style={{ width: "100%", height: "500px" }}
      defaultCenter={{ lat: lat, lng: lng }}
      defaultZoon={13}
    >
      {stores.map(store => (
        <Marker
          key={store.code}
          position={new navermaps.LatLng(store.lat, store.lng)}
          animation={2}
          onClick={() => {
            alert(
              `${store.name}의 남은 마스크 개수는${
                store.remain_stat === "plenty" ? "100개 이상" : ""
              } ${store.remain_stat === "some" ? "30개 이상" : ""}${
                store.remain_stat === "few" ? "10개 이상" : ""
              }${store.remain_stat === "empty" ? "품절" : ""}${
                store.remain_stat === null ? "확인 불가" : ""
              }입니다.`
            );
          }}
        />
      ))}
    </NaverMap>
  );
};
onClick 속성까지 주어서 마커를 눌렀을 때 alert 창이 뜨도록 했어요.
(사실 마커 위에 정보가 표시되면 더 좋겠네요..)
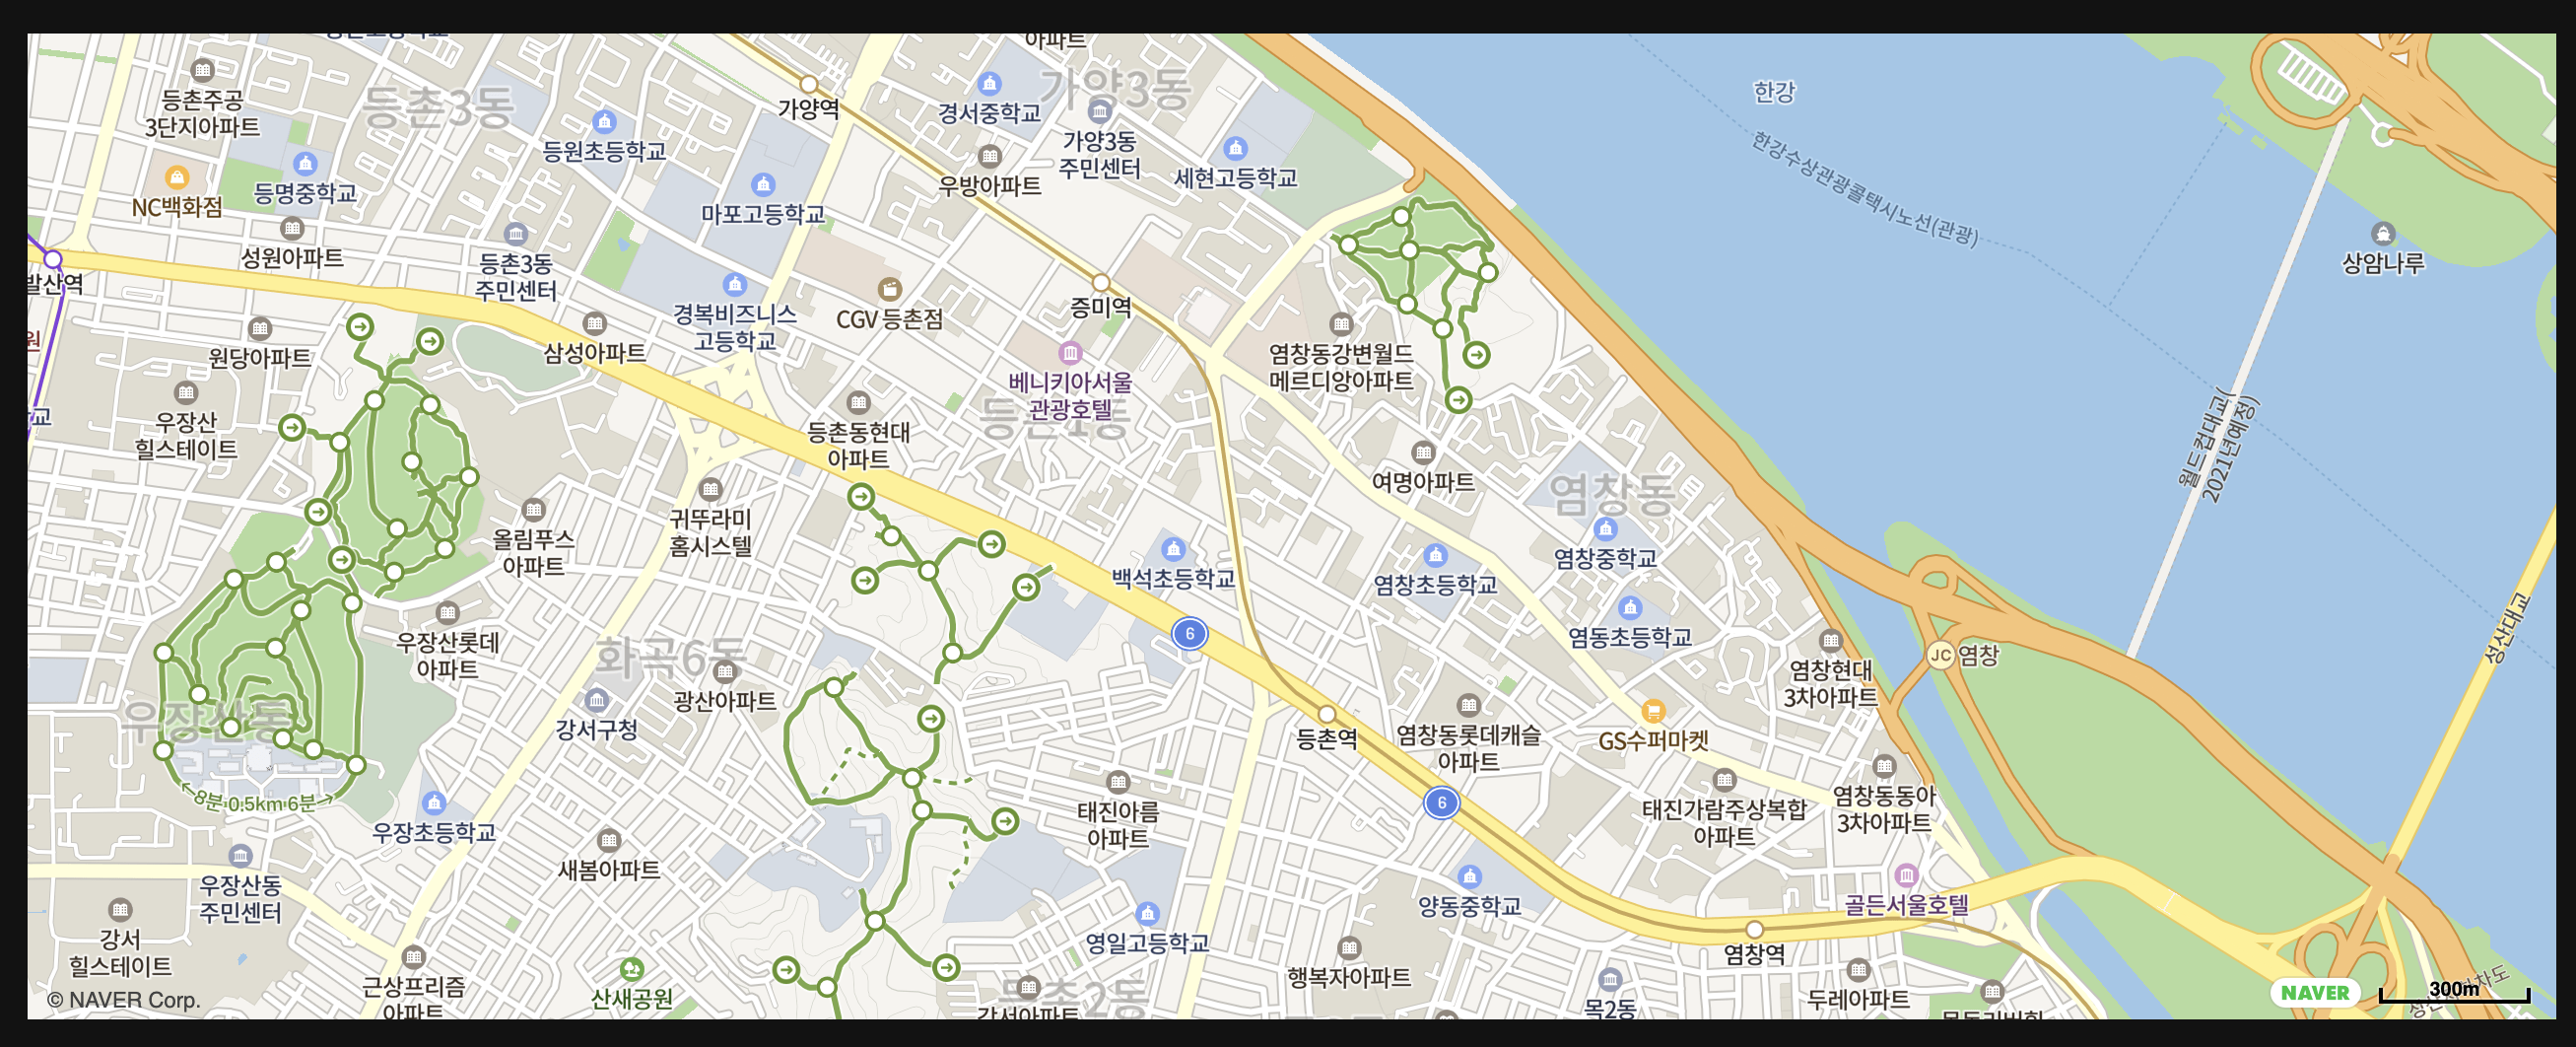
결과

마커도 이쁘게 뜨고 alert 창도 잘 나오네요.
처음으로 지도를 웹에 올려보고, 이것저것 건드려봤습니다. 생각보다 복잡하네요ㅠㅠ 더욱 더 열심히 공부해야겠어요.
지금까지 간단하게 마스크 인포를 만들어봤습니다. 감사합니다 😊