학습내용
네이버 모바일 페이지(2), 자바스크립트 변수와 데이터타입(1), (2), 제어문, 전역/지역변수, 스코프, 호이스팅 (1)
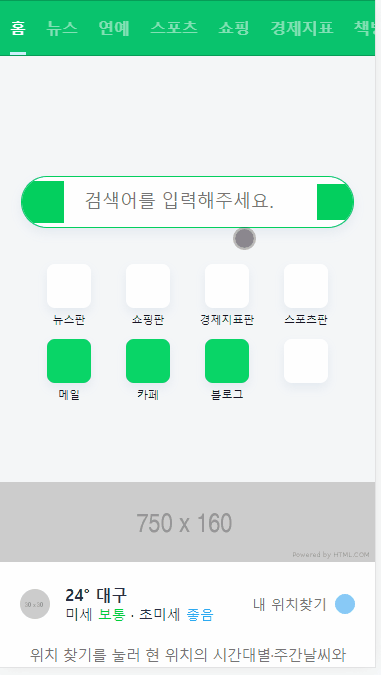
네이버 모바일 페이지(2)
양쪽 리스트 영역
- 배치 방향만 다른 리스트 객체 구현을 위해 html class 이름 및 배치만 바꾸어 주었다.
<li class="left-list">
  <a href="#">
    <i class="icon-arrow icon-arrow-left"></i>
    <div class="content-wrap">
      <div class="txt-wrap">
        <h3>패션뷰티판</h3>
        <p>온호프 론칭 기념<br>
          브랜드 위크
        </p>
      </div>
      <img src="https://via.placeholder.com/52" alt="">
    </div>
  </a>
</li>

<li class="right-list">
  <a href="#">
    <div class="content-wrap">
      <img src="https://via.placeholder.com/52" alt="">
      <div class="txt-wrap">
        <h3>킬리만자로의 용자 다간</h3>
        <p>그레이트다간 GX 공개<br>
          LIVE 중 추가적립
        </p>
      </div>
    </div>
    <i class="icon-arrow icon-arrow-right"></i>
  </a>
</li>- 왼쪽 객체를 기본으로 클래스를 만들고, 오른쪽 객체는 필요한 부분만 커스텀하였다.
- 객체를 왼쪽, 오른쪽으로 붙이기 위해
float을 사용하였다. 이로 인해 부모가 li의 높이를 인식하지 못하게 되어 ul에overflow:hidden을 적용시켜 주었다.
#talk ul {
    overflow: hidden;
}
#talk ul li.left-list {
    float:left;
    border-top-right-radius: 40px;
    border-bottom-right-radius: 40px;
}
#talk ul li.right-list {
    float: right;
    border-top-left-radius: 40px;
    border-bottom-left-radius: 40px;
}
오늘 네이버 영역
- 실제 페이지에선 이미지와 하단 텍스트가 각각 다른 링크로 연결되어 있어서 똑같이 따라 만들어주었다.
<div class="content-body">
  <a class="link-banner" href="#">
    <img class="banner" src="https://via.placeholder.com/345x140" alt="">
  </a>

  <a class="link-txt" href="#">
    <div class="bottom-wrap">
      <i class="icon"></i>
      <div class="txt-wrap">
        <h3>네이버 웨일</h3>
        <p>내 휴대폰 속 사진을 PC로 쏙!<br>
          기기에 관계없이 파일을 그대로 그린드랍
        </p>
      </div>
    </div>
  </a>
</div>- 사진 및 텍스트 영역을 감싸는 content-body에
border-radius를 적용해 모서리를 둥글게 만들어주고overflow:hidden을 사용해 튀어나가는 부분을 안 보이게 처리해주었다.
#today .content-body {
    overflow: hidden;
    width: 100%;
    background-color: #fff;
    border-radius: 8px;
    box-shadow: 0 1px 6px 0 rgb(0 0 0 / 6%), 0 1px 0 0 rgb(0 0 0 / 2%);
}
footer 영역
- after가 3차원 속성일 때 위치 기준점을 부모 태그로 하기 위해 부모 태그를 relative로 감싸주었다.
#footer .txt-wrap a {
    position: relative;
    display: inline-block;
    padding: 3px 9px;
    color: #929294;
    font-size: 13px;
    font-weight: 400;

    letter-spacing: -.5px;
}
#footer .txt-wrap a::before {
    content: "";
    display: block;
    position: absolute;
    top: 7px;
    left: 0;
    width: 1px;
    height: 10px;
    background-color: #d7dfe7;
}- a태그 중 각 줄의 첫번째에 있는 태그에는 after를 적용하지 않기 위해
nth-child()를 이용하여 선택하려 했으나<br>태그로 인해 연속성이 깨져서 잘 선택되지 않았다. 그래서 각 줄을 다시 div태그로 묶은 후 각 영역 안 첫번째 a태그를 선택하는 방식을 사용했다.
<div class="txt-wrap">
  <div class="link">
    <a href="#">로그인</a>
    <a href="#">전체서비스</a>
    <a href="#">PC버전</a>
  </div>

  <div class="link">
    <a href="#">이용약관</a>
    <a href="#">개인정보처리방침</a>
    <a href="#">고객센터</a>
  </div>
</div>
#footer .txt-wrap .link a:first-child:before {
content: none;
}자바스크립트 기초 시작
html에서 자바스크립트 사용하기
- script 태그 안에 직접 입력
<script>
  console.log("hi");
</script>- script src속성에 js 파일 주소값 할당
<script src="js/main.js"></script>변수명 작성요령
- 2개의 명사 이어서 만들기: 명사 1개로는 변수값이 무엇인지 알기 힘들다.
- 방식: camelCase, snake_case
자바스크립트 변수명 작성 시 주의점
- 하이픈 사용 불가 (kebab-case)
- _,$ 을 제외한 특수문자는 변수 첫글자 사용 불가
- 숫자는 변수 첫글자 사용 불가
- 변수명을 보고 값을 유추할 수 있도록 자세하게 적기
기본 데이터타입 8개 2가지 진영
- 원시타입 (primitive): string, number, boolean, undefined, null
- 참조타입 (reference): object, array, function
연산자
==: 값만 비교해서 같으면 true===: 값과 데이터터입 둘다 비교해서 같아야 true
데이터타입 null과 undefined
- null: 변수 초기화로 명시적인 빈 값을 변수 안에 할당한 상태
- undefined: 변수를 선언만 한 상태
null 과 undefined 차이점
typeof a: a의 데이터타입을 문자열로 반환typeof null -> object태생적으로 갖고 있는 버그때문에 object 타입으로 출력됨typeof undefined -> undefinedundefined == null: True (값만 비교)undefined === null: false (값, 데이터타입 비교)
!부정문
- ! '뒤에 오는 내용이 true가 아니다'라는 명제의 참거짓 판별
(!null)-> true로 출력됨(!!null)-> 이미 !null이 true로 반환되어서 !true가 되어 false로 출력됨. undefined도 동일함
null과 undefined의 사칙연산
- number + null = number : null이 0이 된다.
- number + undefined = NaN (Not a Number) '숫자 아님'. 애초에 연산 불가능한 값을 전달했을 때 뜸
함수 function
parameter(매개변수): 함수에서 필요한 값 선언 및 저장하는 곳argument(인수): 함수 호출 시 전달하는 값- 자바스크립트 모든 데이터타입은 함수의 인수가 될 수 있다.
기본 구조
// 함수 선언
function sum(a, b) {
    console.log(a + b);
}

// 함수 호출
sum(2, 10);
sum(10, 30);
배열
- 자바스크립트 모든 데이터타입 삽입 가능
조건문
거짓이 되는 상황
- if의 조건으로 다음 값이 들어가면 false가 된다. : ""(빈 문자열), 0, null, undefined
삼항연산자
- (조건) ? 참이면 실행 : 거짓이면 실행
if(age >= 18) {
    console.log("adult");
} else {
    console.log("kids");
}

// 위 조건문과 동일한 결과 출력
let result = (age>=18) ? "adult" : "kids";
console.log("result = " + result);
조건문 응용
prompt: 브라우저 환경에서 사용자에게서 정보 입력받기 위한 팝업창. 값은 문자로 저장됨alert: 브라우저 환경에서 정보 전달만을 위한 팝업창 띄움
const userId = prompt("아이디를 입력해주세요.");
const userPw = prompt("비밀번호를 입력해주세요");

console.log(userId);
console.log(userPw);
전역변수와 지역변수
- 전역변수: 파일 모든 범위 안에서 적용되는 변수
- 지역변수: 특정 범위에서만 적용되는 변수
- 변수 생성할 때 var가 아닌 let, const 사용 시 전역변수, 지역변수 구분 기준점 달라짐
호이스팅(hoisting)
- hoisting: 무언가를 들어올리다, 끌어올리다.
- var, function 등의 객체 선언문보다 호출을 먼저해도 참조가 되는 현상
변수 호이스팅
- 변수 생성 과정: 선언 -> 초기화 (메모리할당):undefined -> 할당: undefined에 실제값 할당
- var 변수는 선언 + 초기화가 한 번에 이루어지기 때문에 변수에 접근 가능하다 (값은 할당 전이라 undefined로 초기화되어 있음)
- let 변수는 선언 / 초기화 분리되어 진행됨. 초기화 이전 변수 접근하면 아직 변수를 위한 메모리 공간 확보 안 된 상태라 참조에러 발생
console.log(a); // undefined
var a;
a = "나는 a";
console.log(a);


console.log(b); // cannot access before inittialization 에러발생
let b;
console.log(b); // undefined
b = "나는 b";
console.log(b);
함수 호이스팅
- 함수 선언할 때 변수에 저장한 경우 함수 선언 전 호출하면 에러가 발생한다.
func1();
function func1 () {
    console.log("func1 is a function.");
}
func1();

func2(); // 함수 선언 전 호출하면 not a function 에러발생
var func2 = function() {
    console.log("func2 is a function.");
}
func2();
자주 사용되는 객체와 메소드
Math 객체
- console.log(Math); // mdn javascript math로 검색해서 메소드 알아보기
// Math.abs() 절댓값 반환 메소드
const num1 = Math.abs(-3);
console.log(num1);

// Math.ceil() 무조건 올림하는 메소드
const num2 = Math.ceil(0.43);
console.log(num2);

// Math.floor() 무조건 내림하는 메소드
const num3 = Math.floor(10.9);
console.log(num3);

// Math.random() 0에서 1 사이 랜덤한 숫자 뽑아내는 함수
const num4 = Math.random();
console.log(num4);
parse 메소드
- parseInt(): 문자열을 정수형으로 변환. 소수점 아래는 버린다.
- parseFloat(): 문자열을 실수형으로 변환.
어려웠던 점
해결방법
소감
드디어 네이버 모바일 페이지까지 끝내서 카피캣 과정을 모두 완료했다. talk 리스트 부분을 만들 때 모든 리스트 객체에 해당되는 속성들을 잘 모아서 클래스화 한 것 같아서 뿌듯했다.
그리고 오늘부터 자바스크립트 강의를 들었는데 알고 있는 내용이 많아서 빠르게 들었다. 몇 번이나 다른 여러 강의를 통해 들은 내용이기도 했지만 제대로 알고 있지 못했던 내용도 있어서 정리를 좀 해보았다. 빨리 html로 만든 페이지에 자바스크립트를 적용하고 싶다.

문서화를 좋아하는 개발자