model Produce
model Product {
  id Int @id @default(autoincrement())
  title String
  price Float
  description String
  photo String
  created_at DateTime @default(now())
  updated_at DateTime @updatedAt
  user User @relation(fields: [userId], references: [id])
  userId Int
}
사용자가 사진을 보내면 우리는 그 사진을 Server나 DB에 저장하지 않고, 사진을 Cloud에 upload한 다음 URL를 저장할 것이다
schema.prisma를 수정한 다음엔 ? -> npx prisma migrate dev를 꼭 실행해주어야 한다!
Tab Bar
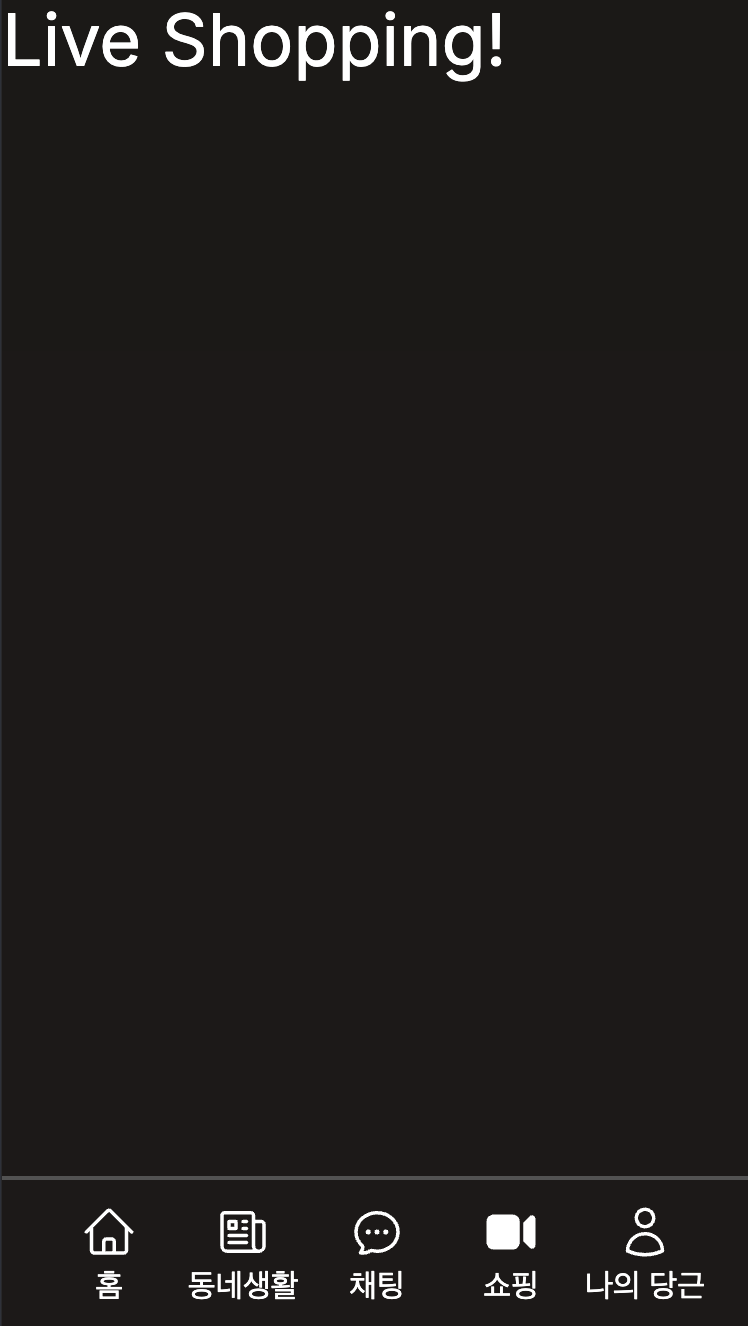 앱을 들어갈 때, 하단에 나오는 Tab Bar를 생성할 것이다. 그 이전에, 폴더 구조 정리를 한번 할 예정이다.
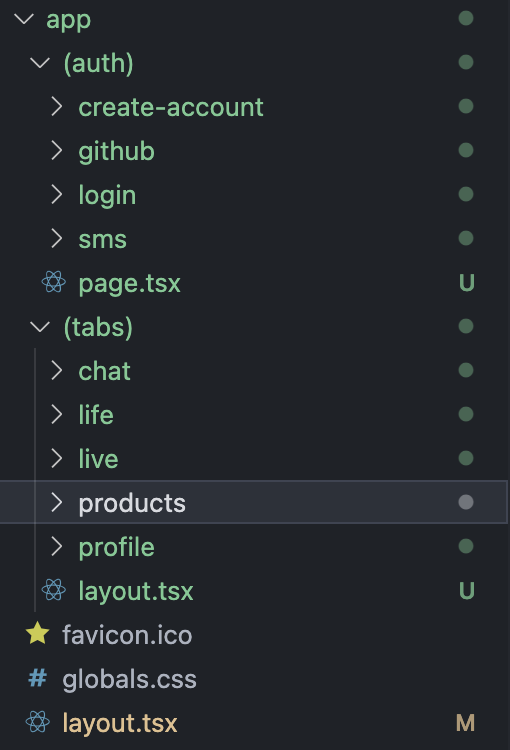 인증에 관련된 코드는
 (auth) 폴더에 넣어주었고, Tab Bar를 통해서 user가 들어갈 수 있는 관련 페이지는 (tabs)에 넣어두었다.
Tab Bar는 chat, life, live, products, profile로 구성되어 있기 때문에 간단하게
export default function Chat() {
  return (
    <div>
      <h1 className="text-white text-4xl">Live Shopping!</h1>
    </div>
  );
}
이런 식으로만 다 구성을 해두었다.
여기서 tab bar는 로그인 후 -> tab bar가 보여야된다.
결론은 (auth)에 있는 코드들에는 tab bar가 존재하면 안된다.
그럼 어떻게 해야하나?
(tabs) 폴더에 layout.tsx를 하나 생성한 후, <TabBar/>를 적용시키면, (tabs) 폴더에 있는 모든 폴더에 <TabBar/>가 적용되게 된다.
app/(tabs)/layout.tsx
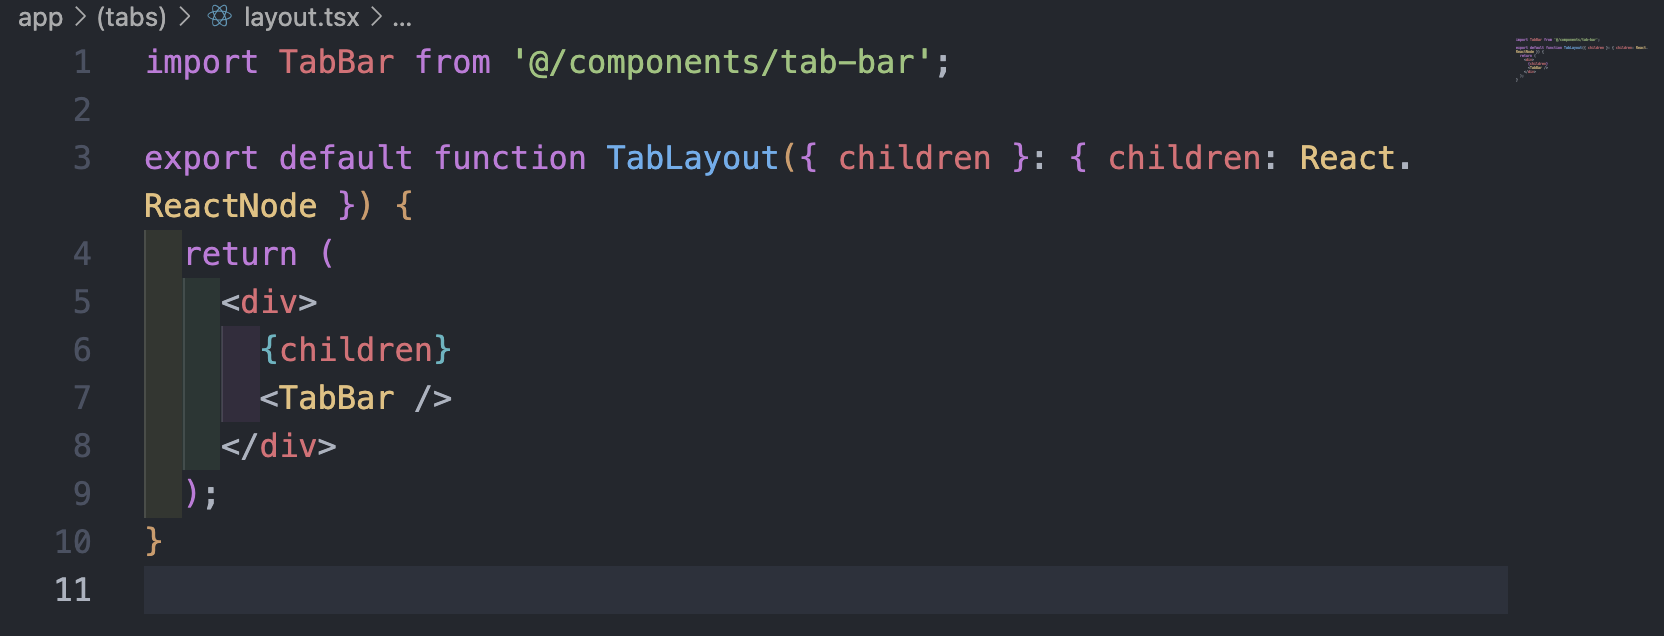 이렇게 구성되어있다.
tab-bar.tsx
'use client';

import Link from 'next/link';
import {
  HomeIcon as SolidHomeIcon,
  NewspaperIcon as SolidNewspaperIcon,
  ChatBubbleOvalLeftEllipsisIcon as SolidChatIcon,
  VideoCameraIcon as SolidVideoIcon,
  UserIcon as SolidUserIcon,
} from '@heroicons/react/24/solid';
import {
  HomeIcon as OutlineHomeIcon,
  NewspaperIcon as OutlineNewspaperIcon,
  ChatBubbleOvalLeftEllipsisIcon as OutlineChatIcon,
  VideoCameraIcon as OutlineVideoIcon,
  UserIcon as OutlineUserIcon,
} from '@heroicons/react/24/outline';
import { usePathname } from 'next/navigation';

export default function TabBar() {
  const pathname = usePathname();
  return (
    <>
      <div className="fixed bottom-0 w-full mx-auto max-w-screen-md grid grid-cols-5 border-neutral-600 border-t-2 px-5 py-3 *:text-white">
        <Link href="/products" className="flex flex-col items-center gap-px">
          {pathname === '/products' ? (
            <SolidHomeIcon className="w-7 h-7" />
          ) : (
            <OutlineHomeIcon className="w-7 h-7" />
          )}
          <span>홈</span>
        </Link>
        <Link href="/life" className="flex flex-col items-center gap-px">
          {pathname === '/life' ? (
            <SolidNewspaperIcon className="w-7 h-7" />
          ) : (
            <OutlineNewspaperIcon className="w-7 h-7" />
          )}
          <span>동네생활</span>
        </Link>
        <Link href="/chat" className="flex flex-col items-center gap-px">
          {pathname === '/chat' ? (
            <SolidChatIcon className="w-7 h-7" />
          ) : (
            <OutlineChatIcon className="w-7 h-7" />
          )}
          <span>채팅</span>
        </Link>
        <Link href="/live" className="flex flex-col items-center gap-px">
          {pathname === '/live' ? (
            <SolidVideoIcon className="w-7 h-7" />
          ) : (
            <OutlineVideoIcon className="w-7 h-7" />
          )}
          <span>쇼핑</span>
        </Link>
        <Link href="/profile" className="flex flex-col items-center gap-px">
          {pathname === '/profile' ? (
            <SolidUserIcon className="w-7 h-7" />
          ) : (
            <OutlineUserIcon className="w-7 h-7" />
          )}
          <span>나의 당근</span>
        </Link>
      </div>
    </>
  );
}
컴포넌트: TabBar
- 화면 하단에 고정된 탭 바를 렌더링하는데, 이 탭 바는 다섯 개의 링크(홈, 동네생활, 채팅, 쇼핑, 나의 당근)로 구성되어 있으며, 사용자가 어떤 페이지에 있는지에 따라 아이콘이 채워진 아이콘(굵은 아이콘) 또는 외곽선 아이콘으로 표시가 되게 되어있다.
- 경로 감지: usePathname() 훅을 사용하여 현재 경로를 감지하고, 경로에 따라 해당 탭의 아이콘을 채워진 버전으로 표시한다.
구성:
- Link: 각각의 탭은 Next.js의 Link 컴포넌트를 사용하여 각 페이지로 연결된다.
- 아이콘:
현재 경로와 일치하면 Solid 아이콘(굵은 아이콘)이 표시된다.
일치하지 않으면 Outline 아이콘(외곽선 아이콘)이 표시된다.
Skeletons
Skeletons는 웹 애플리케이션에서 데이터를 로드하거나, 콘텐츠를 렌더링하는 동안 사용자 경험을 개선하기 위해 사용되는 UI 패턴이다.
Skeletons는 사용자가 콘텐츠가 로딩 중임을 시각적으로 인지할 수 있도록 도와주고,
로딩 중인 콘텐츠와 유사한 모양의 자리 표시자를 사용하여, 실제 콘텐츠가 로드되기 전에 페이지 레이아웃이 안정적으로 유지되도록 한다 --> 텍스트 블록이나 이미지의 자리 표시자로 회색의 사각형을 사용하게 된다.
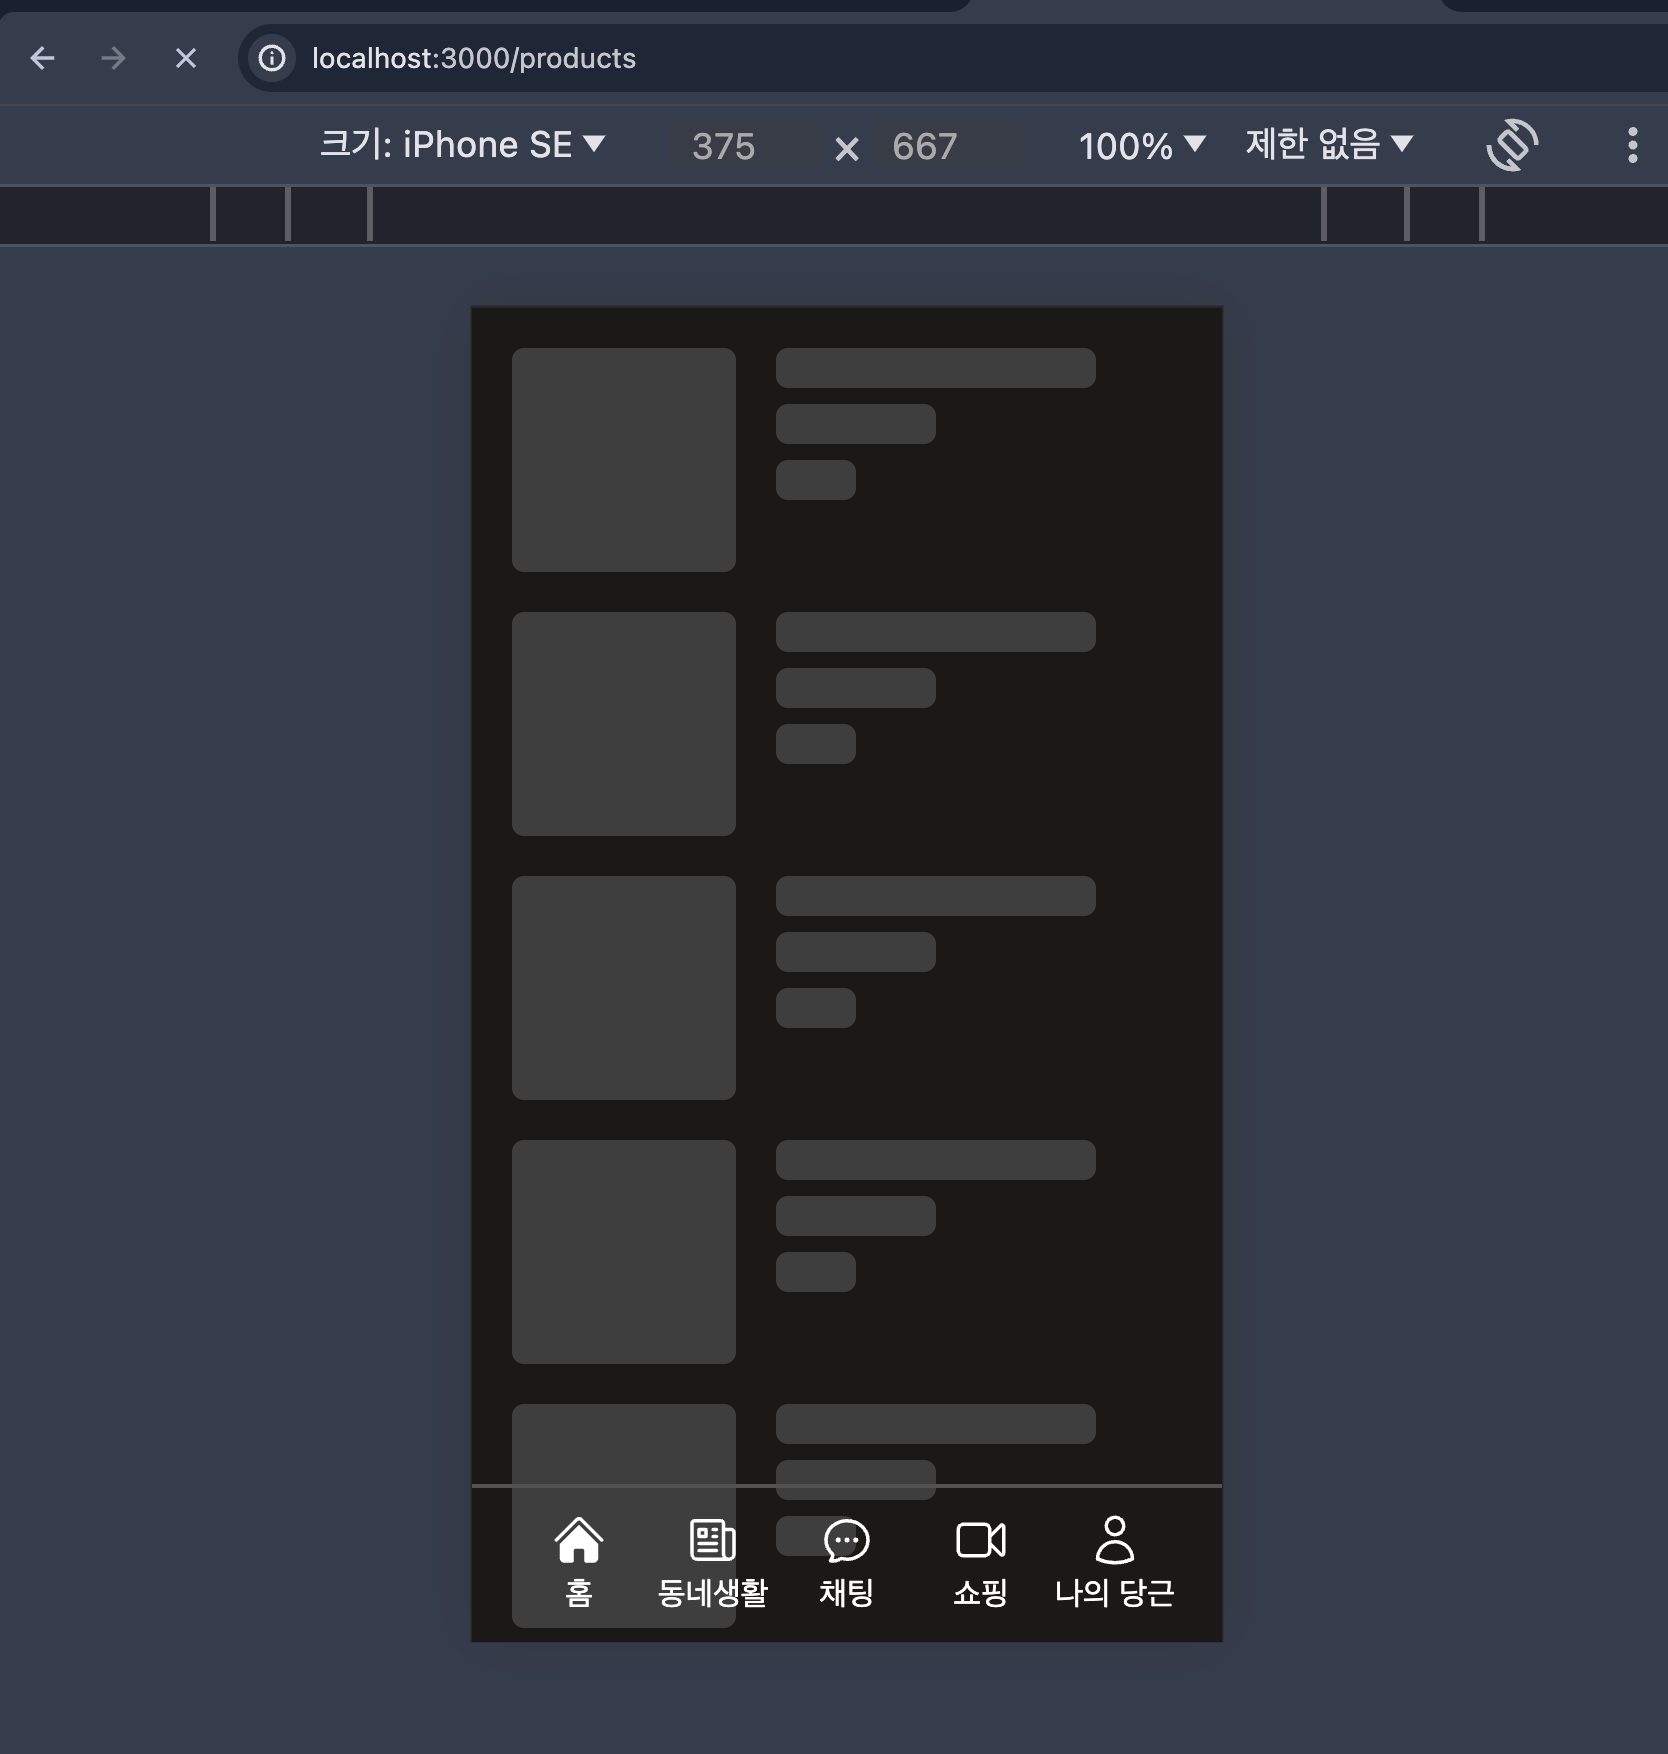 위의 이미지는 현재 완성된 모습은 아니지만, products페이지에 접속했을 때, loading이 발생했을 때를 구현한 페이지이다.
(tabs)/products/loading.tsx
export default function Loading() {
  return (
    <>
      <div className="p-5 animate-pulse flex flex-col gap-5">
        {[...Array(10)].map((_, index) => (
          <div key={index} className="*:rounded-md flex gap-5 ">
            <div className=" size-28 bg-neutral-700" />
            <div className="flex flex-col gap-2 *:h-5 *:rounded-md">
              <div className="bg-neutral-700 w-40 " />
              <div className="bg-neutral-700 w-20" />
              <div className="bg-neutral-700 w-10" />
            </div>
          </div>
        ))}
      </div>
    </>
  );
}animate-pulse를 사용해서 Skeleton이 부드럽게 깜박이는 애니메이션을 적용하여 로딩 중임을 시각적으로 보여주고 있다. 또한, {[...Array(10)]} 를 통해서 10개의 Skeleton 항목을 생성하여 화면에 반복적으로 렌더링을 하고 있다.
예를 들면, 물품과 상세 설명의 모습을 예로 들면서 로딩 중임을 나타내는 것처럼 보여지고 있다.
Product Component
 먼저 products 데이터에 상품을 하나 등록을 해주었다.
photo에는 /goguma.jpg 파일을 등록을 해둔것인데,
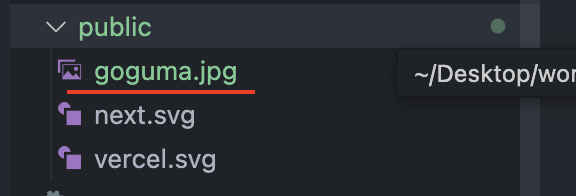 public 폴더에 해당 이름과 같은 goguma.jpg 이미지를 꼭 넣어주어야 한다
위의 Skeletons의 형식과 마찬가지로 photo, title, created-at, price 정보로 product의 list를 보여주는 component를 만들어볼 예정이다.
products/page.tsx
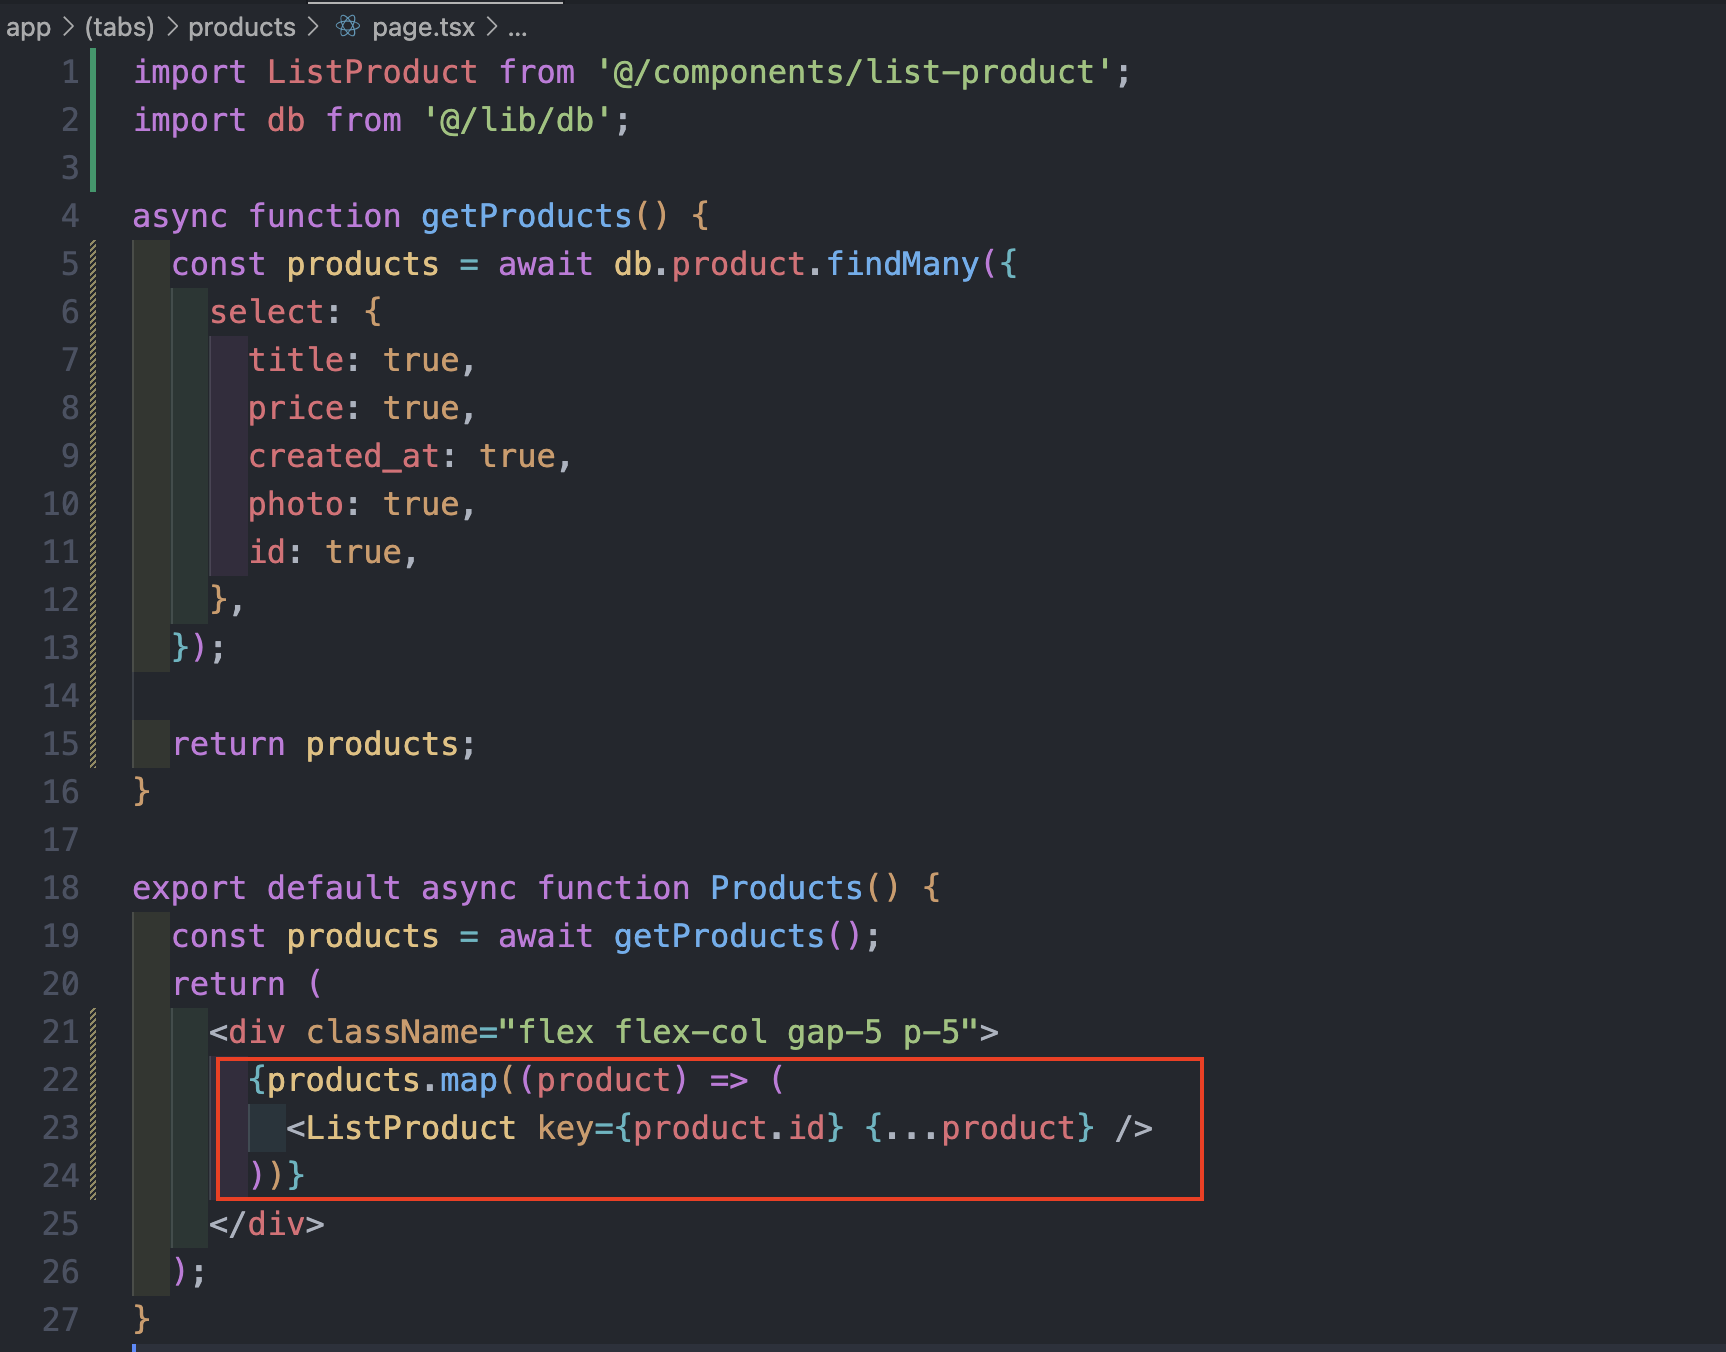
getProducts 함수:
- getProducts 함수는 비동기 함수로, 데이터베이스에서 상품 목록을 가져오는 역할을 한다.
db.product.findMany메서드를 사용하여 상품 정보를 조회하며, select 옵션을 통해 상품의title, price, created_at, photo, id필드만 선택해 가져온다.- 이 함수는 조회된 상품 정보를 배열 형태로 반환한다.
Products 컴포넌트:
- Products getProducts 함수를 호출하여 상품 목록을 받아온다.
- 받은 products 배열을
.map()메서드를 사용하여 반복 처리하면서, 각 상품의 정보를<ListProduct />컴포넌트에 전달한다. - 여기서 {...product} 는 스프레드 연산자를 사용한 것으로, product 객체에 포함된 모든 속성을 개별 속성으로 풀어
<ListProduct />에 전달하는 역할을 한다. 이를 통해<ListProduct />는 title, price, created_at, photo, id를 개별 prop으로 받게 된다!
component/list-product.tsx
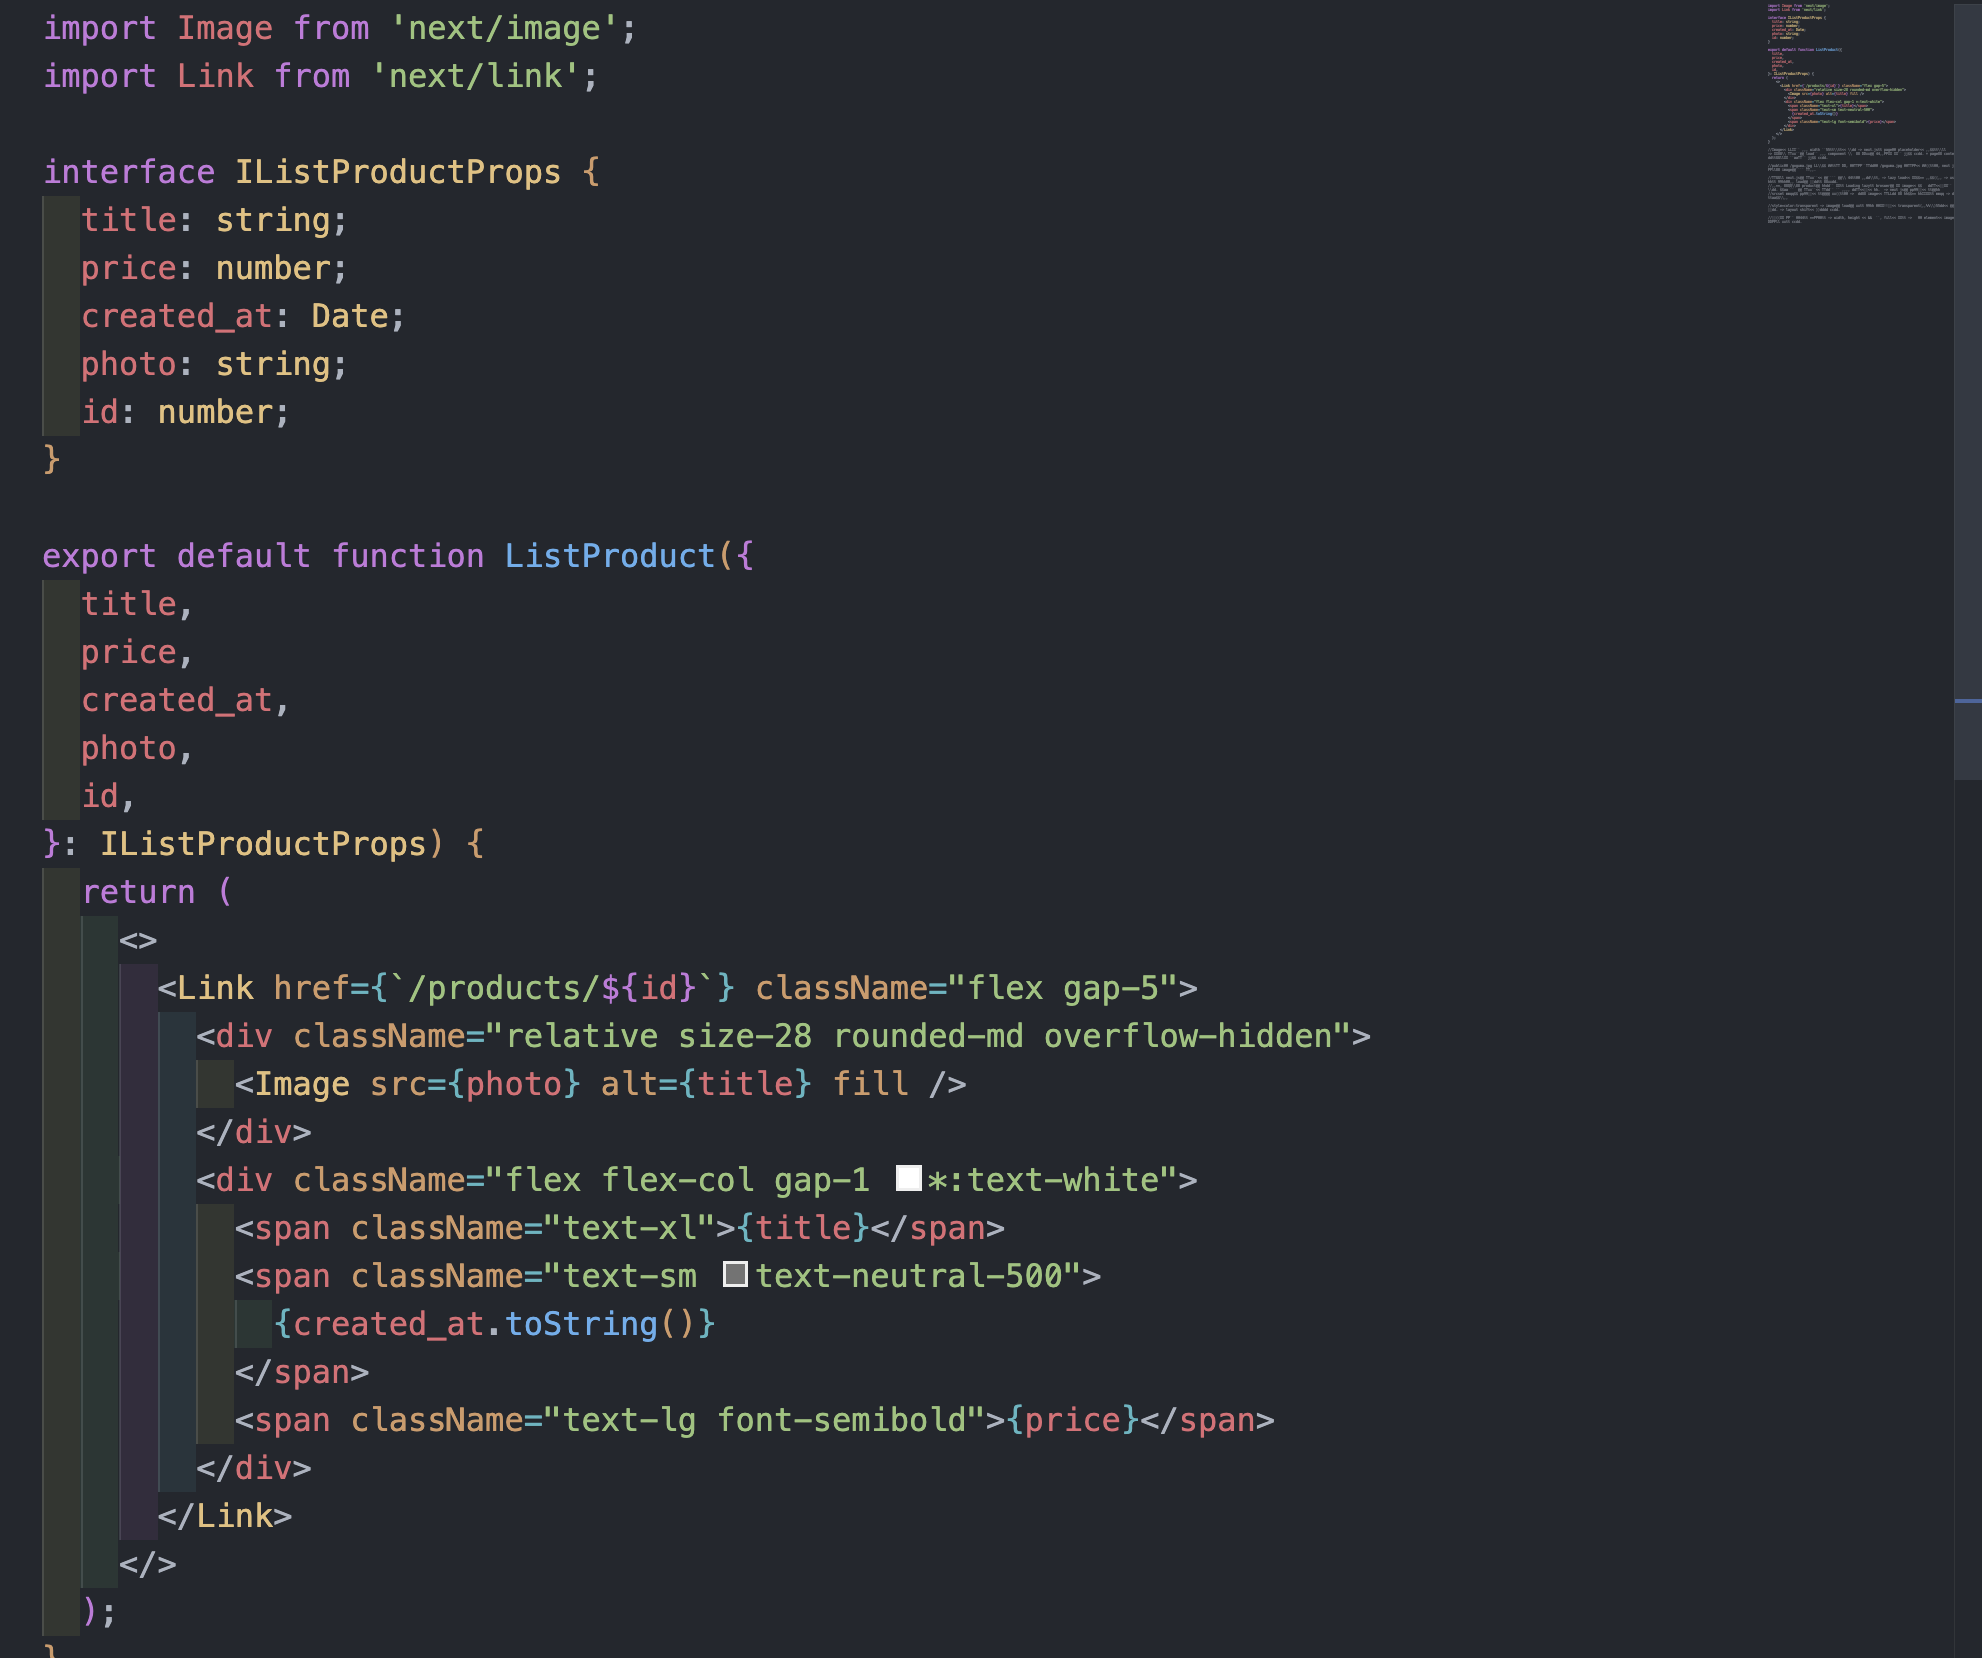
ListProduct에서 받는 props의 type을 IListProductProps를 통해서 type을 지정해 주었다.
<Link/>의 href={/products/${id}} 는 상품의 고유 ID를 이용해 동적 경로를 생성하며, 해당 링크를 클릭하면 /products/[id] 경로로 이동하게 된다!
여기서 <Image/> 컴포넌트가 사용이 되었는데, Image 컴포넌트는 최적화된 이미지 관리를 위해 제공되는 컴포넌트로, 다양한 기능을 통해 이미지의 로딩 성능을 개선하고, 브라우저 및 네트워크 상태에 따라 적절한 크기의 이미지를 제공하는 역할을 한다.
반응형 이미지 (Responsive Images):
- Image 컴포넌트는 다양한 뷰포트 크기에 따라 이미지를 자동으로 조정한다.
width와 height 속성을 기반으로 이미지의 고정 크기를 지정할 수도 있고,layout="responsive"속성을 사용해 비율에 맞게 반응형 이미지를 만들 수도 있다.
이미지 로드 전략 (Loading Strategies):
- loading 속성을 통해 이미지를 어떻게 로드할지 설정할 수 있.
- lazy: 화면에 나타날 때까지 이미지를 지연 로드한다. (기본값)
& eager: 페이지 로드 시 즉시 이미지를 로드 한다.
Image를 사용할 때, width 와 height 지정해주어야 한다 -> next.js는 page에 placeholder를 만들어주게 된다 -> 그래서 이미지가 load할 때, component 주변의 위치가 바뀌거나 하지 않게 된다 + page의 content가 아무렇게나 움직이지 않을 것임.
위에서 설명했듯이, public에 /goguma.jpg 파일을 넣어둔 뒤, 데이터베이스에 /goguma.jpg 데이터를 넣었더니, next js가 우리의 image가지고 갔다.
이렇게 next.js가 이미지를 가지고 가서 화면에 뿌려주면, -> lazy load를 하도록 만들게 된다-> user가 보고 있는 동안에만 load가 된다는 의미이다.
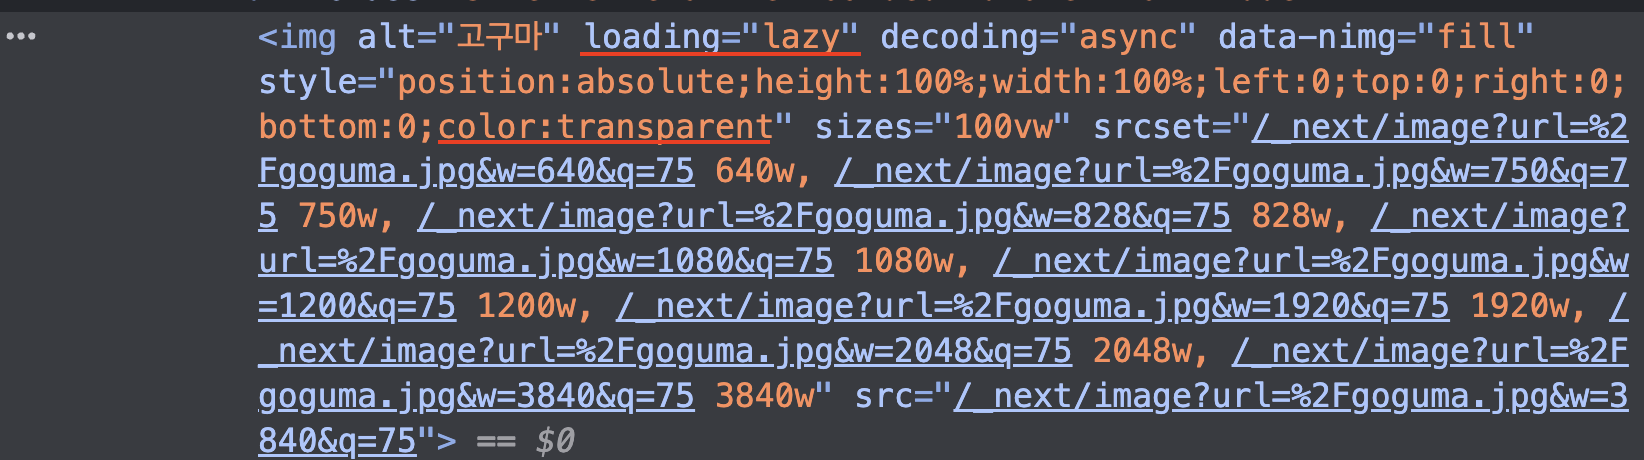
만약, 수백개의 product가 있다고 하면 Loading lazy는 broswer가 그 image를 전부 다운로드하지 않게 한다. 오직 유저가 이미지를 보려고 할 때만 다운로드를 하게 된다
srcset 속성도 자동으로 추가가 되었는데 -> 다른 image를 보여줄 수 있도록 허용하는 속성 -> 다른 스크린 해상도일때 그에 맞춰서 사진을 자동으로 보여주게 된다.
style=color:transparent 속성도 자동으로 추가가 되었는데, image가 load가 되는 동안 기본적으로 transparent(투명한)박스를 가지게 된다. -> layout shift를 막아주게 된다.
Detail Skeleton
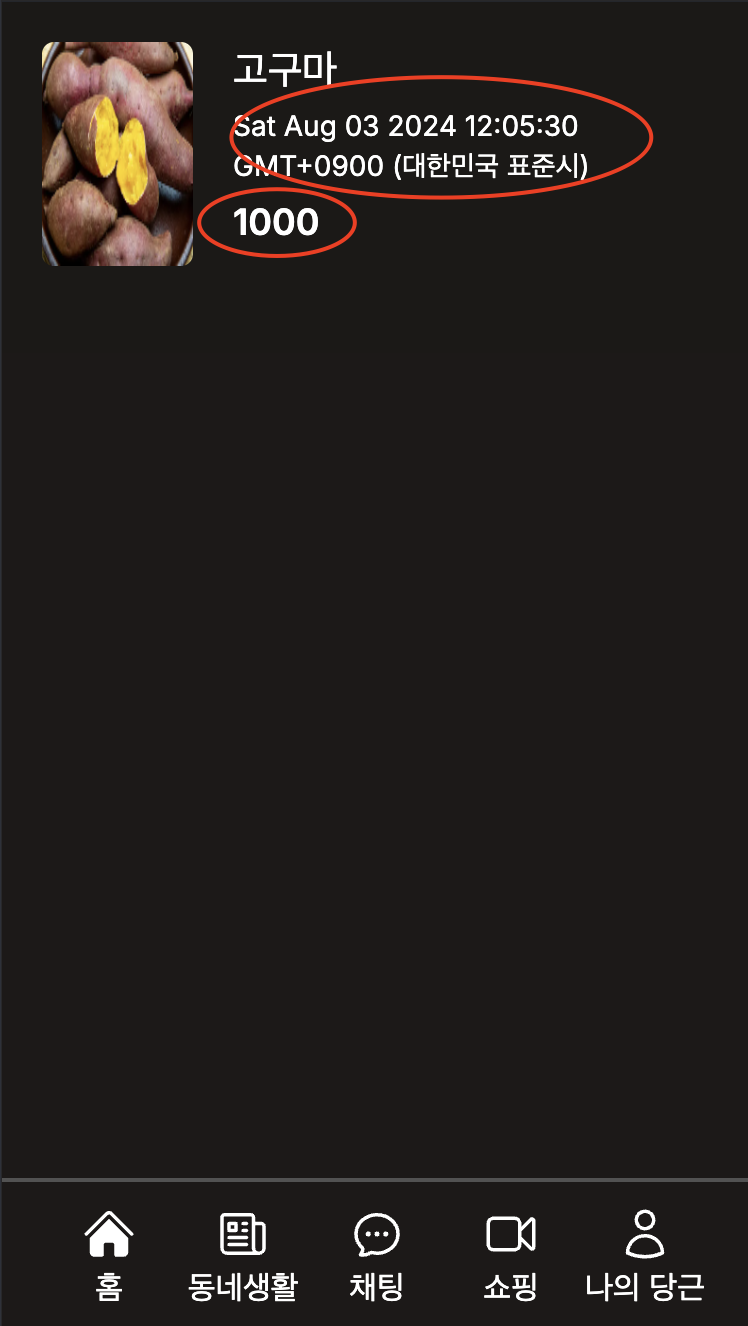 이전의 우리 화면을 살펴보면,
 created_at 부분과, price 부분이 명확하게 정의되어있지 않는 것을 확인할 수 있다.
created_at 부분은 3일 전, 10일 전, 이런식으로 표시되기를 원하고,
price 부분은 1,000원 이렇게 한국 단위의 돈으로 표시되기를 원한다.
그럼 어떻게 해야할 까? --> utils.ts 폴더를 생성 한 뒤, 각각 변경할 수 있는 함수를 정의하면 된다.
lib/utils.ts
export function formatToWon(price: number): string {
  return price.toLocaleString('ko-KR');
}

export function formatToTimeAgo(date: string): string {
  const dayInMs = 1000 * 60 * 60 * 24; //하루동안의 밀리초임
  const time = new Date(date).getTime(); //unix Epoch 의 밀리초를 제공
  const now = new Date().getTime();
  const diff = Math.round((time - now) / dayInMs);

  const formatter = new Intl.RelativeTimeFormat('ko');

  return formatter.format(diff, 'days');
}
formatToWon() 함수는 price.toLocaleString('ko-KR')를 통해 값을 한국 원화 형식의 문자열로 변환하는 역할
toLocaleString()메서드는 숫자를 지역화된 문자열로 변환해 주는 JavaScript 메서드
formatToTimeAgo() 함수는 날짜 문자열을 받아 현재 시간과의 차이를 "며칠 전" 또는 "며칠 후"와 같은 형식으로 반환하는 JavaScript 함수이다.
const dayInMs = 1000 * 60 * 60 * 24 : 하루를 밀리초로 표현한 값을 정의한다. JavaScript에서 시간은 밀리초 단위로 측정되므로, 1초는 1000 밀리초, 1분은 60초, 1시간은 60분, 하루는 24시간으로 계산된다.
따라서 1000 * 60 * 60 * 24 는 하루의 밀리초 수를 나타낸다.
const time = new Date(date).getTime()
입력된 날짜 문자열 date를 Date 객체로 변환하고, 그 날짜를 Unix Epoch(1970년 1월 1일 00:00:00 UTC) 기준의 밀리초 값으로 변환한다.
const now = new Date().getTime()
현재 시간을 Date 객체로 가져오고, 이를 밀리초 단위로 변환한다.
const diff = Math.round((time - now) / dayInMs)
입력된 날짜 time과 현재 시간 now의 차이를 계산한 후, 이를 하루의 밀리초(dayInMs)로 나누어 일(day) 단위의 차이를 계산한다.
이 차이를 Math.round() 를 사용해 반올림한다. 이때 diff 값이 양수이면 미래의 날짜, 음수이면 과거의 날짜를 의미한다.
--> 예를 들어, diff가 -3이면 "3일 전", 5이면 "5일 후"를 의미한다.
const formatter = new Intl.RelativeTimeFormat('ko')
Intl.RelativeTimeFormat 객체는 상대적인 시간 표현을 위한 포맷터를 생성한다.
'ko'는 한국어 설정을 의미하므로, 이 포맷터는 결과를 한국어로 포맷팅해준다.
이를 price, created_at에 적용시키게 되면, 
이렇게 11일 전, 1,000원이 나타나는 것을 확인할 수 있다.
이제, 고구마를 클릭하면 /products/${id} 로 이동하도록 해야 한다.
여기서 생각해봐야 할 부분은 상품의 상세보기 페이지에 들어갔을 때, tab bar가 보여야 하냐는 것이다 --> NO!!!!! 안보이는게 좋다.
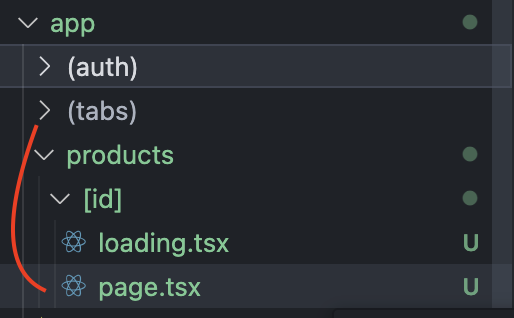
(tabs) 폴더에는 layout.tsx에 tab-bar를 적용시켜놓았기 때문에,
products/[id]/page.tsx를 생성했다.
products/[id]/page.tsx 파일을 생성하면, 이는 Next.js에서 동적 경로(dynamic route) 를 설정하는 것이다.
이 파일은 /products/1, /products/2, /products/123와 같이 products/ 뒤에 숫자나 문자열이 오는 경로에서 해당 컴포넌트를 렌더링한다.
여기서 [id]는 상품의 id를 의미한다!
products/[id]/page.tsx
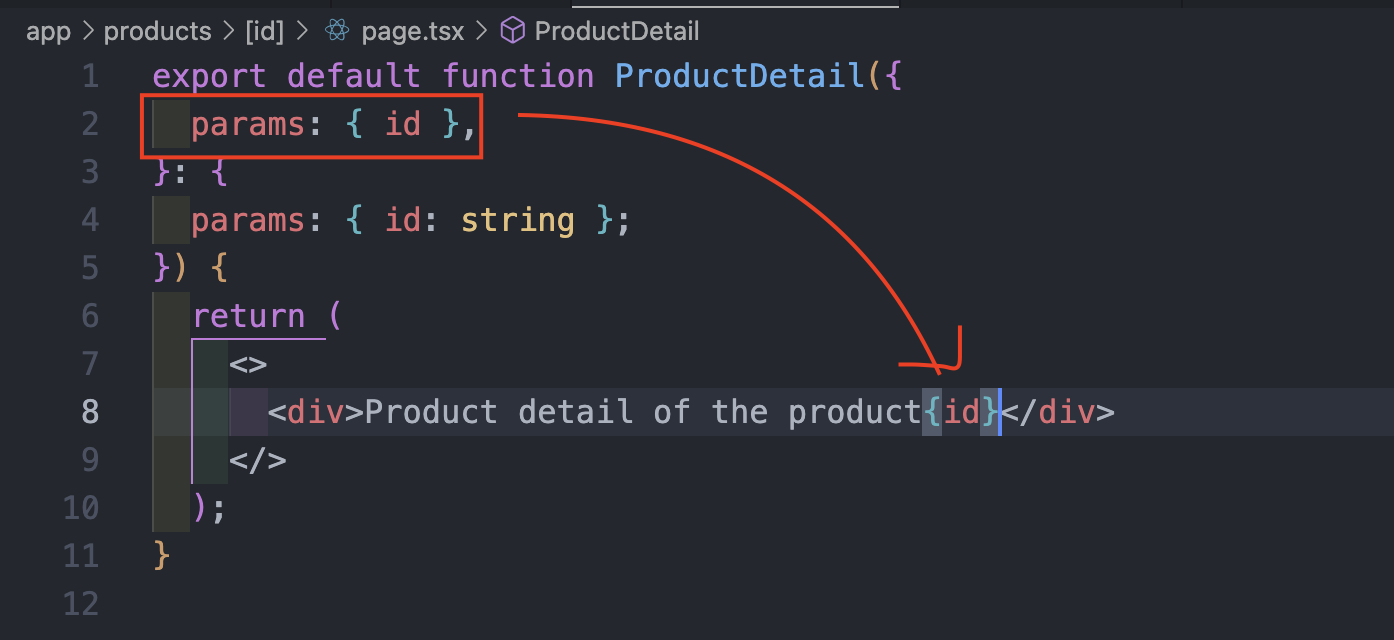
parmas에서 id를 받아온 뒤, 화면에 상품의 id를 출력시켜주었다.
그럼, loading.tsx 페이지를 생성해보도록 하겠다!
async function getProduct() {
  await new Promise((resolve) => setTimeout(resolve, 10000));
}

export default async function ProductDetail({
  params: { id },
}: {
  params: { id: string };
}) {
  const product = await getProduct();
  return <span>Product detail of the product {id}</span>;
}
products/[id]/loading.tsx
 이런 loading 페이지에서 animate-pluse 를 적용시키면 깜빡깜빡한 효과를 제공해 줄 것이다.
import { PhotoIcon } from '@heroicons/react/24/solid';

export default function Loading() {
  return (
    <div className="animate-pulse p-5 flex flex-col gap-5">
      <div className="aspect-square border-neutral-700 border-dashed border-4 rounded-md flex justify-center items-center text-neutral-700">
        <PhotoIcon className="h-28" />
      </div>
      <div className="flex gap-2 items-center">
        <div className="size-14 rounded-full bg-neutral-700" />
        <div className="flex flex-col gap-2">
          <div className="h-5 w-40 bg-neutral-700 rounded-md" />
          <div className="h-5 w-20 bg-neutral-700 rounded-md" />
        </div>
      </div>
      <div className="h-5 w-80 bg-neutral-700 rounded-md" />
    </div>
  );
}
Product Detail
/products/[id] 에서 id는 number 타입으로 들어오게 된다.
만약, /products/sdflgs 로 user가 접속한다면 ? -> 접속이 불가하게 된다 -> notFound()로 이동시켜주어야 한다.
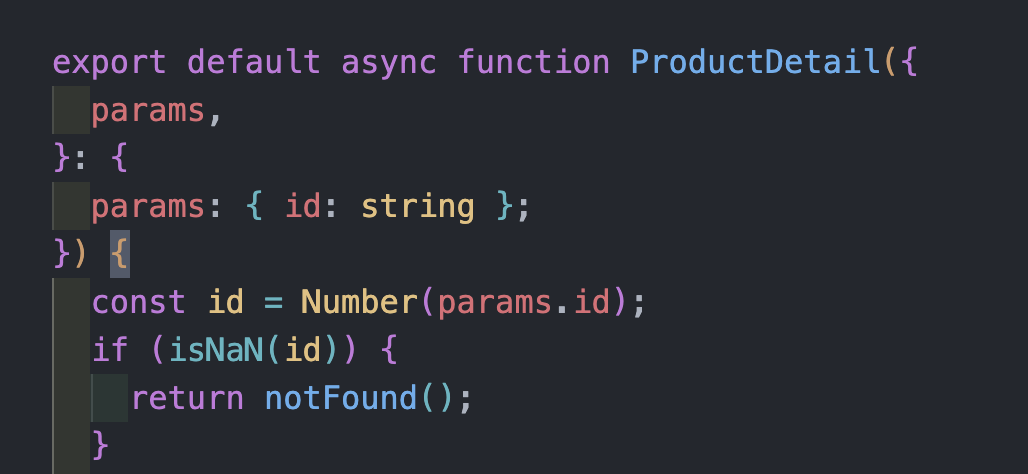
params에서 넘어오는 id는 우선 string 타입이지만,
id를 Number(params.id) 를 통해서 Number타입으로 변경시켜준다.
Number(123) -> 123
Number("asdfa") -> NaN을 반환받게 된다.
이에 만약, id가 isNaN일 경우 -> notFound() return 시켜주는 것이다.
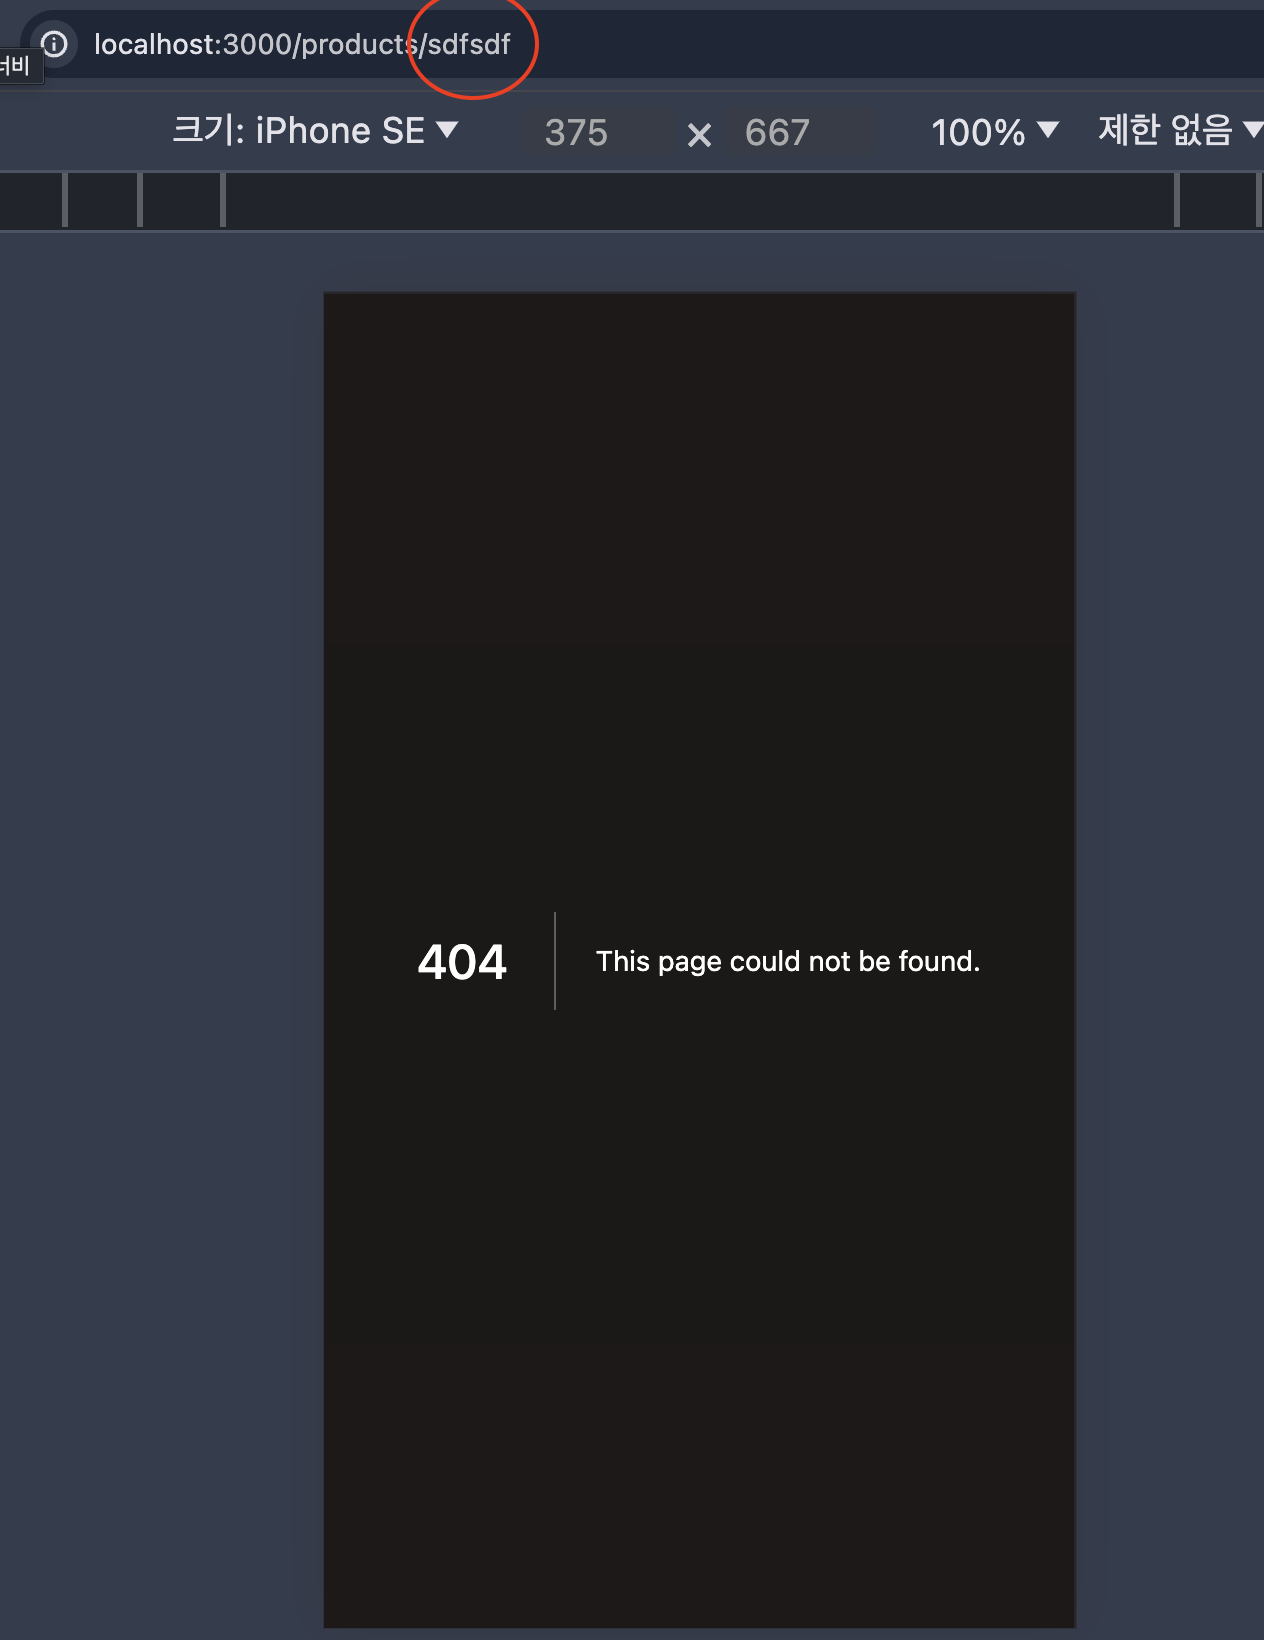
/products/sdfsdf 로 접속하면 -> 404 페이지가 뜨는 것을 확인할 수 있다!
이제 해야할 것은 물건을 올린 사용자가 누군지 알아야 하는 것! 이다.
내가 고구마를 올린 사용자라면, 그 사용자에게는 상품 수정이나 삭제와 같은 버튼을 보여줄 수 있어야 한다.
product model을 만들 때 -> userId가 포함되어있다. 이것을 이용하면 되지 않을까?
async function getIsOwner(userId: number) {
  const session = await getSession();
  if (session.id) {
    return session.id === userId;
  }
  return false;
}getIsOwner는 주어진 사용자 ID(userId) 가 현재 세션의 사용자와 동일한지 확인하는 역할을 한다. 즉, 특정 사용자가 현재 로그인한 사용자(세션의 사용자)인지 확인하는 것
이후 const isOwner = await getIsOwner(product.userId) 를 통해서 product.userId를 getIsOwner()함수에 넣어보면서, product model에 저장된 userId가 session에 저장된 id 즉 현재 로그인한 사용자와 일치하는지 판단하게 된다.
이제 productDetail 페이지를 꾸며볼 차례이다.
return (
    <>
      <div>
        <div className="relative aspect-square">
          <Image fill src={product.photo} alt={product.title} />
        </div>
        <div className="p-5 flex items-center gap-3 border-b border-neutral-600">
          <div className="size-10 rounded-full">
            {product.user.avatar !== null ? (
              <Image
                src={product.user.avatar}
                alt={product.title}
                width={40}
                height={40}
              />
            ) : (
              <UserIcon />
            )}
          </div>
          <div>
            <h3>{product.user.username}</h3>
          </div>
        </div>
        <div className="p-5">
          <h1 className="text-2xl font-semibold">{product.title}</h1>
          <p>{product.description}</p>
        </div>
        <div className="fixed w-full bottom-0 left-0 p-5  bg-neutral-800 flex justify-between items-center">
          <span className="font-semibold text-lg">
            {formatToWon(product.price)}원{' '}
          </span>
          <Link
            className="bg-orange-500 px-5 py-2.5 rounded-md text-white font-semibold"
            href={``}
          >
            채팅하기
          </Link>
        </div>
      </div>
    </>
  );