진행해야 할 코드 챌린지
1 . 상품 상세 -> 판매중, 판매 완료, 예약중 상태 변경 가능하도록
2 . /profile 생성하기 -> 내 프로필에서 내가 상품 (상태별로) , 내가 쓴 글 확인 가능
3 . 프로필 수정 가능 (닉네임, 프로필 사진)
4 . 상품에 대한 채팅으로 연결 시키기 (현재 상품에서 채팅하기를 누르면 채팅방이 생성되긴 하지만, 상품에 대한 정보를 연결시켜 놓지 않았음)
5 . 판매 완료가 되면 -> 리뷰 작성이 가능하도록 하기
6 . 내 리뷰를 프로필에서 확인할 수 있도록
이정도이다..
진짜 할게 많다.. 우선 진행한 것들을 차차 보여주도록 하겠다
/profile -> 나의 프로필 화면 구성
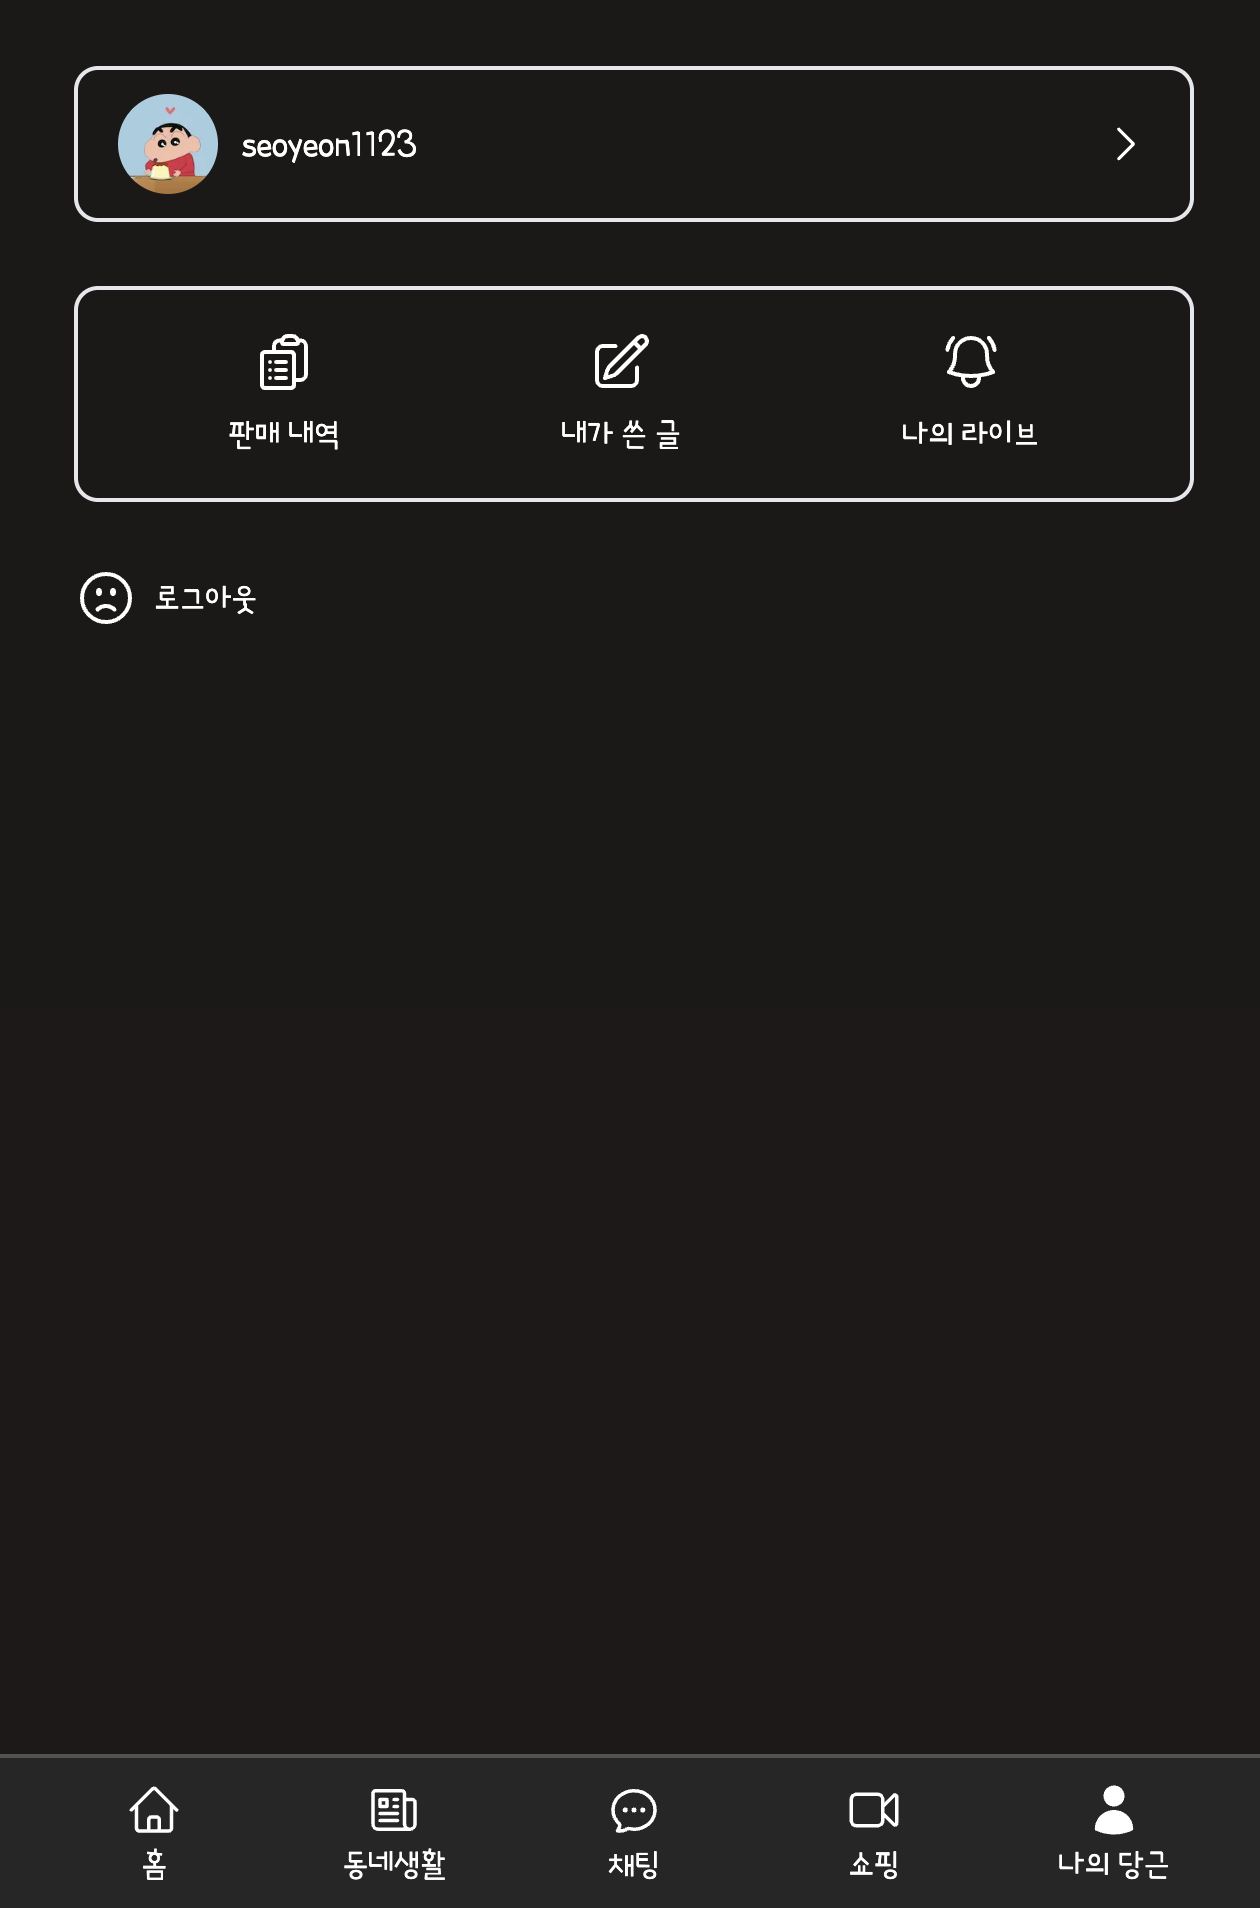 이후에 추가할 것들은 추가하겠지만 최대한 "당근마켓"을 보면서 화면을 구성해 보았다.
프로필 수정하기
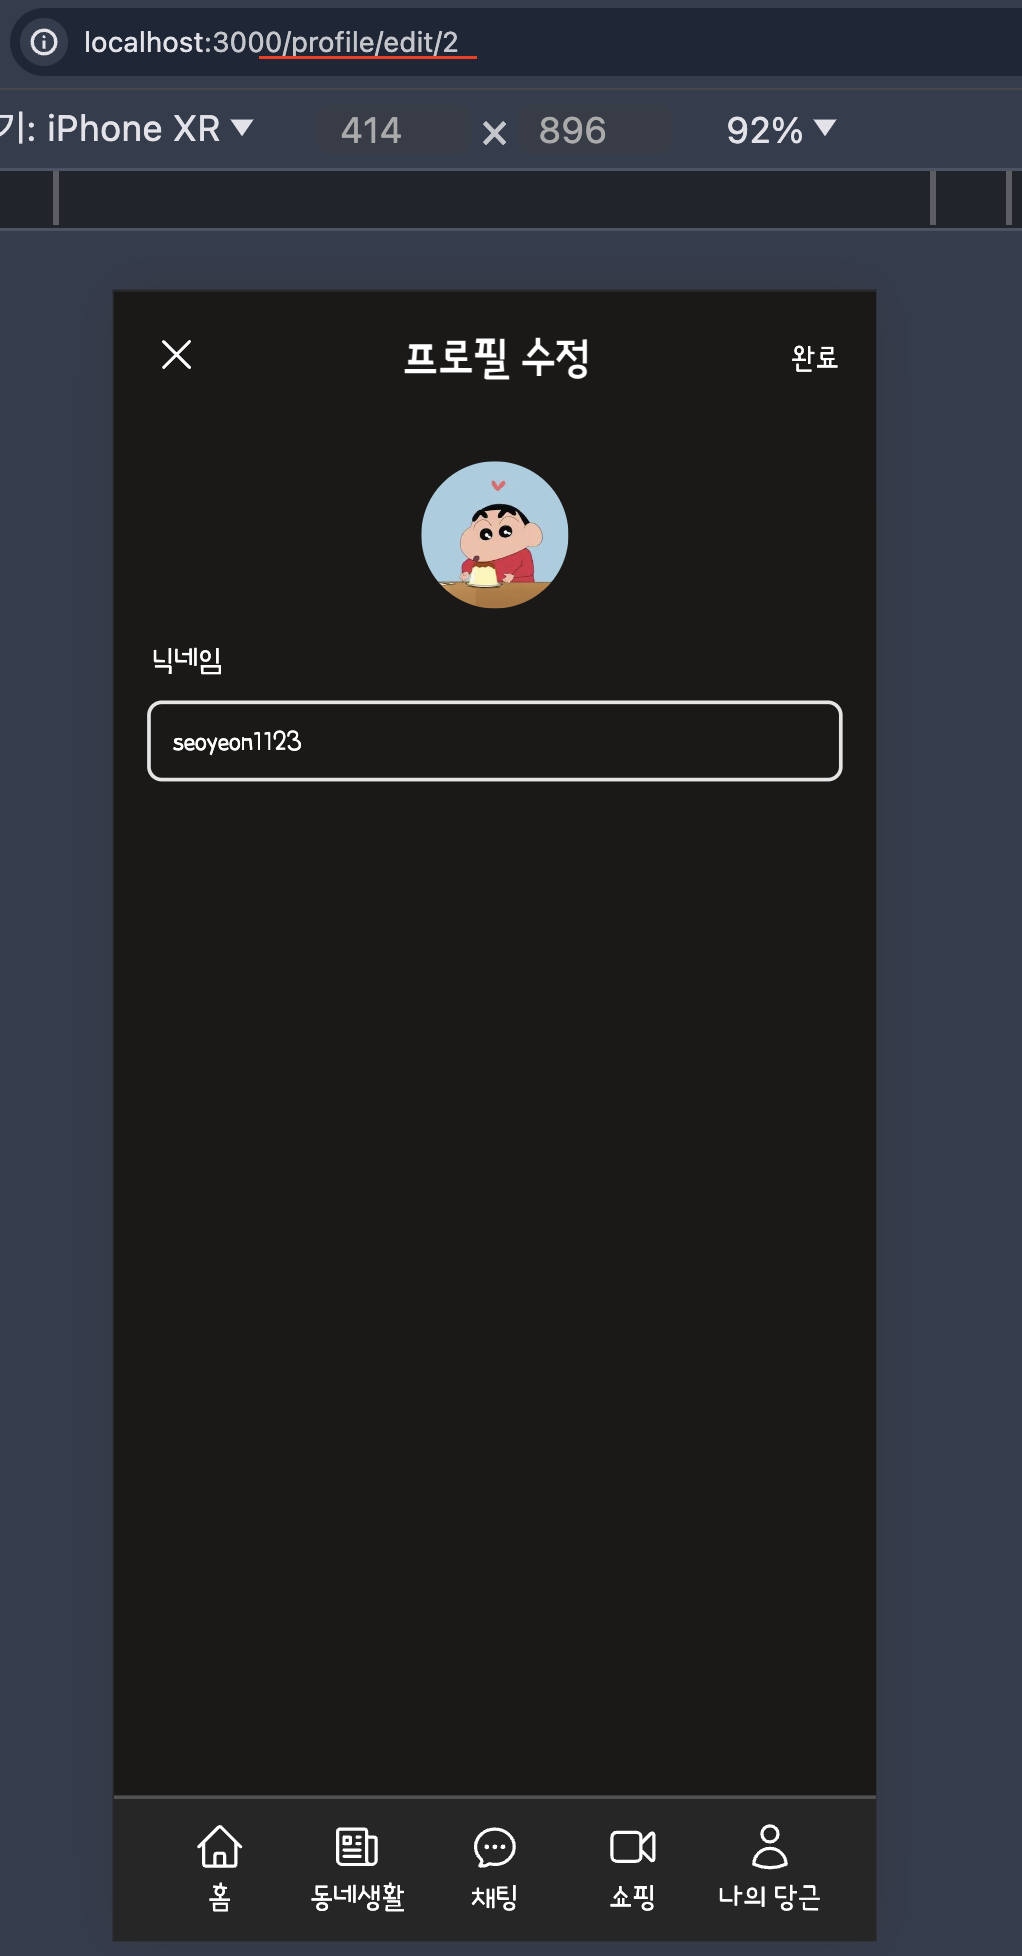
/profile/edit/[id]로 타고 들어가면 나의 프로필을 수정이 가능하도록 해주었다.
profile/edit/[id]/page.tsx
import EditProfile from '@/components/EditProfile';
import db from '@/lib/db';
import { notFound } from 'next/navigation';

async function getProfile(id: number) {
  const user = await db.user.findUnique({
    where: {
      id,
    },
    select: {
      id: true,
      username: true,
      avatar: true,
    },
  });
  return user;
}

export default async function ProfileEdit({
  params,
}: {
  params: { id: string };
}) {
  const id = Number(params.id);
  const user = await getProfile(id);

  if (!user) {
    return notFound();
  }

  return (
    <>
      <EditProfile user={user} />
    </>
  );
}
params을 토대로 가져온 id를 사용해서 (user의 id) getProfile로 user에 대한 정보를 가져오고, 이를 통해서 <EditProfile/> 에 넘겨주었다.
<EditProfile/>
'use client';

import EditProfileAction from '@/app/(tabs)/profile/edit/[id]/actions';
import { getUploadUrl } from '@/app/products/add/actions';
import Image from 'next/image';
import { useState } from 'react';
import { useFormState } from 'react-dom';
import { XMarkIcon } from '@heroicons/react/24/solid';
import Input from './input';
import Link from 'next/link';

interface User {
  user: {
    id: number;
    username: string;
    avatar: string | null;
  };
}

export default function EditProfile({ user }: User) {
  const [preview, setPreview] = useState<string | null>(null);
  const [uploadUrl, setUploadUrl] = useState('');
  const [profilePhotoId, setProfilePhotoId] = useState('');

  const onImageChange = async (e: React.ChangeEvent<HTMLInputElement>) => {
    const {
      target: { files },
    } = e;
    if (!files) {
      return;
    }

    const file = files[0];

    if (!file.type.startsWith('image/')) {
      return alert('이미지 파일만 업로드가 가능합니다');
    }

    const fileSizeInMb = file.size / (1024 * 1024);

    if (fileSizeInMb > 2) {
      return alert(
        '이미지의 크기가 2MB를 초과하는 이미지는 업로드 할 수 없습니다.'
      );
    }

    const url = URL.createObjectURL(file);
    setPreview(url);

    const { result, success } = await getUploadUrl();
    if (success) {
      const { id, uploadURL } = result;
      setUploadUrl(uploadURL);
      setProfilePhotoId(id);
    }
  };

  const interceptAction = async (prevState: any, formData: FormData) => {
    const file = formData.get('avatar');
    if (file instanceof File) {
      const cloudflareForm = new FormData();
      cloudflareForm.append('file', file);
      const response = await fetch(uploadUrl, {
        method: 'post',
        body: cloudflareForm,
      });
      if (response.status !== 200) {
        return;
      }

      const photoUrl = `https://imagedelivery.net/2YRH3jpkhrWOOYZOL3zGhA/${profilePhotoId}`;
      formData.set('avatar', photoUrl);
    }

    return EditProfileAction(prevState, formData);
  };

  const [state, action] = useFormState(interceptAction, null);

  return (
    <div className="p-5 flex flex-col gap-5">
      <form action={action}>
        <div className="flex justify-between">
          <Link href="/profile">
            <XMarkIcon className="size-7 text-white" />
          </Link>
          <h3 className="text-2xl font-semibold">프로필 수정</h3>
          <button>완료</button>
        </div>

        <div className="flex justify-center items-center mt-10">
          <label className="cursor-pointer" htmlFor="avatar-input">
            {preview ? (
              <div
                className="rounded-full"
                style={{
                  backgroundImage: `url(${preview})`,
                  backgroundSize: 'cover',
                  width: '80px',
                  height: '80px',
                }}
              />
            ) : (
              <Image
                src={`${user.avatar}/public`}
                alt={user.username}
                width={80}
                height={80}
                className="rounded-full"
              />
            )}
          </label>

          <input
            onChange={onImageChange}
            type="file"
            id="avatar-input"
            name="avatar"
            accept="image/*"
            className="hidden"
          />
        </div>

        <div className="flex flex-col gap-3">
          <input type="hidden" name="id" value={user.id} />
          <h3 className="mt-4">닉네임</h3>
          <Input
            name="username"
            required
            placeholder="username"
            type="text"
            errors={state?.fieldErrors?.username}
            defaultValue={user.username}
          />
        </div>
      </form>
    </div>
  );
}
여기서 크게 살펴볼 것은 없는데 (이미 cloudflare에 이미지를 저장하는 방법은 이전에 소개를 했었기 때문이다!)
const [state, action] = useFormState(interceptAction, null);
여기서 action을 가로채서 formData의 avatar를 바꾼 avatar로 저장시켜주고, 다시 EditProfileAction를 호출시켜 주었다.
actions.ts
'use server';

import db from '@/lib/db';
import getSession from '@/lib/session';
import { redirect } from 'next/navigation';
import z from 'zod';

const profileSchema = z.object({
  username: z.string({
    required_error: 'username is required',
  }),
  avatar: z.string({
    required_error: 'avatar is required',
  }),
  id: z.string(),
});

export default async function EditProfileAction(
  prevState: any,
  formData: FormData
) {
  const data = {
    username: formData.get('username'),
    avatar: formData.get('avatar'),
    id: formData.get('id'),
  };

  const result = profileSchema.safeParse(data);
  if (!result.success) {
    return result.error.flatten();
  } else {
    const session = await getSession();
    const id = Number(result.data.id);

    if (session.id) {
      // 업데이트할 데이터를 data 객체에 포함시켜야 합니다.
      const updateProfile = await db.user.update({
        where: {
          id: id,
        },
        data: {
          username: result.data.username,
          avatar: result.data.avatar,
        },
        select: {
          id: true,
        },
      });
      redirect(`/profile`);
    }
  }
}
간단하게, id를 통해서 User가 맞는지 확인하고, username, avatar에 대한 검증이 끝나면, db.user.update를 시켜준 것이다.
이렇게 프로필 수정 기능을 추가해 주었다.
상품의 상태(status) 추가해주기
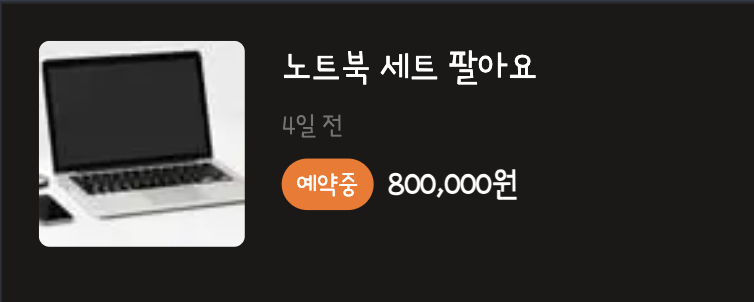 이전과 다르게 상품에 대한 상태를 추가해 주었다.
예약중일 경우 -> 이렇게 예약중이라고 화면에 나타내주고,
판매 완료가 되면 -> /home 에서 상품을 보여주지 않게 된다.
이렇게 상태를 저장하기 위해서는 product의 model에 status를 추가해 주었다. 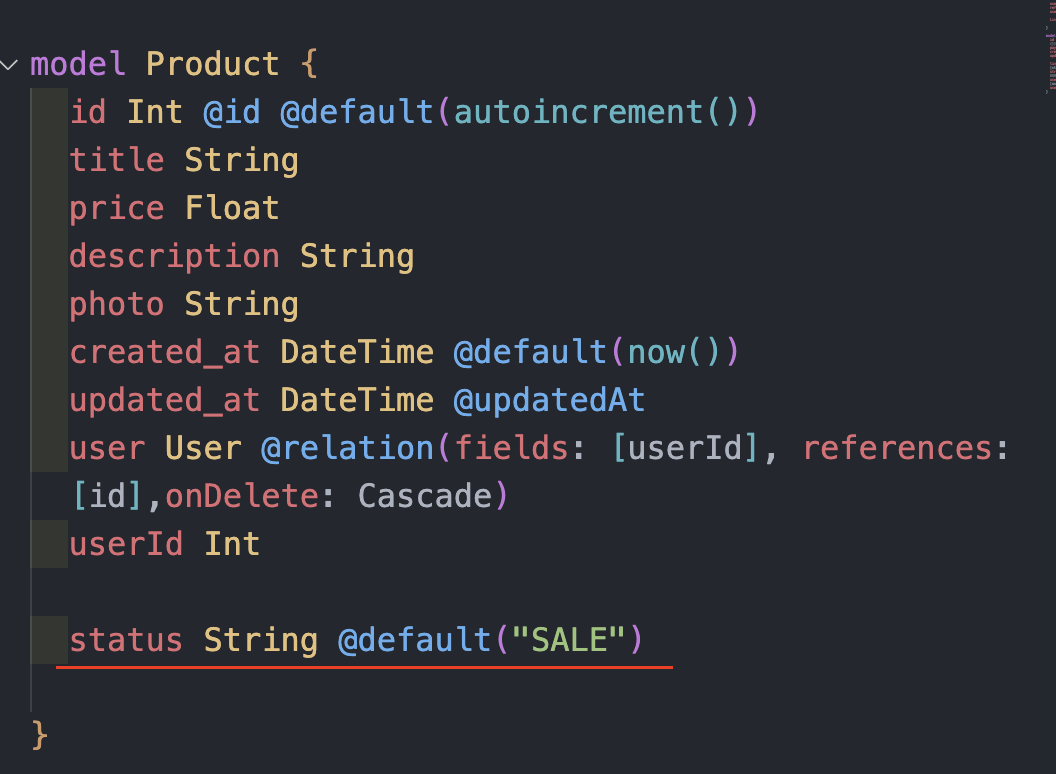 이와 같이 status의 타입을 String 타입으로, 기본값을 SALE(판매중)임으로 저장할 수 있도록 기본적인 model을 설정해 주었다.
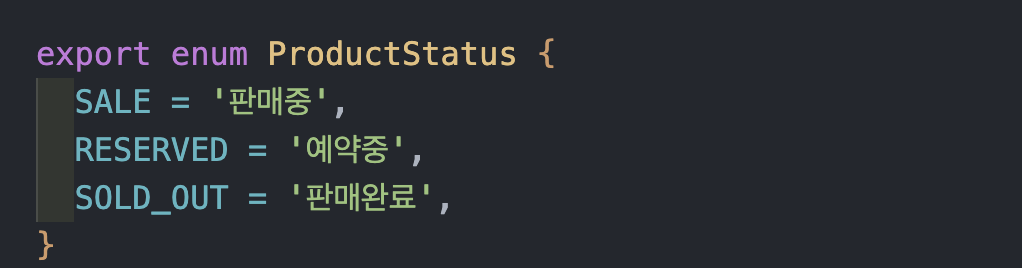 이 status에 대한 각각의 상태들을 enum을 통해서 생성을 해주었다.
그럼 상품의 상태는 어디서 정의할까? --> 상품 상세보기에서 정의하면 된다!
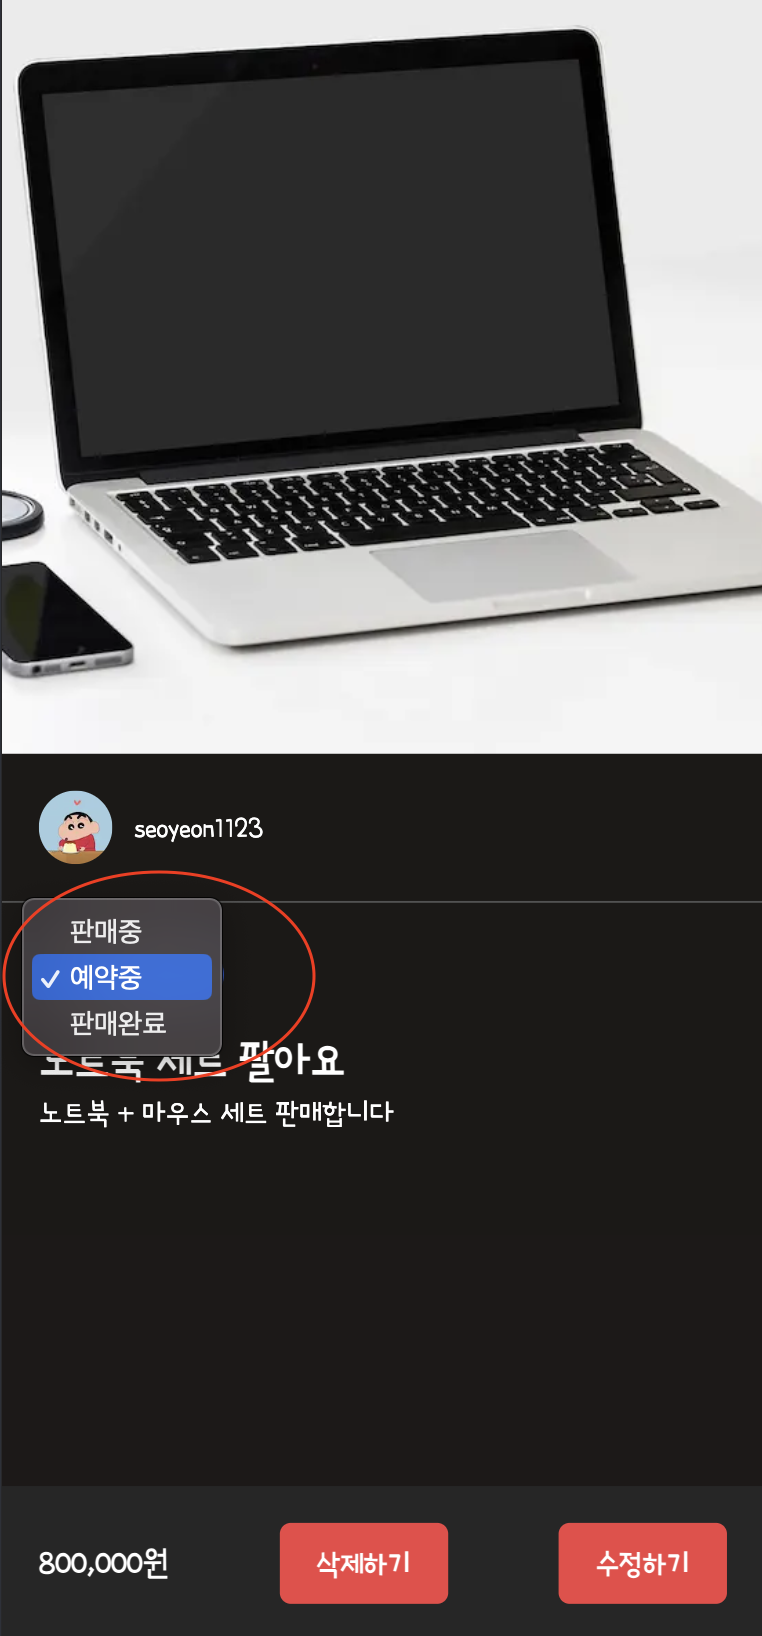 그리고 상품의 상태를 정의할 때에는 , -> 상품을 올린 사용자만 가능하도록 설정을 해주어야 한다.
판매자 페이지
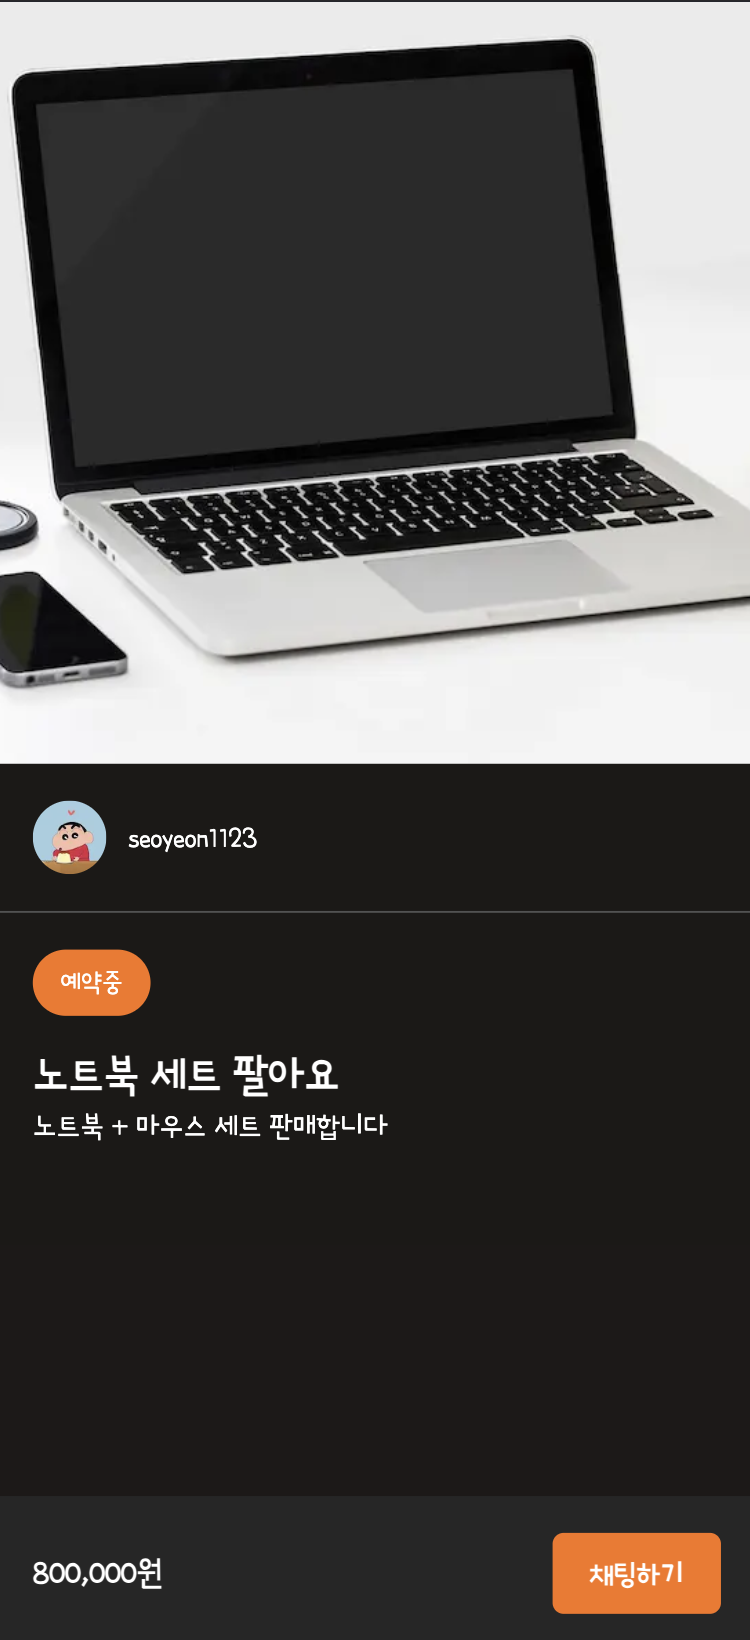
구매자 페이지
약간 이런 느낌!
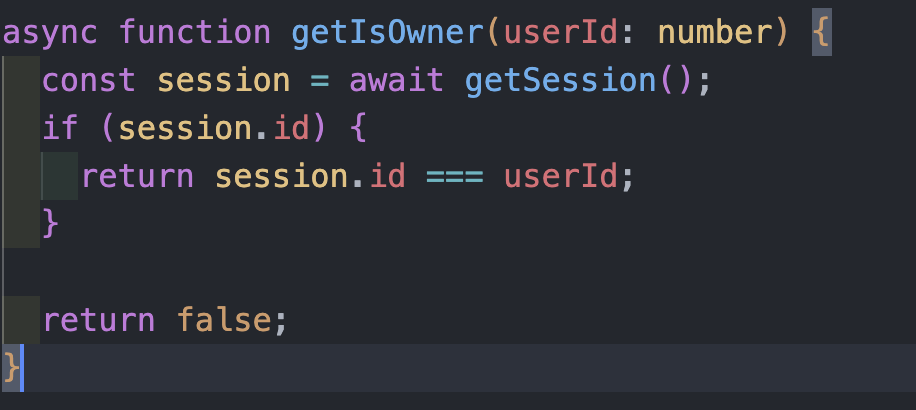
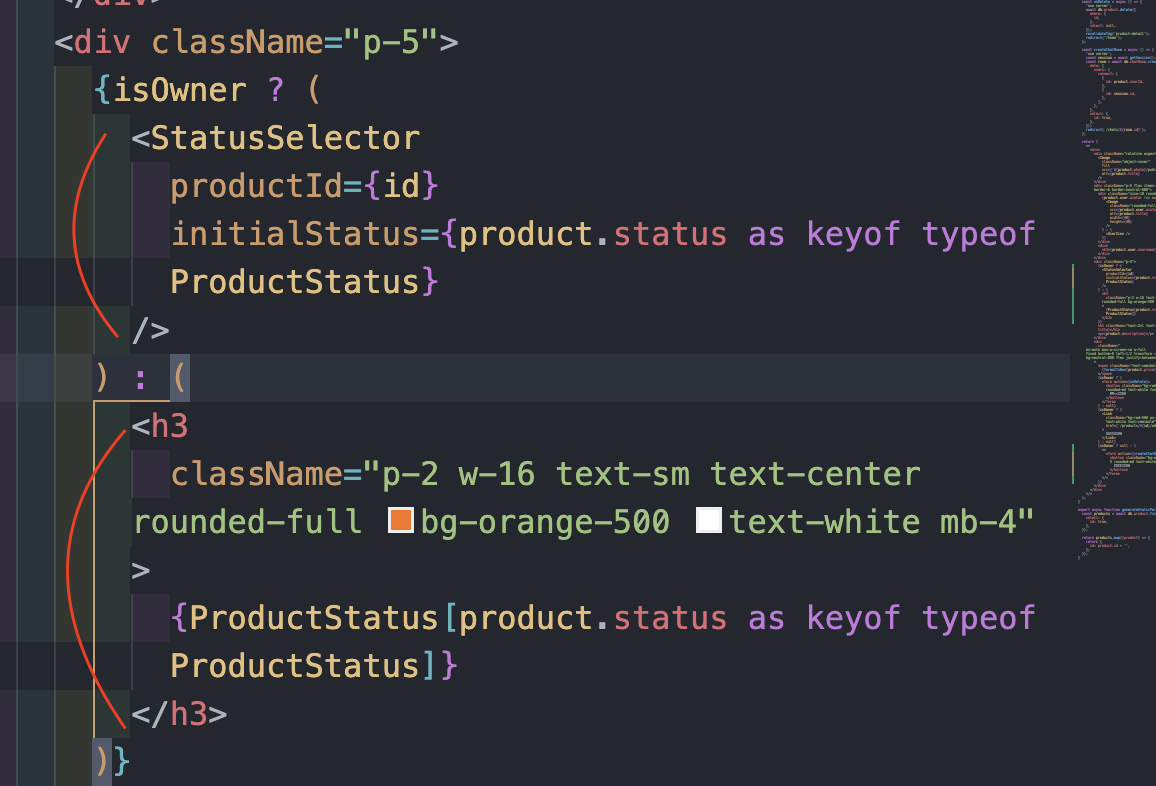
여기서 isOwner이란 ? 
isOwner일 경우 ? --> <StatusSelector/>를 보여주게 되고, 아니라면, status만 보여주도록 되어있는데, 현재 status는 RESERVED, SALE 이런식으로 DB에 저장이 되어있기 때문에,
{ProductStatus[product.status as keyof typeof ProductStatus]}
ProductStatus에 key값으로 status를 넣어주어서 "예약중", "판매중"으로 변경을 시켜서 화면에 뿌려주어야 한다!
<StatusSelector/>
'use client';

import { useState } from 'react';
import { ProductStatus } from '@/lib/utils';
import { UpdateProduct } from '@/app/products/[id]/actions'; // Server-side function

interface IStatusSelectorProductId {
  productId: number;
  initialStatus: keyof typeof ProductStatus;
}

export default function StatusSelector({
  productId,
  initialStatus,
}: IStatusSelectorProductId) {
  const [status, setStatus] =
    useState<keyof typeof ProductStatus>(initialStatus);

  const initial = initialStatus as keyof typeof ProductStatus;

  const handleStatusChange = async (
    event: React.ChangeEvent<HTMLSelectElement>
  ) => {
    const selectedStatus = event.target.value as keyof typeof ProductStatus;
    setStatus(selectedStatus);
    await UpdateProduct(productId, selectedStatus);
  };

  return (
    <div className="mb-3">
      <select
        value={status}
        onChange={handleStatusChange}
        defaultValue={initial}
        className="rounded-full text-black text-sm"
      >
        <option value="SALE">{ProductStatus.SALE}</option>
        <option value="RESERVED">{ProductStatus.RESERVED}</option>
        <option value="SOLD_OUT">{ProductStatus.SOLD_OUT}</option>
      </select>
    </div>
  );
}
이전에 저장되어있던 status에 대해서 initialStatus의 값으로 받아온다. 그리고 그 값을 status에 기본값으로 넣어주었다.
handleStatusChange 함수 :
- 드롭다운 메뉴에서 선택이 변경되면 호출되는 함수이다.
- 사용자가 선택한 값을 (event.target.value)로 가져온다.
- 그 값을 상태(status)로 업데이트한다. (setStatus(selectedStatus)).
- 선택한 상태를 서버 측 함수 UpdateProduct에 전달하여, 해당 상품의 상태를 데이터베이스에 업데이트를 하게 된다.
즉, 사용자가 선택한 값을 status에 업데이트하고, 이 값을 UpdateProduct에 전달해서 product의 status를 update를 해주었다.
'use server';

import db from '@/lib/db';
import { ProductStatus } from '@/lib/utils';

export async function UpdateProduct(
  id: number,
  newStatus: keyof typeof ProductStatus
) {
  await db.product.update({
    where: {
      id,
    },
    data: {
      status: newStatus,
    },
  });
}
UpdateProduct는 간단하게 새로운 status를 업데이트를 시켜주었다.
만약, 판매자가 물건을 판매를 해서 판매 완료로 상태를 변경하게 되면 ? --> 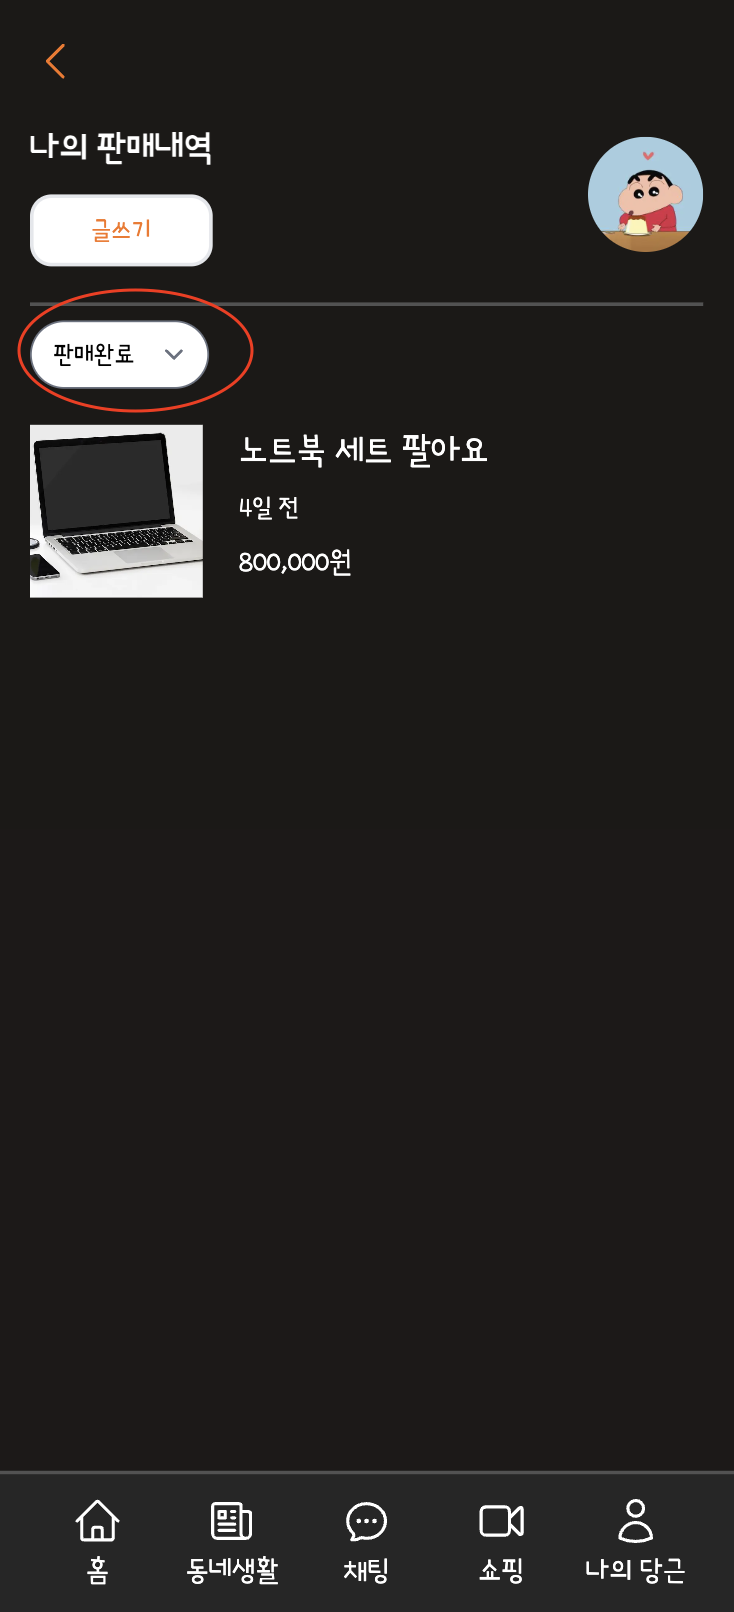 프로필에서 판매완료 창에서 상품을 확인할 수 있다 ! 쿠쿠