진행해야 할 코드 챌린지
1 . 상품 상세 -> 판매중, 판매 완료, 예약중 상태 변경 가능하도록
2 . /profile 생성하기 -> 내 프로필에서 내가 상품 (상태별로) , 내가 쓴 글 확인 가능
3 . 프로필 수정 가능 (닉네임, 프로필 사진)
4 . 상품에 대한 채팅으로 연결 시키기 (현재 상품에서 채팅하기를 누르면 채팅방이 생성되긴 하지만, 상품에 대한 정보를 연결시켜 놓지 않았음)
5 . 판매 완료가 되면 -> 리뷰 작성이 가능하도록 하기
6 . 내 리뷰를 프로필에서 확인할 수 있도록
이제 4,5,6을 완성해야 할 시간이다.
이전에, /life에서 동네 생활 (post)를 작성하는데, /add, /edit을 내가 이전에 만들어 놓지 않는 것을 확인했다..
코드 챌린지 전에 먼저 완성하고 가보도록 하겠다!
동네생활 POST -> /add 구현
<Link
   href="/life/add"
   shallow
   className="bg-orange-500 flex items-center justify-center rounded-full size-16 fixed bottom-24 right-8 text-white transition-colors hover:bg-orange-400"
      >
  <PlusIcon className="size-10" />
</Link>
이렇게 먼저 /life 페이지에 /life/add 로 링크를 넘길 수 있도록 ! <PlusIcon/>을 추가해 주었다.
/life/add/page.tsx
'use client';

import Button from '@/components/button';
import Input from '@/components/input';
import { GlobeAsiaAustraliaIcon, XMarkIcon } from '@heroicons/react/24/solid';
import Link from 'next/link';
import { useFormState } from 'react-dom';
import AddPost from './actions';

export default function AddLife() {
  const [state, action] = useFormState(AddPost, null);
  return (
    <>
      <div className="p-5">
        <Link href="/life">
          <XMarkIcon className="size-8 text-white" />
        </Link>
        <form className=" flex flex-col gap-4" action={action}>
          <div className="flex flex-row justify-center items-center gap-2 mb-4">
            <h1 className="text-center text-xl p-2">
              우리 동네 생활 이야기를 들려주세요
            </h1>
            <GlobeAsiaAustraliaIcon className="size-7 text-orange-600 animate-spin" />
          </div>
          <div className="flex gap-2 flex-col">
            <h1>제목을 입력하세요</h1>
            <Input
              type="text"
              name="title"
              errors={state?.fieldErrors.title}
              required
            />
          </div>
          <div className="flex gap-2 flex-col">
            <h1>내용을 입력하세요</h1>
            <Input
              type="text"
              name="description"
              errors={state?.fieldErrors.description}
              required
            />
          </div>
          <Button text="저장" />
        </form>
      </div>
    </>
  );
}
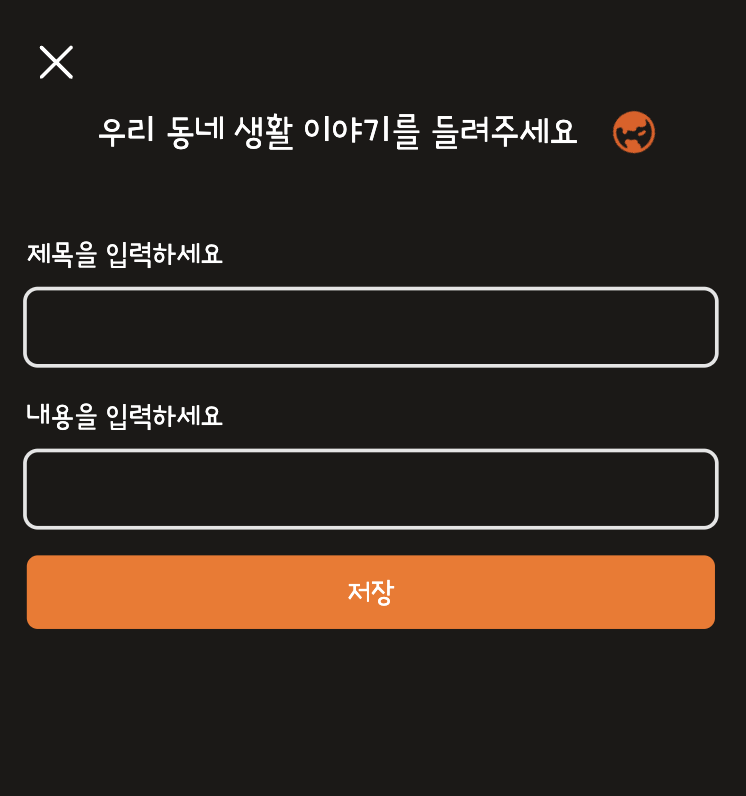 이런식으로 간단하게 제목과 내용을 입력할 수 있는 Input을 생성하고, 저장을 할 수 있는 Button을 생성해 주었다.
이를 const [state, action] = useFormState(AddPost, null);를 통해서 검증 + db.post.create 를 진행하려고 한다.
/life/add/actions.ts
'use server';

import db from '@/lib/db';
import getSession from '@/lib/session';
import { redirect } from 'next/navigation';
import { describe } from 'node:test';
import z from 'zod';

const formSchema = z.object({
  title: z.string(),
  description: z.string(),
});
export default async function AddPost(prevState: any, formData: FormData) {
  const data = {
    title: formData.get('title'),
    description: formData.get('description'),
  };

  const result = await formSchema.spa(data);
  if (!result.success) {
    return result.error.flatten();
  } else {
    const user = await getSession();
    if (user.id) {
      await db.post.create({
        data: {
          title: result.data.title,
          description: result.data.description,
          userId: user.id!,
        },
      });
    }
  }
  redirect('/life');
}
zod를 통해서 타입을 검증을 거치고, 거친 후, db.post.create({}) 를 통해서 새로운 post를 넘겨주엇다.
여기서, post를 저장할 때, 누가 저장했는지를 같이 저장해 주어야 한다. (곧, session에 저장한 id를 저장하면 되기 때문에! ) --> 이를 통해서
user.id --> true라면, post를 create를 해주도록 한다! 를 의미한다.
저장이 완료되면, redirect를 통해서 다시 /life 페이지로 이동을 하게 된다.
동네생활 POST -> /edit 구현
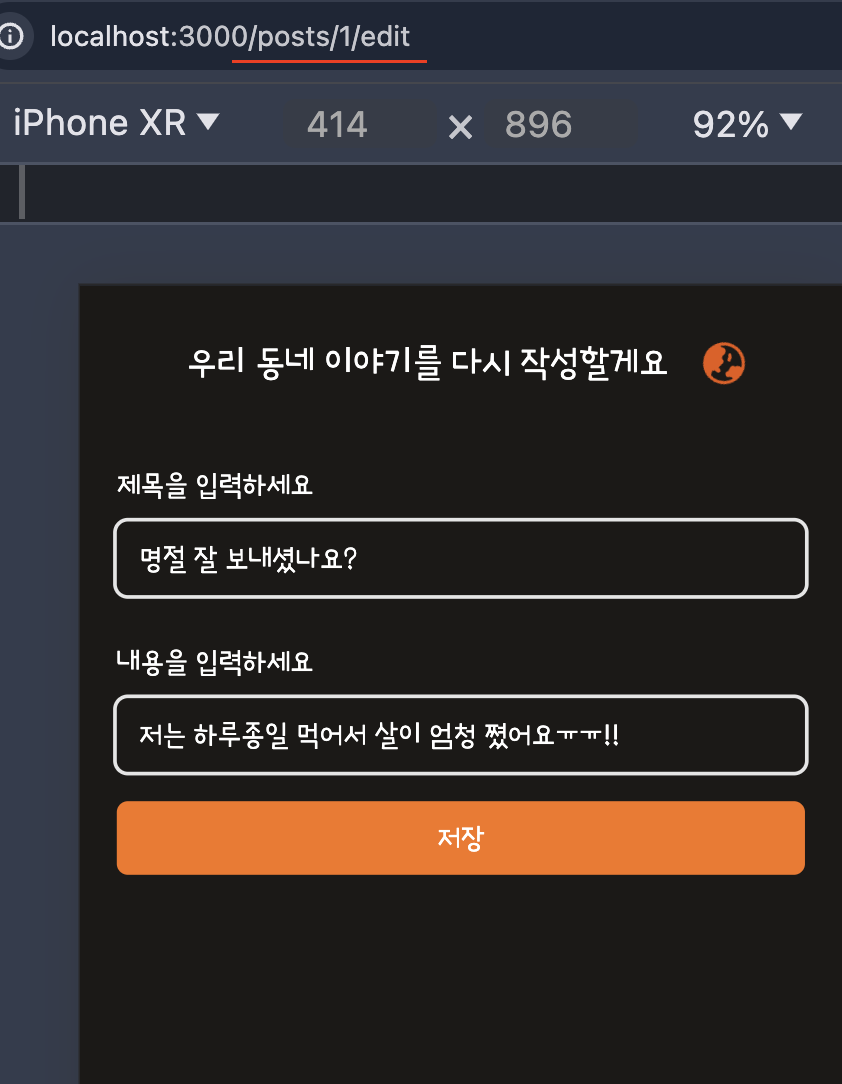
post/[id]/edit 페이지로 이동해서 post 수정이 가능하도록 설정을 해두었다
✚ 여기서 중요한 점은 이전에 내가 작성한 값을 defaultValue의 값으로 보여준다는 것이다.
/posts/[id]/edit/page.tsx
import Button from '@/components/button';
import EditPostComponent from '@/components/EditPost';
import Input from '@/components/input';
import db from '@/lib/db';
import { GlobeAsiaAustraliaIcon } from '@heroicons/react/24/solid';
import { notFound } from 'next/navigation';

async function getPost(id: number) {
  const post = await db.post.findUnique({
    where: {
      id,
    },
    select: {
      title: true,
      description: true,
      id: true,
    },
  });
  return post;
}

export default async function EditPost({ params }: { params: { id: string } }) {
  const id = Number(params.id);
  if (!id) {
    notFound();
  }

  const post = await getPost(id);
  if (!post) {
    return notFound();
  }
  return (
    <>
      <div className="p-5">
        <EditPostComponent post={post!} />
      </div>
    </>
  );
}
에서는 getPost()함수를 통해서 (params에서 가져온 id를 통해) db에 저장되어있는 post를 가져오고, 이를 <EditPostComponent/>로 넘겨주었다.
EditPostComponent
'use client';

import { GlobeAsiaAustraliaIcon } from '@heroicons/react/24/solid';
import Input from './input';
import Button from './button';
import { useFormState } from 'react-dom';
import EditPostAction from '@/app/posts/[id]/edit/actions';

interface IPost {
  post: {
    title: string;
    description?: string | null;
    id: number;
  };
}

export default function EditPostComponent({ post }: IPost) {
  const [state, action] = useFormState(EditPostAction, null);

  return (
    <div>
      <form className="flex flex-col gap-4" action={action}>
        <div className="flex flex-row justify-center items-center gap-2 mb-4">
          <h1 className="text-center text-xl p-2">
            우리 동네 이야기를 다시 작성할게요
          </h1>
          <GlobeAsiaAustraliaIcon className="size-7 text-orange-600 animate-spin" />
        </div>
        <div className="flex gap-2 flex-col">
          <h1>제목을 입력하세요</h1>
          <Input
            type="text"
            name="title"
            errors={state?.fieldErrors?.title}
            required
            defaultValue={post.title}
          />
          <Input
            type="hidden"
            name="id"
            defaultValue={post.id.toString()} // 숫자를 문자열로 변환
          />
        </div>
        <div className="flex gap-2 flex-col">
          <h1>내용을 입력하세요</h1>
          <Input
            type="text"
            name="description"
            errors={state?.fieldErrors?.description}
            required
            defaultValue={post.description ?? ''}
          />
        </div>
        <Button text="저장" />
      </form>
    </div>
  );
}
/add 페이지와 거의 일치하게 화면 구성을 해두었고, 이 역시
const [state, action] = useFormState(EditPostAction, null) 를 통해서 검증 + db.post.update 를 해줄 수 있어야 한다!
posts/[id]/edit/action.ts
'use server';
import db from '@/lib/db';
import { redirect } from 'next/navigation';
import z from 'zod';

const formSchema = z.object({
  title: z
    .string({
      required_error: '제목을 입력해주세요. ',
    })
    .trim(),
  description: z
    .string({
      required_error: '내용을 입력해주세요. ',
    })
    .trim(),
  id: z.coerce.number(),
  //z.coerce.number()는 Zod 라이브러리에서 제공하는 메서드로, 입력값을 숫자로 강제 변환(coerce)하는 기능
});

export default async function EditPostAction(
  prevState: any,
  formData: FormData
) {
  const data = {
    title: formData.get('title'),
    description: formData.get('description'),
    id: formData.get('id'),
  };

  const result = formSchema.safeParse(data);
  if (!result.success) {
    return result.error.flatten();
  } else {
    await db.post.update({
      where: {
        id: result.data.id,
      },
      data: {
        title: result.data.title,
        description: result.data.description,
      },
    });
    redirect(`/posts/${result.data.id}`);
  }
}
타입 및 검증을 끝낸 후, await.db.post.update({}) 를 통해서 업데이트를 해주어야 한다.
여기서 , 업데이트를 하기 위해서 post의 id를 넘겨주어야 하기 때문에 (어떤 post인지 알아야 하기 때문)
 <Input
    type="hidden"
    name="id"
    defaultValue={post.id.toString()} // 숫자를 문자열로 변환
/>
Input에 post.id를 넘겨주어서, string()으로 넘겨받은 id를 id: z.coerce.number()를 통해서 number로 타입을 강제 변환시켜 주었다.
이를 db.post.update({})를 하면서, where에 (어디에 업데이트를 할 것인지) id를 넘겨주면 된다!
--> update가 끝나면 redirect()를 통해서 다시 /posts/[id]로 이동할 수 있도록 설정을 해주었다.
상품에 대한 채팅으로 연결하기
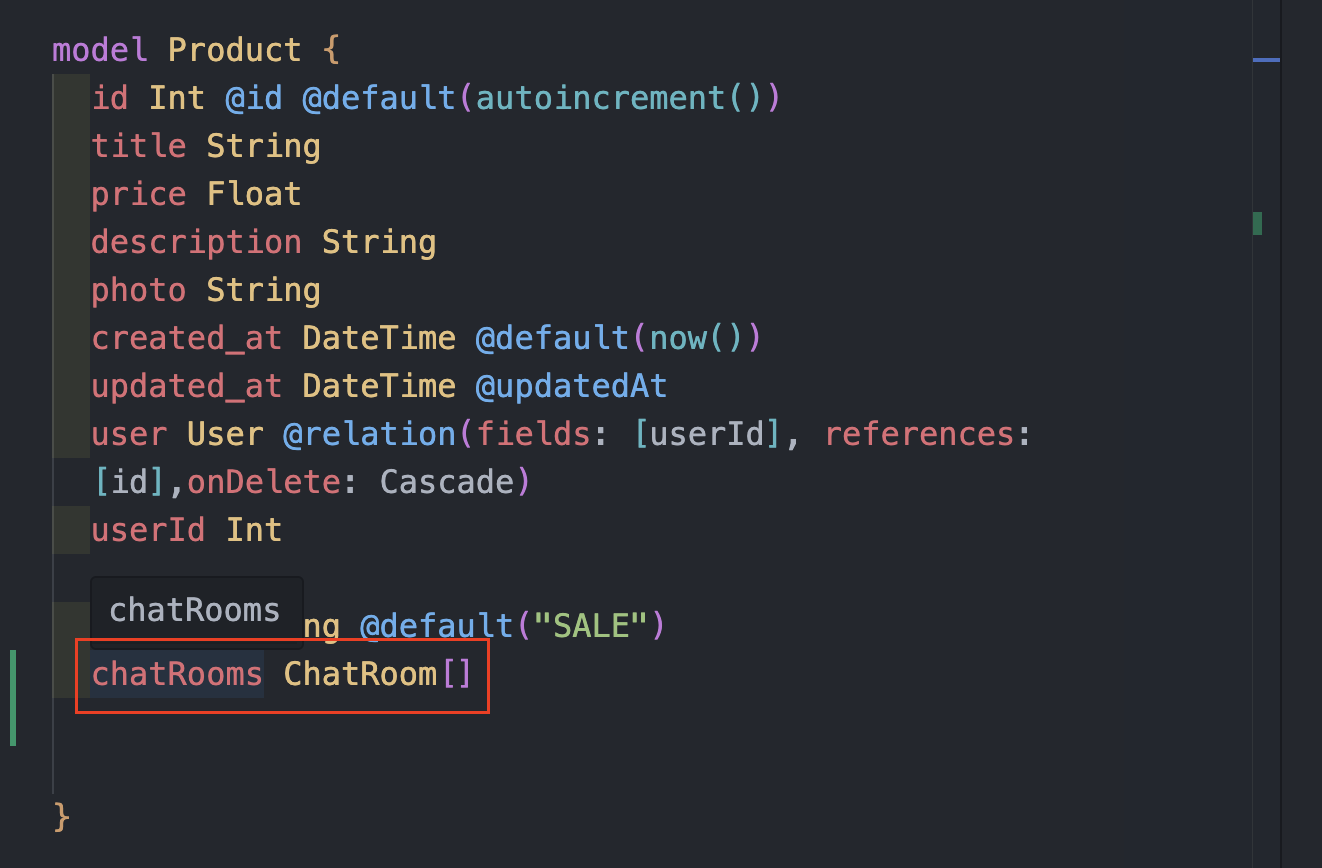 Product의 모델을 chatRooms로 연결해 주었다.
즉, 하나의 상품에 여러 chatRooms이 생성될 수 있기 때문에
일대다 로 연결을 시켜주었다. (chatRoom에도 마찬가지로)
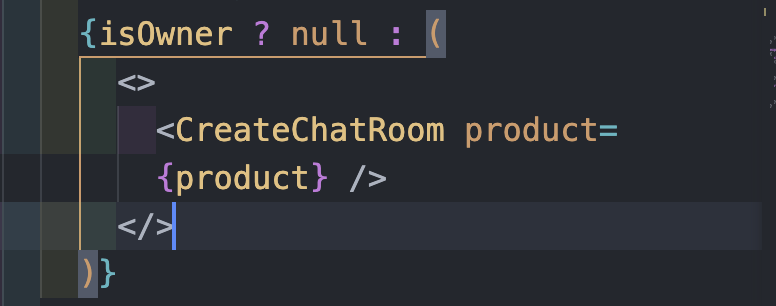 이와 같이 채팅하기를 누르면,
 <CreateChatRoom/>에 product에게 넘겨주어서
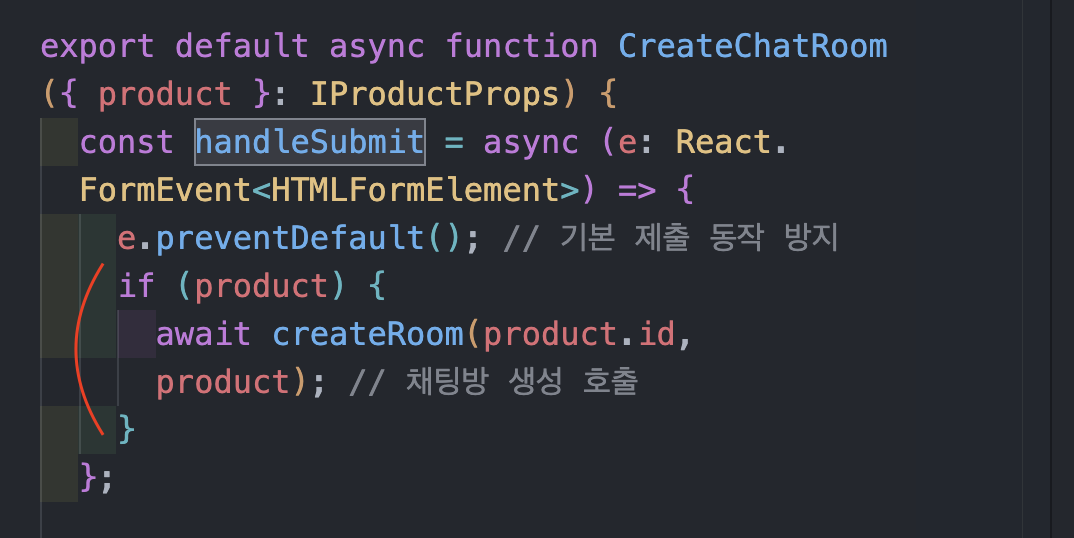 createRoom에 product에 대한 정보와, id를 넘겨주어서 상품에 대한 채팅방이 생성되도록 해주었다.
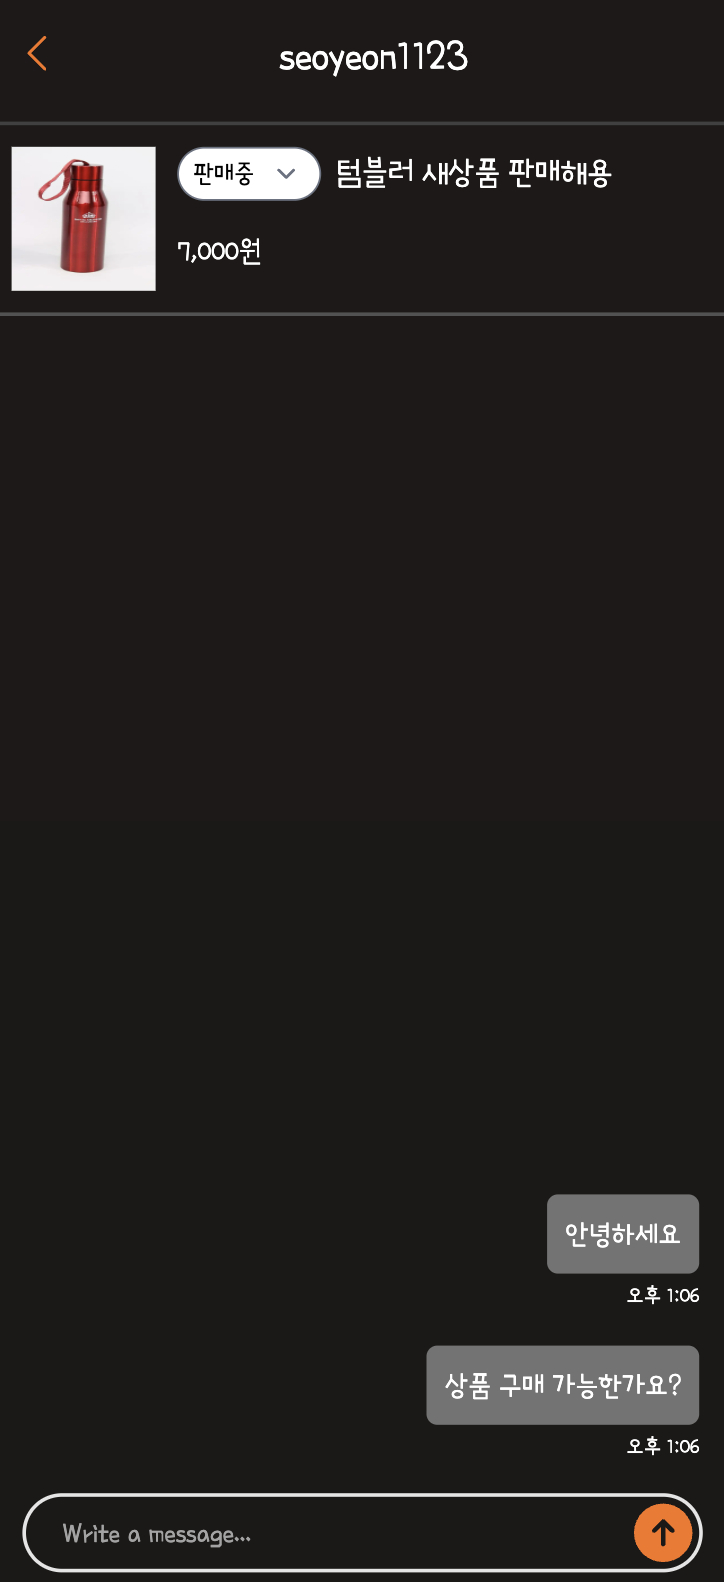 또한, 채팅화면에서 상품에 대한 정보를 나타낼 수 있도록 해주었다.
간단하다!
(사실 prisma 가 오류가 떠서 reset을 했더니 모든 데이터가 다 날라갔당 ㅋㅋㅋㅋㅋㅋㅋㅋ)
+ 채팅방 수정하기
상품에서 채팅하기 버튼을 누르면 새로운 채팅방이 생성은 되는데, 이게 같은 사람이 채팅하기 버튼을 또 누르면 또 다른 채팅방이 생성되는 참사가 발생한다..
고로 채팅방을 생성하기 전에, 채팅방이 있는지를 먼저 확인한 후,
없다면 채팅방을 만들어주도록 해주어야 겠다.. 🥲
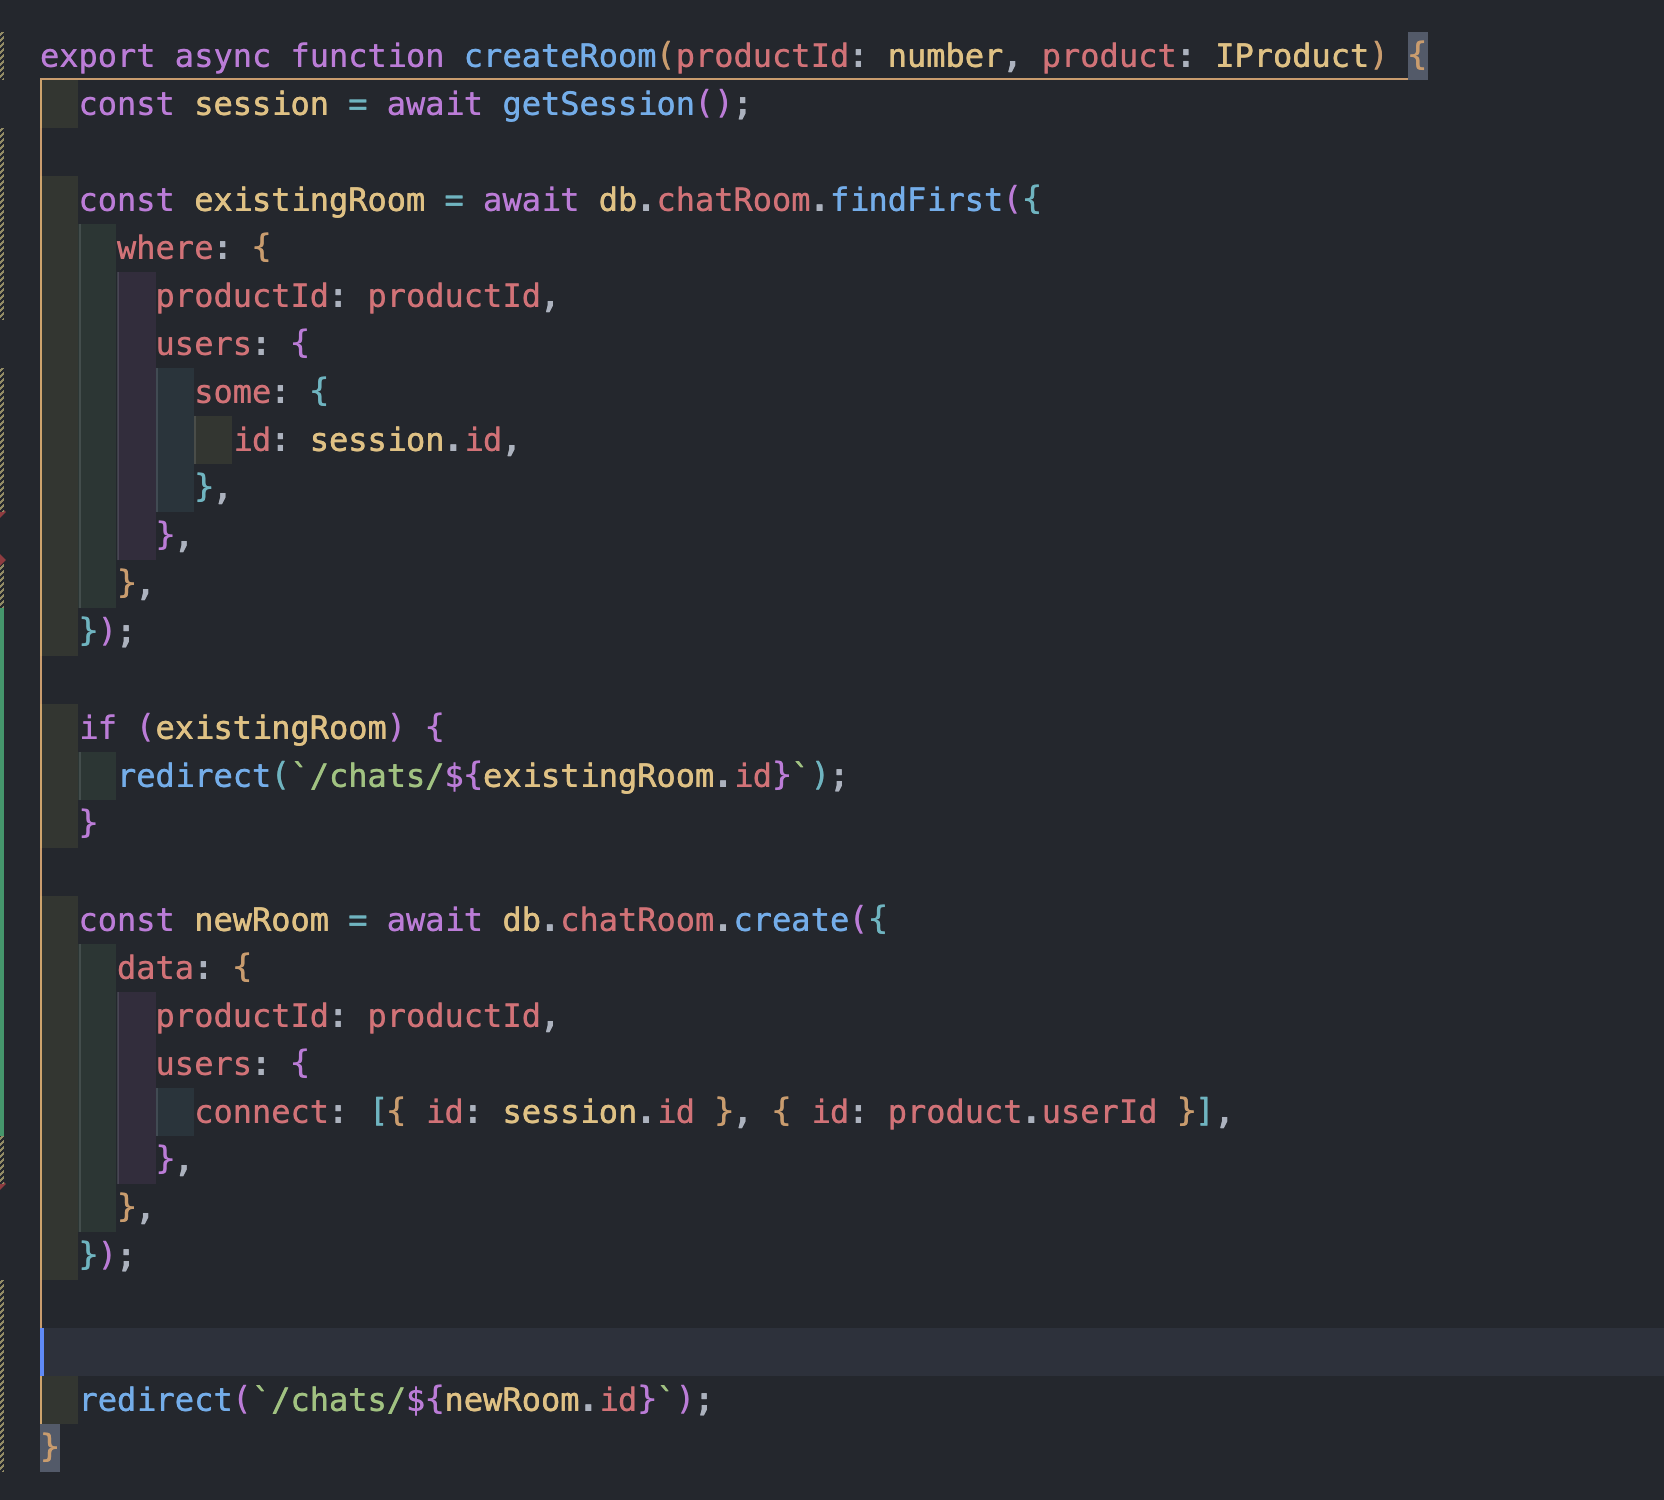
여기서 createRoom을 생성할 때, 먼저 db.chatRoom.findFirst를 통해서 productId에 로그인한 사용자가 생성된 chatRoom이 있는지를 확인하고, 있다면, 해당 chatRoom의 id로 이동하고, 없다면 db.chatRoom.create({})를 통해 채팅방을 생성해 주었다.
별건 없고, 이렇게 살짝 세팅만 해주어도, 채팅하기를 또 눌러도 새로운 채팅방이 생성되지 않고, 기존의 채팅방을 열어주게 된다 !!!!! 야호