다이얼로그
다이얼로그란 사용자와 상호 작용하는 대화상자이다.
그 중 가장 많이 사용하는 토스트에 대해 알아보도록 하겠다.
여기서 토스트란 화면 아래쪽에 잠깐 보였다가 사라지는 문자열을 의미하며 사용자에게 간단한 메시지로 특정한 상황을 알릴 때 사용한다.
토스트는 Toast의 makeText() 함수로 만든다.
makeText() 함수의 두 번째 매개변수가 출력할 문자열이며, 세 번째 매개변수는 토스트가 화면에 출력되는 시간이다.
val toast = Toast.makeText(this, "종료하려면 한 번 더 누르세요", Toast.LENGTH_SHORT)
toast.show()
날짜 또는 시간 입력받기
앱에서 사용자에게 날짜나 시간을 입력받는 데 사용하는 다이얼로그를 피커(Picker) 다이얼로그라고 한다.
날짜를 입력받을 때는 데이터 피커 다이얼로그(DatePickerDialog)를, 시간을 입력받을 때는 타임 피커 다이얼로그(TimePickerDialog)를 사용한다.
- 날짜 입력받기
두 번째 매개변수로 DatePickerDialog.OnDateSetListener 구현 객체를 등록하면 다이얼로그에서 사용자가 설정한 날짜를 콜백 함수로 얻을 수 있다. - 시간 입력받기
두 번째 매개변수로 TimePickerDialog.OnTimeSetListener를 구현한 객체를 지정하면 사용자가 다이얼로그에서 설정한 시간을 얻을 수 있다.
알림 창 띄우기
안드로이드 다이얼로그의 기본은 AlertDialog이다. 위에서 언급한 데이터 피커와 타임 피커도 AlertDialog의 하위 클래스이다.
알림 창은 크게 3가지 영역으로 구분된다. (제목, 내용, 버튼)
알림 창에 아이콘, 제목, 내용을 지정하는 함수가 있고, 버튼을 지정하는 함수가 있다.
이를 이용한 간단한 예시는 아래와 같다.
AlertDialog.Builder(this).run{
	setTitle("알림입니다.")
    setIcon(android.R.drawable.ic_dialog_info)
    setMessage("해당 앱을 종료하시겠습니까?")
    setPositiveButton("네", null)
    setNegativeButton("아니오", null)
    setNeutralButton("더 보기", null)
    show()
 }
버튼 함수를 구분하는 이유는 이벤트 핸들러에서 어떤 버튼이 클릭되었는지 구분하기 위해서이다.
소리와 진동 알림
소리 알림
사용자에게 짧은 소리로 특정한 상황을 알릴 때가 있다. 이를 알림음이라고 한다.
안드로이드 시스템은 알람(NOTIFICATION), 알람(ALARM), 벨소리(RINGTONE) 등의 소리를 제공한다.
val notification: Uri = RingtoneManager.getDefaultUri(RingtoneManager.TYPE_NOTIFICATION)
val ringtone = RingtoneManager.getRingtone(applicationContext, notification)
ringtone.play()
먼저 RingtoneManager.getDefaultUri() 함수를 이용해 소리의 식별값을 얻는다. 이 식별 값은 Uri 객체이며 이 값을 RingtoneManager.getRingtone() 함수의 두 번째 매개변수로 전달하면 소리를 재생하는 Ringtone 객체를 얻는다. 이 객체를 play() 함수로 호출하면 비로소 소리가 재생되는 것이다.
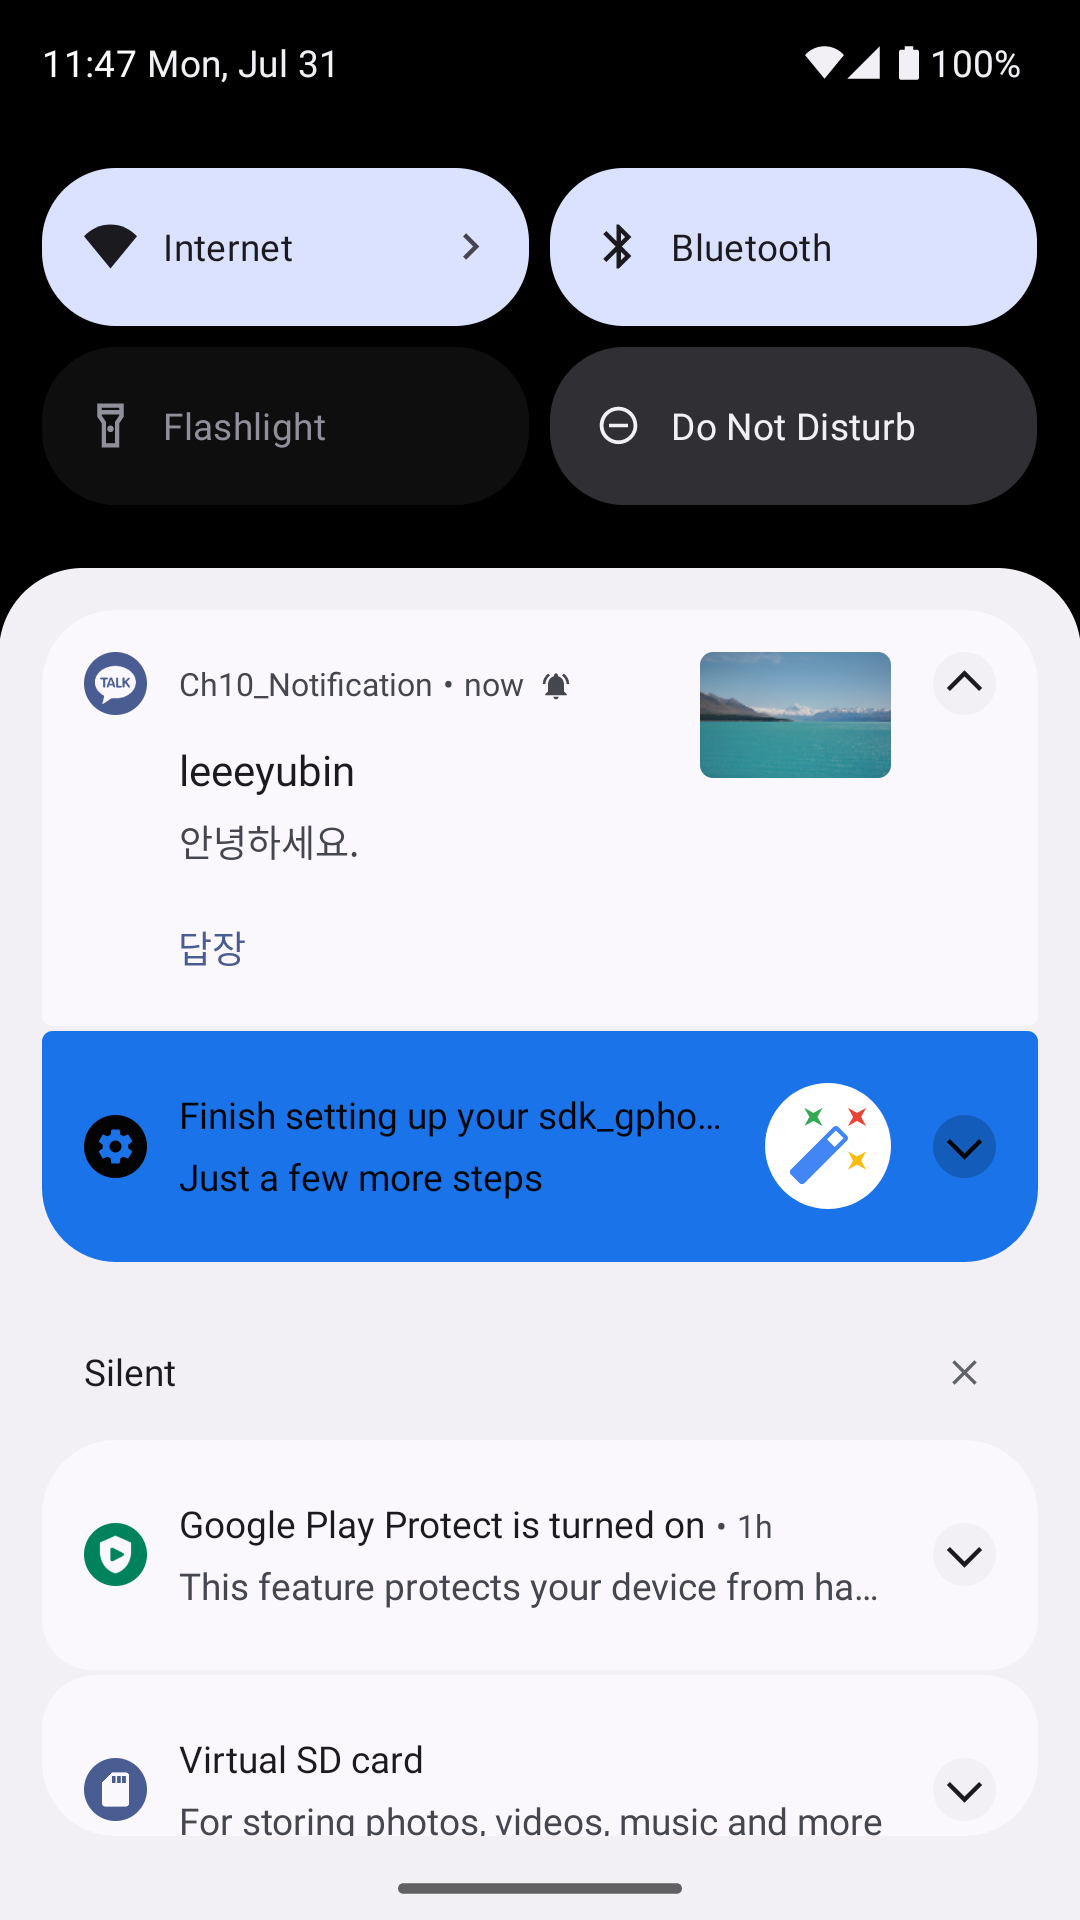
알림 띄우기
상태 바는 화면 상단의 한 줄을 의미하며 이곳에 배터리, 네트워크, 시간 등 시스템의 상태 정보가 출력된다. 이 상태 바에 앱의 정보를 출력하는 것을 알림이라고 한다.
알림 객체
알림 빌더를 만들었으면 이 빌더를 이용해 Notification 객체를 만들어야 한다. 이 객체에 출력할 이미지, 문자열, 등의 정보를 담는다. 앱에서 알림이 발생하면 상태 바에 이미지가 출력된다. 이를 스몰 아이콘이라 부른다.
알림은 스몰 아이콘과 발생 시각, 제목, 내용 등으로 구성된다. 이러한 알림 정보를 Notification 객체에 설정해야 한다.
builder.setSmallIcon(android.R.drawable.ic_notification_overlay)
builder.setWhen(System.currentTimeMillis())
builder.setContentTitle("Content Title")
builder.setContentText("Content Massage")
여기까지 했다면 이제 NotificationManager 클래스의 notify() 함수를 이용해 알림을 띄운다.
알림 만들기
지금까지 살펴본 정보에서 더 추가해 알림을 띄우는 기능을 만들어보도록 하겠다.
class MainActivity : AppCompatActivity() {
override fun onCreate(savedInstanceState: Bundle?) {
super.onCreate(savedInstanceState)
val binding = ActivityMainBinding.inflate(layoutInflater)
setContentView(binding.root)
val permissionLauncher = registerForActivityResult(
ActivityResultContracts.RequestMultiplePermissions()
) {
if (it.all { permission -> permission.value == true }) {
noti()
} else {
Toast.makeText(this, "permission denied...", Toast.LENGTH_SHORT).show()
}
}
binding.notificationButton.setOnClickListener {
if(Build.VERSION.SDK_INT >= Build.VERSION_CODES.TIRAMISU) {
if (ContextCompat.checkSelfPermission(
this,
"android.permission.POST_NOTIFICATIONS"
) == PackageManager.PERMISSION_GRANTED
) {
noti()
} else {
permissionLauncher.launch(
arrayOf(
"android.permission.POST_NOTIFICATIONS"
)
)
}
}else {
noti()
}
}
}
fun noti(){
val manager = getSystemService(NOTIFICATION_SERVICE) as NotificationManager
val builder: NotificationCompat.Builder
if(Build.VERSION.SDK_INT >= Build.VERSION_CODES.O){
val channelId="one-channel"
val channelName="My Channel One"
val channel = NotificationChannel(
channelId,
channelName,
NotificationManager.IMPORTANCE_DEFAULT
).apply {
description = "My Channel One Description"
setShowBadge(true)
val uri: Uri = RingtoneManager.getDefaultUri(RingtoneManager.TYPE_NOTIFICATION)
val audioAttributes = AudioAttributes.Builder()
.setContentType(AudioAttributes.CONTENT_TYPE_SONIFICATION)
.setUsage(AudioAttributes.USAGE_ALARM)
.build()
setSound(uri, audioAttributes)
enableVibration(true)
}
manager.createNotificationChannel(channel)
builder = NotificationCompat.Builder(this, channelId)
}else {
builder = NotificationCompat.Builder(this)
}
builder.run {
setSmallIcon(R.drawable.small)
setWhen(System.currentTimeMillis())
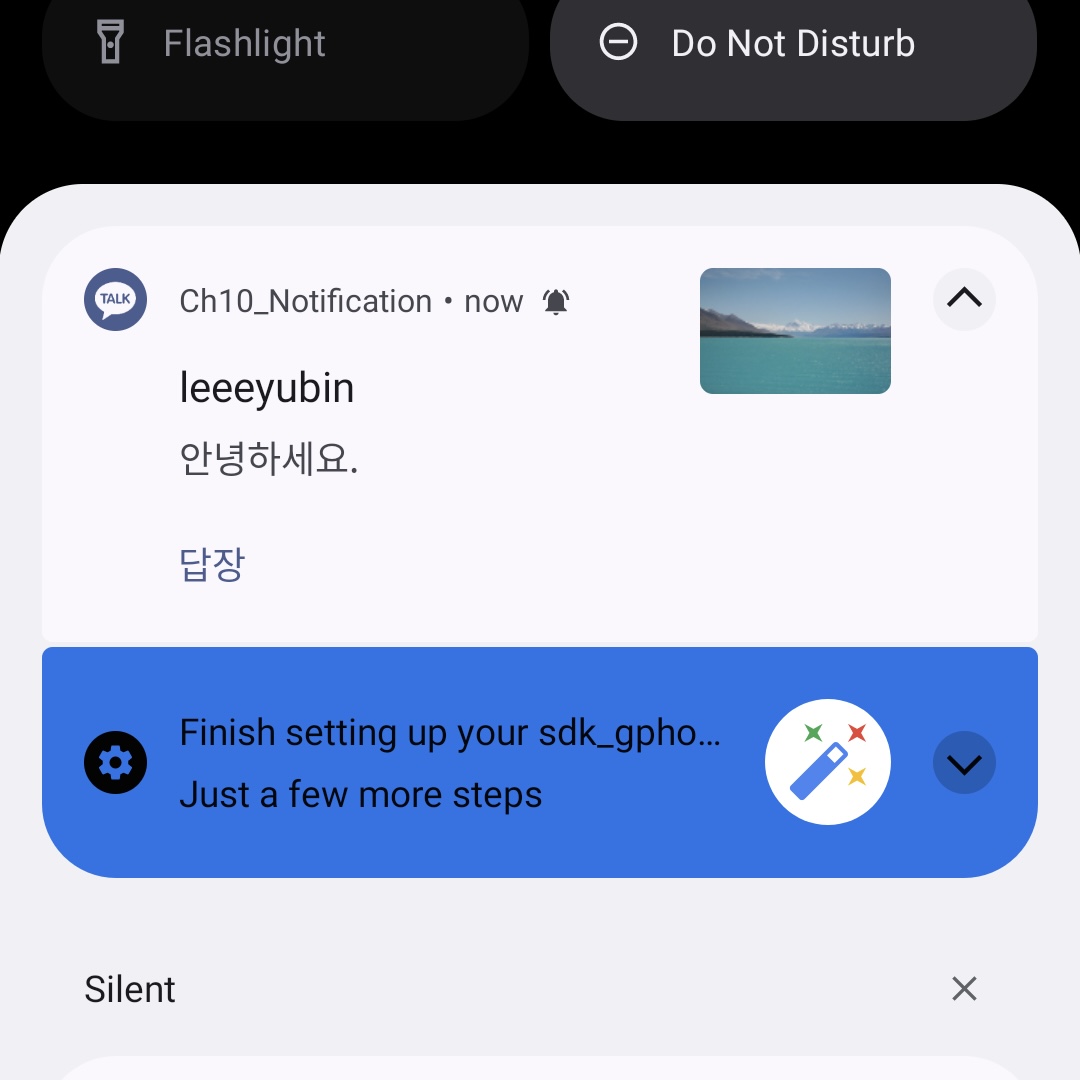
setContentTitle("leeeyubin")
setContentText("안녕하세요.")
setLargeIcon(BitmapFactory.decodeResource(resources, R.drawable.big))
}
val KEY_TEXT_REPLY = "key_text_reply"
var replyLabel = "답장"
var remoteInput: RemoteInput = RemoteInput.Builder(KEY_TEXT_REPLY).run {
setLabel(replyLabel)
build()
}
val replyIntent = Intent(this, ReplyReceiver::class.java)
val replyPendingIntent = PendingIntent.getBroadcast(
this, 30, replyIntent, PendingIntent.FLAG_MUTABLE
)
builder.addAction(
NotificationCompat.Action.Builder(
R.drawable.send,
"답장",
replyPendingIntent
).addRemoteInput(remoteInput).build()
)
manager.notify(11, builder.build())
}