
Jest + react-testing-library
Jest를 사용하면 단위 테스트를 할 수 있고, react-testing-library와 함께 사용하면 통합 테스트까지 할 수 있다.
설치 및 적용
jest, testing-library설치
yarn create next-app --typescriptTypeScript + Next.js 프로젝트를 CNA를 이용하여 생성하자.
yarn add jest jest-dom jest-environment-jsdom ts-jest babel-jest --devJest를 사용하기 위해 필요한 것들을 설치해준다.
node-mocks-http: Request와 Response에 대한 Mock 객체를 얻을 수 있다. 필요하다면 설치해주자.(여기서는 설치 안했다.)
yarn add @testing-library/user-event @testing-library/react-hooks @testing-library/react @testing-library/jest-dom @testing-library/dom --devtesting-library를 위한 모듈들도 설치하자.
설정
package.json 설정
    "test": "jest --watch --passWithNoTests",
    "test:ci": "jest --ci --passWithNoTests"
scripts부분에 test를 위한 명령어를 추가해주자. test:ci는 ci/cd에서 사용한다.
passWithNoTests는 파일을 찾을 수 없을 때 테스트 스위트가 통과하도록 허용하는 옵션이다. 자세한 옵션이 궁금하면 jest 공식문서를 확인해보자.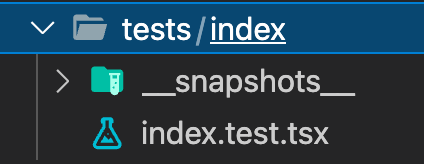
tsconfig 설정
//tsconfig.json

{
  "compilerOptions": {
    "baseUrl": "./src",
    "paths": {
      "@/*": ["./*"],
      "@pages/*": ["pages/*"],
      "@components/*": ["components/*"],
      "@utils/*": ["utils/*"],
      "@hooks/*": ["hooks/*"],
      "@types/*": ["types/*"]
    },
      //...
  },
  "include": ["next-env.d.ts", "**/*.ts", "**/*.tsx"],
  "exclude": ["node_modules"]
}
TypeScript를 사용할 경우 절대경로를 많이 이용하게 된다. config 파일에서 절대경로를 설정해주면, 나중에 생성할 jest.config.js에서 이것을 이용하여 설계하면 된다.
jest 설정
//jest.setup.js

import '@testing-library/jest-dom/extend-expect';
Jest의 모든 테스트 코드에서 공통적으로 사용되는 설정이나 Mock 정의에 사용한다. 지금은 @testing-library/jest-dom에 있는 custom matcher를 사용하기 위해 import해준다. 이 파일은 jest.config.js에서 불러올 것이다.
//jest.confing.js

const nextJest = require('next/jest');

const createJestConfig = nextJest({
  dir: './',
});
Next.js는 버전 12부터 Jest의 기본 설정을 제공하고 있다. 테스트 환경에서 next.config.js 및 .env 파일을 로드하려면 Next.js 앱의 경로를 제공해야 하므로 dir을 설정해주었다.
//jest.confing.js

const customJestConfig = {
  setupFilesAfterEnv: ['<rootDir>/jest.setup.js'],
  moduleNameMapper: {
    '^@/(.*)$': '<rootDir>/src/$1',
    '^@components/(.*)$': '<rootDir>/src/components/$1',
    '^@pages/(.*)$': '<rootDir>/src/pages/$1',
    '^@styles/(.*)$': '<rootDir>/src/styles/$1',
    '^@public/(.*)$': '<rootDir>/public/$1',
  },
  testEnvironment: 'jest-environment-jsdom',
};

module.exports = createJestConfig(customJestConfig);
이제 createJestConfig를 이용하여 customJestConfig를 생성하자. jest.setup.js파일도 불러오고, Path alias설정도 해준다.
src 디렉터리 안에서 사용되는 것은 components, pages 등이고, 밖에서 사용하는것은 public 디렉터리라는 의미이다.
간단한 예제
index 페이지
//pages/index.tsx

import type { NextPage } from 'next';

const Home: NextPage = () => <div>Home</div>;

export default Home;
Next.js 프로젝트의 index파일을 간단하게 구성하자. 브라우저에서 그냥 Home이라는 글자만 보이게 될 것이다.
테스트
//tests/index/index.test.ts

import { render, screen } from '@testing-library/react';

import Home from '@/pages/index';

describe('<Home />', () => {
  it('renders a heading', () => {
    const { container } = render(<Home />);

    const home = screen.getByText('Home');

    expect(home).toBeInTheDocument();
    expect(container).toMatchSnapshot();
  });
});
Home 페이지에 Home이라는 텍스트가 있는지 찾는 테스트이고, 성공하면 스냅샷 파일을 생성할 것이다.
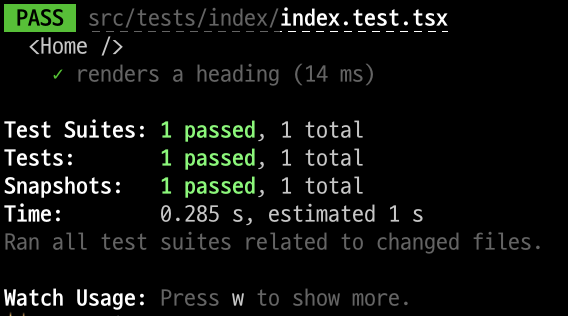
index.tsx 파일(Home page)에서 Home이라는 텍스트가 있었으므로 테스트가 통과했다.

exports[`<Home /> renders a heading 1`] = `
<div>
  <div>
    Home
  </div>
</div>
`;
스냅샷이라는 디렉터리가 생성된 것을 볼 수 있다. Snapshot test 란 UI가 바뀌지 않았다는 것을 증명하는 유용한 도구이다.
마무리
이렇게 Jest + react-testing-library를 설치하고 적용까지 해보았다. 테스트 도구들을 어떻게 사용하는지 다음 글에서 TDD로 TODO 프로젝트를 설계하며 알아볼 예정이다.

jest 설정에서
// jest.confing.js 오타 인 것 같습니다.