
SPACE_DEV_CLUB 프로젝트에서 Front Stack이 위와 같다. 그래서 먼저 간단한 프로젝트를 설계하며 해당 스택들을 사용해보기로 했다.
TypeScript 기반 Next App 생성
yarn global add create-next-app
create-next-app project-name
next 앱을 설치하고 typescript를 추가하려고 했는데 명령어가 동작하지 않았다.
그래서 yarn create next-app --typescript으로 typescript를 기반의 next앱을 설치했다. 설치가 완료되면 프로젝트 이름을 결정해주면 된다.
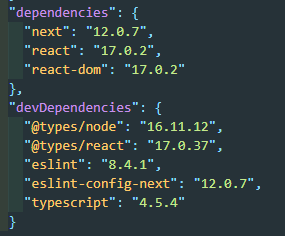
package.json을 보면 eslint까지 적용 되어있다.
styled-components 추가
yarn add styled-components @types/styled-components
yarn add -D babel-plugin-styled-components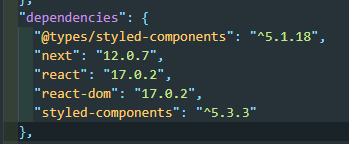
이제 styled-components도 추가 되었다.
- styled-components 테스트
// H1 생성
  const H1 = styled.h1`
    color: red;
  `;
// return 안에 h1태그 작업
<H1>
Welcome to <a href="https://nextjs.org">Next.js!</a>
</H1>
이제 styled-components를 사용할 수 있다.
Prettier
yarn add --dev --exact prettier
yarn prettier --write .
팀 프로젝트를 진행하므로 프리티어도 설치해주자.
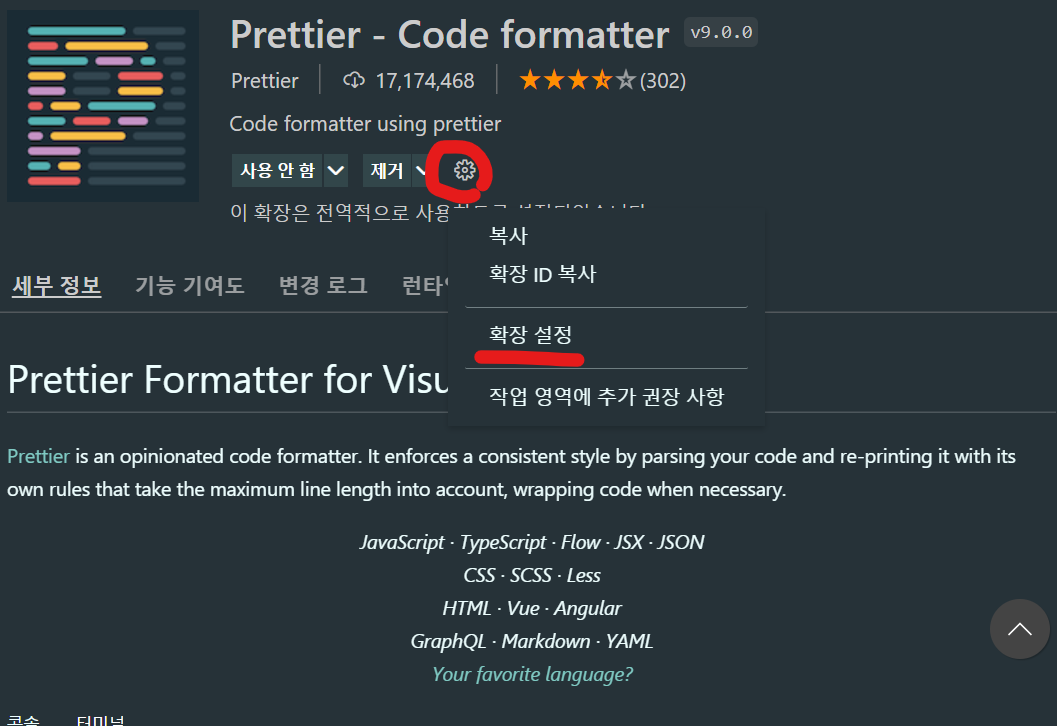
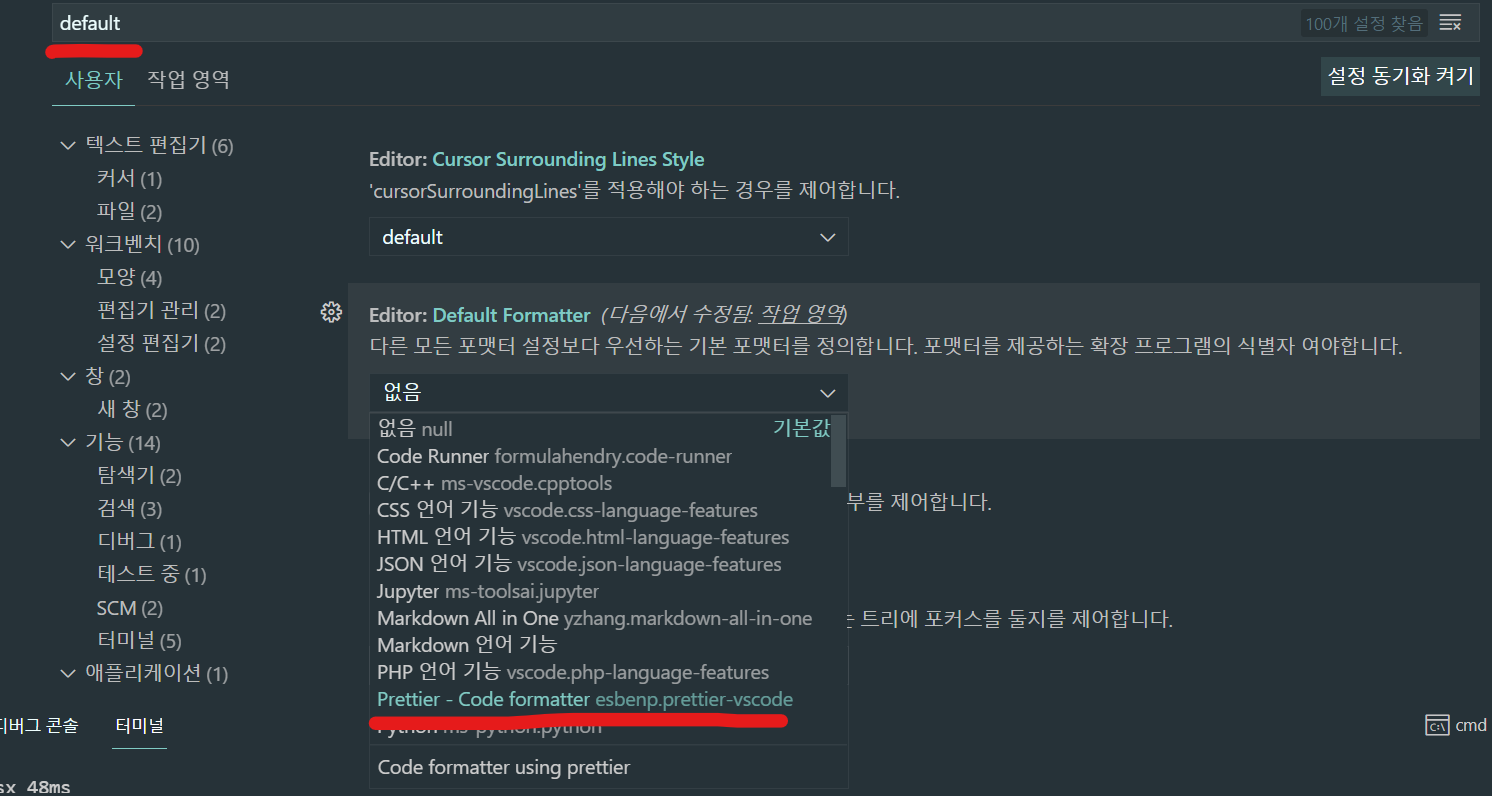
위의 사진처럼 VScode에서 설정들을 해주자.
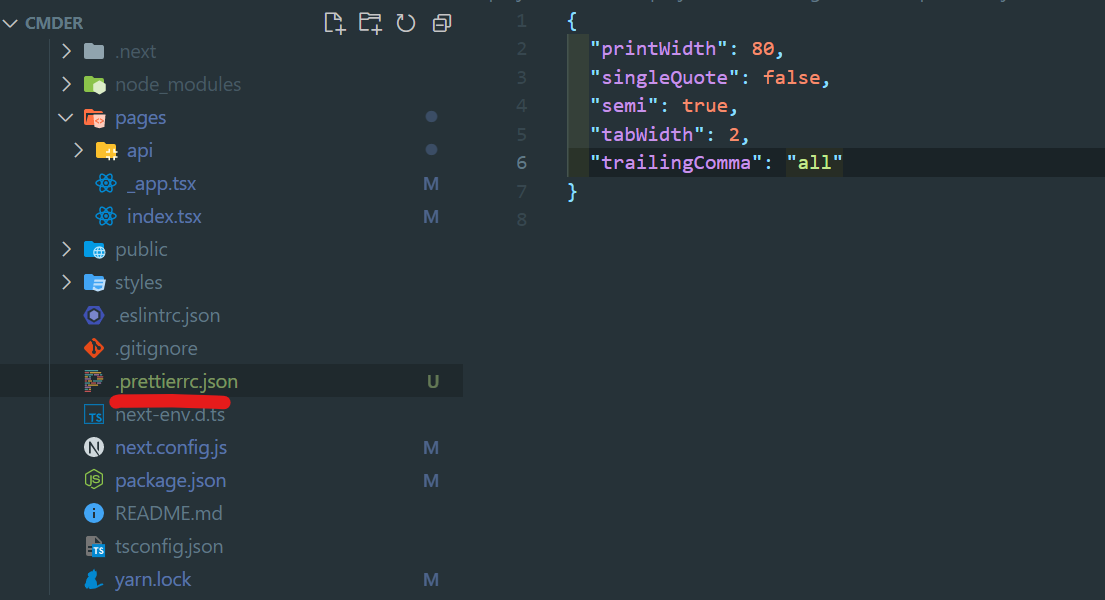
{
  "printWidth": 80,
  "singleQuote": false,
  "semi": true,
  "tabWidth": 2,
  "trailingComma": "all"
}
.prettierrc.json 파일에는 위의 코드를 붙여넣자.
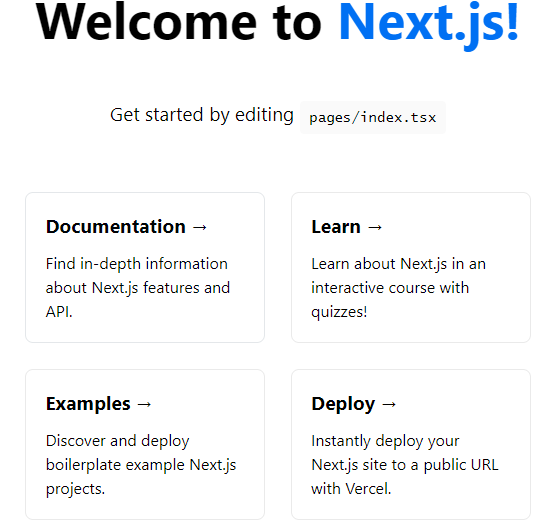
이제 yarn dev 해보면 정상적으로 동작하는것을 볼 수 있다.

함께 일하고 싶은 개발자가 되기 위해 달려나가고 있습니다.