
React 엘리먼트 개념
저번 시간에 React 엘리먼트에 대해서 알아보았다. React 앱의 가장 작은 단위이며, 일반 객체이므로 쉽게 생성할 수 있다. React DOM은 React 엘리먼트와 일치하도록 DOM을 업데이트한다.
<!-- HTML -->
<div id="root"></div>
우리가 자주 만난 예시이다. 이 안에 들어가는 모든 엘리먼트를 React DOM에서 관리한다. 그래서 이것을 root DOM 노드 라고 부른다. 원하는 만큼 많은 수의 독립된 root DOM 노드가 있을 수 있다.
const element = (
  <h1 className="greeting">
    Hello, world!
  </h1>
);

ReactDOM.render(
  <React.StrictMode>
    {element}
  </React.StrictMode>,
  document.getElementById('root')
);
React.StrictMode 에 대해서는 일단 넘어가자. React 엘리먼트를 root DOM 노드에 렌더링하기 위해서는 둘 다 ReactDOM.render() 해주면 된다.
-
렌더링 된 엘리먼트 업데이트
React 엘리먼트는 생성한 이후에 자식이나 속성을 변경할 수 없는 불변객체이다. 현재 배운것들로 할 수 있는 UI 업데이트 방법은 새 엘리먼트를 생성하고 ReactDOM.render() 로 전달하는 것이다.
function tick() {
  const element = (
    <div>
      <h1>Hello, Hyunho!</h1>
      <h2>It is {new Date().toLocaleTimeString()}.</h2>
    </div>
  );
  ReactDOM.render(element, document.getElementById('root'));
}

setInterval(tick, 1000); 
setInterval(함수, 1000) 으로 1초마다 ReactDOM.render를 호출하고 있는 모습이다.
- 변경된 부분만 업데이트
React DOM은 해당 엘리먼트와 그 자식 엘리먼트를 이전의 엘리먼트와 비교하고 DOM을 원하는 상태로 만든다. 필요한 경우에만 DOM을 업데이트하는 특성을 가지고 있다.
위의 코드가 1초마다 전체 UI를 다시 그리도록 설계되어 있지만 실제로는 내용이 변경되는 부분만 업데이트 되고있다.
Components와 Props
Component는 UI를 재사용 가능하게 여러 조각으로 나눈 것이다. props라는 임의의 입력을 받은 후, 화면에 어떻게 표시되는지를 기술하는 React 엘리먼트를 반환한다.
- 함수 컴포넌트와 클래스 컴포넌트
  function Welcome(props) {
    return <h1>Hello, {props.name}</h1>;
  }
컴포넌트를 JavaScript 함수로 작성했다. props라는 객체 인자를 받은 후 React 엘리먼트를 반환한다.
(나중에 함수형 컴포넌트에서도 상태 관리를 할 수 있는 useState, 렌더링 직후 작업을 설정하는 useEffect 등의 기능 등을 제공하는 Hooks가 등장하게 된다.)
class Welcome extends React.Component {
  render() {
    return <h1>Hello, {this.props.name}</h1>;
  }
}
ES6 class를 사용하여 컴포넌트를 정의했다. 위의 코드와 출력은 동일하지만 class component에는 여러가지 기능이 더 있다. 다음 포스팅에서 알아볼 예정이다.
- Component 렌더링
ReactDOM.render(
  <React.StrictMode>
    <Welcome name="hyunho"/>
  </React.StrictMode>,
  document.getElementById('root')
);
위에서 우리는 함수형과 class Component를 생성했었다. 이제 렌더링을 시켜보자. React는 사용자 정의 Component로 작성한 엘리먼트를 발견하면 JSX 속성과 자식을 해당 컴포넌트에 전달한다. 이 때, 단일 객체인 props를 전달하는 것이다. JSX 속성인name="hyunho" 이 전달되어 this.props.name으로 사용되고 있는 것이다.
<Welcome name="hyunho"/>엘리먼트로 ReactDOM.render() 호출- React가 {name: 'hyunho'}를 props로 하여 Welcome Component 호출
- Welcome Component는
<h1>Hello, hyunho</h1>반환 - React DOM은
<h1>Hello, hyunho</h1>엘리먼트와 일치하도록 DOM을 효율적으로 업데이트

속성 값을 잘 전달 받고 사용하여 Hello, hyunho가 출력된 것을 볼 수 있다.
- Component 합성
class App1 extends React.Component{
  render(){
    return(
      <div>
        <Welcome name="hyunho"/>
        <Welcome name="hyunho2"/>
        <Welcome name="hyunho3"/>
      </div>
    )
  }
}
Component는 자신의 출력에 다른 Component를 참조할 수 있다. 공통되는 Welcome Component를 3번 사용하고 싶어 App1 Component의 출력에 3개 넣었다.
ReactDOM.render(
  <React.StrictMode>
    <App1 />
  </React.StrictMode>,
  document.getElementById('root')
);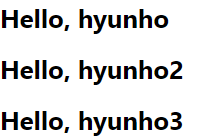
App1 Component를 렌더링 시켜서 원하는 결과를 얻을 수 있었다.
- Component 추출
function formatDate(date) {
return date.toLocaleDateString();
}
const comment = {
date: new Date(),
text: 'I hope you enjoy learning React!',
author: {
name: 'Hello Kitty',
avatarUrl: 'https://placekitten.com/g/64/64',
},
};
class Comment extends React.Component{
render(){
return(
<div className="Comment">
<div className="UserInfo">
<img
className="Avatar"
src={this.props.author.avatarUrl}
alt={this.props.author.name}
/>
<div className="UserInfo-name">
{this.props.author.name}
</div>
</div>
<div className="Comment-text">{this.props.text}</div>
<div className="Comment-date">
{formatDate(this.props.date)}
</div>
</div>
);
}
}
ReactDOM.render(
<React.StrictMode>
{/* <App /> */}
<Comment
date={comment.date}
text={comment.text}
author={comment.author}
/>
</React.StrictMode>,
document.getElementById('root')
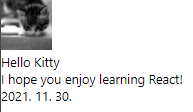
);Comment 는 예시 Component 이다. ReactDOM.render 할때 date, text, author을 Comment Component에 넘기고 있다. 현재 Component가 구성요소들이 모두 중첩 구조로 이루어져 있어 변경하기 어렵고, 재사용하기도 힘들다. Component를 추출하자.
class Avatar extends React.Component{
  render(){
    return(
      <img
      className="Avatar"
      src={this.props.user.avatarUrl}
      alt={this.props.user.name}
    />
    )
  }
}

class Comment extends React.Component{
  render(){
    return(
      <div className="Comment">
      <div className="UserInfo">
        <Avatar user={this.props.author} />
        <div className="UserInfo-name">
          {this.props.author.name}
        </div>
      </div>
      <div className="Comment-text">{this.props.text}</div>
      <div className="Comment-date">
        {formatDate(this.props.date)}
      </div>
    </div>
    );
  }
}
먼저 img 부분을 Avator Component로 추출했다. Avator는 자신이 Comment 내에서 렌더링 된다는 것을 알 필요가 없다. 그러므로 props의 이름을 author에서 더욱 일반화된 uswer로 변경해주었다.
props의 이름은 사용될 context가 아닌 컴포넌트 자체의 관점에서 짓자.
class Avatar extends React.Component{
  render(){
    return(
      <img
      className="Avatar"
      src={this.props.user.avatarUrl}
      alt={this.props.user.name}
    />
    )
  }
}

class UswerInfo extends React.Component{
  render(){
    return(
      <div className="UserInfo">
        <Avatar user={this.props.user} />
        <div className="UserInfo-name">
          {this.props.user.name}
        </div>
    </div>
    );
  }
}

class Comment extends React.Component{
  render(){
    return(
      <div className="Comment">
        <UswerInfo user={this.props.author}/>
        <div className="Comment-text">{this.props.text}</div>
        <div className="Comment-date">
          {formatDate(this.props.date)}
        </div>
    </div>
    );
  }
}
한번 더 UserInfo Component를 추출했다. Comment Component가 단순해진 것을 볼 수 있다. 각각의 Components는 재사용이 가능하다. 여러번 사용되거나 자체적으로 복잡한 UI들은 별도의 Components로 두자.
출력은 Components를 추출하기 전과 똑같다.
- props는 읽기 전용
함수 Component나 class Component에서 자체 props를 수정해서는 안된다. 입력값을 바꾸려 하지 않고 항상 동일한 입력값에 대해 동일한 결과를 반환한다.(순수함수)
모든 React 컴포넌트는 자신의 props를 다룰 때 반드시 순수 함수처럼 동작해야 한다.
애플리케이션의 UI는 동적이고 시간에따라 변하는데, state를 통해 위 규칙을 위반하지 않고 자신의 출력값을 변경할 수 있다.
style
JSX에 style을 추가하는 부분을 미리 찾아보았다.
class Comment extends React.Component{
  render(){
    const date_style = {
      fontSize: 32
    }
    return(
      <div className="Comment">
        <UswerInfo user={this.props.author}/>
        <div className="Comment-text">{this.props.text}</div>
        <div style={date_style} className="Comment-date">
          {formatDate(this.props.date)}
        </div>
    </div>
    );
  }
}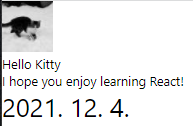
인라인 스타일은 객체 형태로 작성한다. - 로 구분되어 있는 속성들은 camelCase 형태로 작성해야한다. ex ) font-size -> fontSize
마무리
컴포넌트가 분리되어 있는 상태라면, 사용될 파일에서는 export default 이름;을 넣고 사용할 파일에서는 import 이름 from '이름'; 하면 된다. props.children의 사용이 궁금하면 벨로퍼트님의 글도 참고하자.
렌더링 된 엘리먼트 업데이트 부분에서 사용된 예제는 [State and Lifecycle]에서 다시 다룰 예정이다. 그리고 여기서 class component와 함수형 component의 기능들에 대해서 알아볼 예정이다.

리액트는 잘모르지만, 화이팅입니다!!