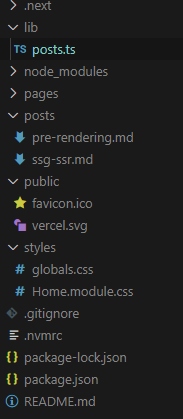
폴더 구조
front-matter
: 문서의 파일의 맨 앞에 위치하는 메타 데이터
- 파일의 가장 첫 부분에 작성해야 하며, 삼중 점선(---) 사이에 작성하면 된다.
---
title: "When to Use Static Generation v.s. Server-side Rendering"
date: "2020-01-02"
---
gray-matter
: 파일에서 fornt matter를 추출하여 js객체로 반환해주는 라이브러리
- 이 모듈을 이용해 front matter의 정보에 접근하고, 작성자, 작성일, 제목 등의 정보를 추출할 수 있다.
- 메타 데이터는 data 속성에, 본문의 내용은 content 속성에 담긴다.
{
	data : {
      date : "2020-01-02"
      id : "ssg-ssr"
      title : "When to Use Static Generation v.s. Server-side Rendering"
    }
}
위 내용을 인지한 후, 루트 경로에 posts라는 폴더를 만들고, 안에 마크다운 파일을 2개 생성했다.
posts - pre-rendering.md
---
title: "Two Forms of Pre-rendering"
date: "2020-01-01"
---

Next.js has two forms of pre-rendering: **Static Generation** and **Server-side Rendering**. The difference is in **when** it generates the HTML for a page.

- **Static Generation** is the pre-rendering method that generates the HTML at **build time**. The pre-rendered HTML is then _reused_ on each request.
- **Server-side Rendering** is the pre-rendering method that generates the HTML on **each request**.

Importantly, Next.js lets you **choose** which pre-rendering form to use for each page. You can create a "hybrid" Next.js app by using Static Generation for most pages and using Server-side Rendering for others.
posts - ssg-ssr.md
---
title: "When to Use Static Generation v.s. Server-side Rendering"
date: "2020-01-02"
---

We recommend using **Static Generation** (with and without data) whenever possible because your page can be built once and served by CDN, which makes it much faster than having a server render the page on every request.

You can use Static Generation for many types of pages, including:

- Marketing pages
- Blog posts
- E-commerce product listings
- Help and documentation

You should ask yourself: "Can I pre-render this page **ahead** of a user's request?" If the answer is yes, then you should choose Static Generation.

On the other hand, Static Generation is **not** a good idea if you cannot pre-render a page ahead of a user's request. Maybe your page shows frequently updated data, and the page content changes on every request.

In that case, you can use **Server-Side Rendering**. It will be slower, but the pre-rendered page will always be up-to-date. Or you can skip pre-rendering and use client-side JavaScript to populate data.
lib - posts.ts
마크다운 파일을 읽어와 정렬된 데이터를 반환하는 getSortedPostsData() 함수를 생성한다.
import fs from "fs"; //파일을 읽고 쓰는 기능을 제공하는 Node.js 파일 시스템 모듈
import path from "path"; // 파일 경로를 다루는 모듈
import matter from "gray-matter"; // 마크다운 파일의 front matter를 추출하는 함수


const postsDirectory = path.join(process.cwd(), "posts");

export function getSortedPostsData() {
  const fileNames = fs.readdirSync(postsDirectory);
  const allPostsData = fileNames.map((fileNames) => {
  const id = fileNames.replace(/\.md$/, "");
  const fullPath = path.join(postsDirectory, fileNames);
  const fileContents = fs.readFileSync(fullPath, "utf-8");
  const matterResult = matter(fileContents);

  return {
    id,
       ...(matterResult.data as { date: string; title: string }),
  };
});

  return allPostsData.sort((a, b) => {
    if (a.data < b.data) {
      return 1;
    } else {
      return -1;
    }
  });
}
process.cwd()
현재 작업 폴더를 반환하는 메서드
const postsDirectory = path.join(process.cwd(), "posts");
posts라는 경로를 postsDirectory 변수에 저장한다.
fs.readdirSync()
지정된 디렉터리에서 파일 및 디렉터리 목록을 동기적으로 읽어오는 역할
const fileNames = fs.readdirSync(postsDirectory);
postsDirectory의 목록의 값을 fileNames 변수에 저장한다.
예시 ['pre-rendering.md', 'ssg-ssr.md']
fs.readFileSync()
함수는 파일을 동기적으로 읽어와서 파일 내용을 문자열 또는 버퍼로 반환
const id = fileNames.replace(/\.md$/, "");
fileNames의 값에서 뒤 확장자명인 .md 제거한 후 id 변수에 저장한다.
const fullPath = path.join(postsDirectory, fileNames);
postsDirectory와 fileNames을 조합해 파일의 전체 경로를 생성한다.
const fileContents = fs.readFileSync(fullPath, "utf-8");
파일의 경로를 사용하여 내용을 동기적으로 읽어오고, 문자열 형태로 저장한다.
matter()
const matterResult = matter(fileContents);
fileContents안에 있는 frontmatter를 추출해 matterResult변수에 저장한다.
pages - index.tsx
사용하고자 하는 곳에서 getSortedPostsData 호출해 사용한다.
const Home = ({ allPostData }) => {
console.log(allPostData);
return (
<div>
<Head>
<title>John Ahn</title>
<link rel="icon" href="/favicon.ico" />
</Head>
<section className={homeStyles.headingMd}>
<p>[John Ahn Introduction]</p>
<p>(This is a website)</p>
</section>
<section className={`${homeStyles.headingMd} ${homeStyles.padding1px}`}>
<h2 className={homeStyles.headingLg}>Blog</h2>
<ul className={homeStyles.list}></ul>
{allPostData.map(({ id, title, date }) => (
<li className={homeStyles.list} key={id}>
<a>{title}</a>
<br />
<small className={homeStyles.lighyText}>{date}</small>
</li>
))}
</section>
</div>
);
};
export default Home;
//getSortedPostsData 호출해 사용한다.
export const getStaticProps: GetStaticProps = async () => {
const allPostData = getSortedPostsData();
return {
props: {
allPostData,
},
};
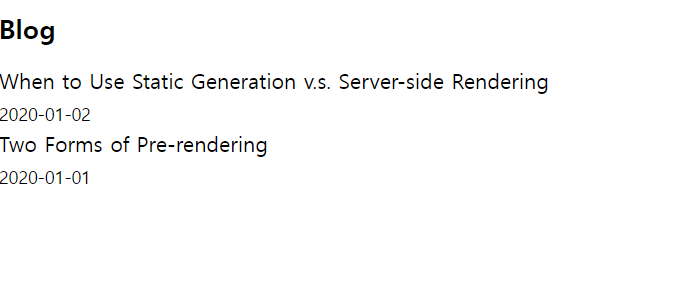
};결과 화면
allPostData의 title과 date 값을 가져와 출력할 수 있다.