Git 사이트 접속하기
아래의 링크로 Git 사이트 접속
1. Windows 설치 순서)
1) Download for Windows 클릭
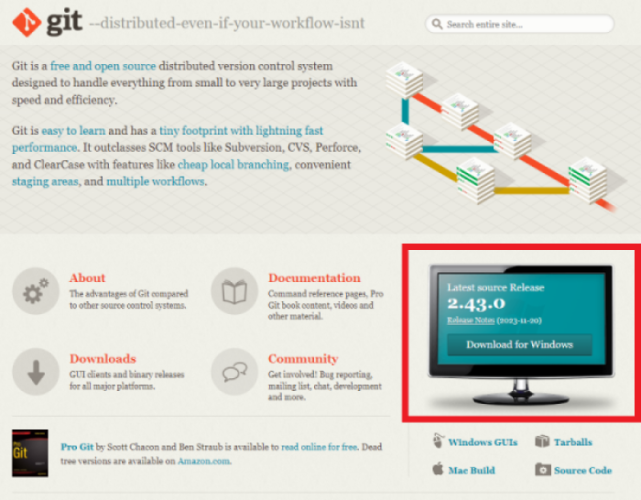
2) 64-bit Git for Windows Setup 클릭
-
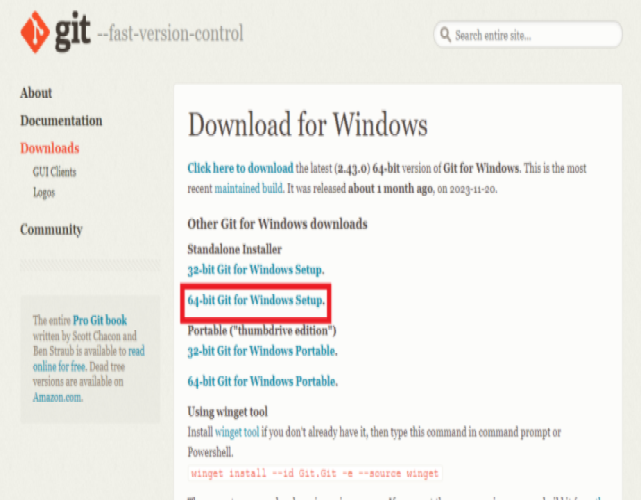
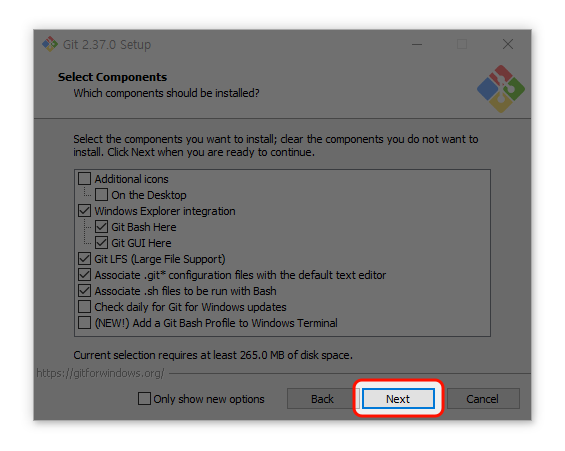
Next를 눌러 다음 단계로 이동합니다.
-
Next를 눌러 다음 단계로 이동합니다.
-
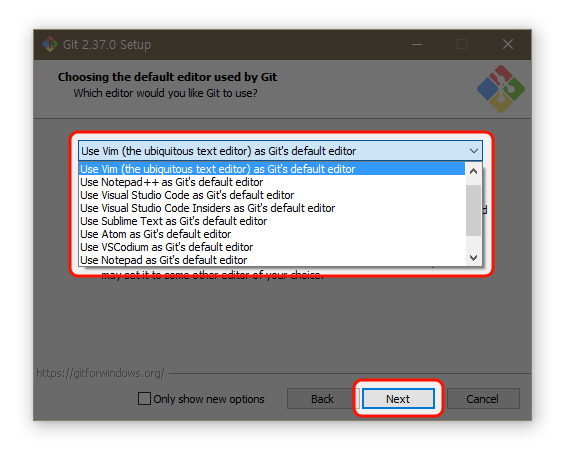
Use Vim (the ubiquitous text editor) as Git’s default editor를 선택하고, Next를 눌러 다음 단계로 이동합니다.
-
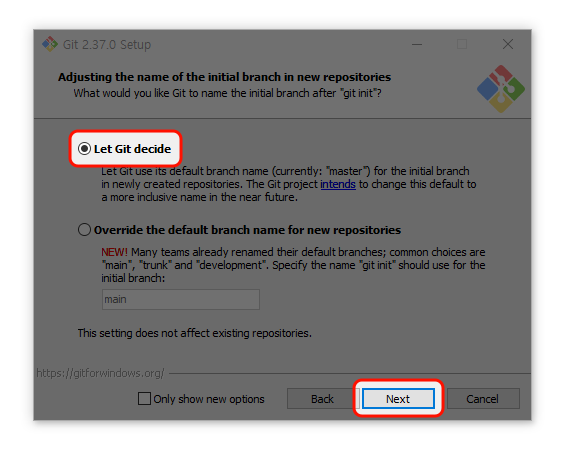
Let Git decide를 선택하고, Next를 눌러 다음 단계로 이동합니다.
-
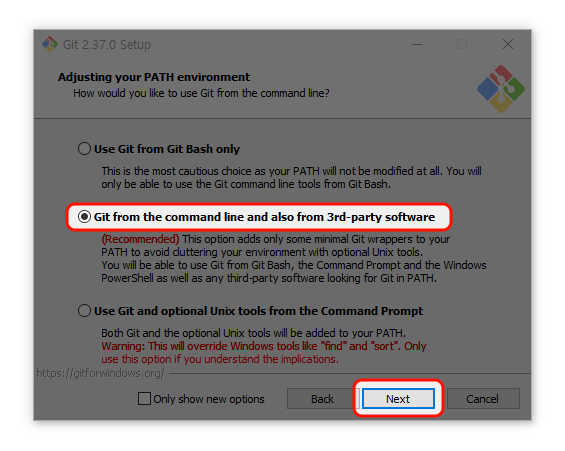
Git from the command line and also from 3rd-party software를 선택하고, Next를 눌러 다음 단계로 이동합니다.
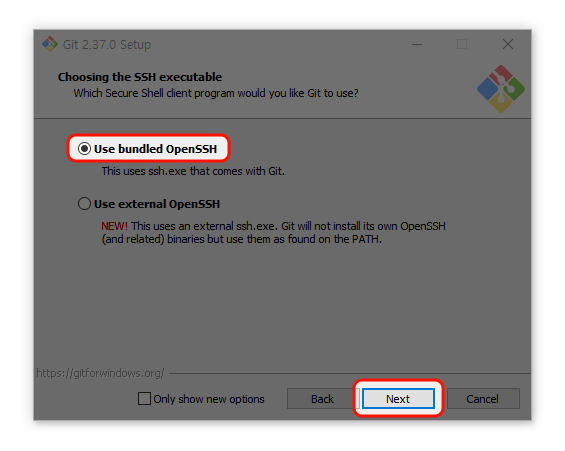
-
Use bundled OpenSSH를 선택하고, Next를 눌러 다음 단계로 이동합니다.
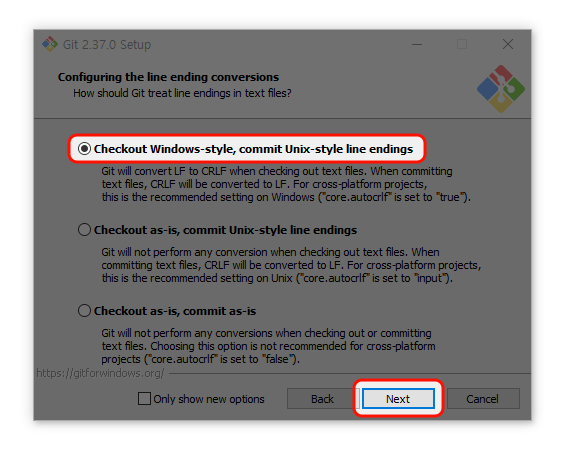
-
Checkout Windows-style, commit Unix-style line endings를 선택하고, Next를 눌러 다음 단계로 이동합니다.
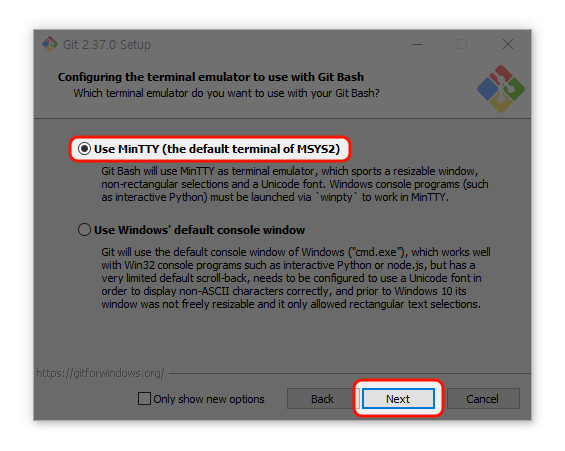
-
Use MinTTY (the default terminal of MSYS2)를 선택하고, Next를 눌러 다음 단계로 이동합니다.
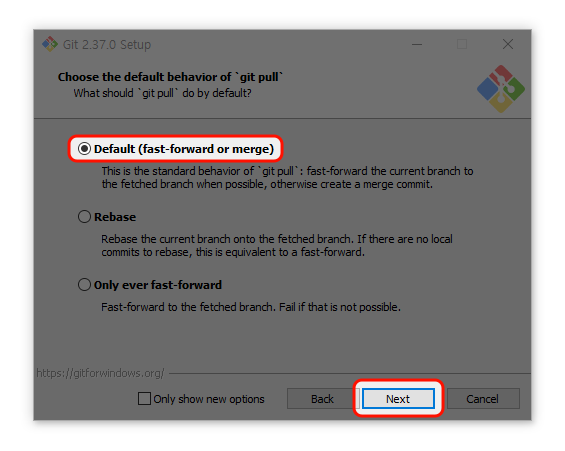
-
Default (fast-forward or merge)를 선택하고, Next를 눌러 다음 단계로 이동합니다.
-
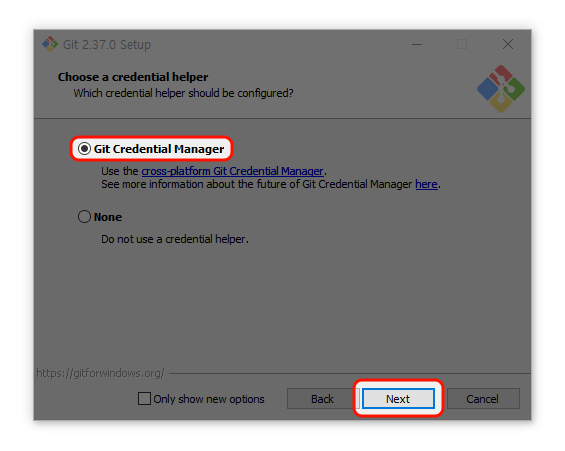
Git Credential Manager를 선택하고, Next를 눌러 다음 단계로 이동합니다.
-
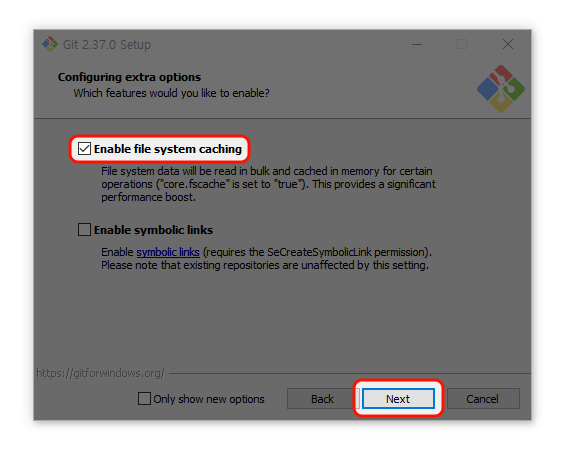
Enable file system caching을 선택하고, Next를 눌러 다음 단계로 이동합니다.
-
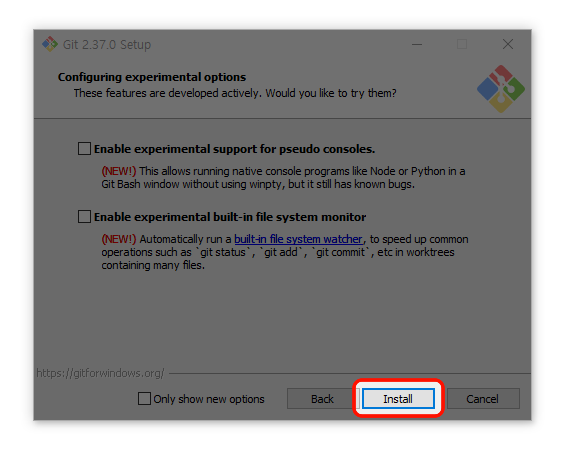
항목을 선택하지 않고, Install을 눌러 설치를 시작합니다.
-
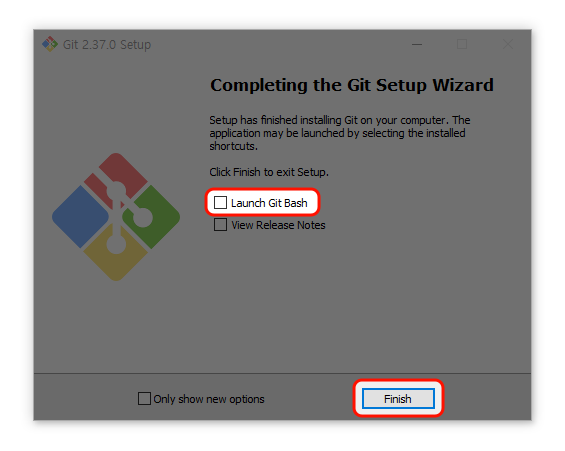
Launch Git Bash를 선택하고, Finish를 눌러 설치를 종료합니다.
2. Mac 설치 순서)
- Git 홈페이지 접속
https://git-scm.com/ 링크를 클릭하여 Git 홈페이지에 접속 합니다.
-
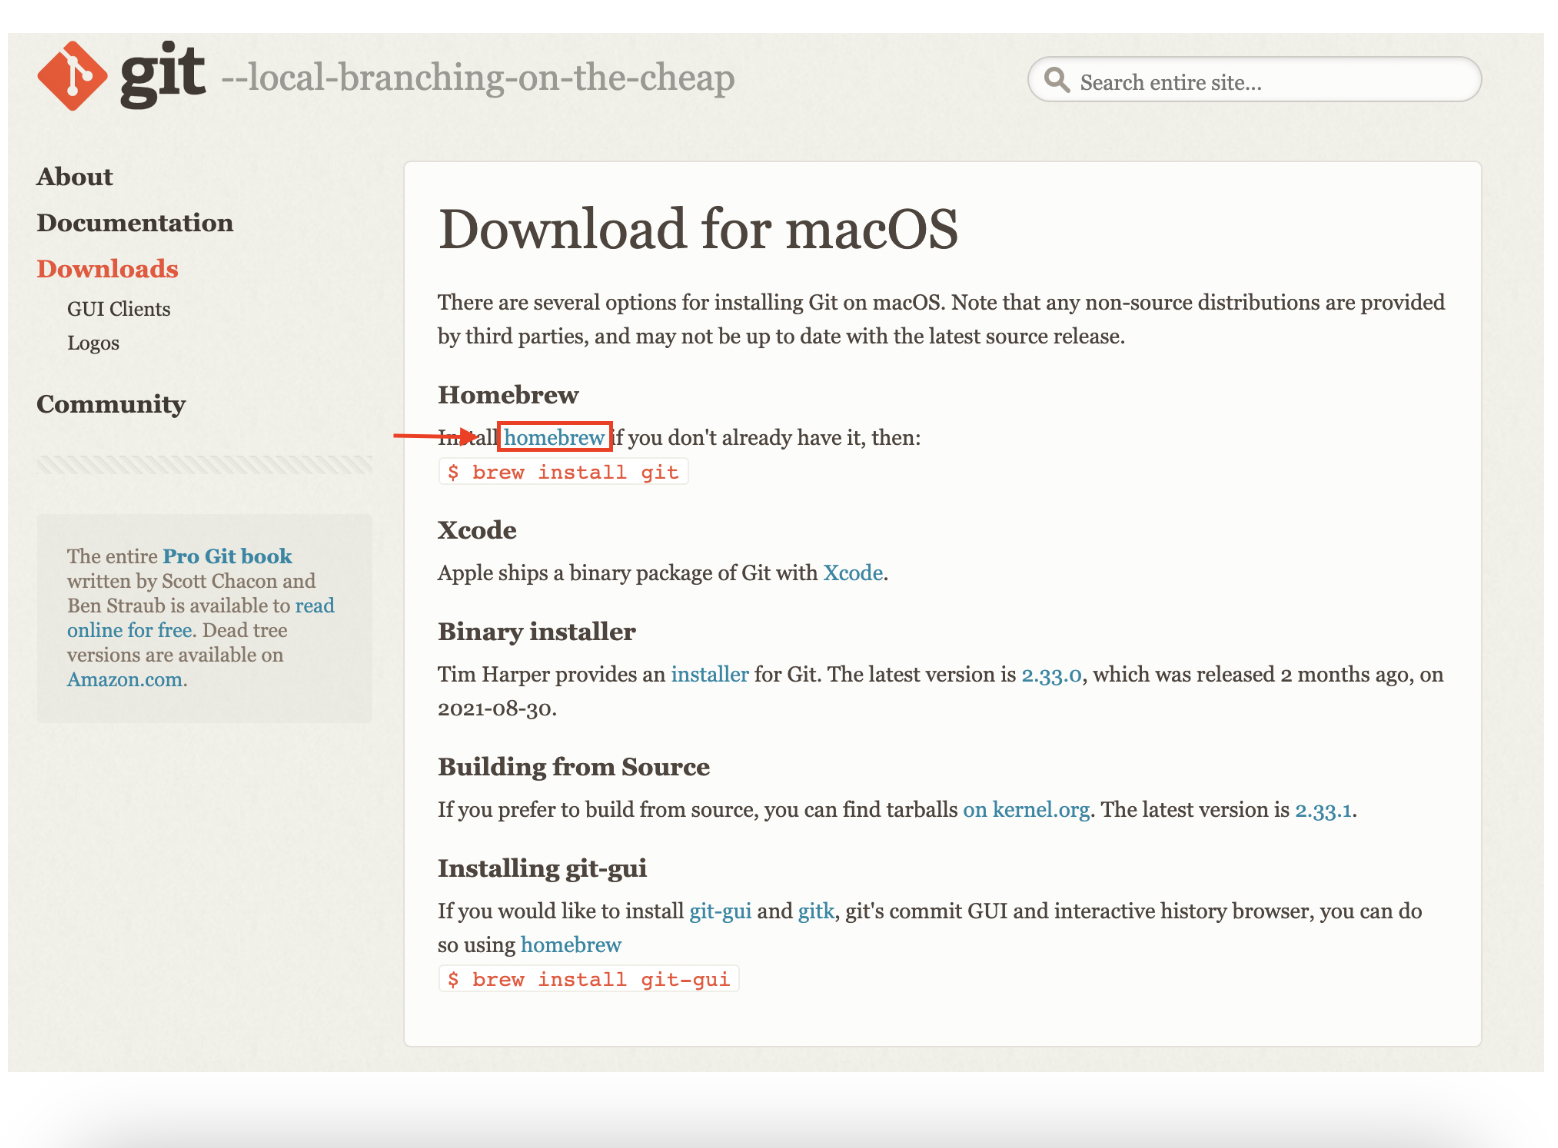
아래의 빨간색으로 표시한 Download for mac 클릭

-
아래의 빨간색으로 표시한 부분을 클릭하여 homebrew 홈페이지로 이동
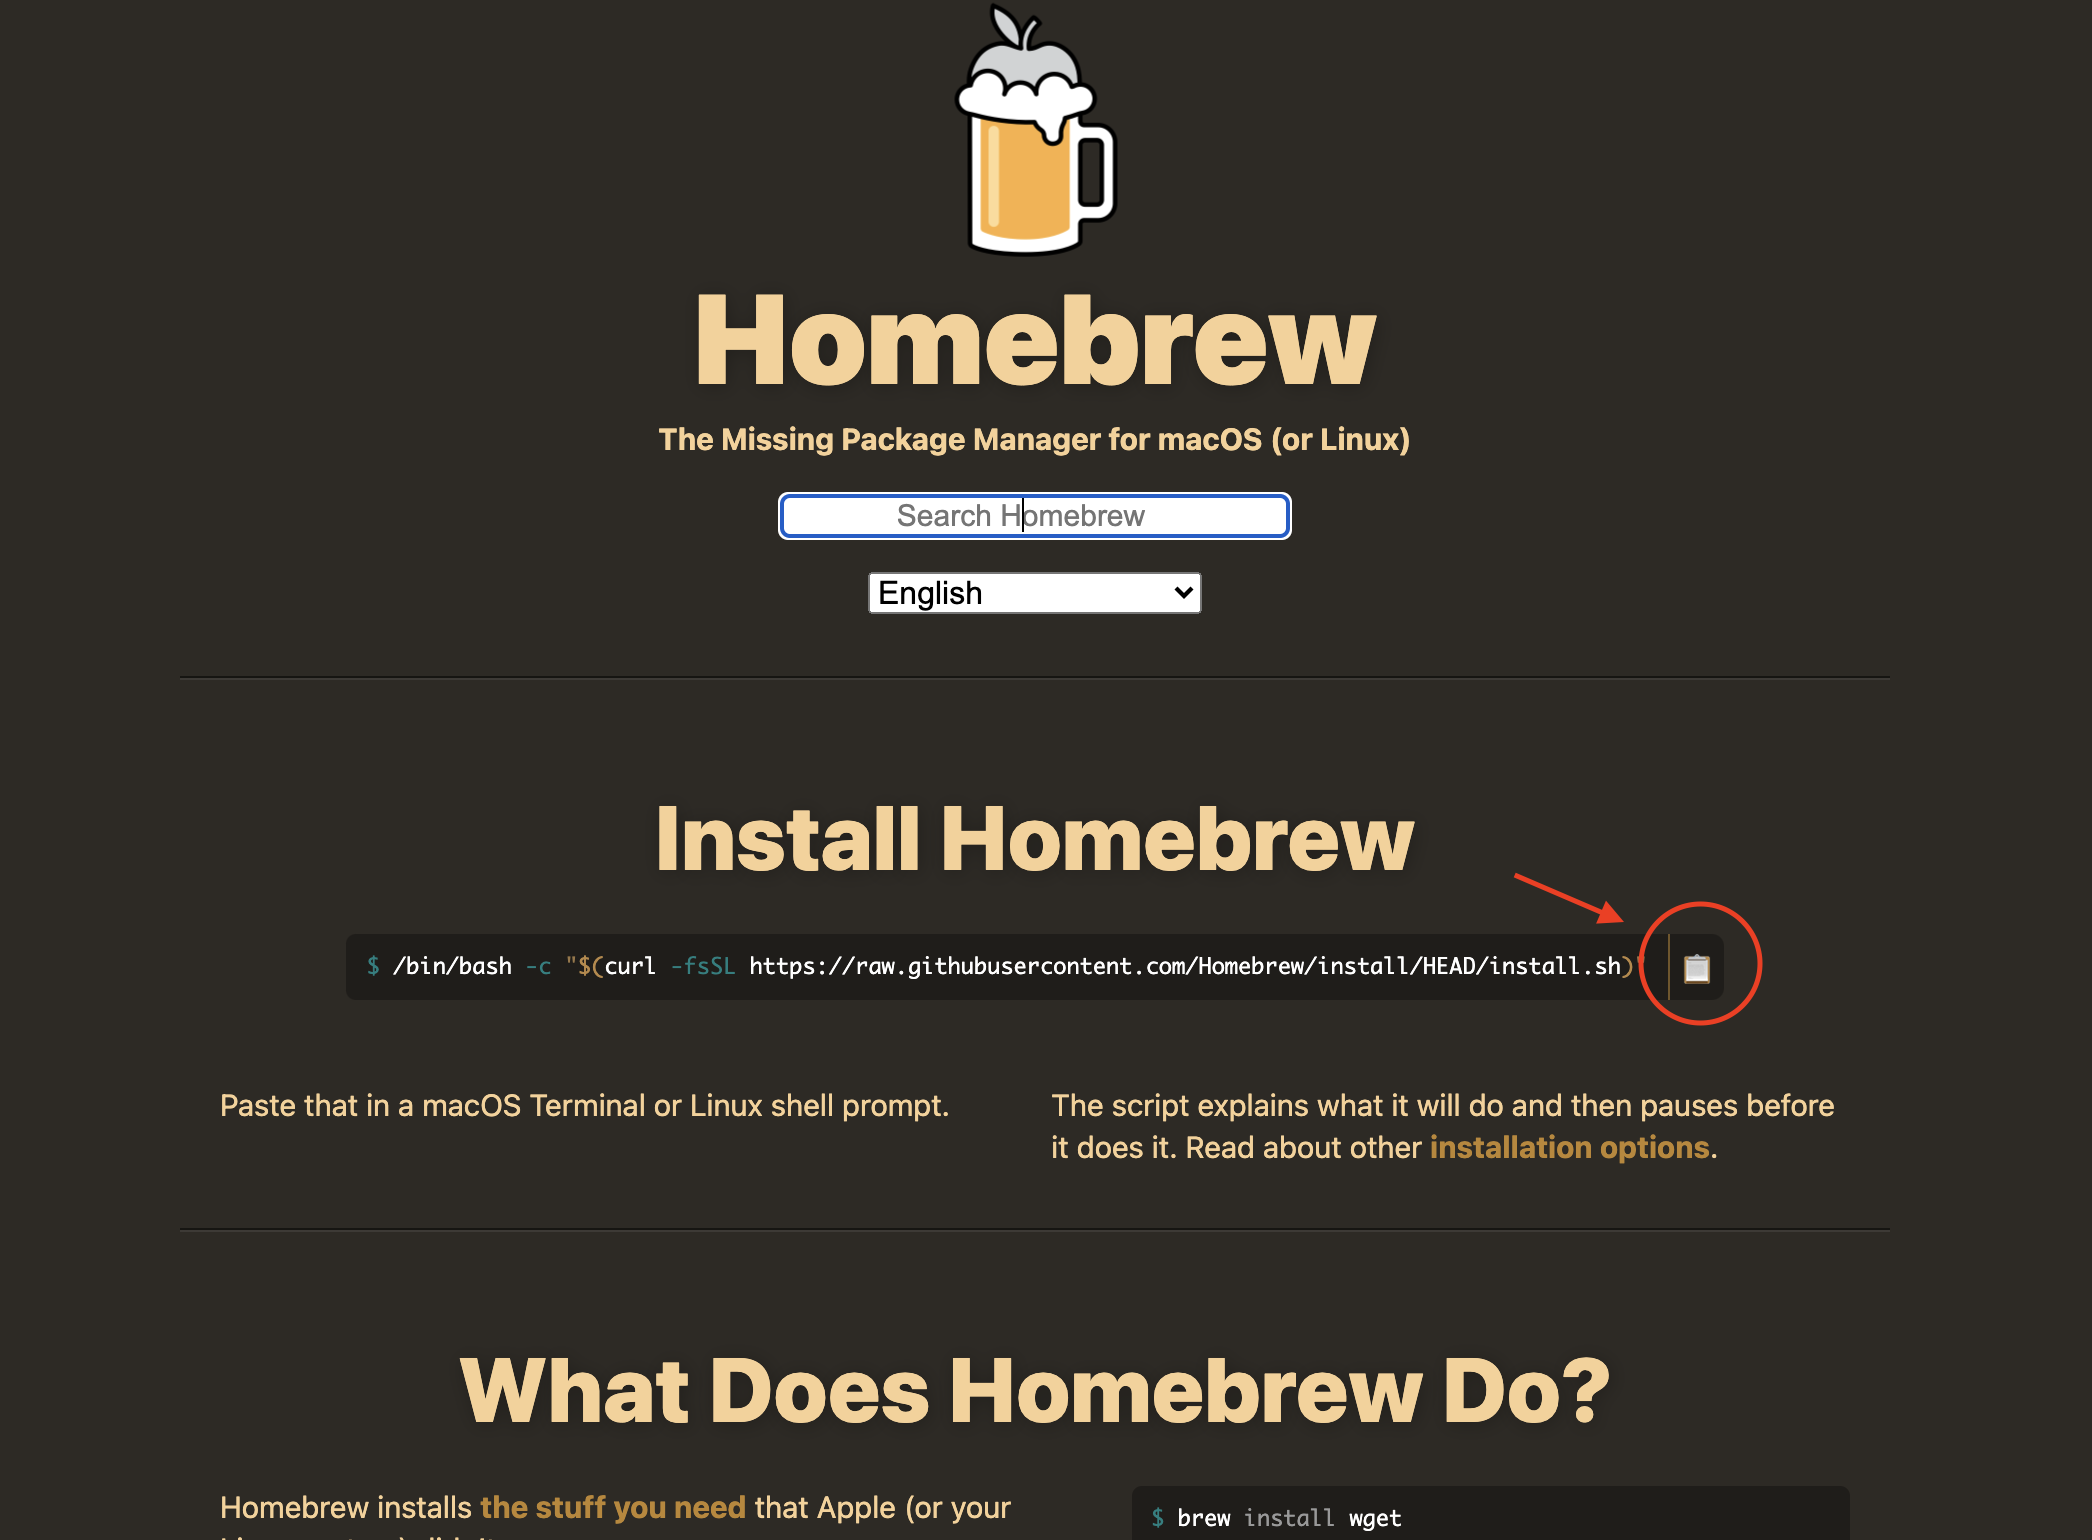
- 아래의 빨간색으로 표시한 부분을 클릭하여 링크 복사
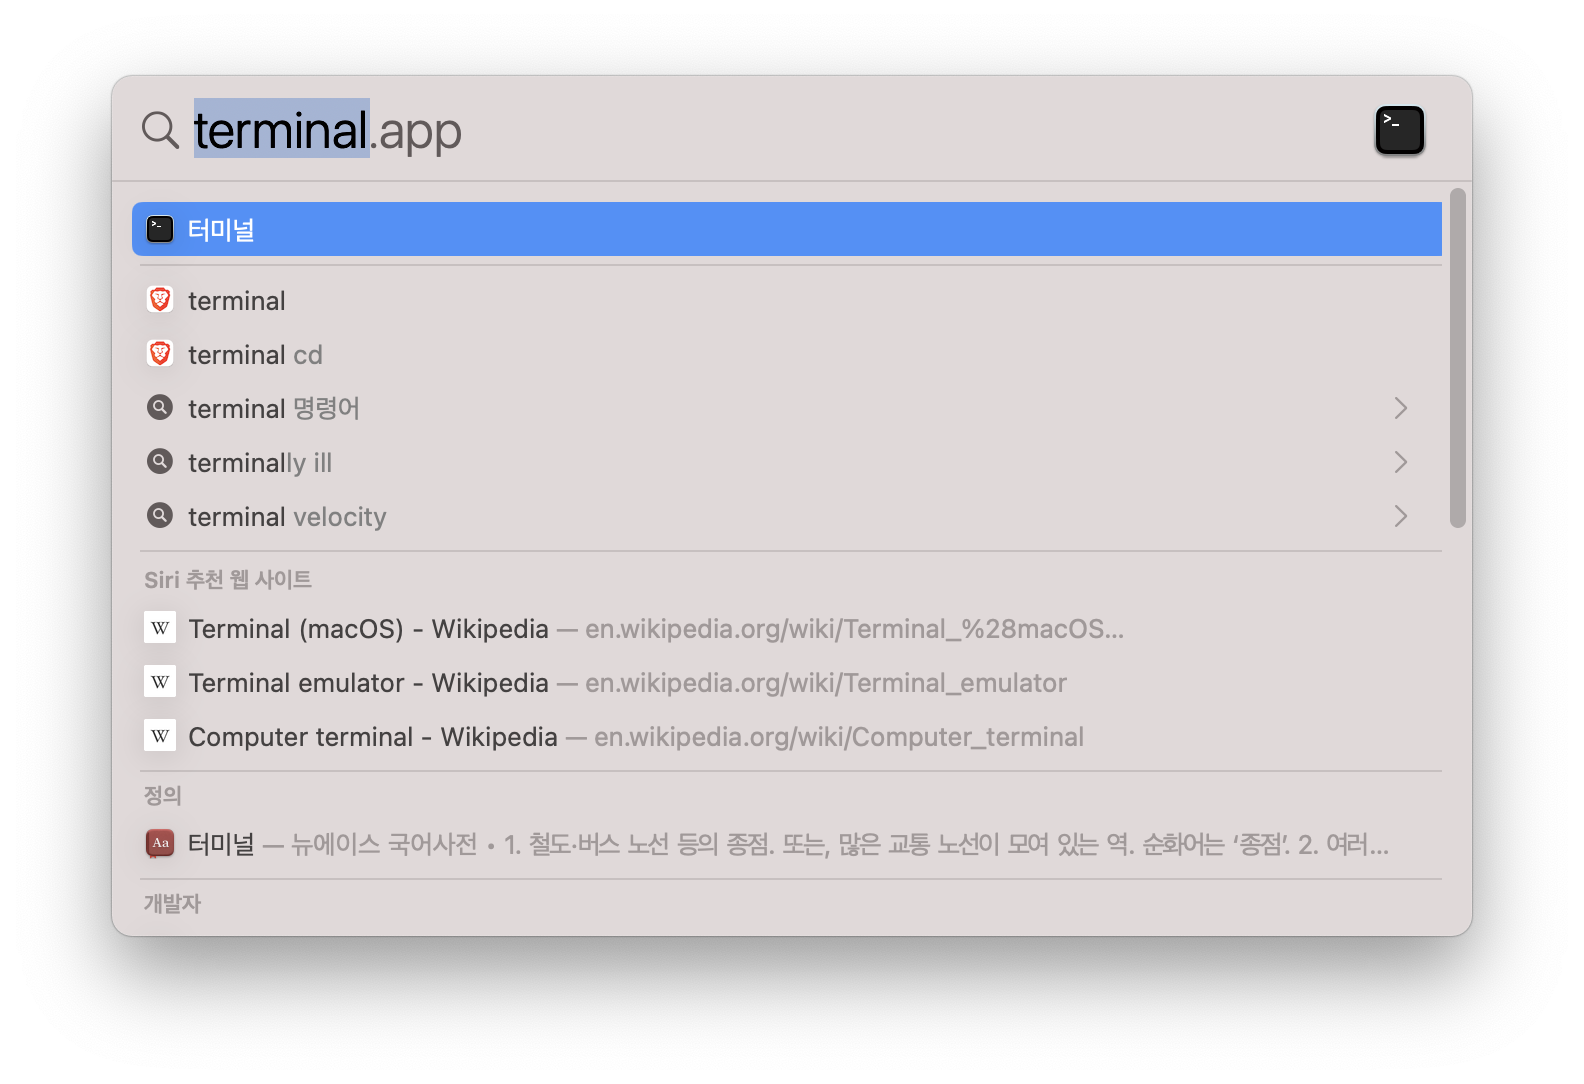
- mac의 terminal을 검색하여 열기
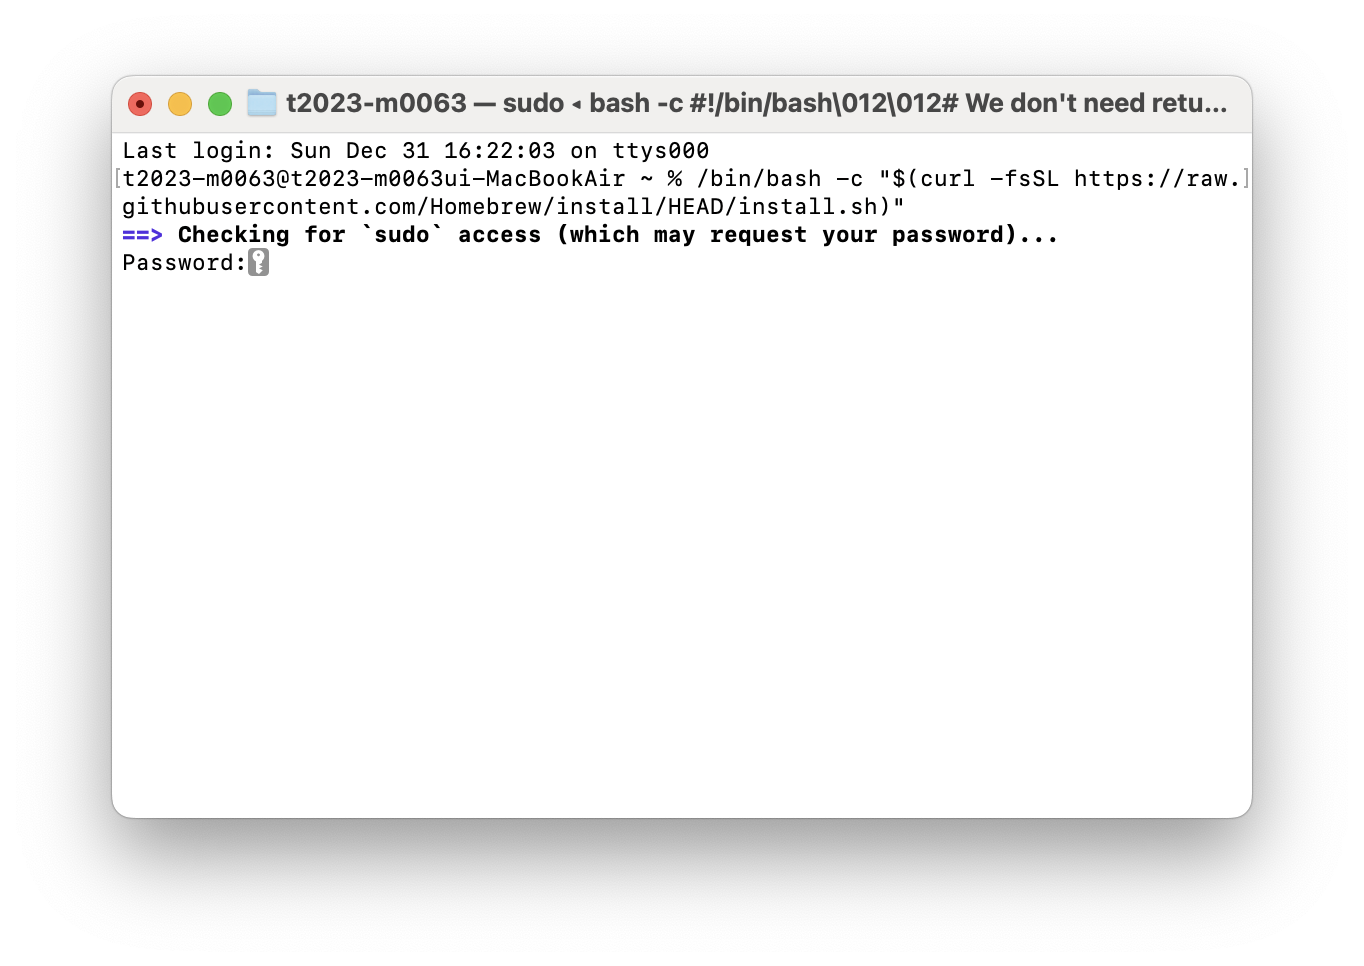
6-1. homebrew 홈페이지에서 복사한 링크를 terminal에 붙여넣기
6-2. password를 입력하기
- password는 자신의 mac 로그인 비밀번호를 입력하면 된다.
7-1. "ENTER" 키를 눌러 작업 계속 진행하기
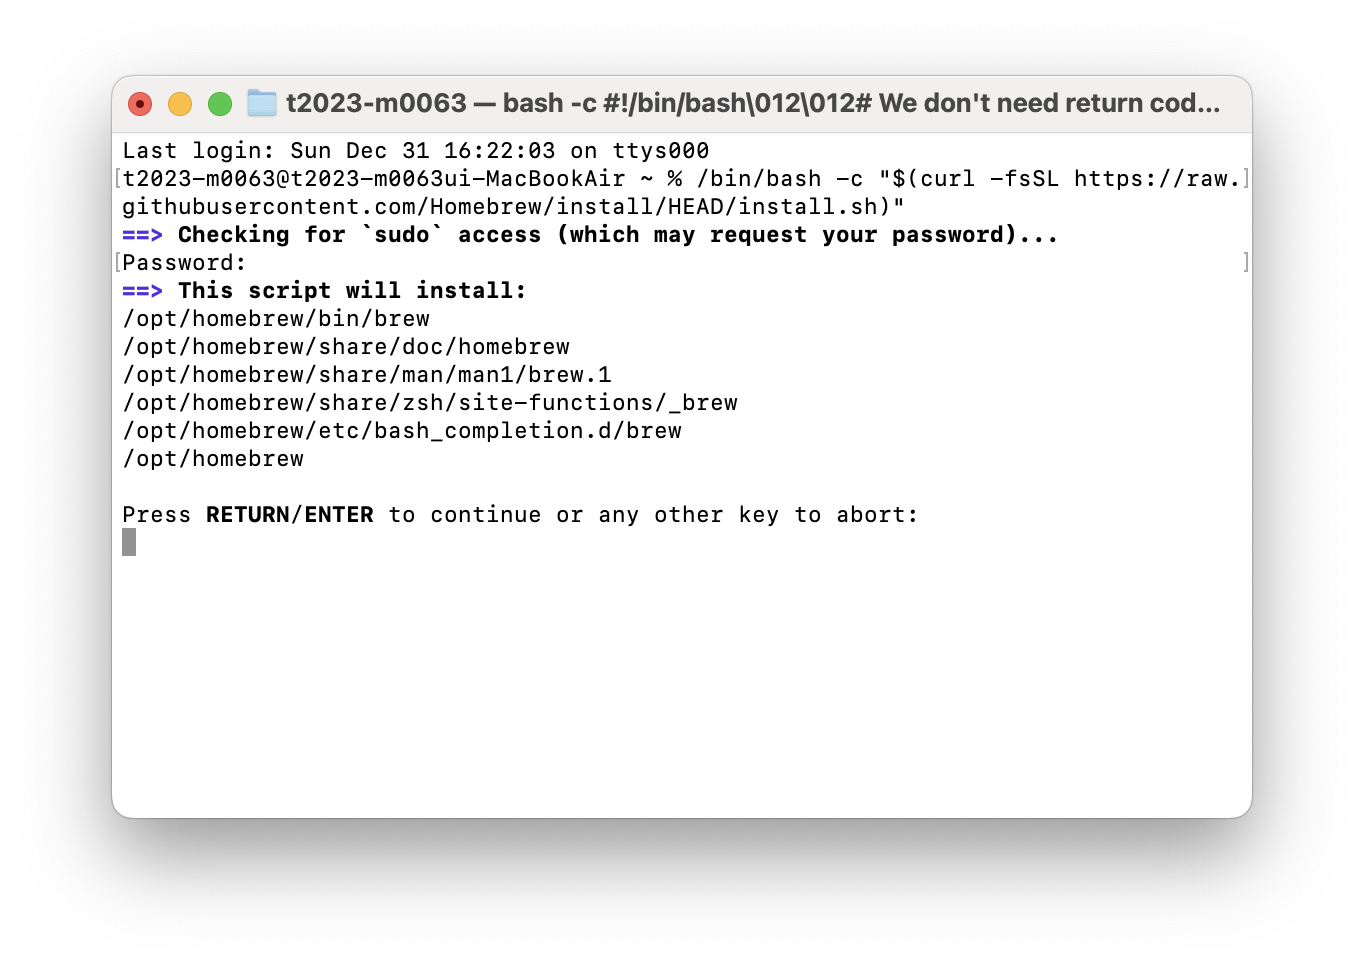
7-2 "Downloading Command Line Tools for Xcode" 문구가 나오면 정상 작동중이며, 이후 아래의 문구가 순서대로 작동된다.
- Downloaded Command Line Tools for Xcode
- Installing Command Line Tools for Xcode
- Done with Command Line Tools for Xcode Done.
7-3. 아래의 사진처럼 "zsh: command not found : brew" 표시 될 시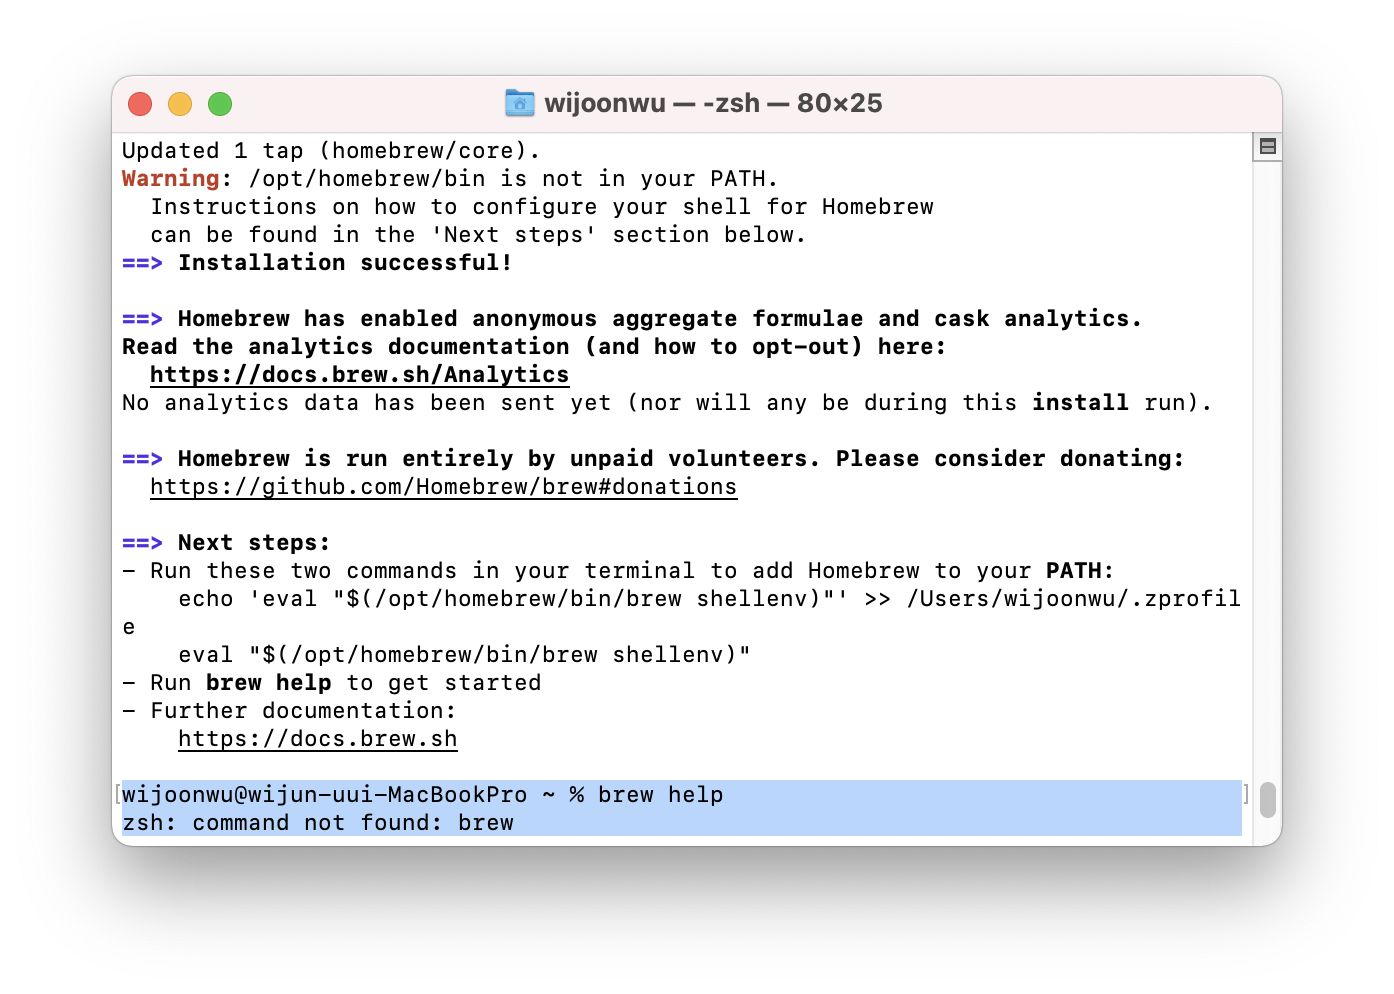 터미널 창에 아래의 코드를 입력하면 해결된다.
eval $(/opt/homebrew/bin/brew shellenv)8. 아래의 명령어로 git 설치하기
brew install git- 아래의 명령어를 입력하여 git 설치 여부 확인하기
git --version 
위의 사진처럼 git 버전이 나오면 정상 설치된 것이다.!
Window 및 Mac 공통 사항
전역으로 변경하지 않을 시
git add.git commit -m입력할 때마다 이메일을 입력해야한다.