
문제
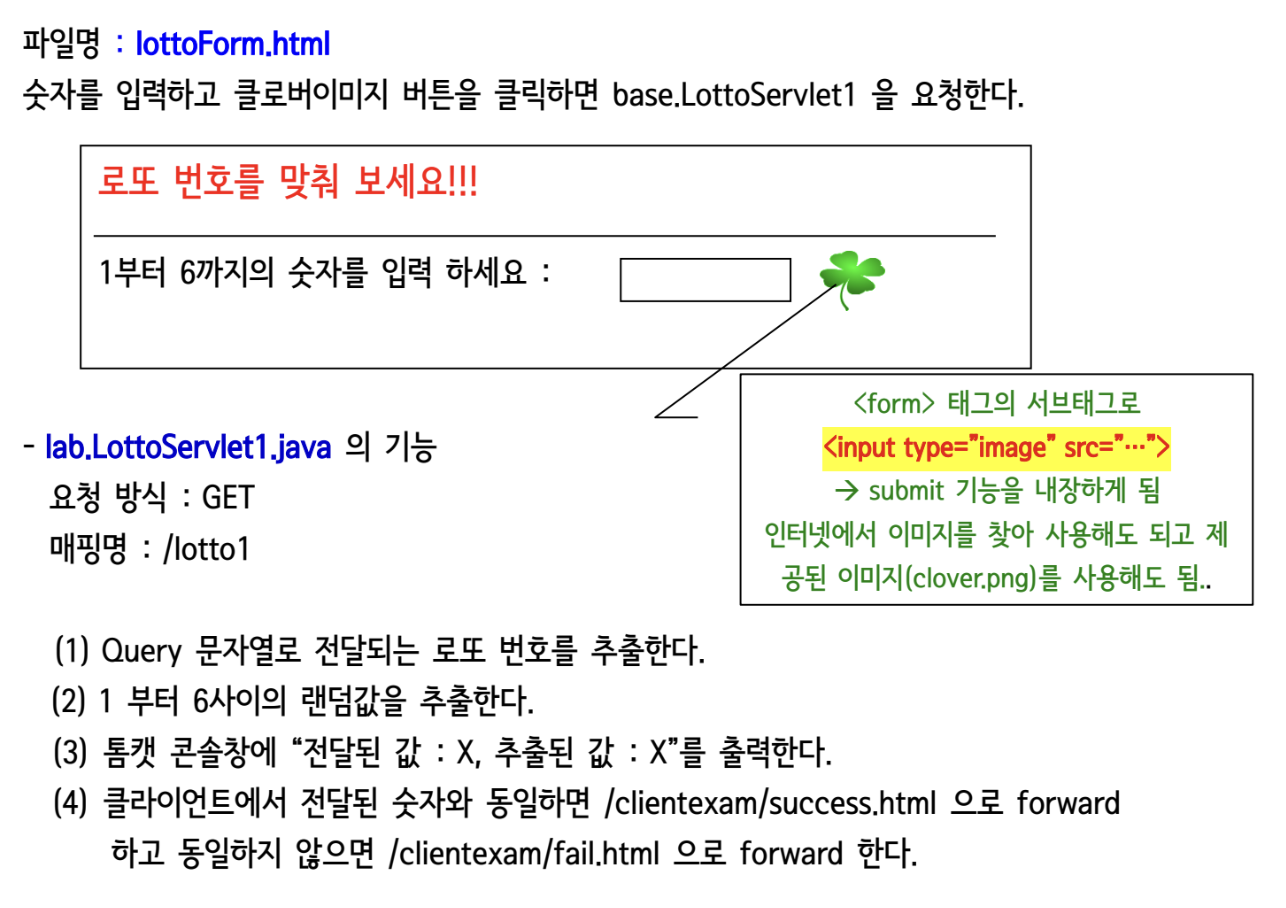
먼저 문제 원본은 아래와 같다.
문제에서 실제로 구현해야 하는 조건만 다시 정리하면 이렇다.
- 숫자를 입력하는
lottoForm.html을 만든다.- 숫자를 입력하고 클로버 이미지를 누르면
GET방식으로Servlet을 요청해야 한다.- 이번 실습에서는
LottoServletPractice1클래스와/lottoPractice1매핑으로 진행한다.- 전달된 숫자는
Query String으로 받아야 한다.- 서버에서는
1~6사이 랜덤값을 하나 뽑아야 한다.- 전달된 숫자와 랜덤값을 콘솔에 출력해야 한다.
- 두 값이 같으면
success.html로, 다르면fail.html로forward해야 한다.success.html과fail.html은 미리 만들어 두고 결과 페이지로 사용해야 한다.
문제 해석
이 문제는 단순히 숫자 입력 폼 하나 만드는 문제가 아니다.
브라우저에서 입력한 숫자가GET방식으로 서버에 전달되고, 서버가 그 값을 꺼낸 뒤 랜덤값과 비교해서 다른 결과 페이지로 보내는 전체 흐름을 구현하는 문제다.
이번 실습의 핵심은 세 부분이다.
먼저 숫자를 입력하고 요청을 보낼 수 있는lottoForm.html을 만들어야 한다.
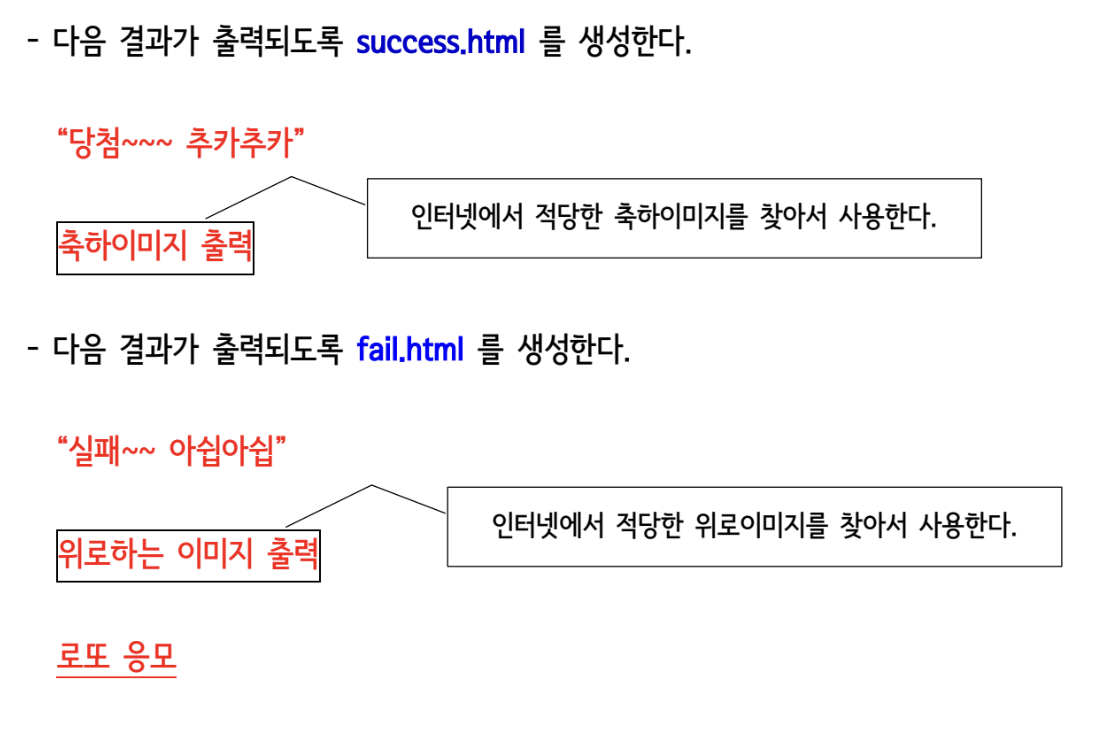
그다음 당첨 화면과 실패 화면이 될success.html,fail.html을 미리 준비해야 한다.
마지막으로Servlet에서 전달값을 꺼내고, 랜덤값을 만들고, 비교 결과에 따라forward를 처리해야 한다.
즉 이 실습의 흐름은 아래처럼 정리할 수 있다.
lottoForm.html작성 → 결과 페이지 준비 →GET요청 전달 → 숫자 추출 → 랜덤값 생성 → 콘솔 확인 → 결과 비교 →forward
풀이 순서
- 숫자를 입력하고 요청을 보낼
lottoForm.html을 작성한다.- 당첨 화면
success.html과 실패 화면fail.html을 만든다.LottoServletPractice1에서 전달값을 꺼내고 랜덤값과 비교한 뒤 결과 페이지로forward한다.
자세한 풀이
1. lottoForm.html 작성
이번 실습에서는 앞에서
Servlet생성 과정을 여러 번 반복했기 때문에, 먼저 폼 화면부터 정리했다.
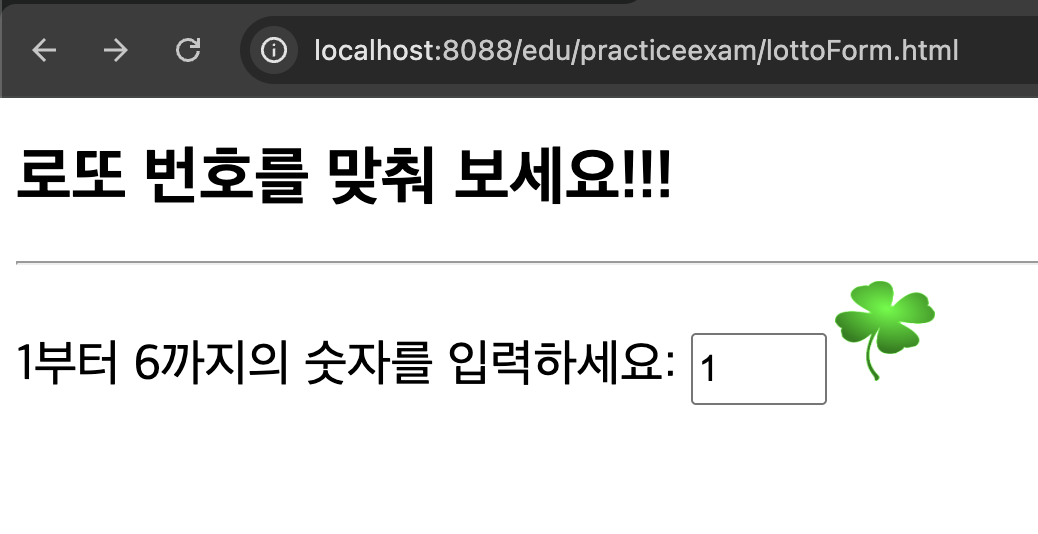
이 단계에서 중요한 것은 숫자를 입력받는 입력창, 서버로 값을 보낼name속성, 그리고GET요청 경로를 맞추는 것이다.
또 문제 조건처럼 클로버 이미지를 눌렀을 때 제출되도록input type="image"를 사용했다.<!doctype html> <html lang="en"> <head> <meta charset="UTF-8" /> <meta name="viewport" content="width=device-width, initial-scale=1.0" /> <title>Document</title> </head> <body> <h1>로또 번호를 맞춰 보세요!!!</h1> <hr /> <form method="get" action="/edu/lottoPractice1"> <label for="lottoNum" style="font-size: 25px">1부터 6까지의 숫자를 입력하세요: </label> <input type="number" id="lottoNum" name="lottoNum" min="1" max="6" step="1" required style="width: 60px; height: 30px; font-size: 18px" /> <input type="image" src="../images/clover.png" alt="로또 추첨" style="width: 50px; height: 50px" /> </form> </body> </html>이 코드에서 핵심은
method="get"과action="/edu/lottoPractice1"이다.
사용자가 숫자를 입력하고 클로버 이미지를 누르면 브라우저가/edu/lottoPractice1으로 요청을 보내게 된다.
그리고 입력한 숫자는name="lottoNum"이라는 이름으로 서버에 전달된다.데이터 흐름 예상
<form method="get" action="/edu/lottoPractice1">
  <!-- 1. 브라우저가 `/edu/lottoPractice1`로 `GET` 요청을 보냄 -->
  <input type="number" id="lottoNum" name="lottoNum" min="1" max="6" step="1" required />
  <!-- 2. 사용자가 입력한 숫자가 `lottoNum`이라는 이름으로 전달됨 -->
  <input type="image" src="../images/clover.png" alt="로또 추첨" />
  <!-- 3. 클로버 이미지를 누르면 제출 버튼처럼 동작함 -->
</form>
→ 사용자가
1~6사이 숫자를 입력한다.
→ 클로버 이미지를 누르면 브라우저가GET요청을 보낸다.
→ 주소에는?lottoNum=입력값형태의Query String이 붙는다.
→ 서버는 이 값을 나중에request.getParameter("lottoNum")로 꺼내게 된다.
2. success.html, fail.html 결과 페이지 준비
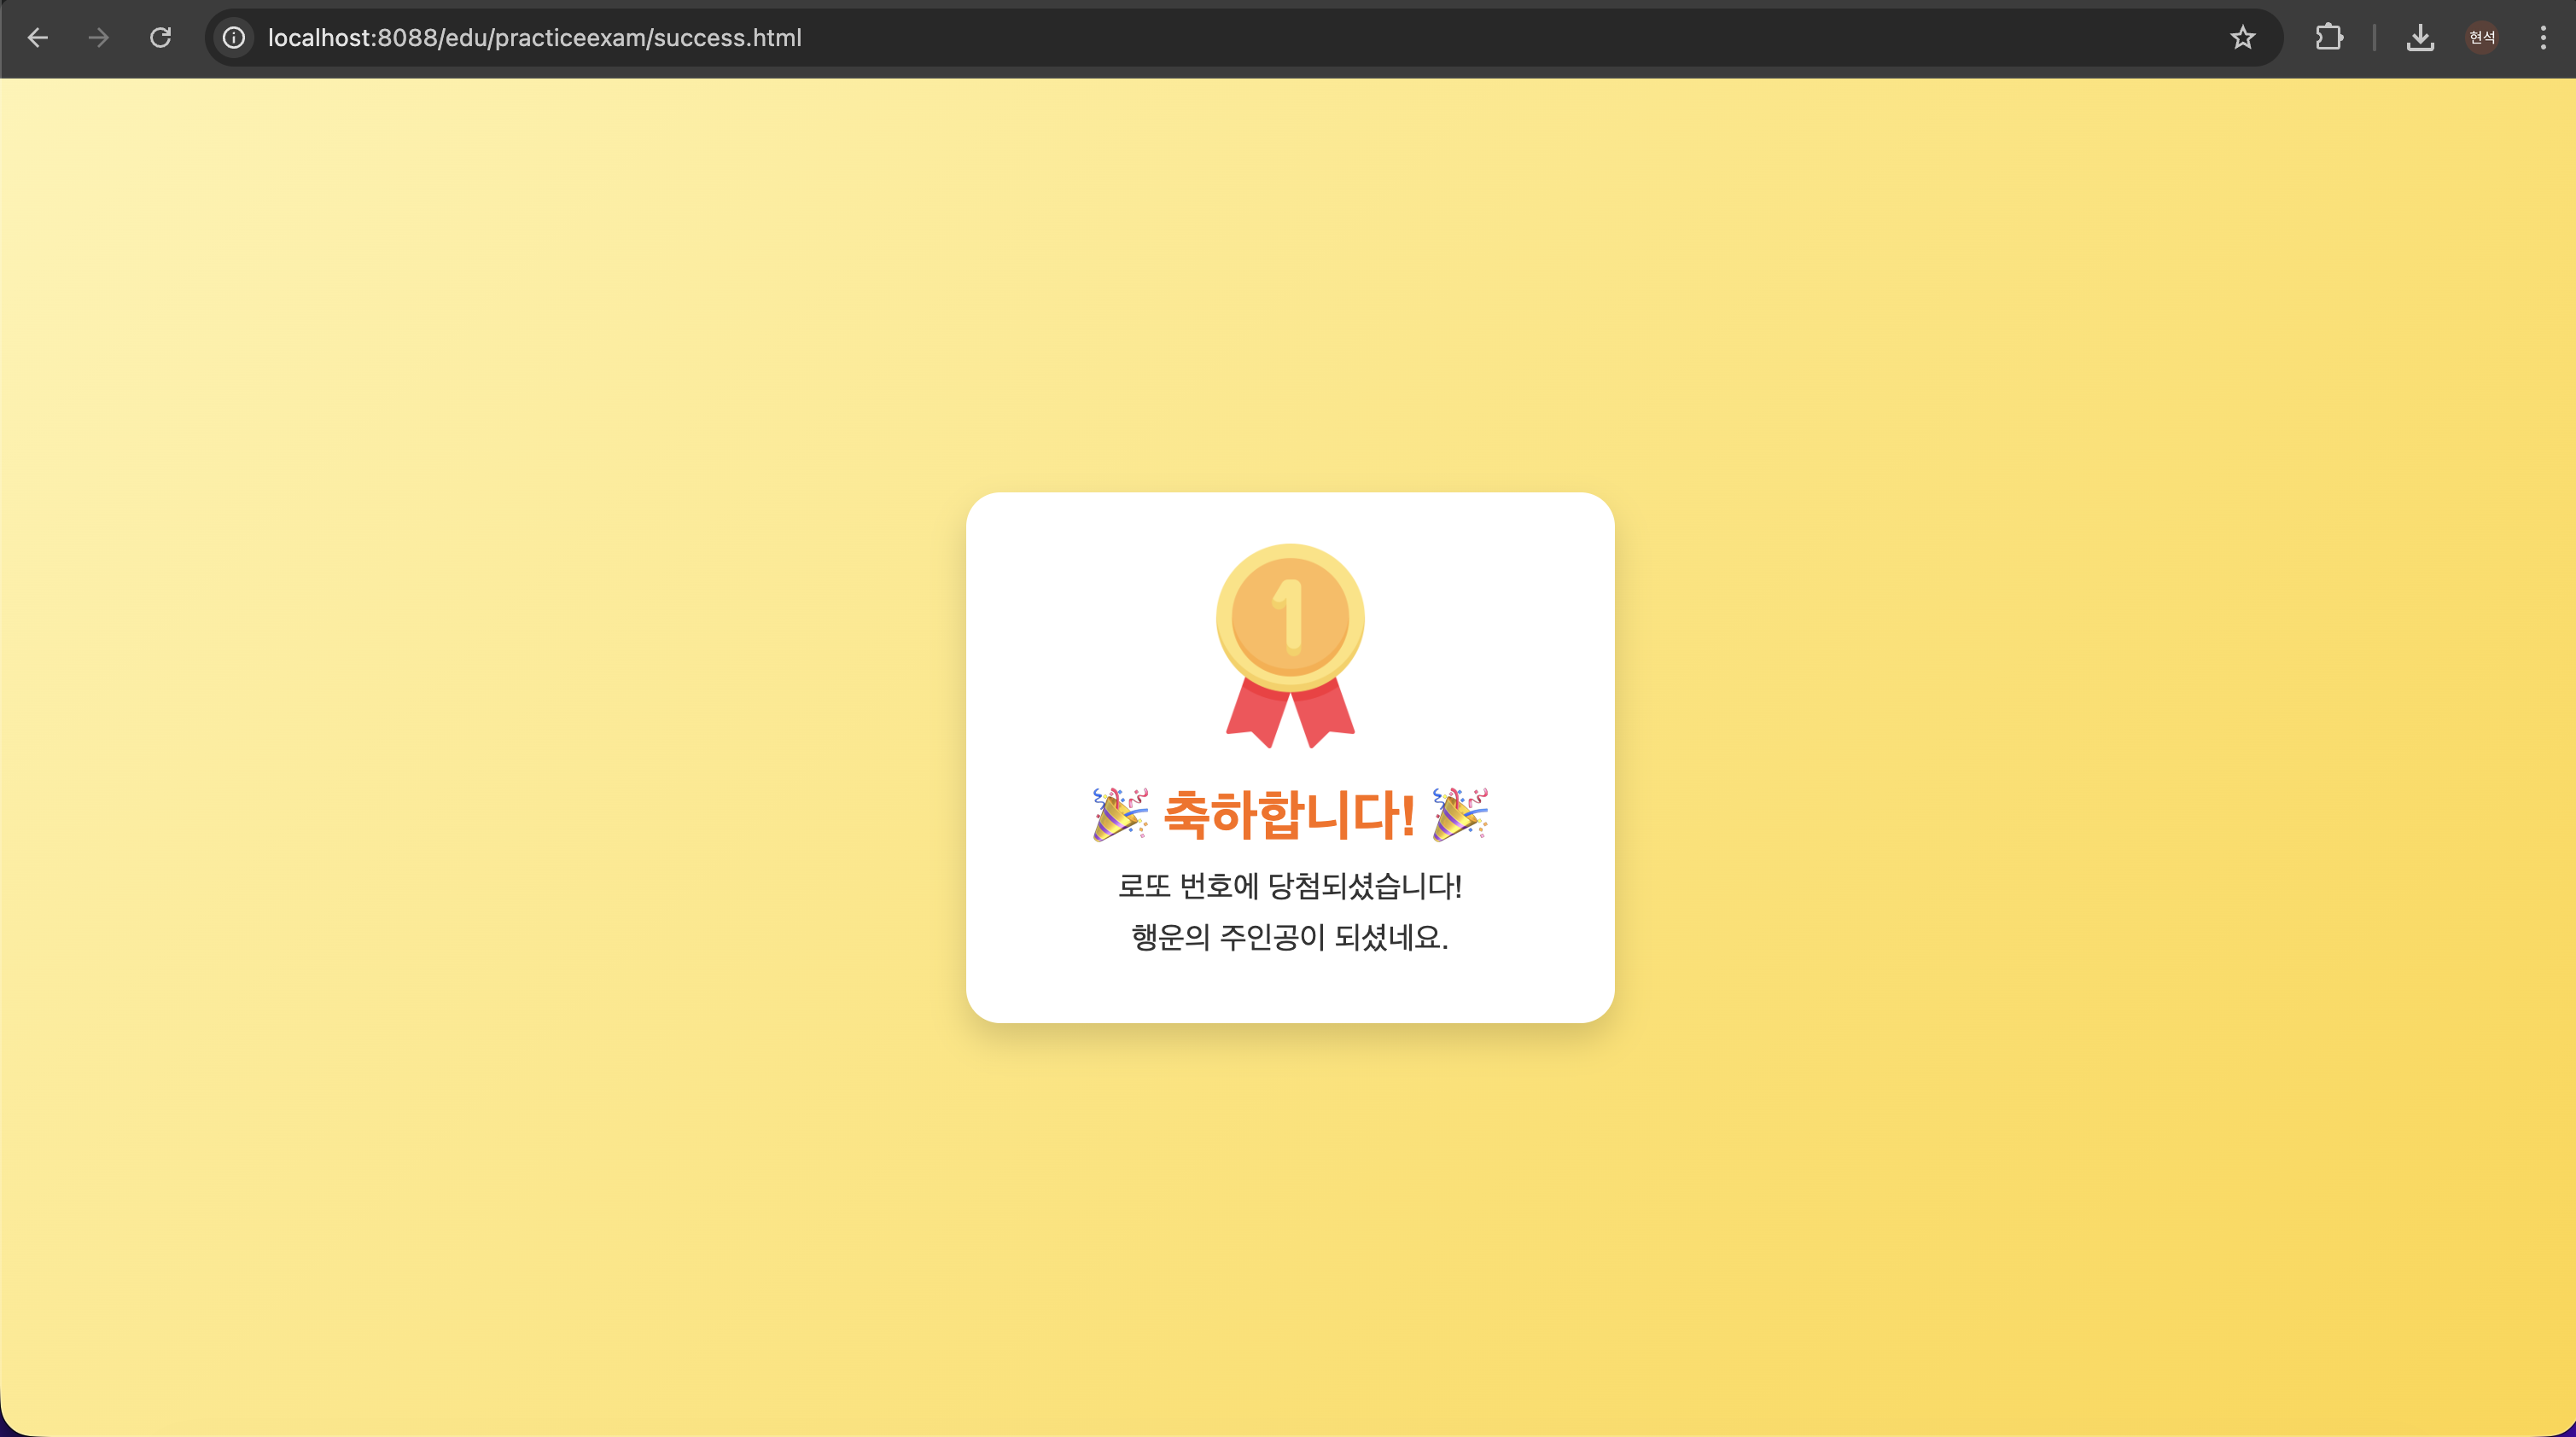
다음으로는 비교 결과에 따라 보여 줄 결과 페이지를 먼저 만들어 두었다.
이 단계에서는 아직Servlet이 보내 주는 흐름까지 확인하는 게 아니라, 각 결과 페이지 자체가 브라우저에서 잘 보이는지 먼저 확인했다.
즉, 나중에forward할 목적지를 미리 준비한 단계라고 보면 된다.
success.html<!doctype html> <html lang="ko"> <head> <meta charset="UTF-8" /> <meta name="viewport" content="width=device-width, initial-scale=1.0" /> <title>로또 당첨 축하</title> <style> body { margin: 0; height: 100vh; display: flex; justify-content: center; align-items: center; background: linear-gradient(135deg, #fff3b0, #ffd43b); font-family: Arial, sans-serif; text-align: center; } .card { background: #fff; padding: 30px; border-radius: 20px; box-shadow: 0 10px 20px rgba(0, 0, 0, 0.15); width: 320px; } .card img { width: 120px; margin-bottom: 15px; } h1 { margin: 0 0 10px; color: #ff6b00; } p { margin: 8px 0; font-size: 18px; color: #333; } </style> </head> <body> <div class="card"> <img src="https://cdn-icons-png.flaticon.com/512/2583/2583344.png" alt="축하 이미지" /> <h1>🎉 축하합니다! 🎉</h1> <p>로또 번호에 당첨되셨습니다!</p> <p>행운의 주인공이 되셨네요.</p> </div> </body> </html>
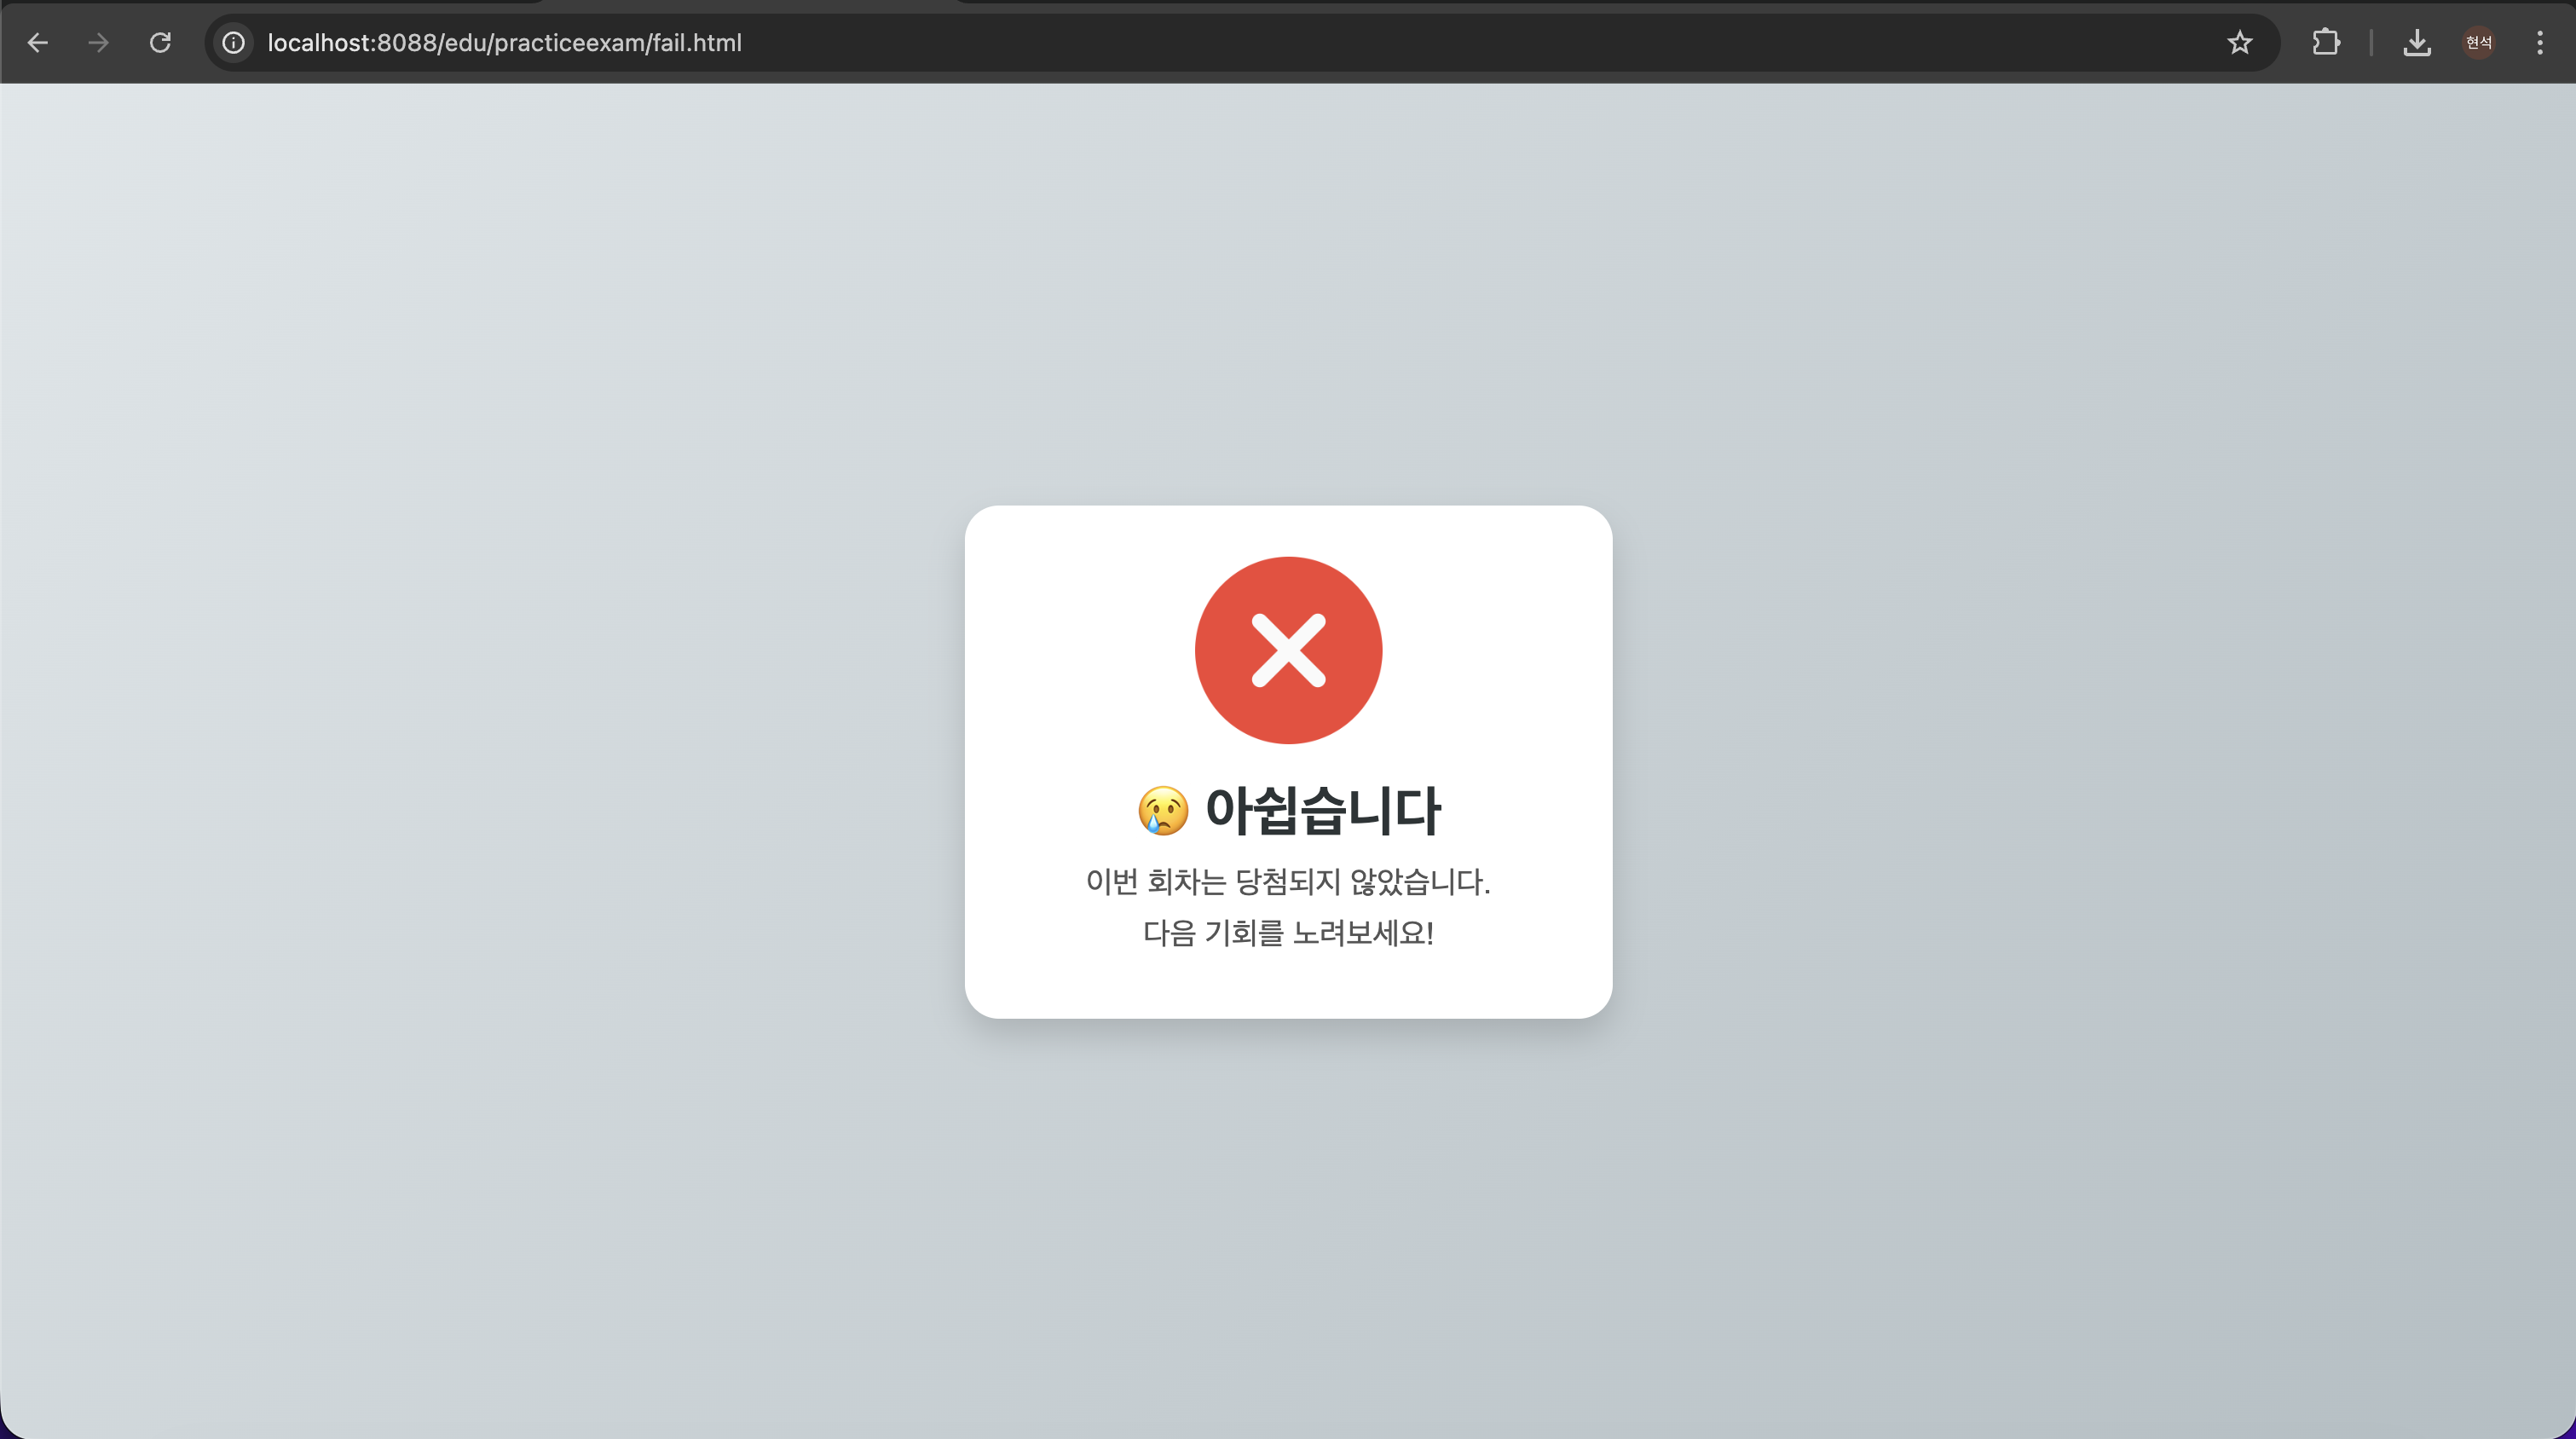
fail.html<!doctype html> <html lang="ko"> <head> <meta charset="UTF-8" /> <meta name="viewport" content="width=device-width, initial-scale=1.0" /> <title>로또 실패 화면</title> <style> body { margin: 0; height: 100vh; display: flex; justify-content: center; align-items: center; background: #d6dde3; font-family: Arial, sans-serif; text-align: center; } .card { background: #fff; padding: 30px; border-radius: 20px; box-shadow: 0 10px 20px rgba(0, 0, 0, 0.12); width: 320px; } .card img { width: 120px; margin-bottom: 15px; } h1 { margin: 0 0 10px; color: #333; } p { margin: 8px 0; font-size: 18px; color: #555; } </style> </head> <body> <div class="card"> <img src="https://cdn-icons-png.flaticon.com/512/1828/1828843.png" alt="실패 이미지" /> <h1>😢 아쉽습니다</h1> <p>이번 회차는 당첨되지 않았습니다.</p> <p>다음 기회를 노려보세요!</p> </div> </body> </html>이 단계에서는 두 페이지를 직접 열어서 화면이 정상적으로 잘 보이는지 먼저 확인했다.
나중에Servlet에서forward할 때는 이 두 페이지 중 하나로 보내게 된다.데이터 흐름 예상
1. `success.html`은 숫자가 맞았을 때 보여 줄 페이지
2. `fail.html`은 숫자가 다를 때 보여 줄 페이지
3. 지금 단계에서는 두 파일을 브라우저에서 직접 열어 화면 구성을 먼저 확인함
4. 이후 `Servlet`이 비교 결과에 따라 둘 중 하나로 `forward`함
→ 아직 이 단계에서는 값 비교가 일어난 것은 아니다.
→ 결과 페이지 파일이 준비되어 있어야 다음 단계에서forward가 가능하다.
→ 즉 이 단계는 결과 화면을 미리 준비하는 단계였다.
3. LottoServletPractice1에서 숫자 비교와 forward 처리
이제 실제 핵심 처리 코드를
Servlet에 작성했다.
브라우저에서 전달한 숫자를 받아 정수로 바꾸고,1~6사이 랜덤값을 만든 뒤 두 값을 비교했다.
그리고 결과에 따라RequestDispatcher로success.html또는fail.html로 보냈다.package practiceLab; import jakarta.servlet.RequestDispatcher; import jakarta.servlet.ServletException; import jakarta.servlet.annotation.WebServlet; import jakarta.servlet.http.HttpServlet; import jakarta.servlet.http.HttpServletRequest; import jakarta.servlet.http.HttpServletResponse; import java.io.IOException; @WebServlet("/lottoPractice1") public class LottoServletPractice1 extends HttpServlet { private static final long serialVersionUID = 1L; protected void doGet(HttpServletRequest request, HttpServletResponse response) throws ServletException, IOException { int lottoNum = Integer.parseInt(request.getParameter("lottoNum")); int randomNum = (int)(Math.random() * 6) + 1; System.out.printf("전달된 값: %d", lottoNum); System.out.println(); System.out.printf("추출된 값: %d", randomNum); System.out.println(); if (lottoNum == randomNum) { RequestDispatcher rd = request.getRequestDispatcher("/practiceexam/success.html"); rd.forward(request, response); } else { RequestDispatcher rd = request.getRequestDispatcher("/practiceexam/fail.html"); rd.forward(request, response); } } }이 코드에서 먼저
request.getParameter("lottoNum")로 문자열을 꺼낸 뒤Integer.parseInt()로 정수로 바꿨다.
그다음Math.random()으로1~6범위의 랜덤값을 만들었다.
이후에는 전달된 값과 랜덤값을 콘솔에 출력해서 실제 비교가 어떻게 이루어졌는지 확인하고,if문으로 결과 페이지를 나눴다.
데이터 흐름
int lottoNum = Integer.parseInt(request.getParameter("lottoNum"));
// 1. `Query String`으로 전달된 `lottoNum` 값을 문자열로 꺼낸 뒤 정수로 바꿈

int randomNum = (int)(Math.random() * 6) + 1;
// 2. `1~6` 사이의 랜덤값을 하나 만듦

System.out.printf("전달된 값: %d", lottoNum);
System.out.println();
System.out.printf("추출된 값: %d", randomNum);
System.out.println();
// 3. 전달된 값과 추출된 값을 콘솔에 출력해 비교 과정을 확인함

if (lottoNum == randomNum) {
    RequestDispatcher rd = request.getRequestDispatcher("/practiceexam/success.html");
    rd.forward(request, response);
} else {
    RequestDispatcher rd = request.getRequestDispatcher("/practiceexam/fail.html");
    rd.forward(request, response);
}
// 4. 두 값이 같으면 `success.html`, 다르면 `fail.html`로 `forward`함
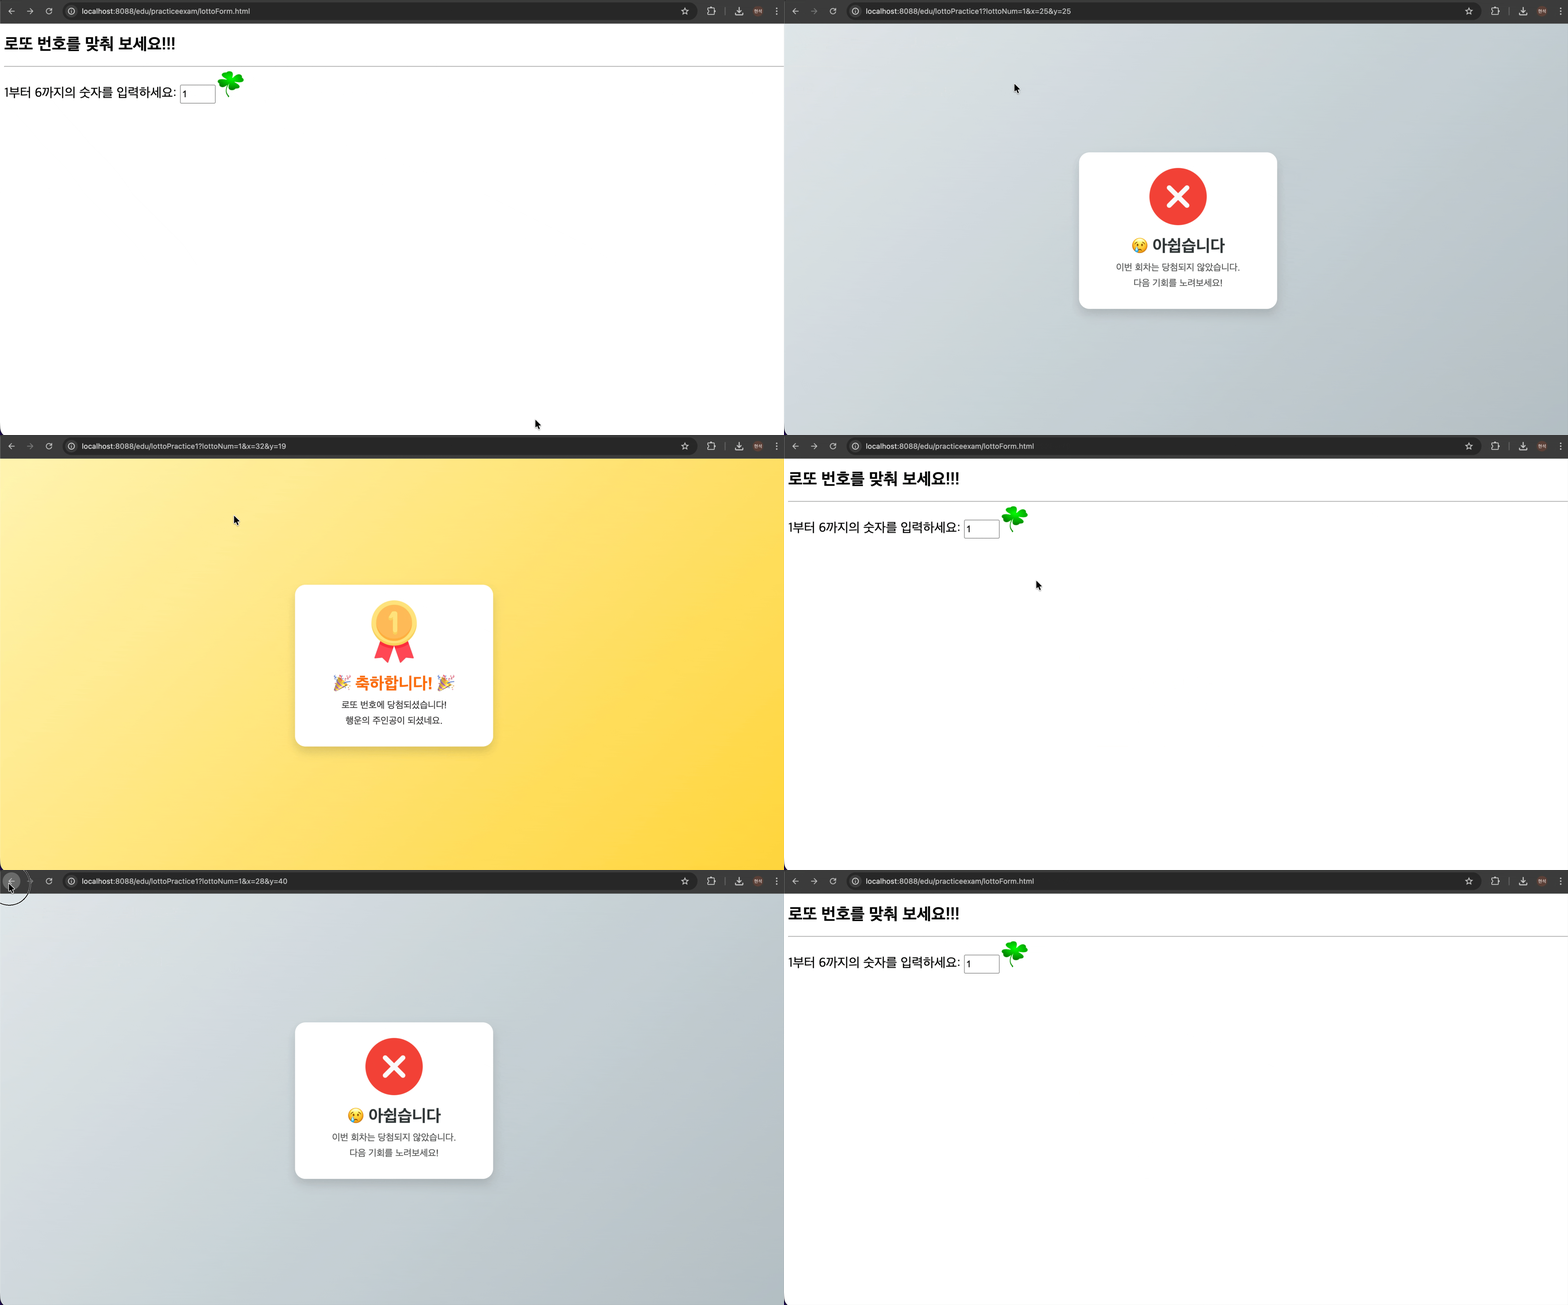
→ 브라우저에서 예를 들어
1을 입력하면 주소에는?lottoNum=1이 붙는다.
→ 서버는 이 값을 꺼내int로 변환한다.
→ 서버가 랜덤값을 하나 뽑는다.
→ 두 값을 비교한 뒤 결과에 맞는 페이지로 넘긴다.
→ 이때forward이기 때문에 브라우저 화면은 결과 페이지가 보이지만, 요청 처리는Servlet이 맡아서 진행한 것이다.

최종 코드
lottoForm.html<!doctype html> <html lang="en"> <head> <meta charset="UTF-8" /> <meta name="viewport" content="width=device-width, initial-scale=1.0" /> <title>Document</title> </head> <body> <h1>로또 번호를 맞춰 보세요!!!</h1> <hr /> <form method="get" action="/edu/lottoPractice1"> <label for="lottoNum" style="font-size: 25px">1부터 6까지의 숫자를 입력하세요: </label> <input type="number" id="lottoNum" name="lottoNum" min="1" max="6" step="1" required style="width: 60px; height: 30px; font-size: 18px" /> <input type="image" src="../images/clover.png" alt="로또 추첨" style="width: 50px; height: 50px" /> </form> </body> </html>
success.html<!doctype html> <html lang="ko"> <head> <meta charset="UTF-8" /> <meta name="viewport" content="width=device-width, initial-scale=1.0" /> <title>로또 당첨 축하</title> <style> body { margin: 0; height: 100vh; display: flex; justify-content: center; align-items: center; background: linear-gradient(135deg, #fff3b0, #ffd43b); font-family: Arial, sans-serif; text-align: center; } .card { background: #fff; padding: 30px; border-radius: 20px; box-shadow: 0 10px 20px rgba(0, 0, 0, 0.15); width: 320px; } .card img { width: 120px; margin-bottom: 15px; } h1 { margin: 0 0 10px; color: #ff6b00; } p { margin: 8px 0; font-size: 18px; color: #333; } </style> </head> <body> <div class="card"> <img src="https://cdn-icons-png.flaticon.com/512/2583/2583344.png" alt="축하 이미지" /> <h1>🎉 축하합니다! 🎉</h1> <p>로또 번호에 당첨되셨습니다!</p> <p>행운의 주인공이 되셨네요.</p> </div> </body> </html>
fail.html<!doctype html> <html lang="ko"> <head> <meta charset="UTF-8" /> <meta name="viewport" content="width=device-width, initial-scale=1.0" /> <title>로또 실패 화면</title> <style> body { margin: 0; height: 100vh; display: flex; justify-content: center; align-items: center; background: #d6dde3; font-family: Arial, sans-serif; text-align: center; } .card { background: #fff; padding: 30px; border-radius: 20px; box-shadow: 0 10px 20px rgba(0, 0, 0, 0.12); width: 320px; } .card img { width: 120px; margin-bottom: 15px; } h1 { margin: 0 0 10px; color: #333; } p { margin: 8px 0; font-size: 18px; color: #555; } </style> </head> <body> <div class="card"> <img src="https://cdn-icons-png.flaticon.com/512/1828/1828843.png" alt="실패 이미지" /> <h1>😢 아쉽습니다</h1> <p>이번 회차는 당첨되지 않았습니다.</p> <p>다음 기회를 노려보세요!</p> </div> </body> </html>
LottoServletPractice1.javapackage practiceLab; import jakarta.servlet.RequestDispatcher; import jakarta.servlet.ServletException; import jakarta.servlet.annotation.WebServlet; import jakarta.servlet.http.HttpServlet; import jakarta.servlet.http.HttpServletRequest; import jakarta.servlet.http.HttpServletResponse; import java.io.IOException; @WebServlet("/lottoPractice1") public class LottoServletPractice1 extends HttpServlet { private static final long serialVersionUID = 1L; protected void doGet(HttpServletRequest request, HttpServletResponse response) throws ServletException, IOException { int lottoNum = Integer.parseInt(request.getParameter("lottoNum")); int randomNum = (int)(Math.random() * 6) + 1; System.out.printf("전달된 값: %d", lottoNum); System.out.println(); System.out.printf("추출된 값: %d", randomNum); System.out.println(); if (lottoNum == randomNum) { RequestDispatcher rd = request.getRequestDispatcher("/practiceexam/success.html"); rd.forward(request, response); } else { RequestDispatcher rd = request.getRequestDispatcher("/practiceexam/fail.html"); rd.forward(request, response); } } }
실습하면서 확인한 점
GET요청은 입력값이 주소의Query String으로 전달된다.- 입력창에
name속성이 있어야 서버가request.getParameter()로 값을 꺼낼 수 있다.input type="image"도 제출 버튼처럼 동작할 수 있다.- 전달받은 문자열 숫자는
Integer.parseInt()로 정수로 바꿔야 비교할 수 있다.Math.random()을 이용하면 원하는 범위의 랜덤값을 만들 수 있다.- 이번 실습에서는 비교 결과에 따라 다른 페이지로 보내는 흐름을
RequestDispatcher와forward로 구현했다.- 직접 응답을 출력하지 않고 결과 페이지로 넘길 때는
PrintWriter가 꼭 필요하지 않다.