컨테이너화
연보라 : 이전까지 한 내용
초록 : 오늘 할 내용
My-Docker-Project -> My-CI-Project로 이름 변경
image를 save하면 파일로 보낼 수 있다. 그러나 보통 파일로 만들진 않고 docker push 해서 pubilc image repository(docker hub)를 쓴다.
다른 곳에서 docker pull 해서 이미지를 내려받아 docker run 할 수 있다.
초록 : CI
분홍 : CD
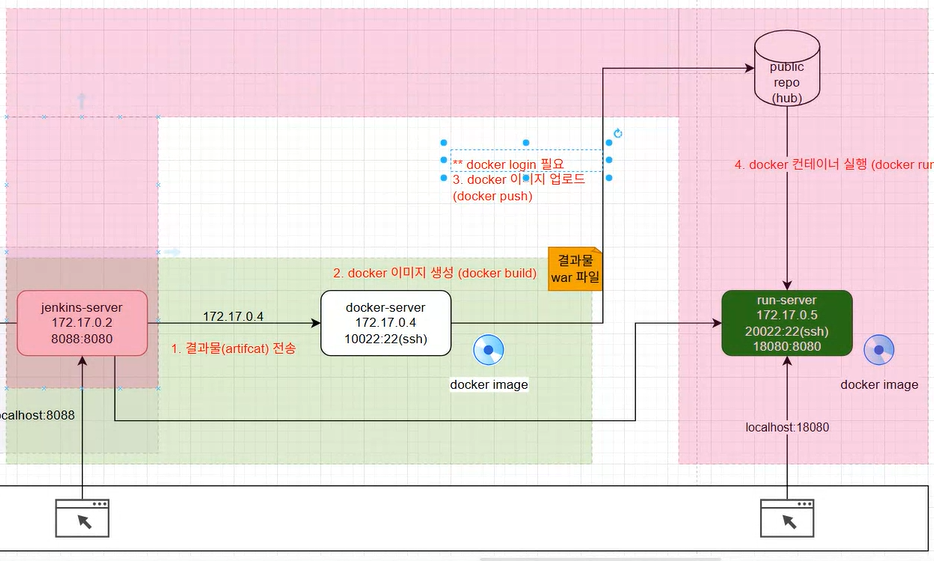
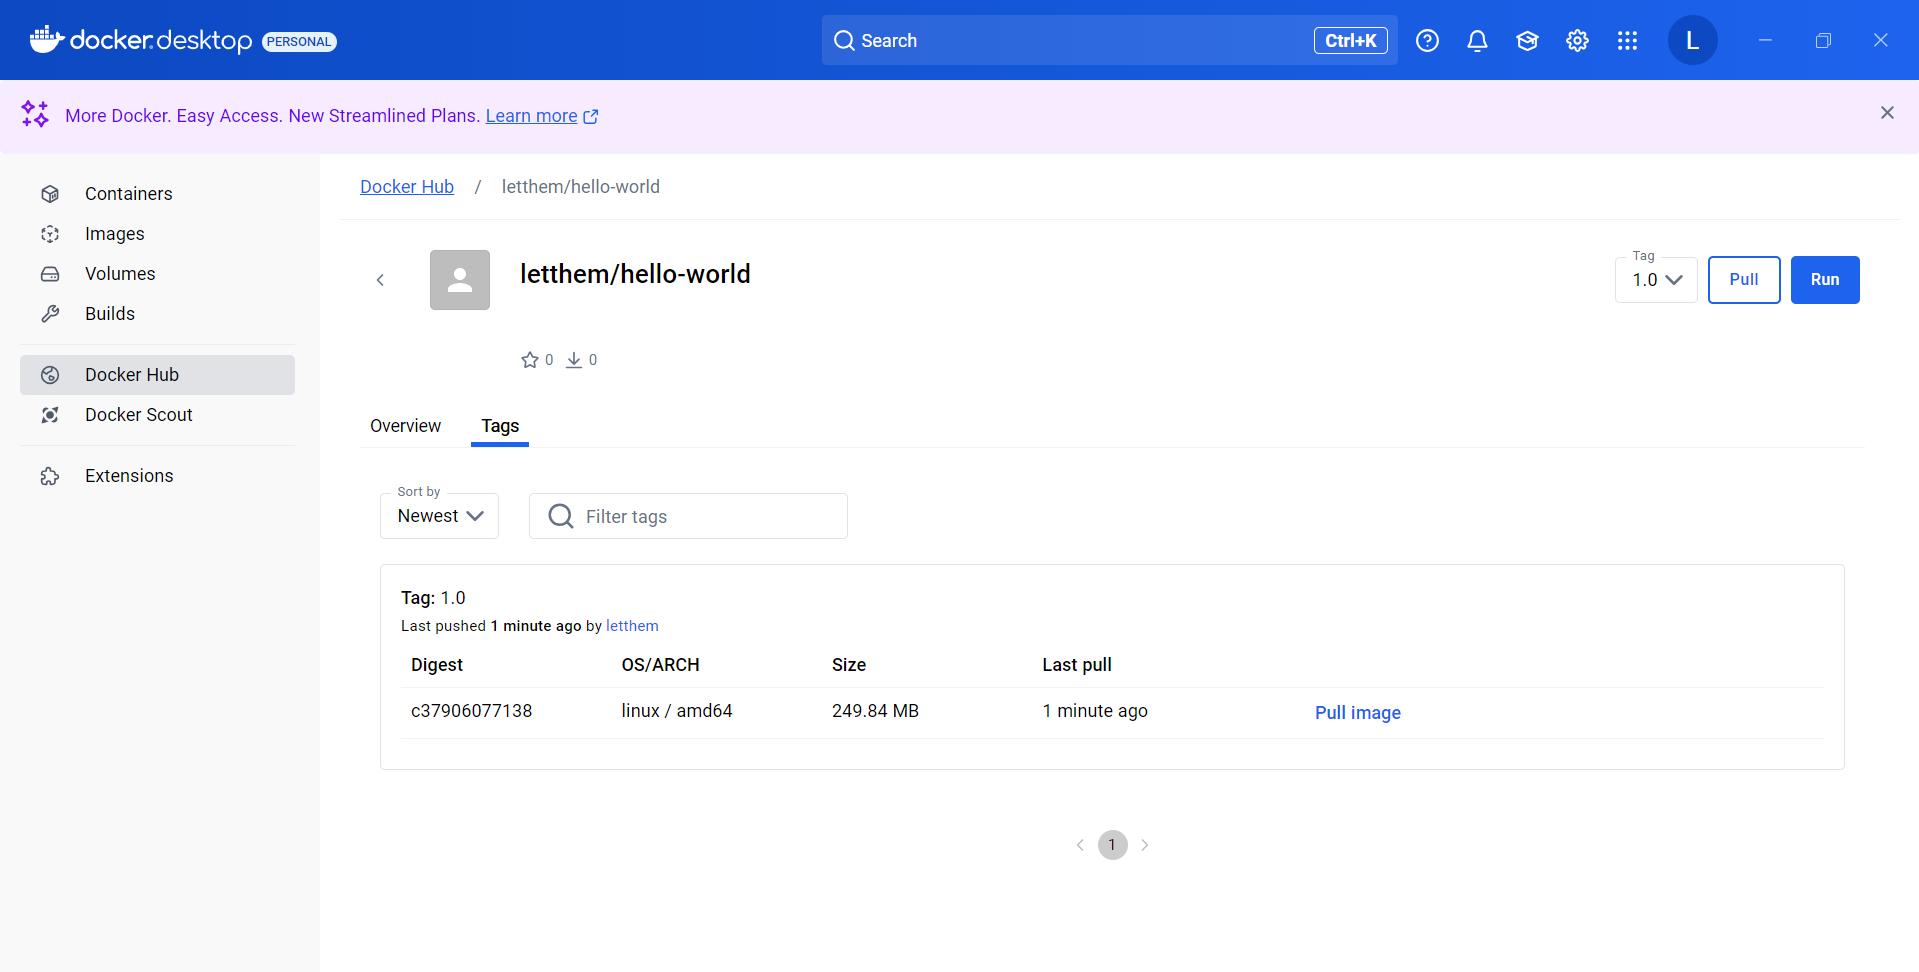
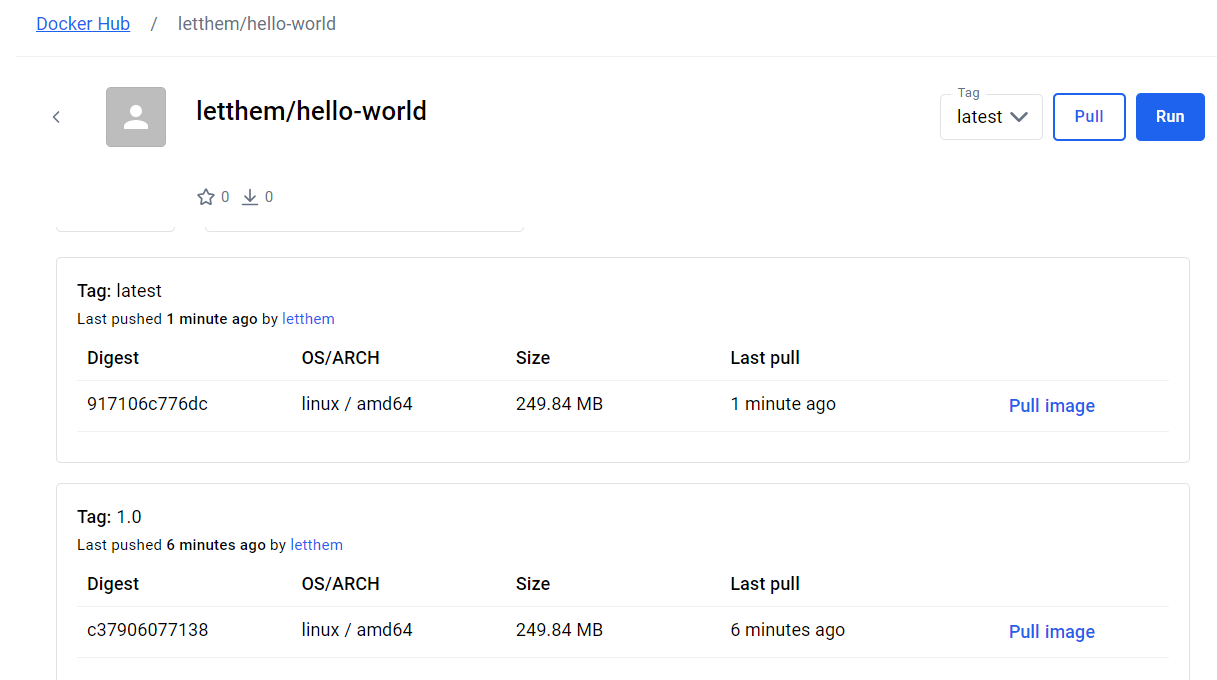
docker hub private 한 레포지토리
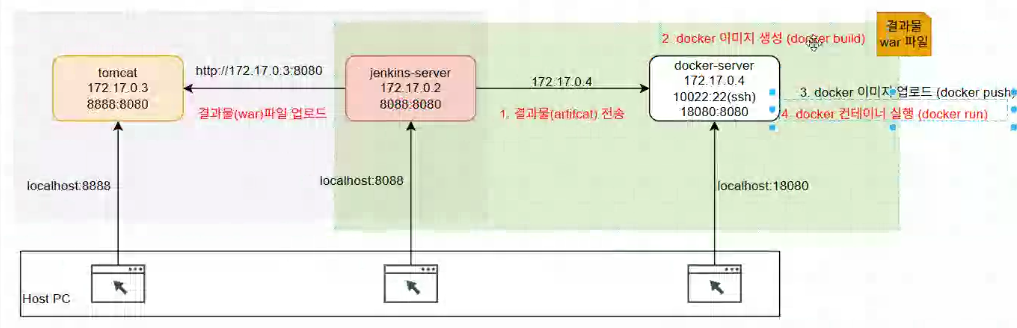
docker-server 접속
ssh 접속
ssh root@127.0.0.1 -p 10022
->[root@641fc028e14f ~]#
docker login
push 위해 tag 등록
docker tag hello-world:1.0 letthem/hello-world:1.0
push
docker push letthem/hello-world:1.0
Jenkins로 !
위 과정 그대로를 Jenkins에서 해보자 !
My-CI-Project에서
기존
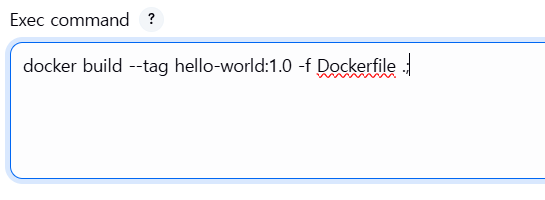
이랬는데
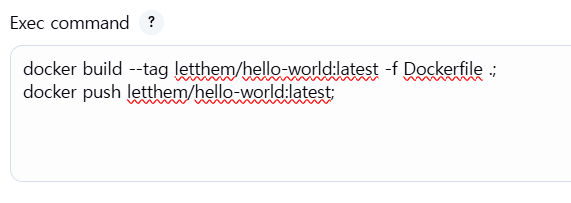
docker build --tag letthem/hello-world:latest -f Dockerfile .;
docker push letthem/hello-world:latest;
이렇게 push까지 해서 바로 run 할 수 있게 하자
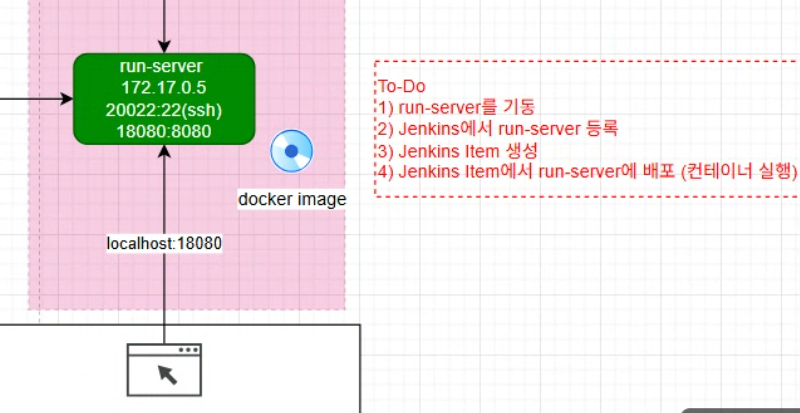
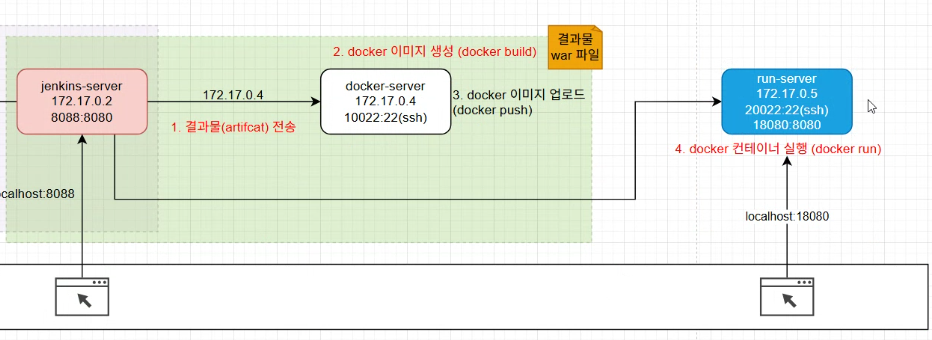
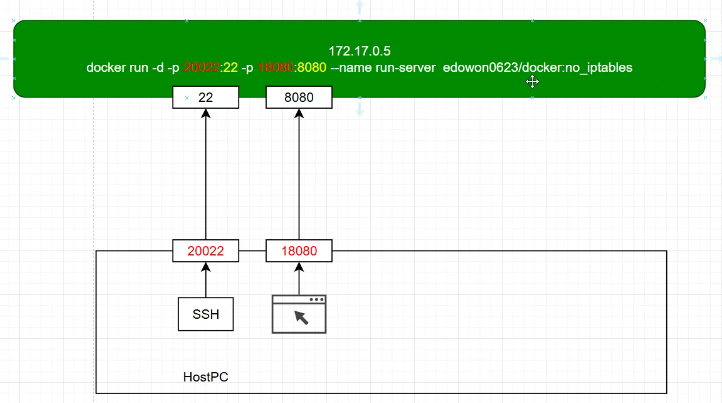
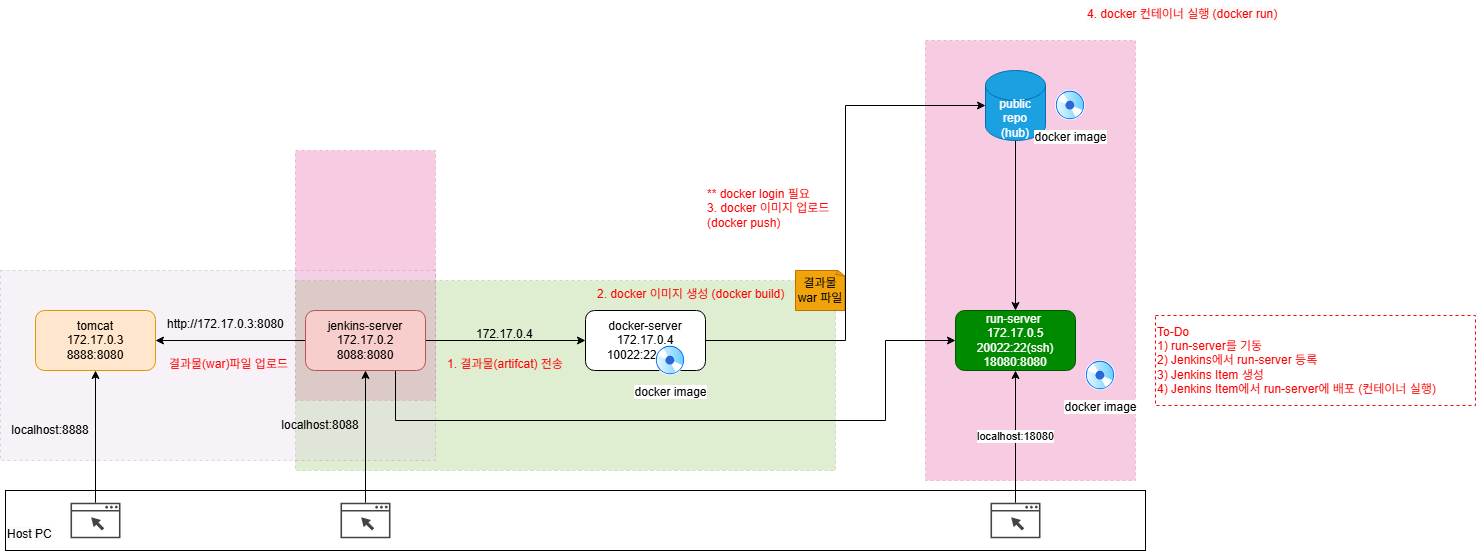
1. run-server를 기동
docker run --privileged -itd --name run-server -p 20022:22 -p 18080:8080 -e container=docker --tmpfs /run --tmpfs /tmp -v /sys/fs/cgroup:/sys/fs/cgroup:rw --cgroupns=host edowon0623/docker:no_iptables /usr/sbin/init
ssh root@127.0.0.1 -p 20022
warning 뜨면
users/user/.ssh에 있는 known_hosts 파일 VSCode로 열어서 삭제하면 된다.
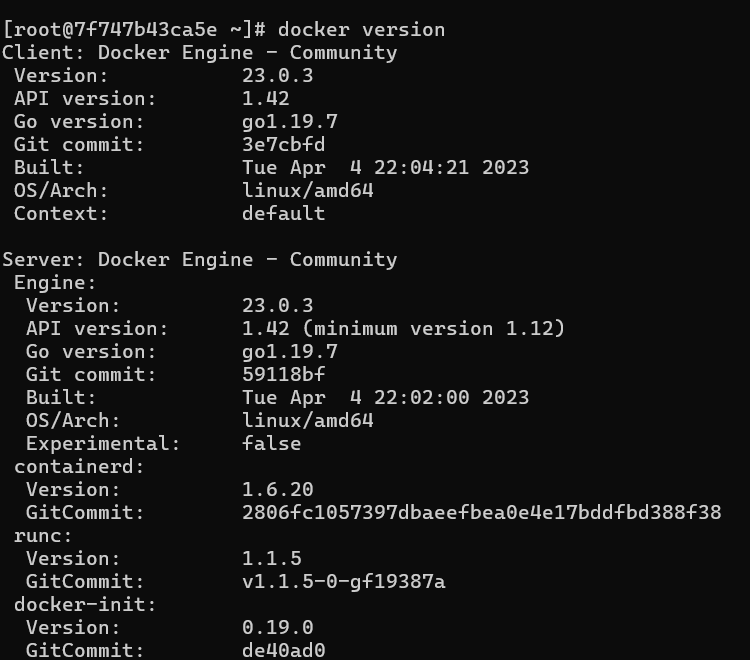
docker version
systemctl enable docker
systemctl start docker
systemctl status docker
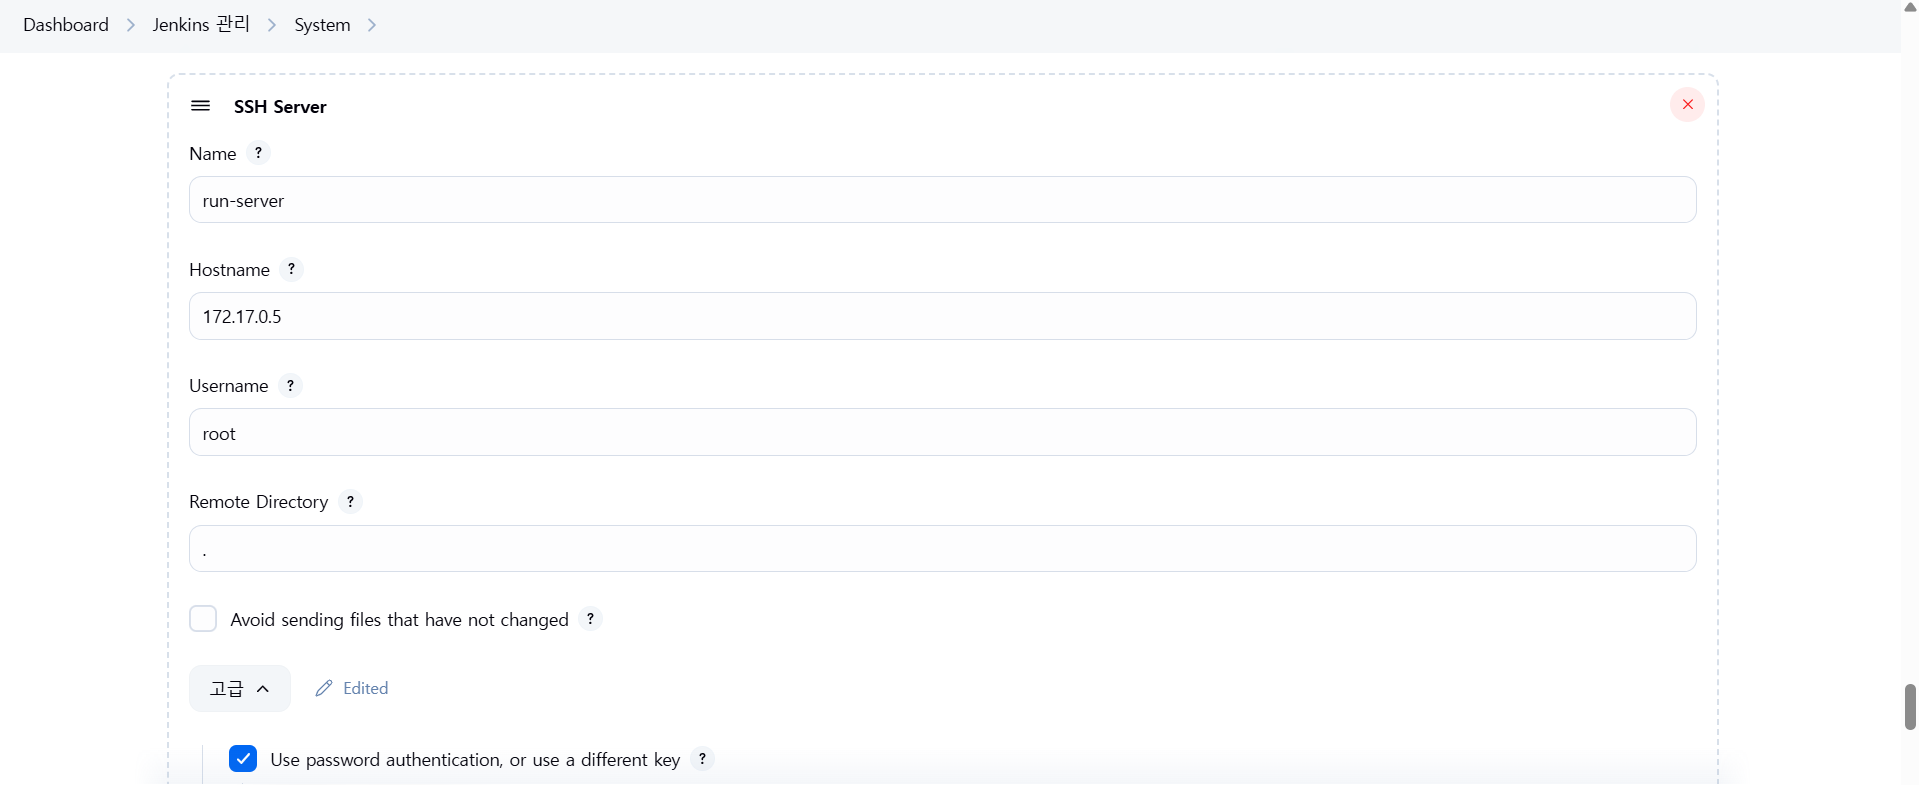
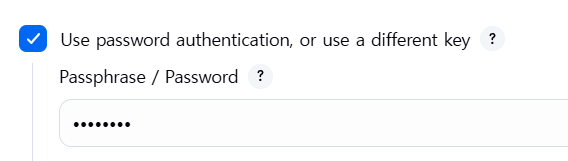
2. Jenkins 설정에 ssh run-server 추가
PS C:\Users\user> docker network inspect bridge

172.17.0.5 🔽

3. My-CD-Project 프리스타일로 생성
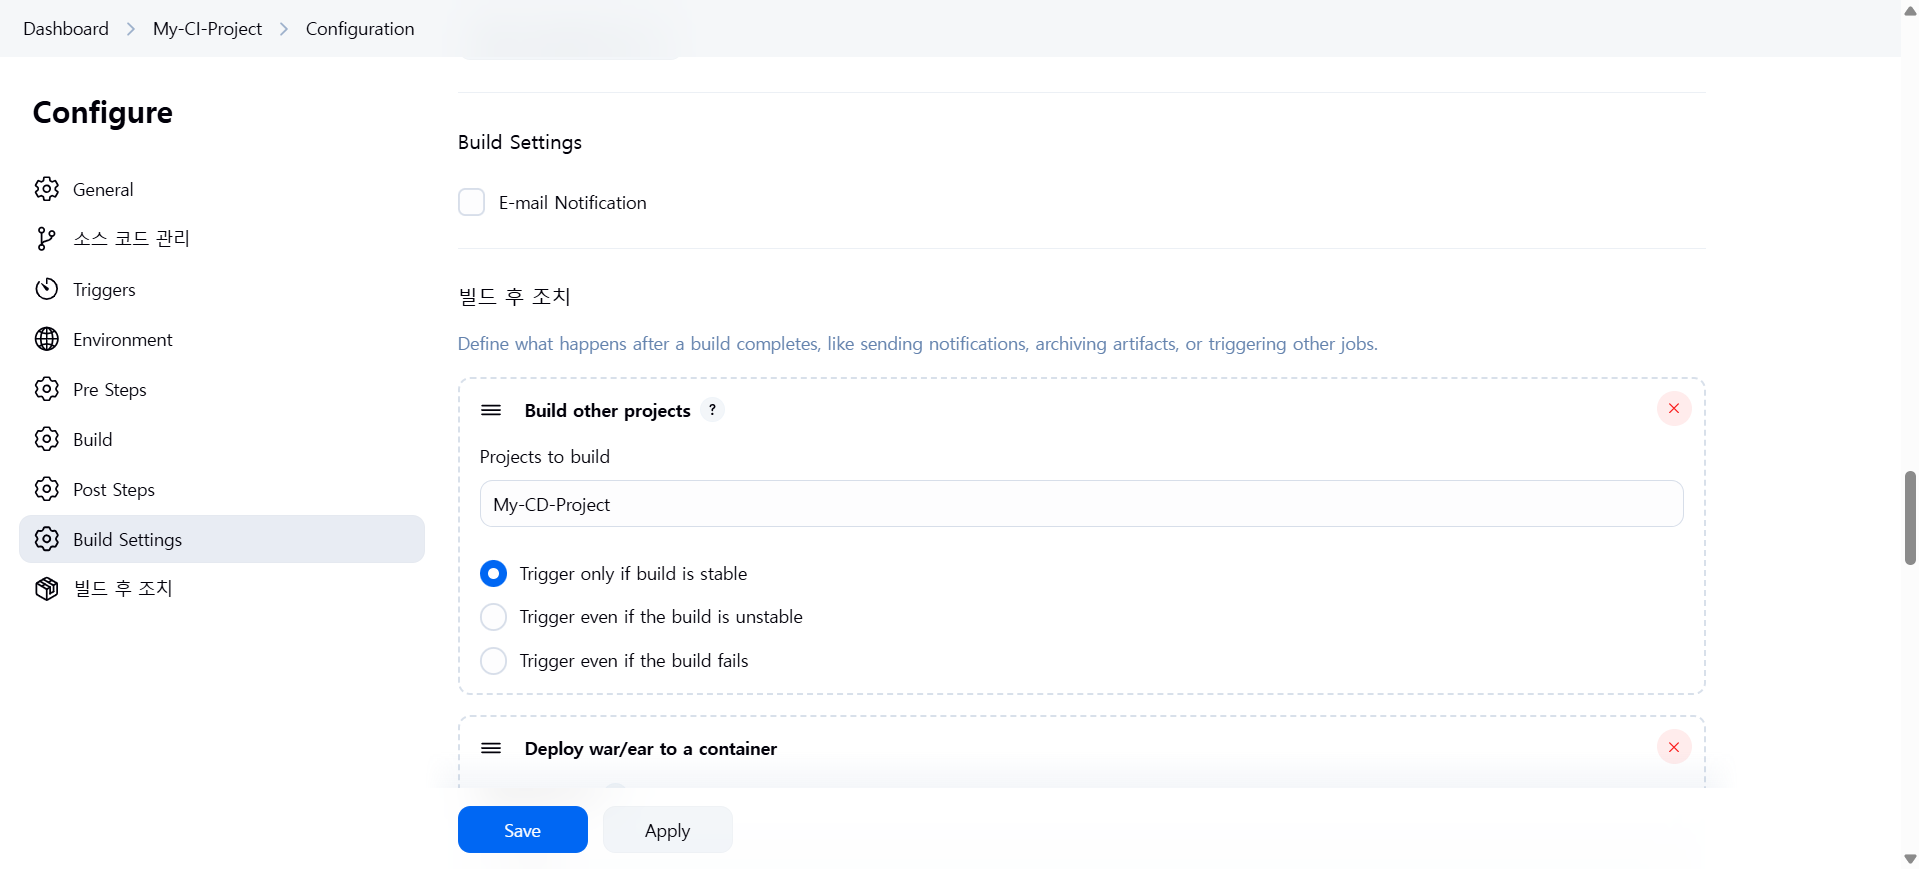
빌드 후 조치 추가
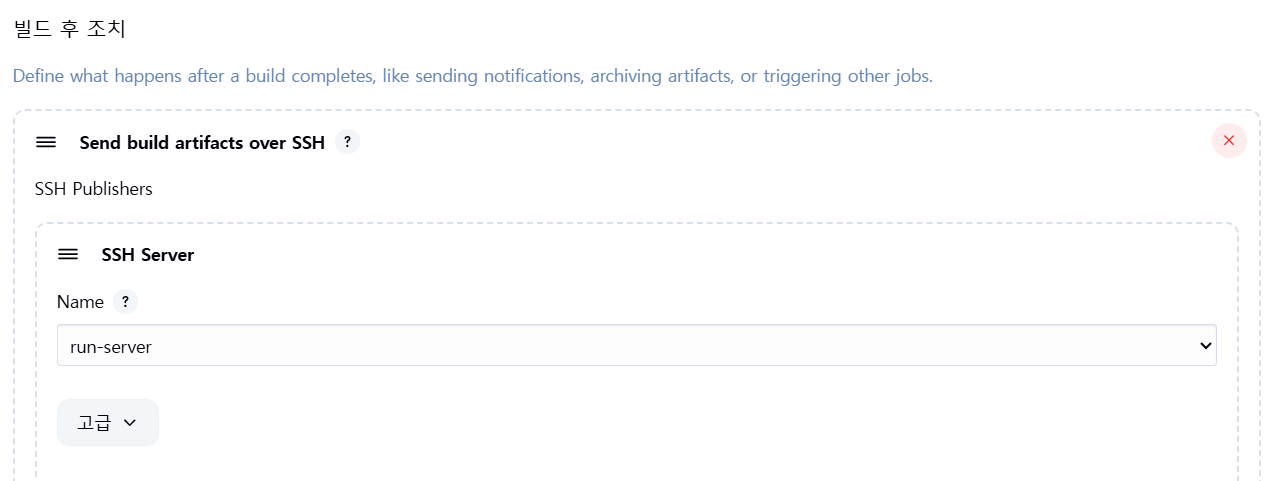
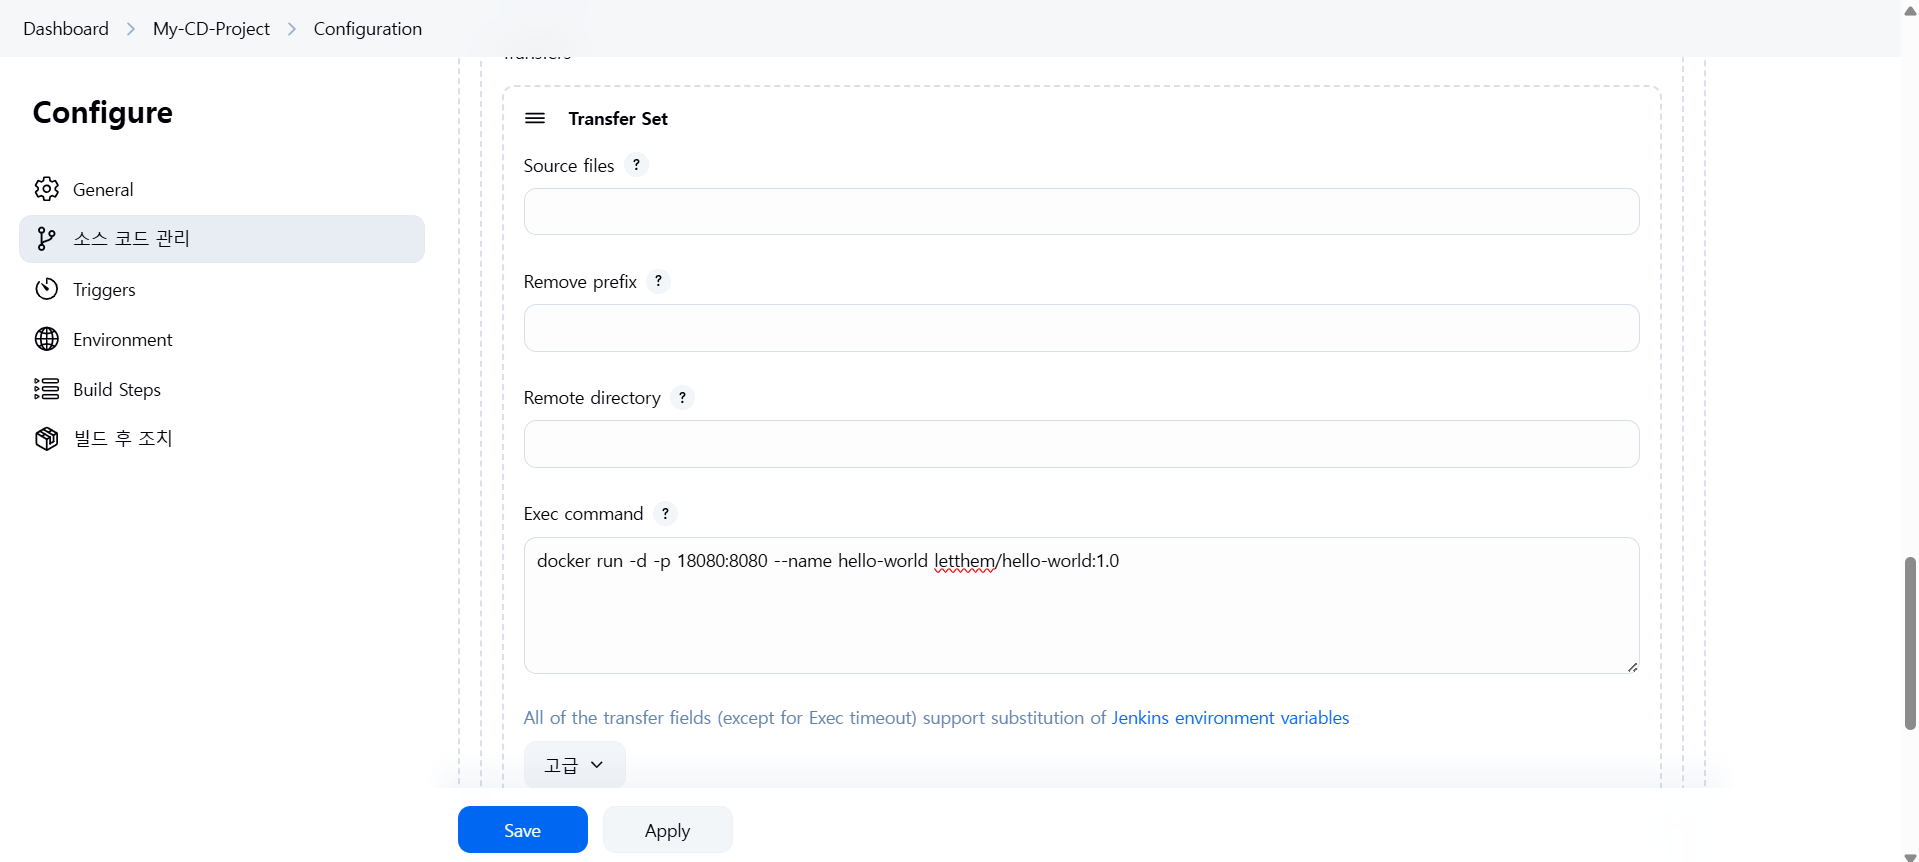
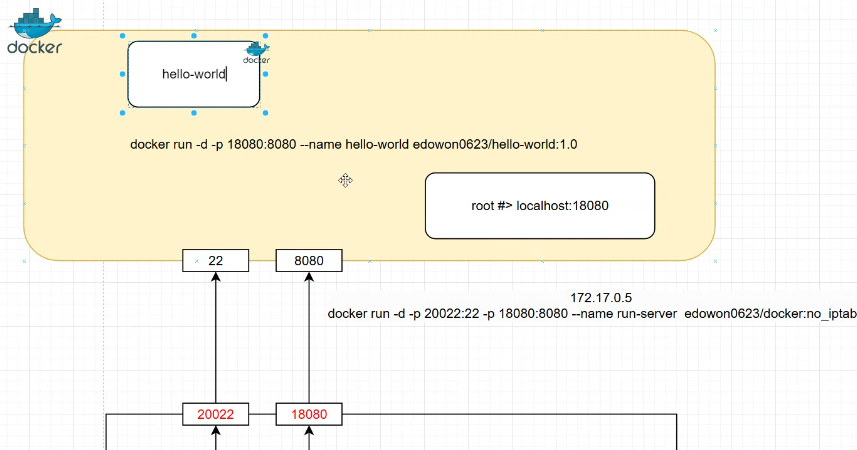
4. run-server에 배포 (컨테이너 실행)
run-server 들어가서
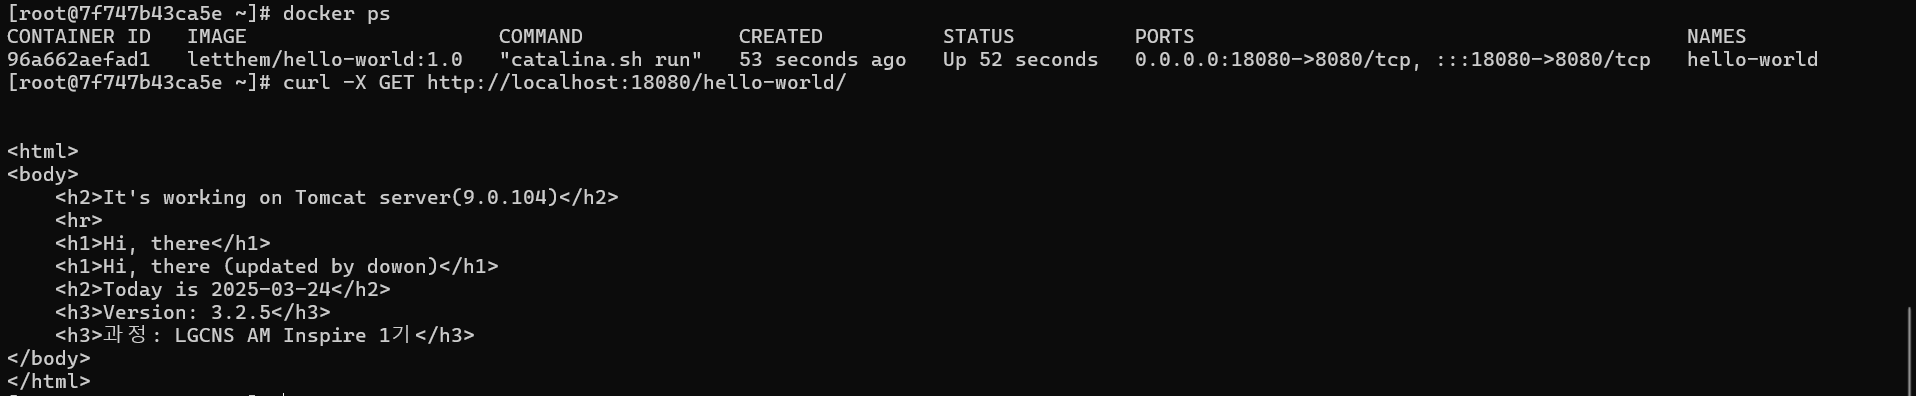
docker ps

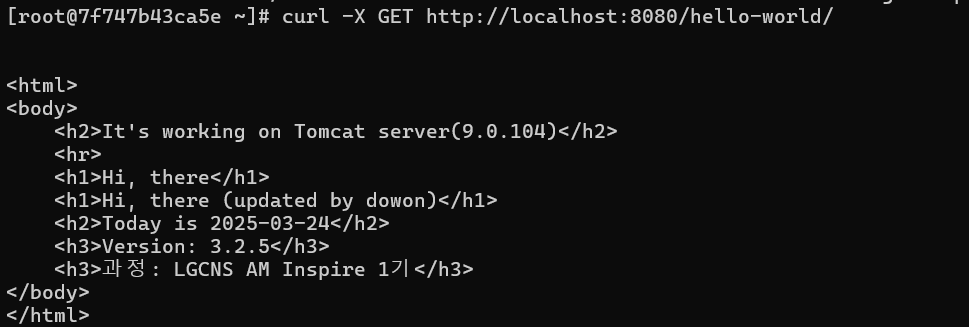
curl -X GET http://localhost:18080/hello-world/
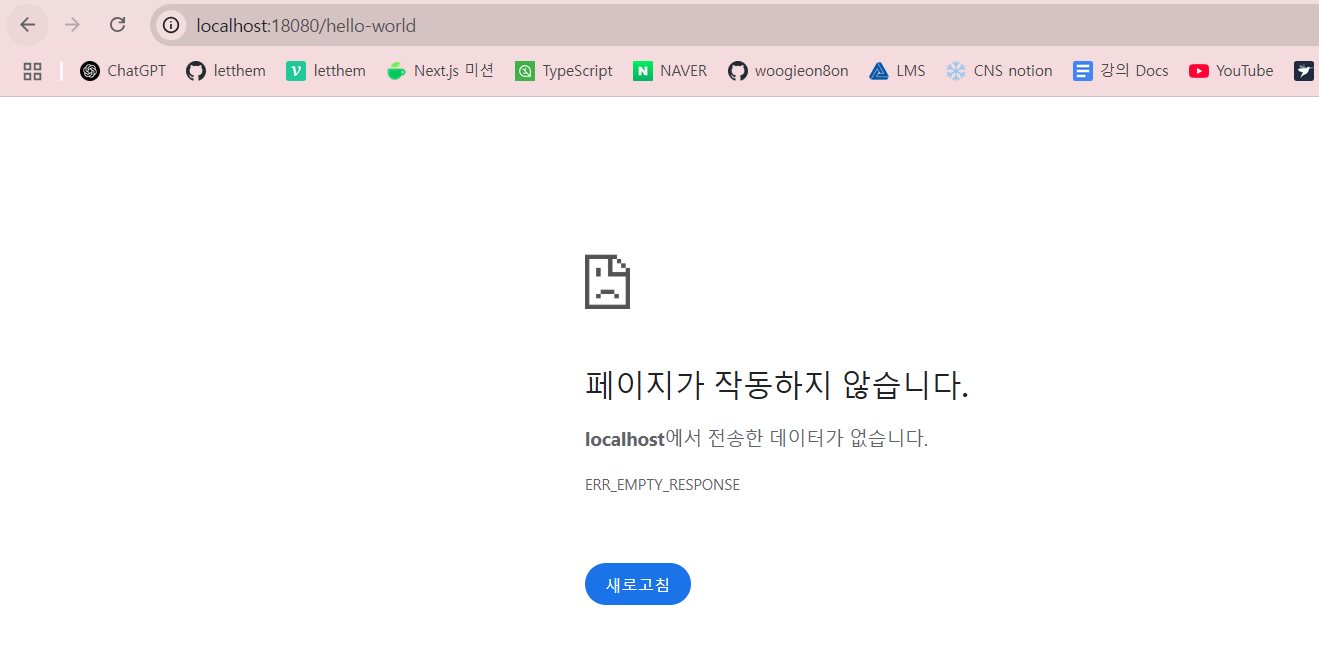
웹 브라우저에서 왜 안 되는지 실습!
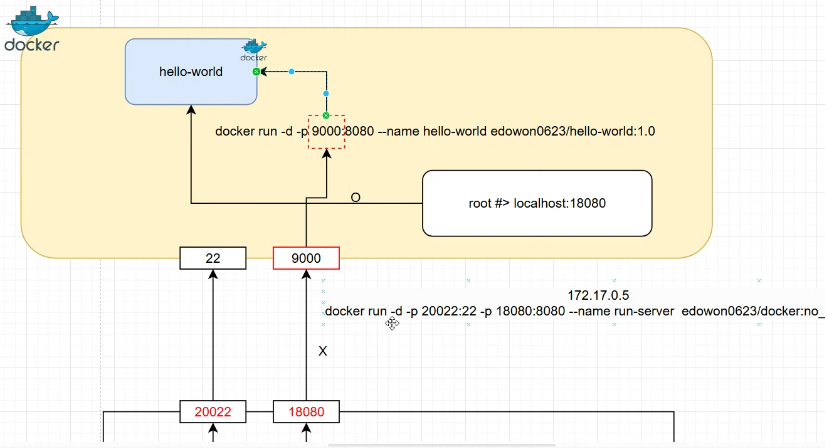
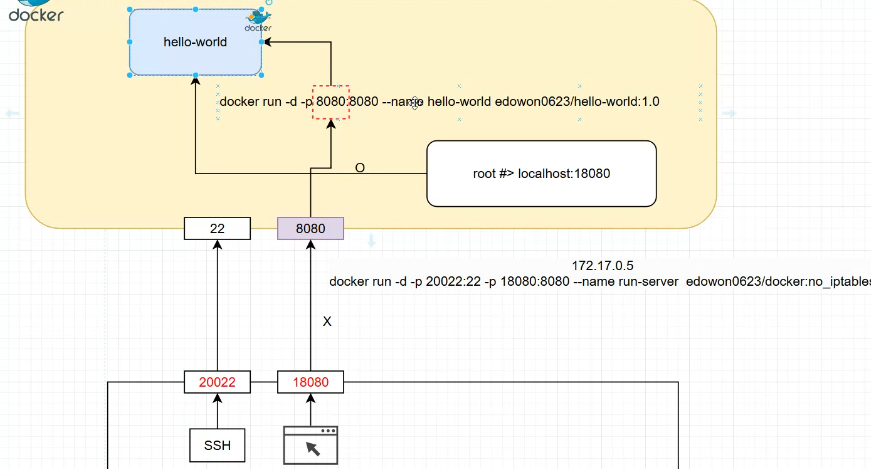
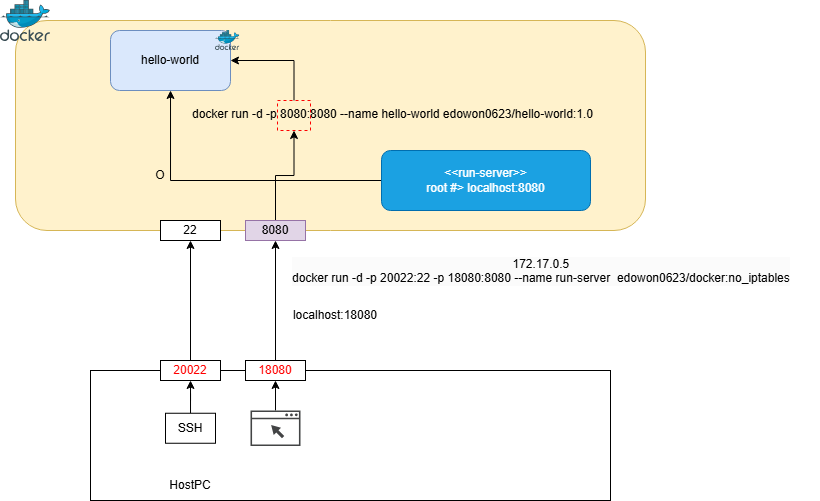
ex) 아래 예시에서 9000 번이랑 9000 이랑 매칭이 되어야 한다. 그래야 웹 브라우저에서도 실행이 잘 된다
현재 상황은 이런데 🔽
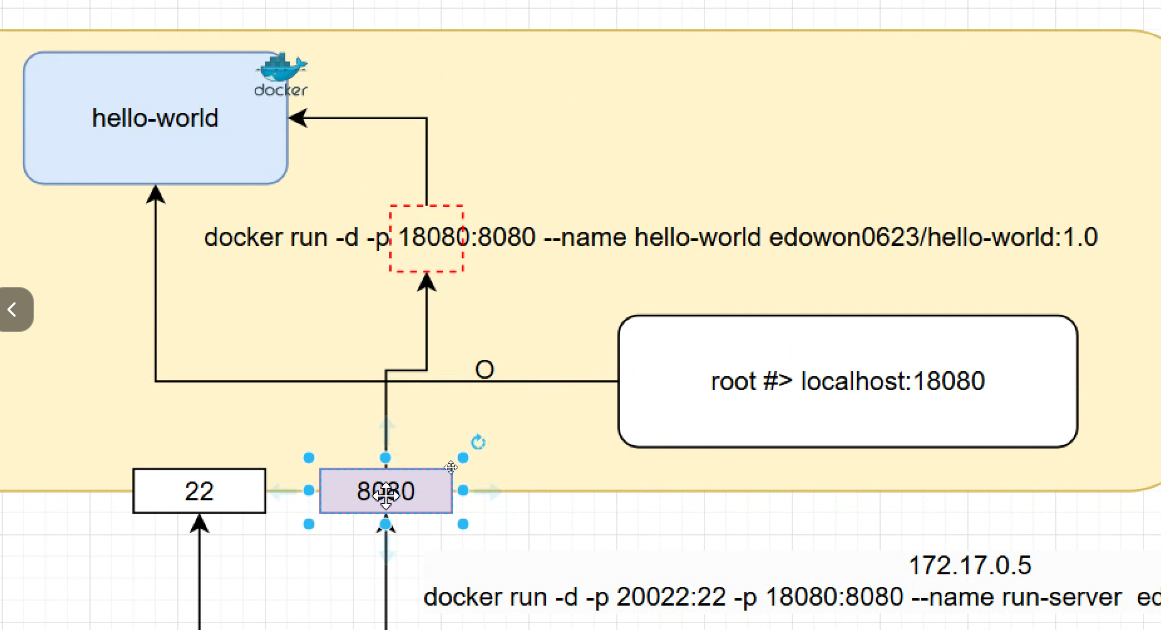
이렇게 바꿀 것이다 (18080 -> 8080) 🔽
컨테이너 stop -> 컨테이너 remove -> 이미지 remove
docker stop hello-world
docker rm hello-world
docker rmi hello-world

18080 -> 8080으로 변경
지금 빌드

터미널에서 테스트
curl -X GET http://localhost:8080/hello-world/
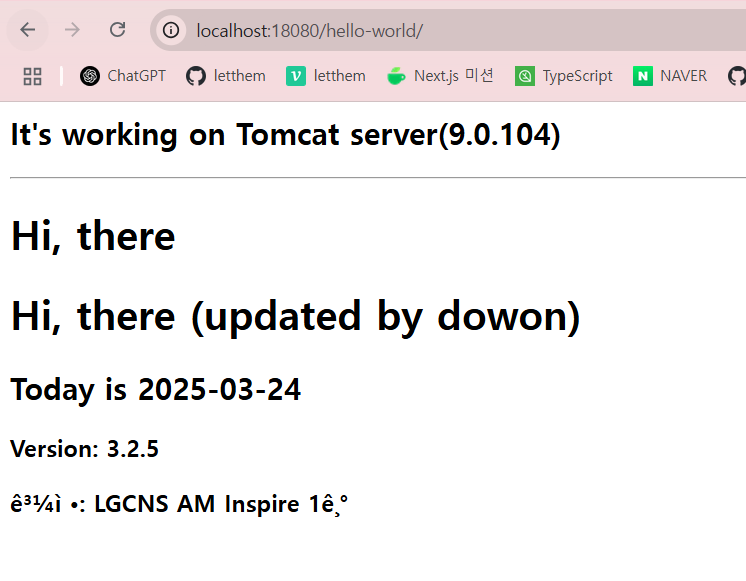
웹 브라우저에서 테스트
최종 그림
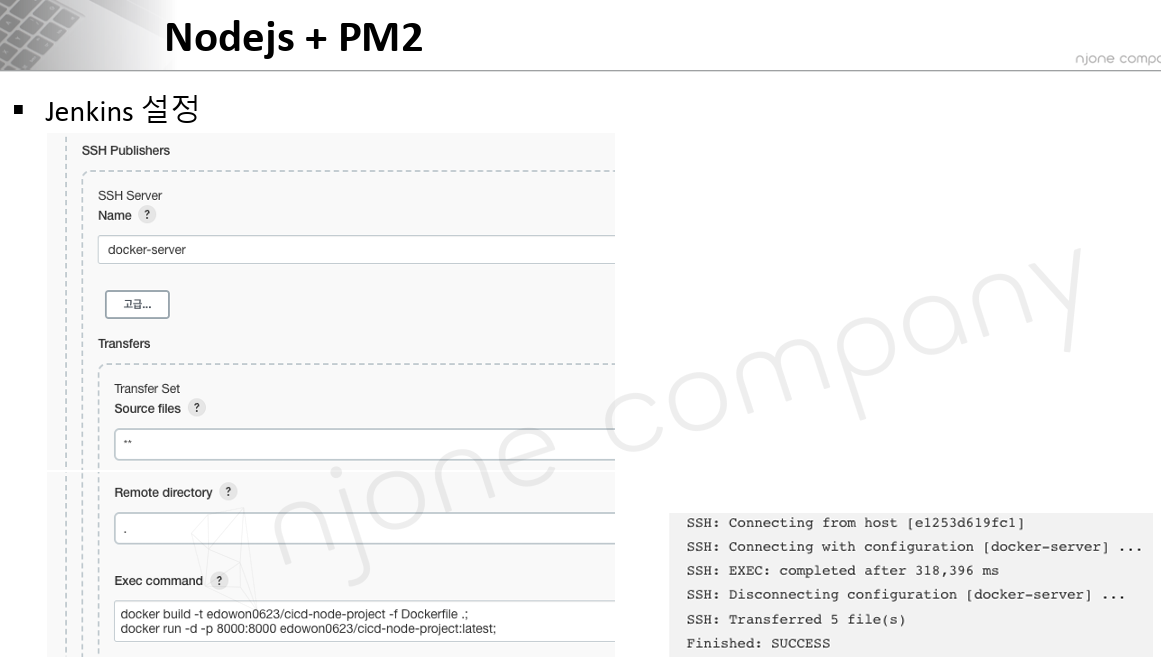
Node.js + PM2
Dockerfile
$ docker build -t edowon0623/cicd-node-example .
$ docker run -p 8000:8000 edowon0623/cicd-node-example
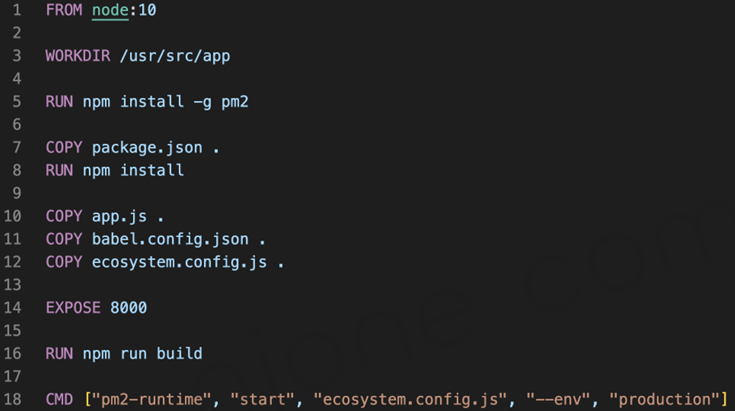
PM2
- Node.js 애플리케이션을 쉽게 관리할 수 있게 해주는 Process Manager - Cluster mode 실행 가능
$ npm install –g pm2ecosystem.config.js
Pipeline
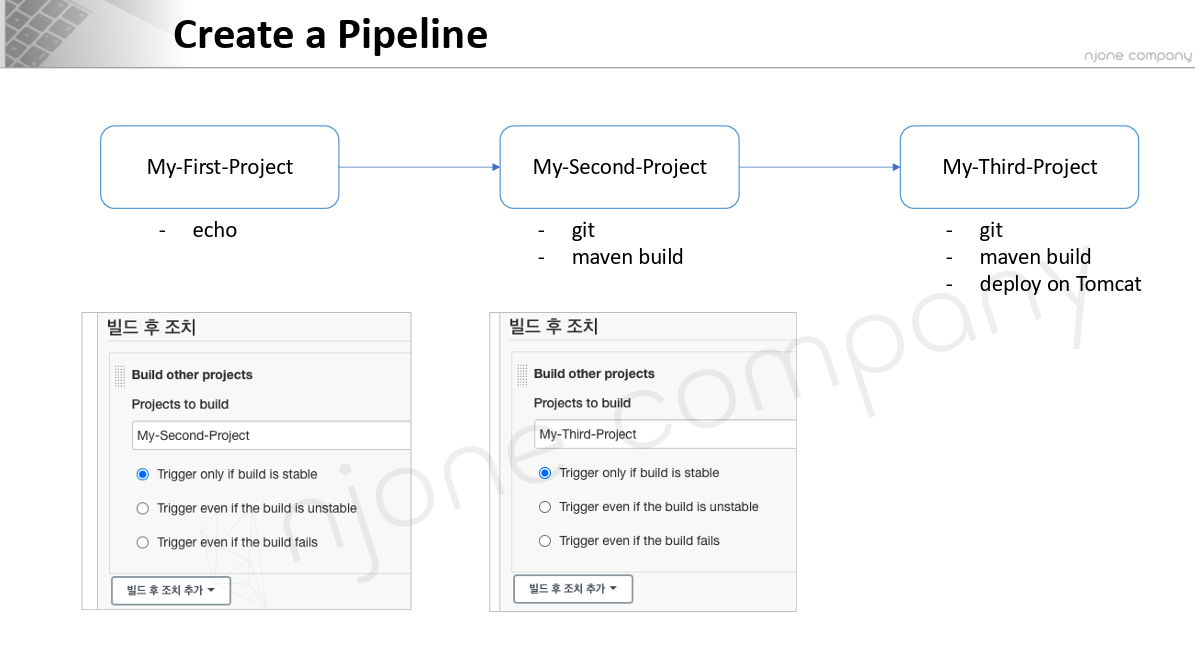
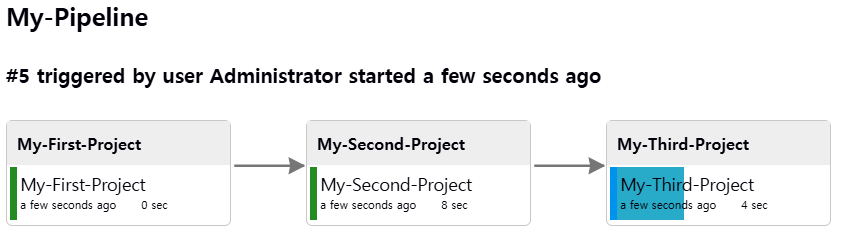
Trigger: 하나의 작업에서 연쇄적으로 일이 일어나는 것
즉, 1번 끝나고 2번 시작하고 2번 끝나고 3번 시작하게 설정
Jenkins plugin -> Delivery Pipline 설치
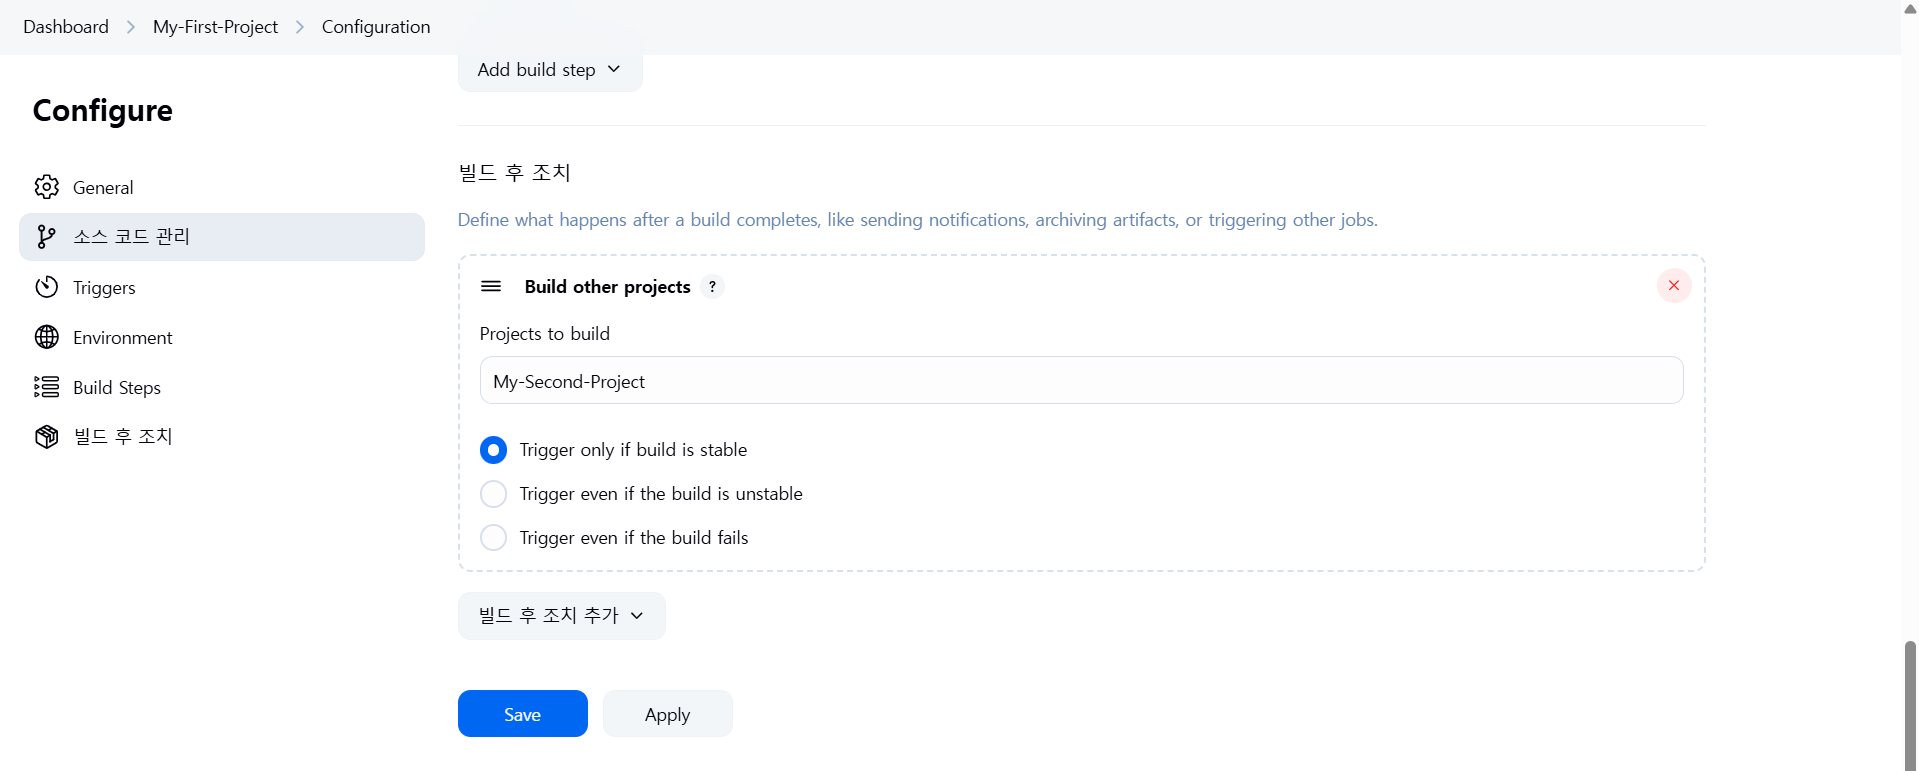
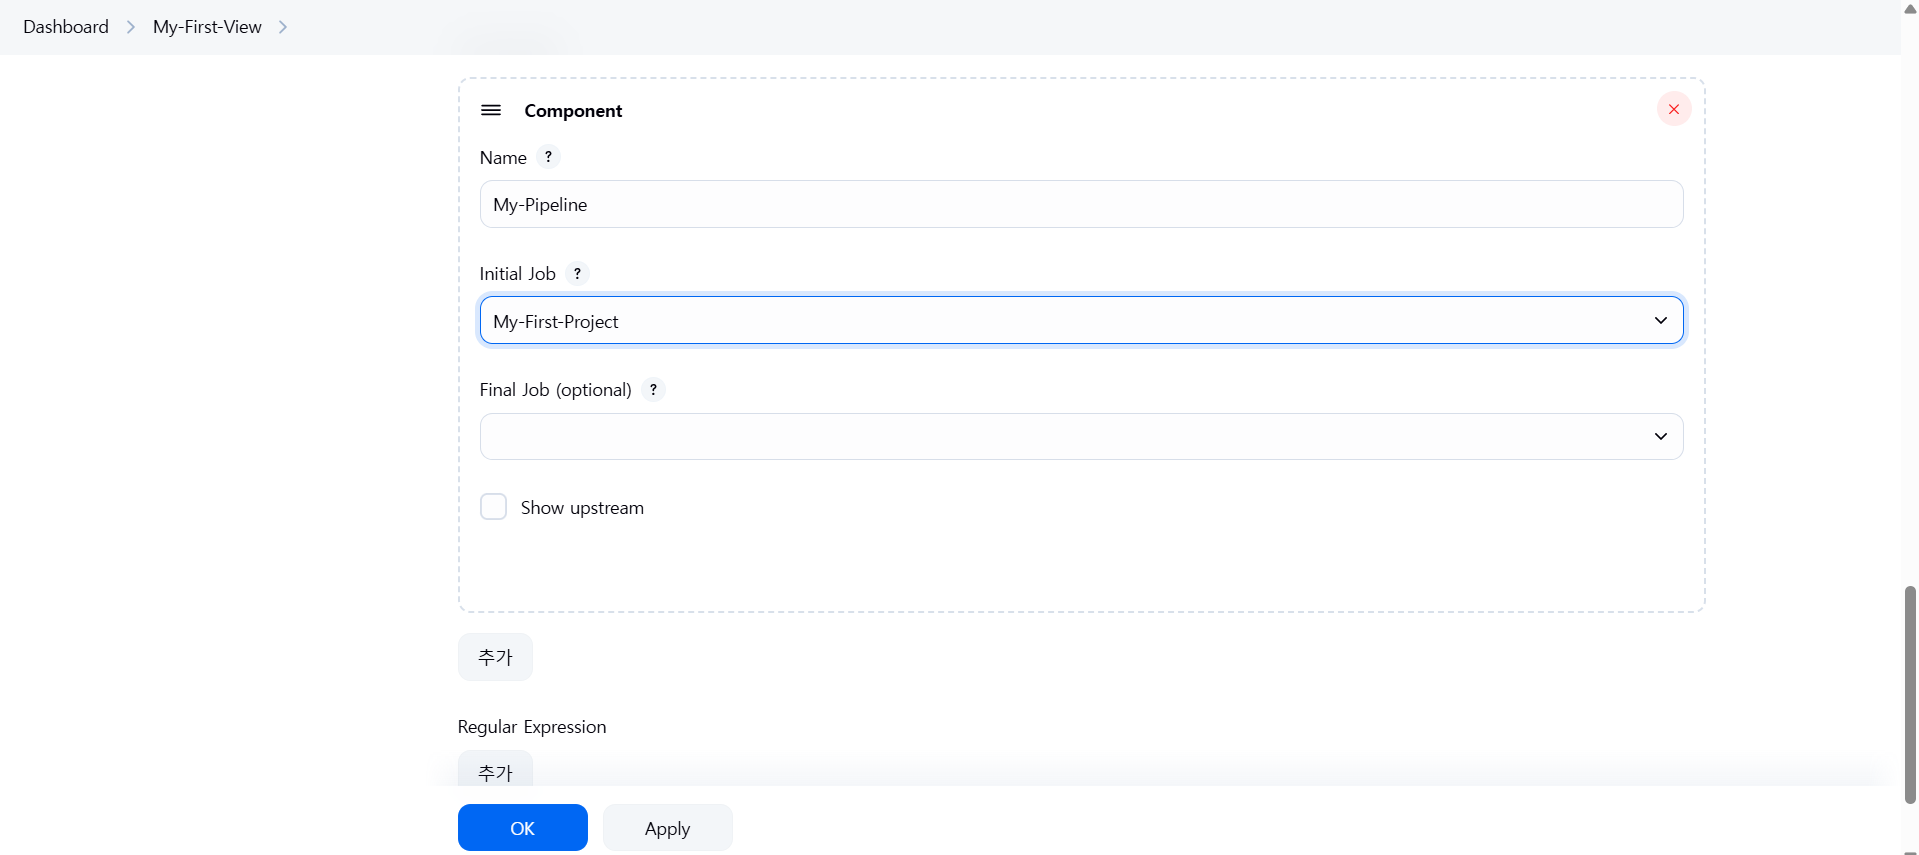
My-First-Project에서 빌드 후 조치에 Build other projects -> My-Second-Project
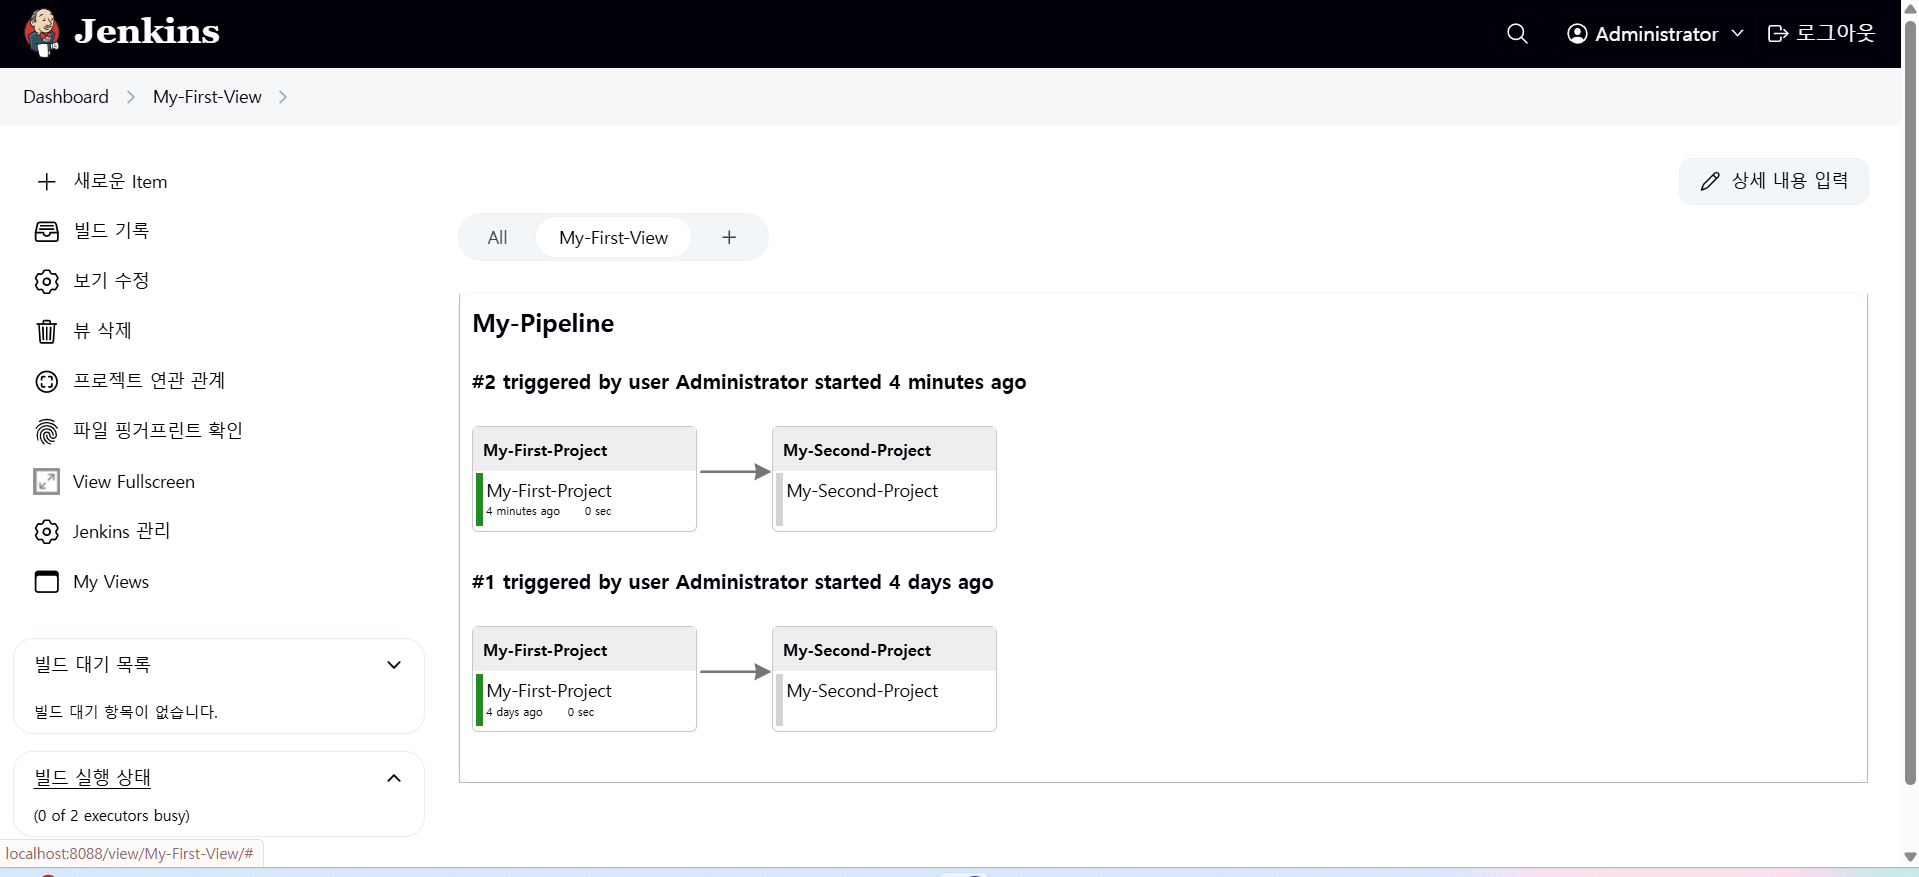
My-First-Project 지금 빌드 클릭
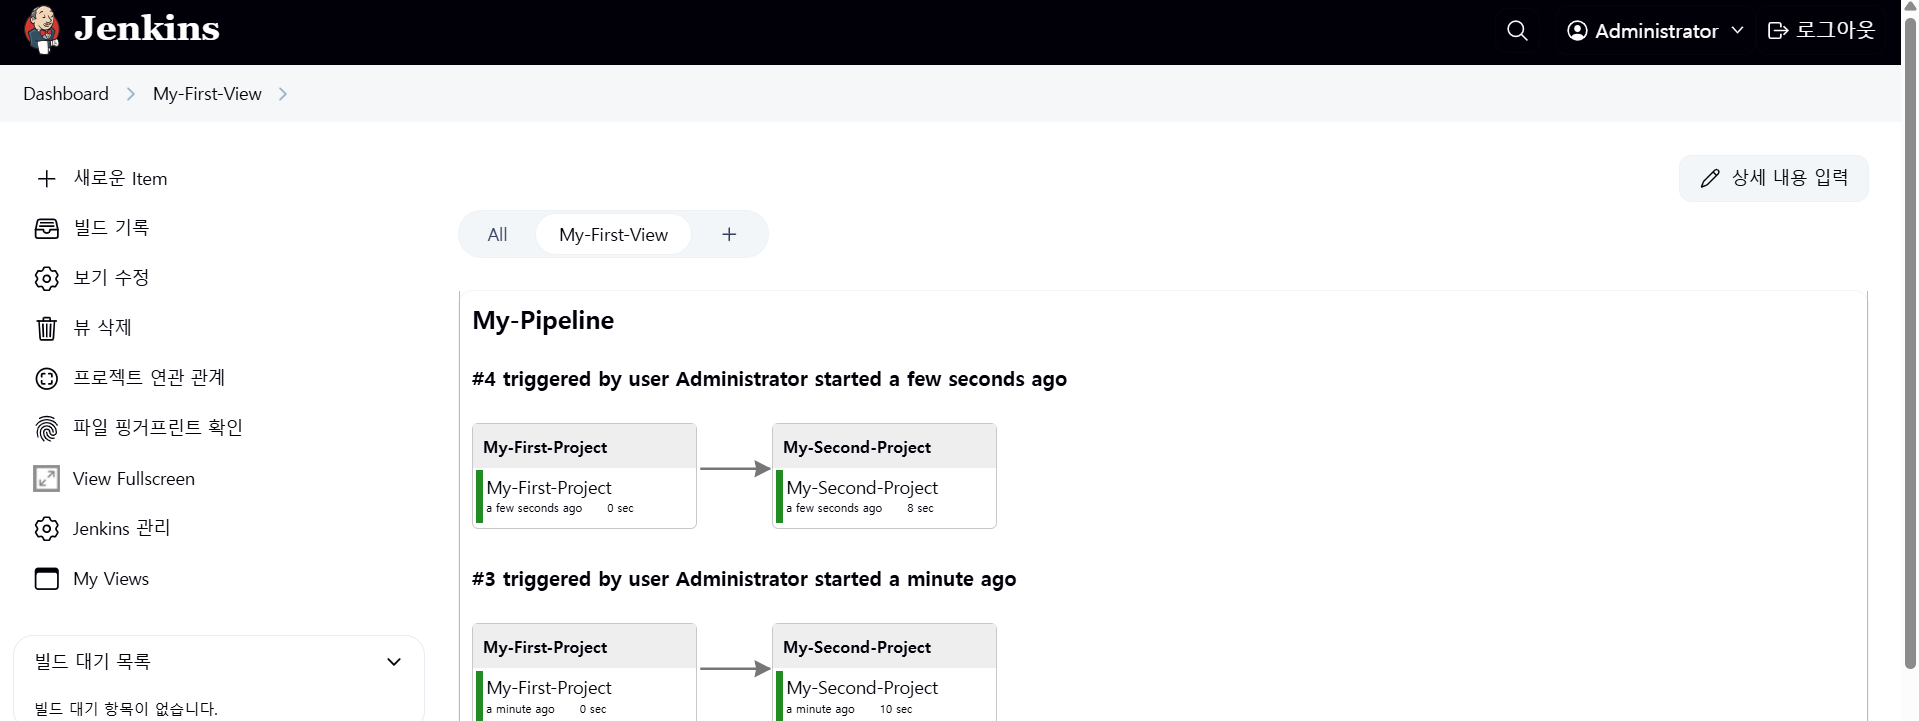
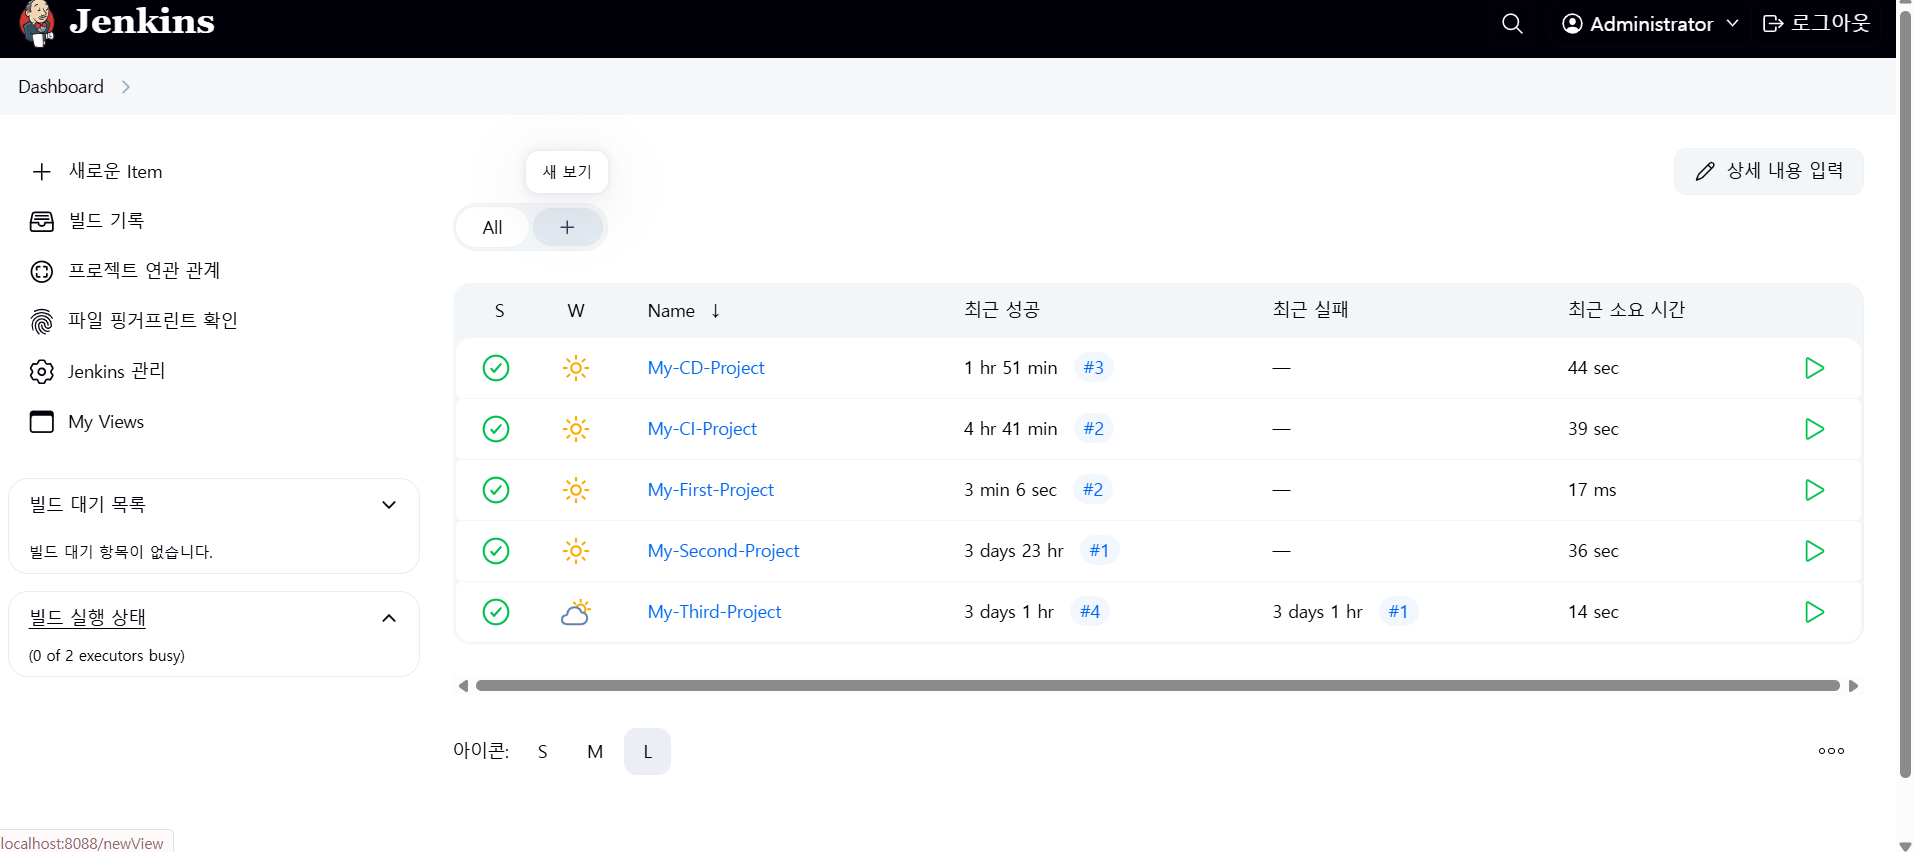
=> My-Second-Project도 자동으로 빌드된다!
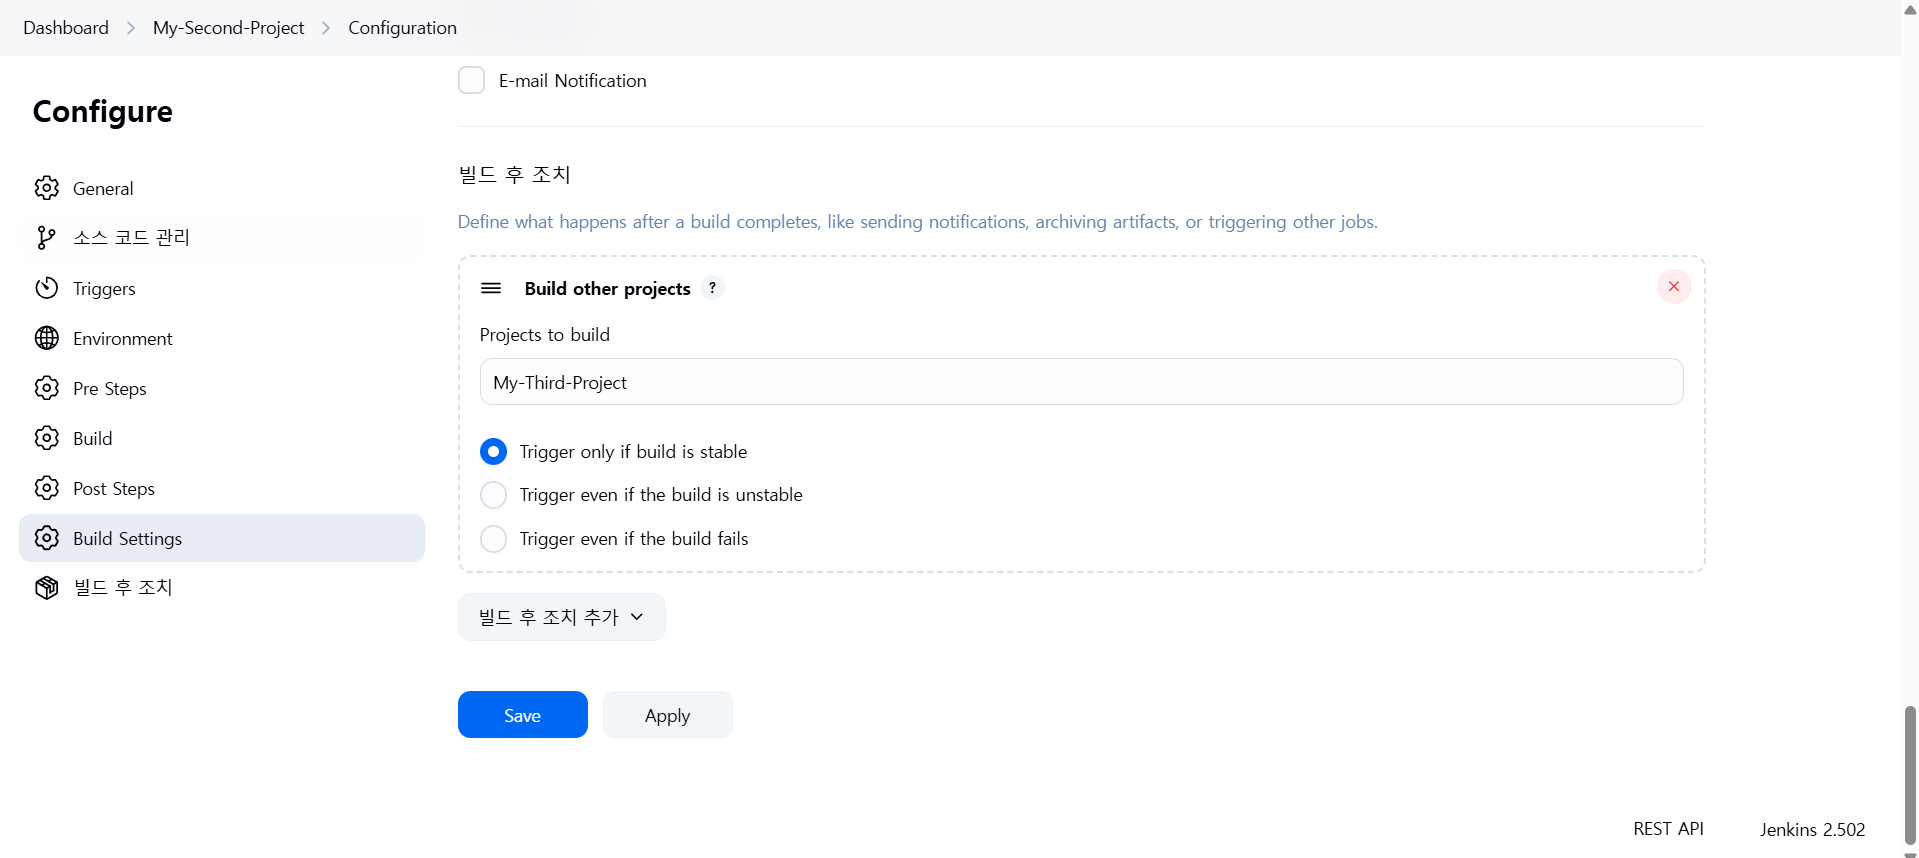
이제 My-Second-Project에서 My-Third-Project를 연결해보자
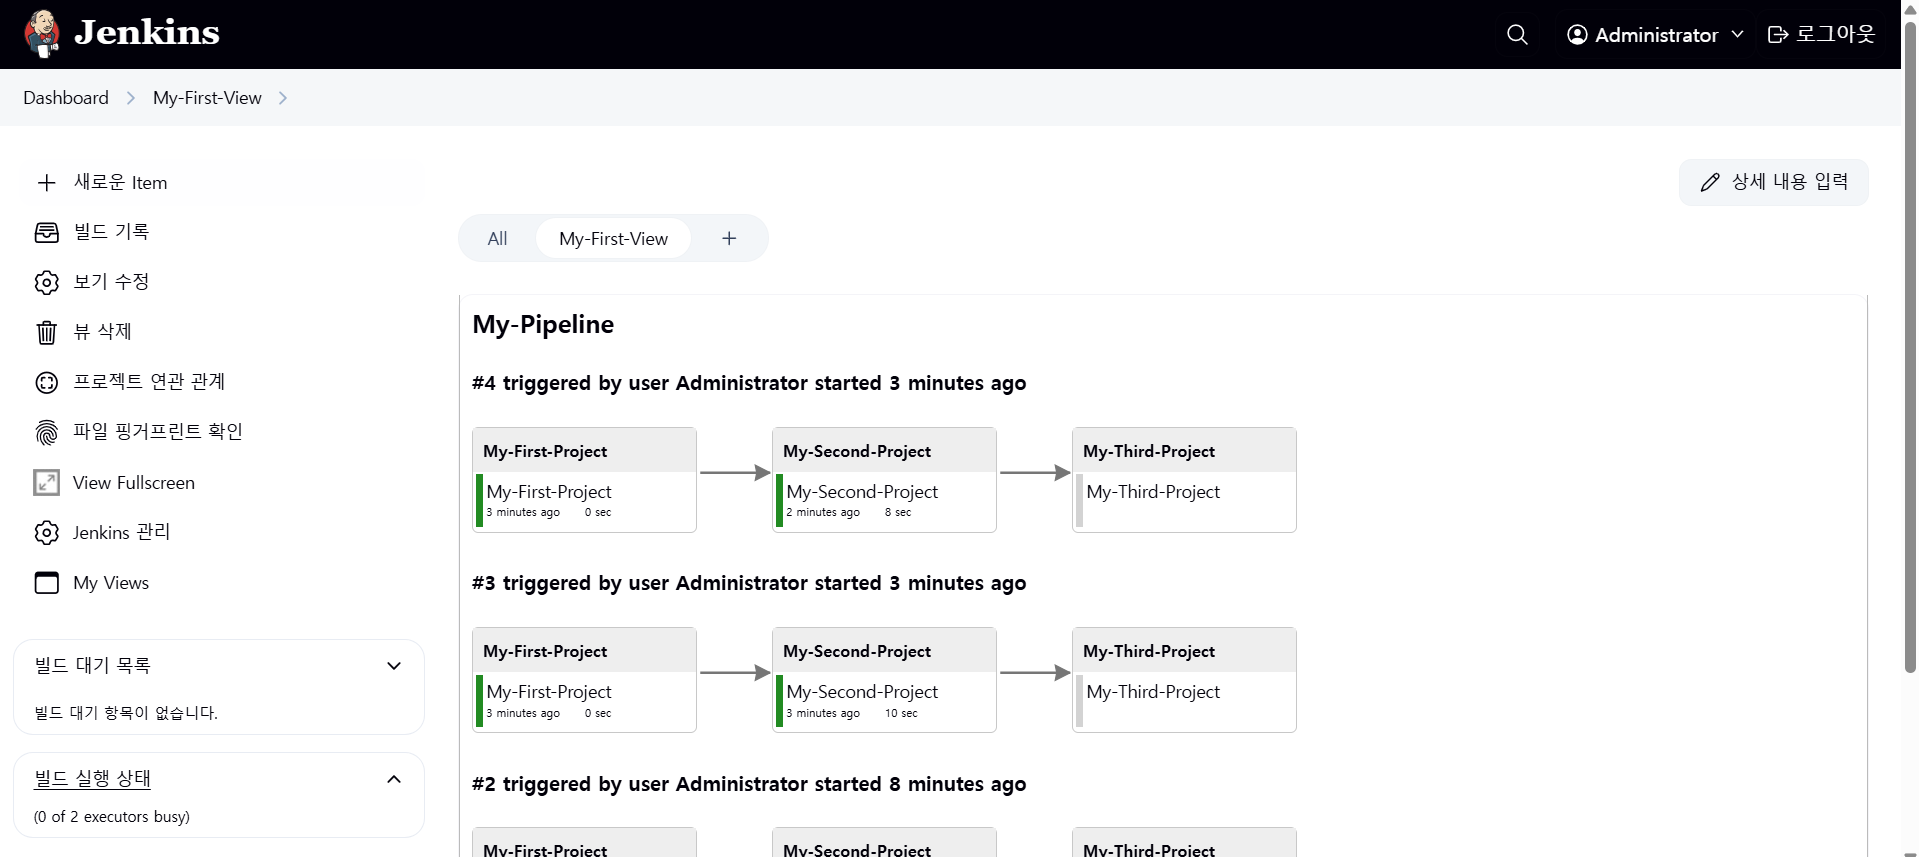
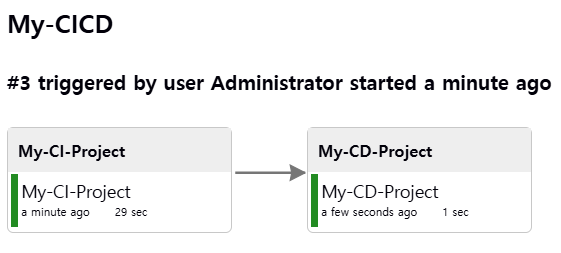
이제 My-CI-Project에서 My-CD-Project를 연결해보자
** shell programming xxxx.sh -> if loop var ..
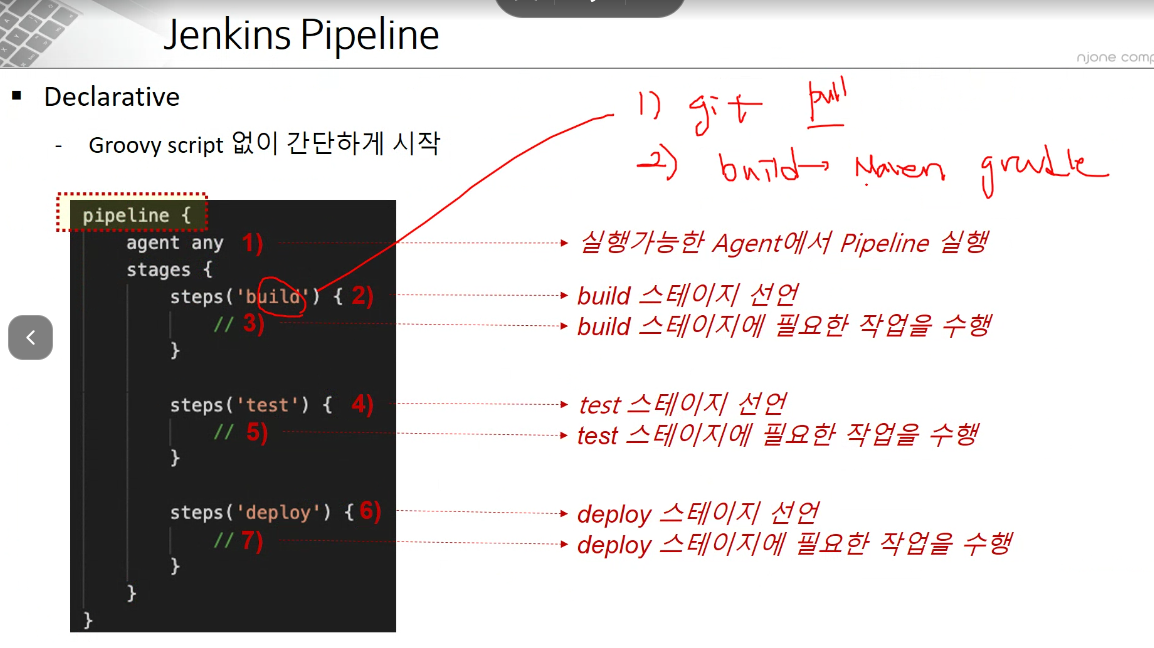
1) Jenkins Pipeline item (project)
2) IaC (Terraform, Ansible, Salt ...)
docker stop hello-world;
docker rm hello-world;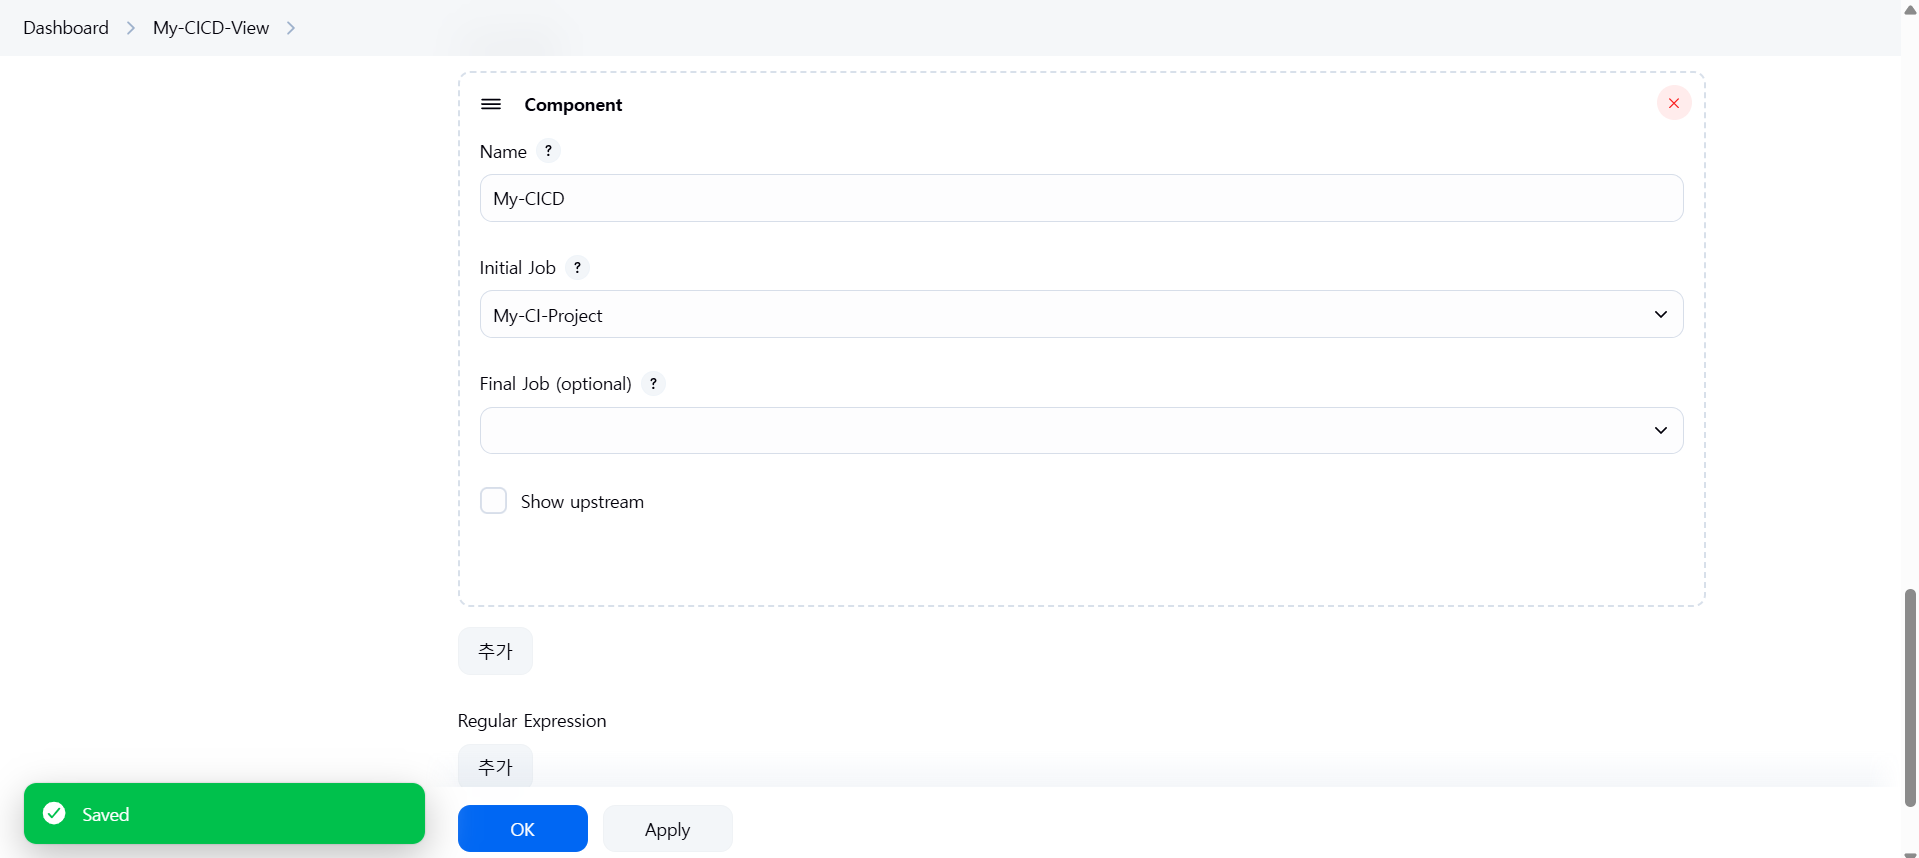

Jenkins Pipeline
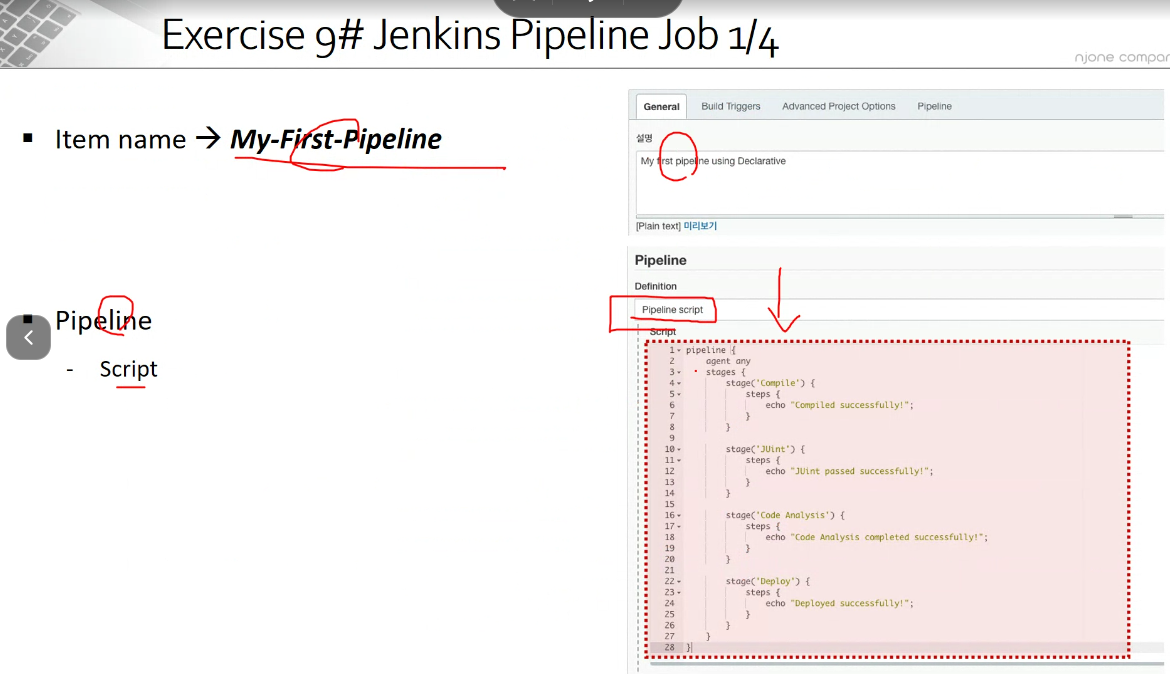
My-First-Pipeline
cd \work\git
git clone https://github.com/joneconsulting/jenkins_pipeline_script
cd jenkins_pipeline_script
code .
실습
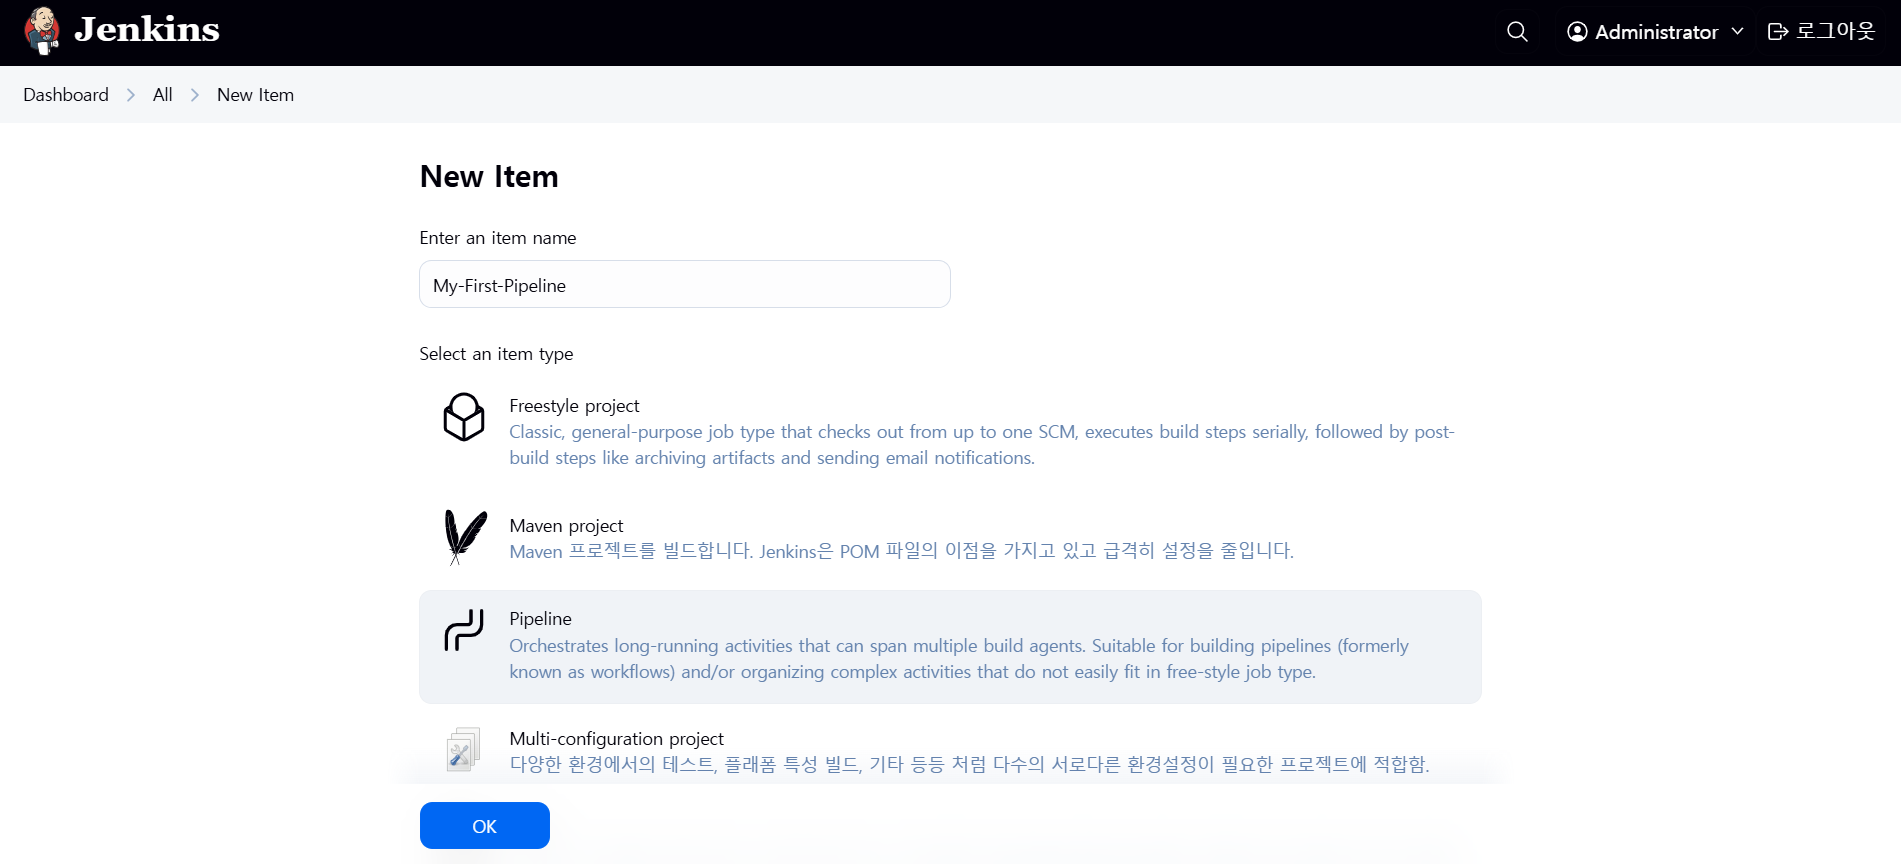
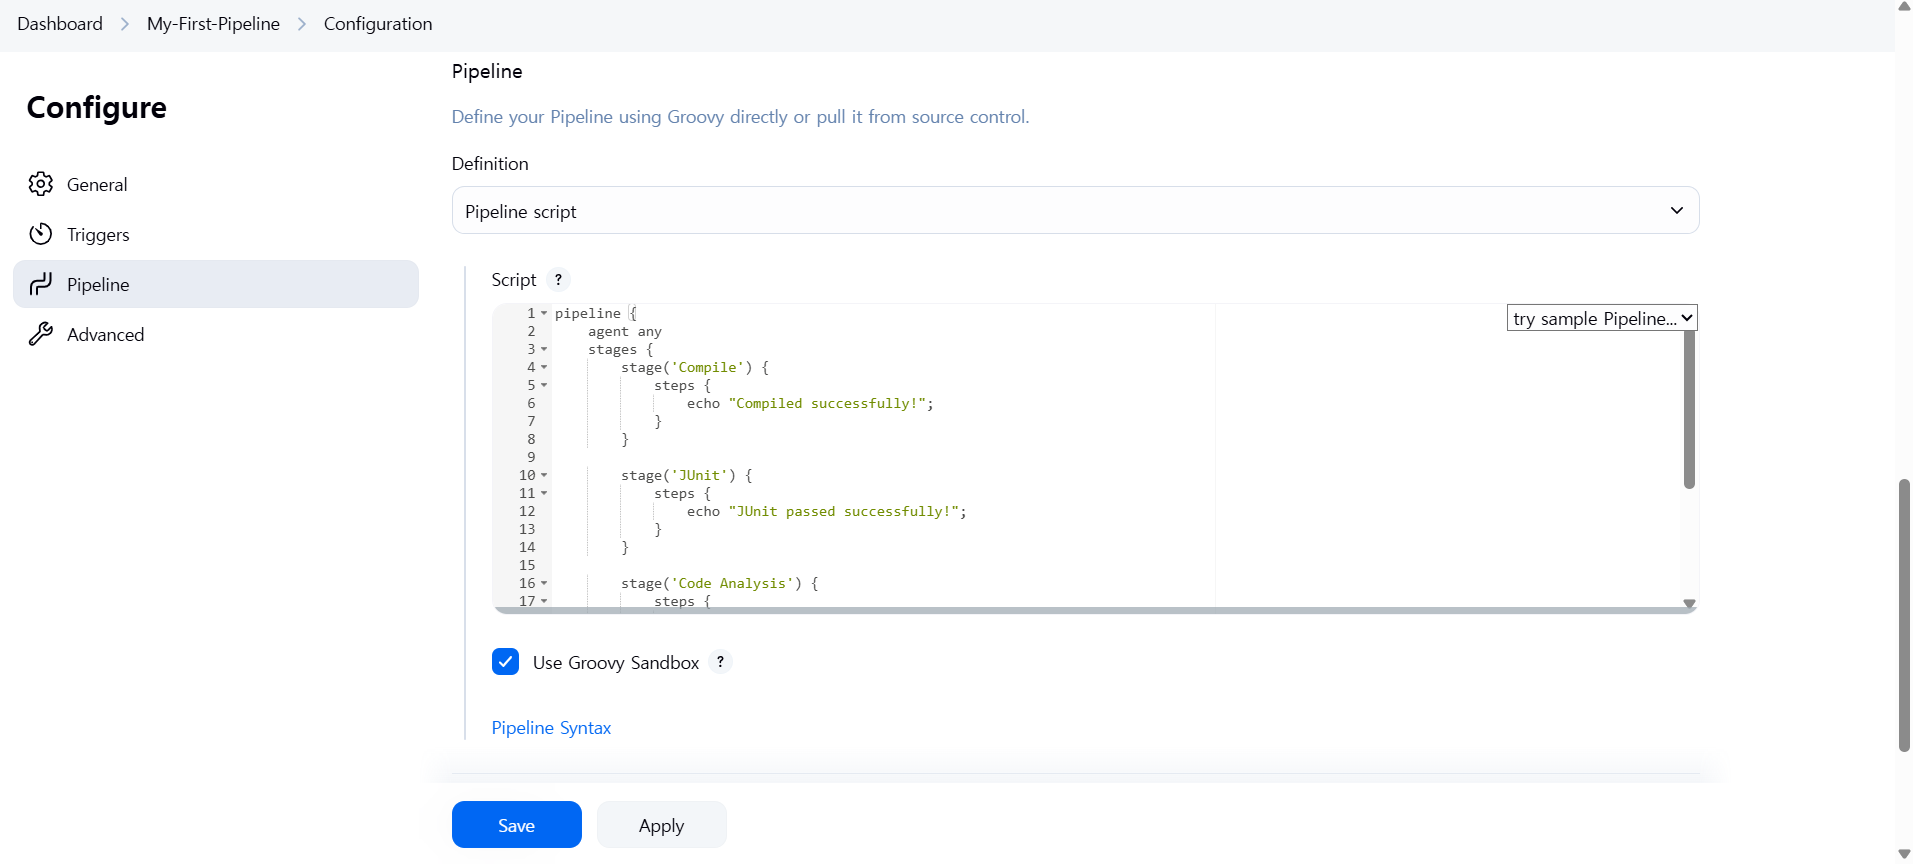
pipeline {
agent any
stages {
stage('Compile') {
steps {
echo "Compiled successfully!";
}
}
stage('JUnit') {
steps {
echo "JUnit passed successfully!";
}
}
stage('Code Analysis') {
steps {
echo "Code Analysis completed successfully!";
}
}
stage('Deploy') {
steps {
echo "Deployed successfully!";
}
}
}
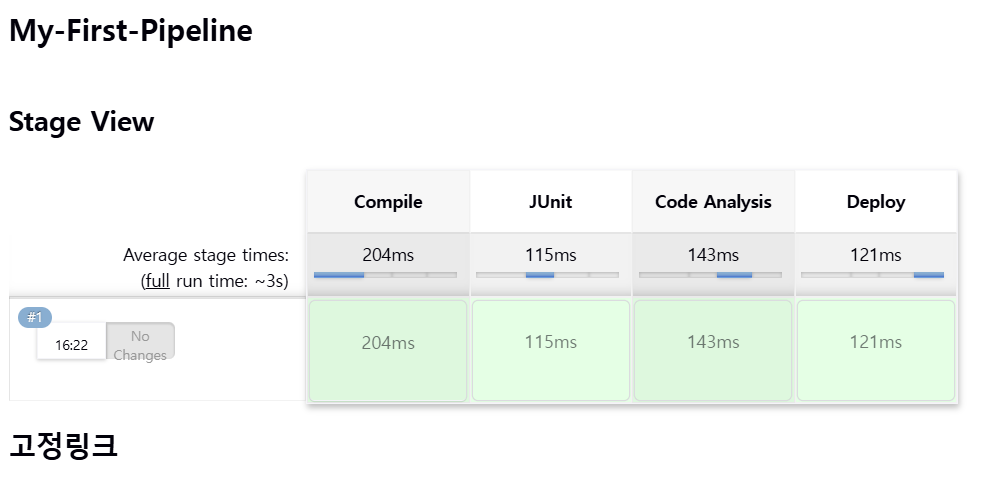
}지금 빌드
pipeline {
agent any
stages {
stage('Compile') {
steps {
echo "Compiled successfully!";
}
}
stage('JUnit') {
steps {
echo "JUnit passed successfully!";
}
}
stage('Code Analysis') {
steps {
echo "Code Analysis completed successfully!";
}
}
stage('Deploy') {
steps {
echo "Deployed successfully!";
}
}
}
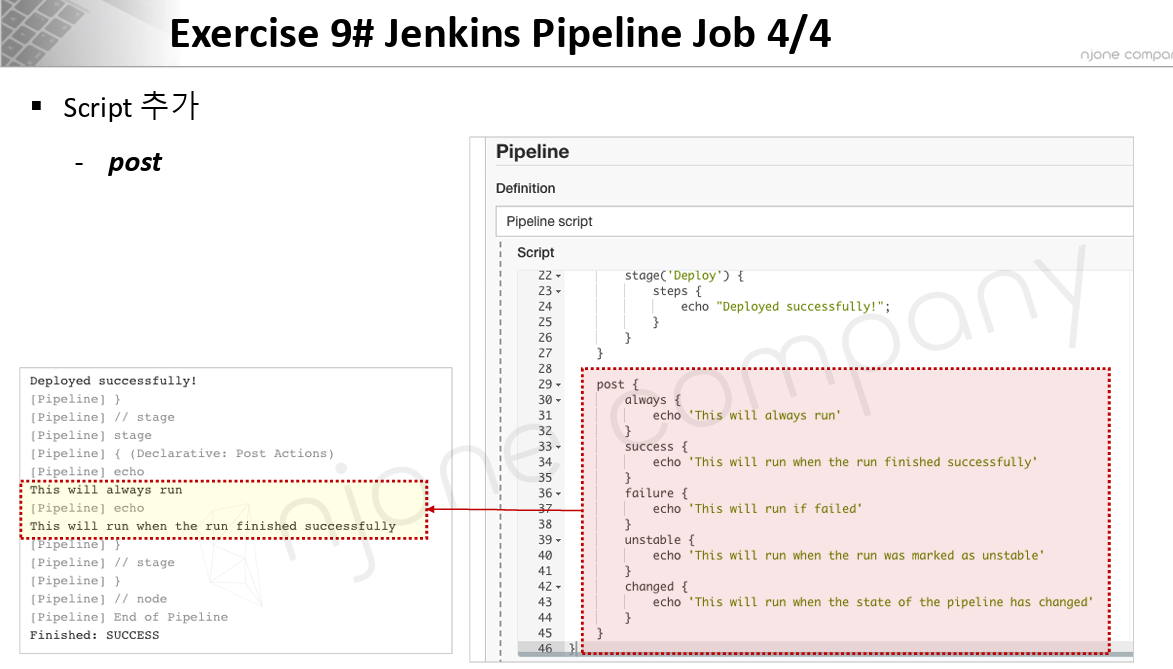
post {
always {
echo "This will always run"
}
success {
echo "This will run when the run finished successfully"
}
failure {
echo "This will run if failed"
}
unstable {
echo "This will run when the run was marked as unstable"
}
changed {
echo "This will run when the state of the pipeline has changed"
}
}
}
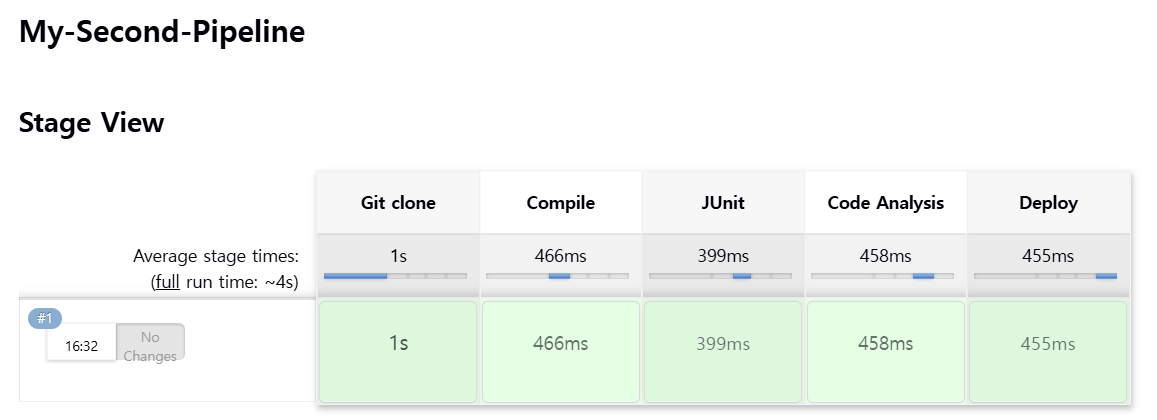
My-Second-Pipeline
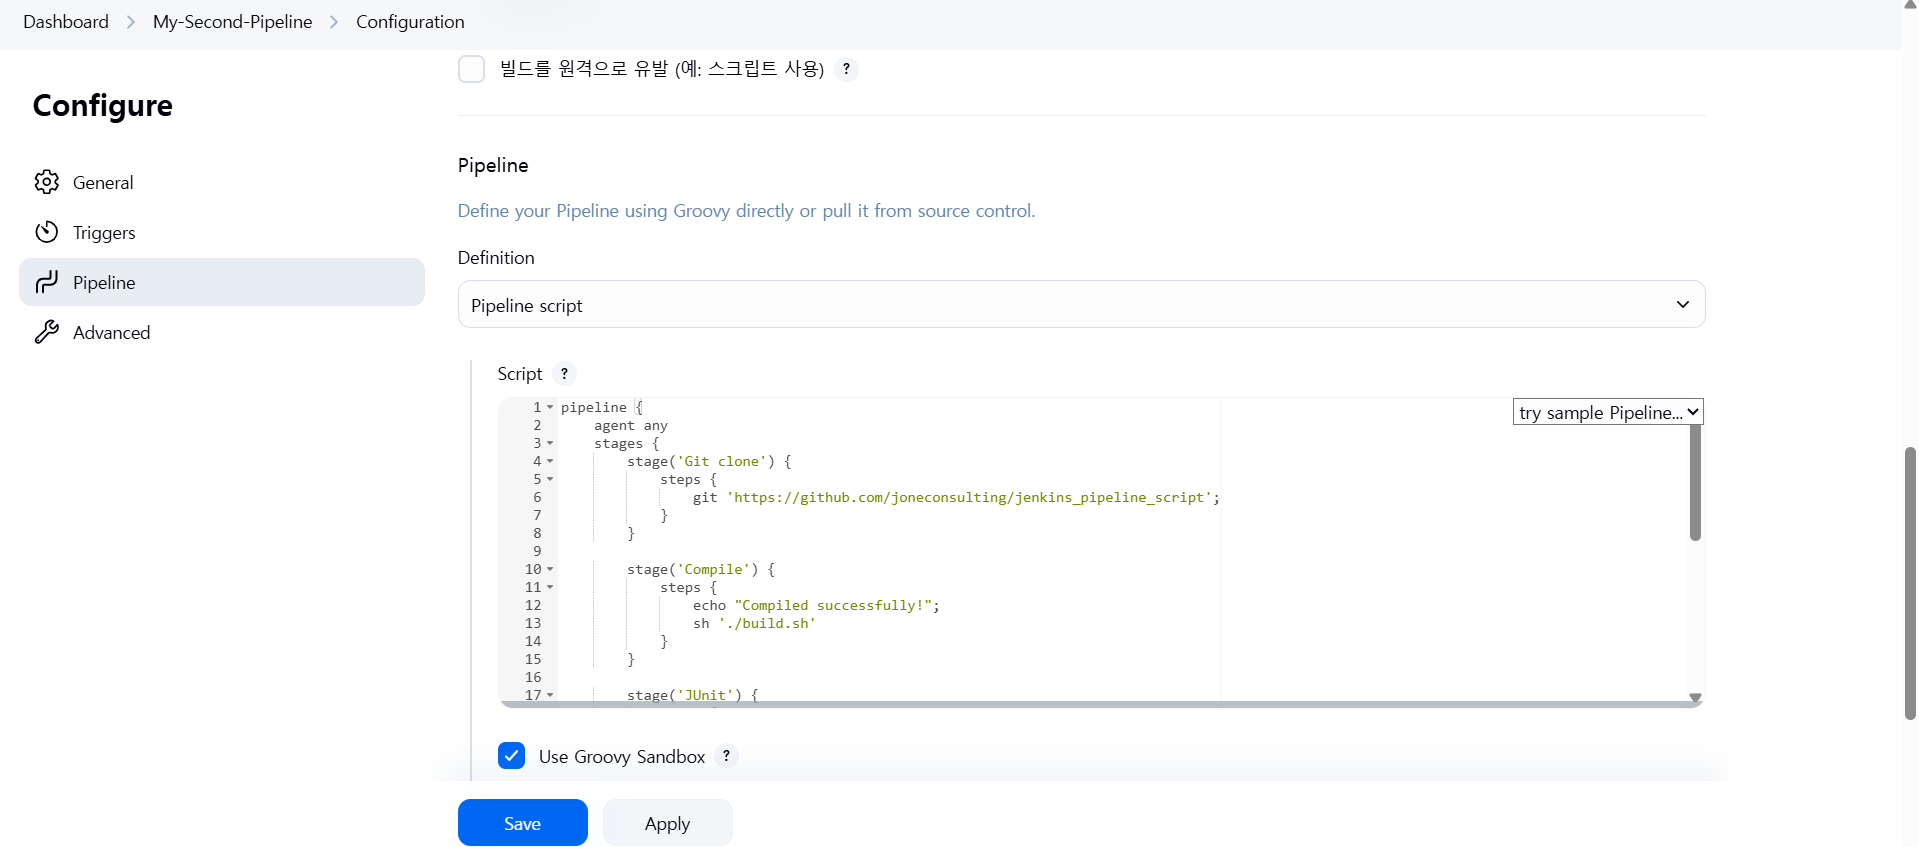
pipeline {
agent any
stages {
stage('Git clone') {
steps {
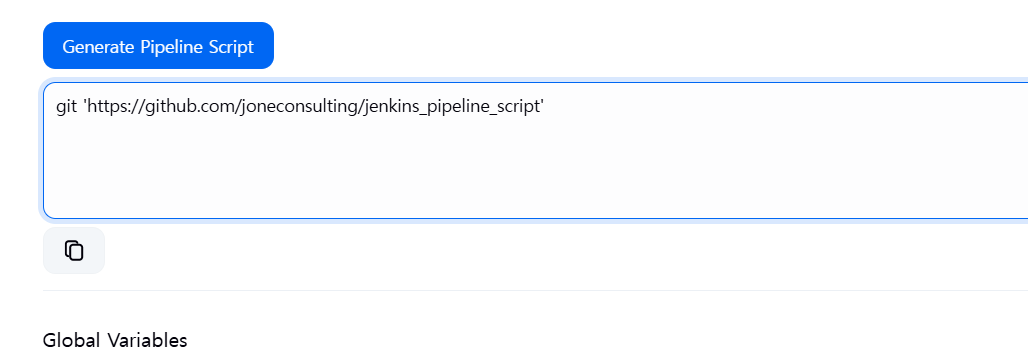
git 'https://github.com/joneconsulting/jenkins_pipeline_script';
}
}
stage('Compile') {
steps {
echo "Compiled successfully!";
sh './build.sh'
}
}
stage('JUnit') {
steps {
echo "JUnit passed successfully!";
sh './unit.sh'
}
}
stage('Code Analysis') {
steps {
echo "Code Analysis completed successfully!";
sh './quality.sh'
}
}
stage('Deploy') {
steps {
echo "Deployed successfully!";
sh './deploy.sh'
}
}
}
}
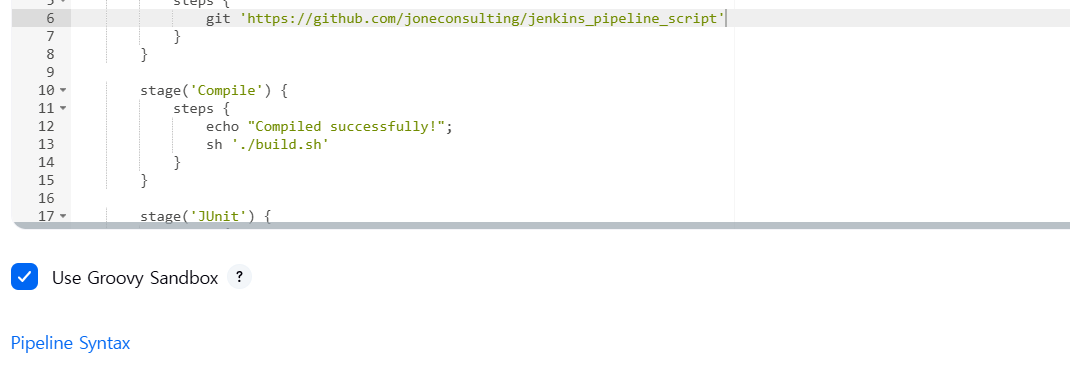
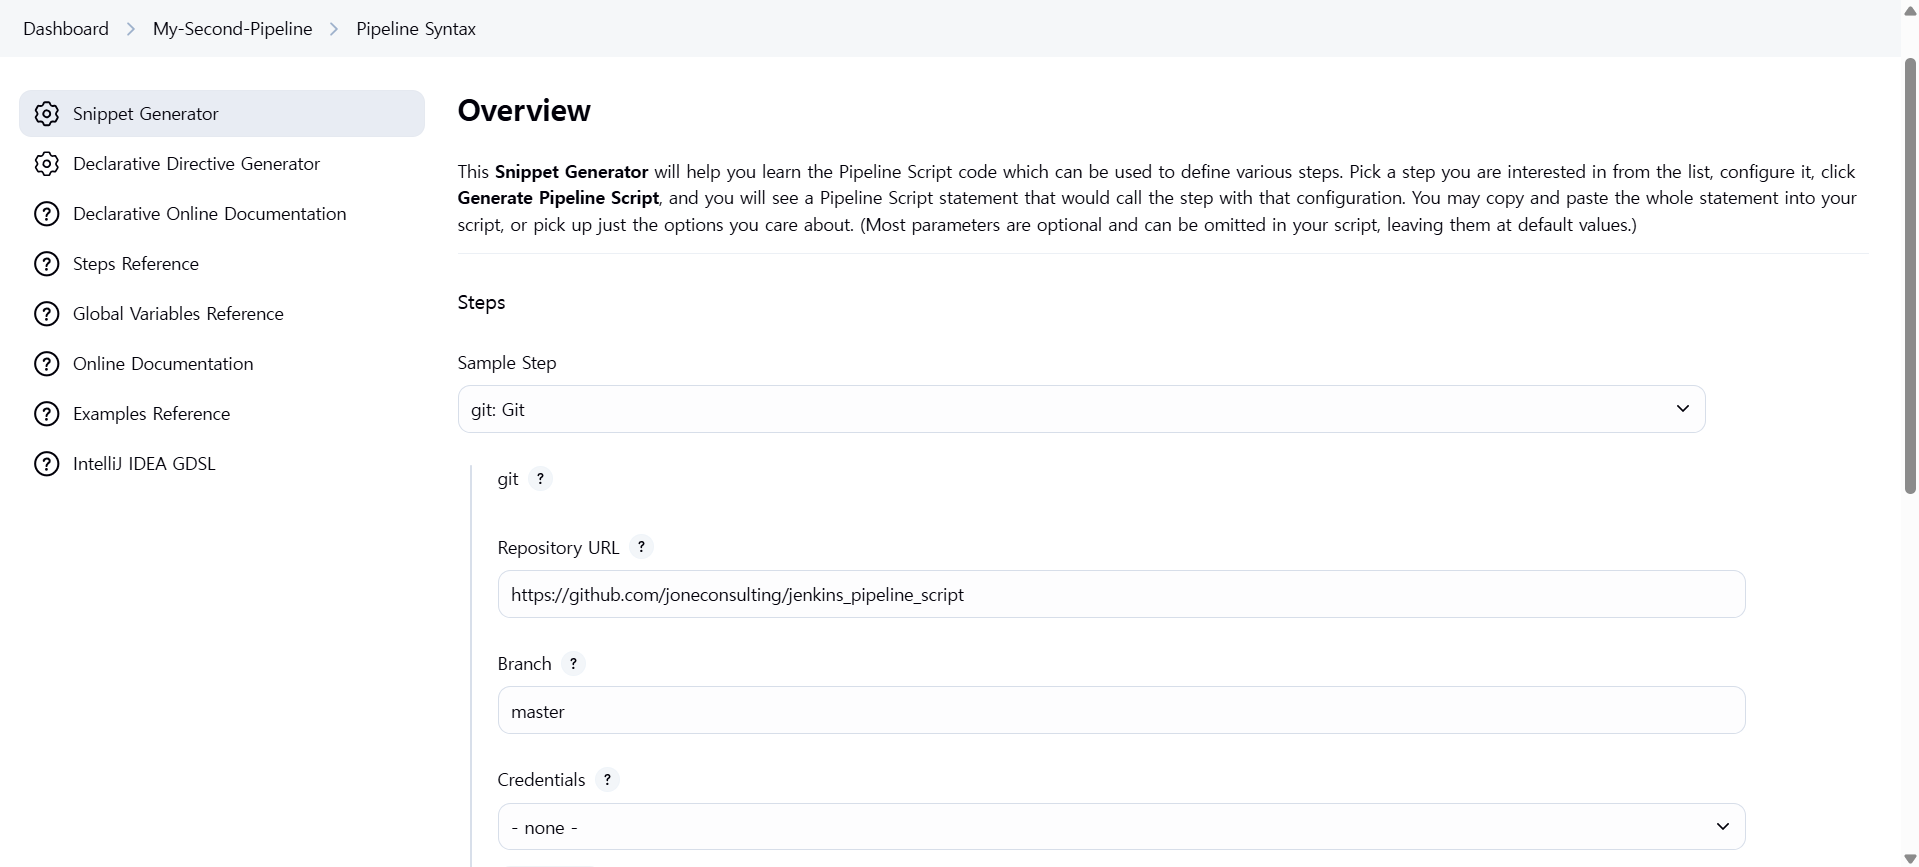
pipeline syntax 클릭하면 pipeline script 만들어준다 !
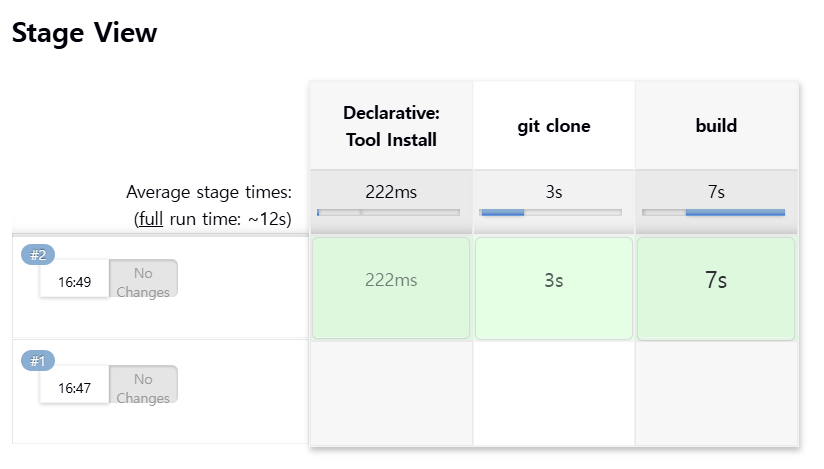
My-Third-Pipeline
pipeline {
    agent any;

    tools {
        maven 'maven3.8.8'
    }

    stages {
        stage('git clone') {
            steps {
                git branch: 'main', url: 'https://github.com/joneconsulting/cicd-web-project.git';
            }
        }

        stage('build') {
            steps {
                sh '''
                    echo build start
                    mvn clean compile package -DskipTest=true
                ''';
            }

        }
    }
}