AppLifecycleState
Flutter에서는 앱에서 홈으로 나갔을 때, 전화가 왔을 때, 긴급 문자가 도착하였을 때 등등 앱 라이프사이클 상태가 변하게 된다.
아래와 같이 총 4가지 상태가 있다.
inactive
paused
resumed
detached
각각 '화면에 노출', '유저 입력 가능', 'os view' 상태에 따라서 나눌 수 있다.
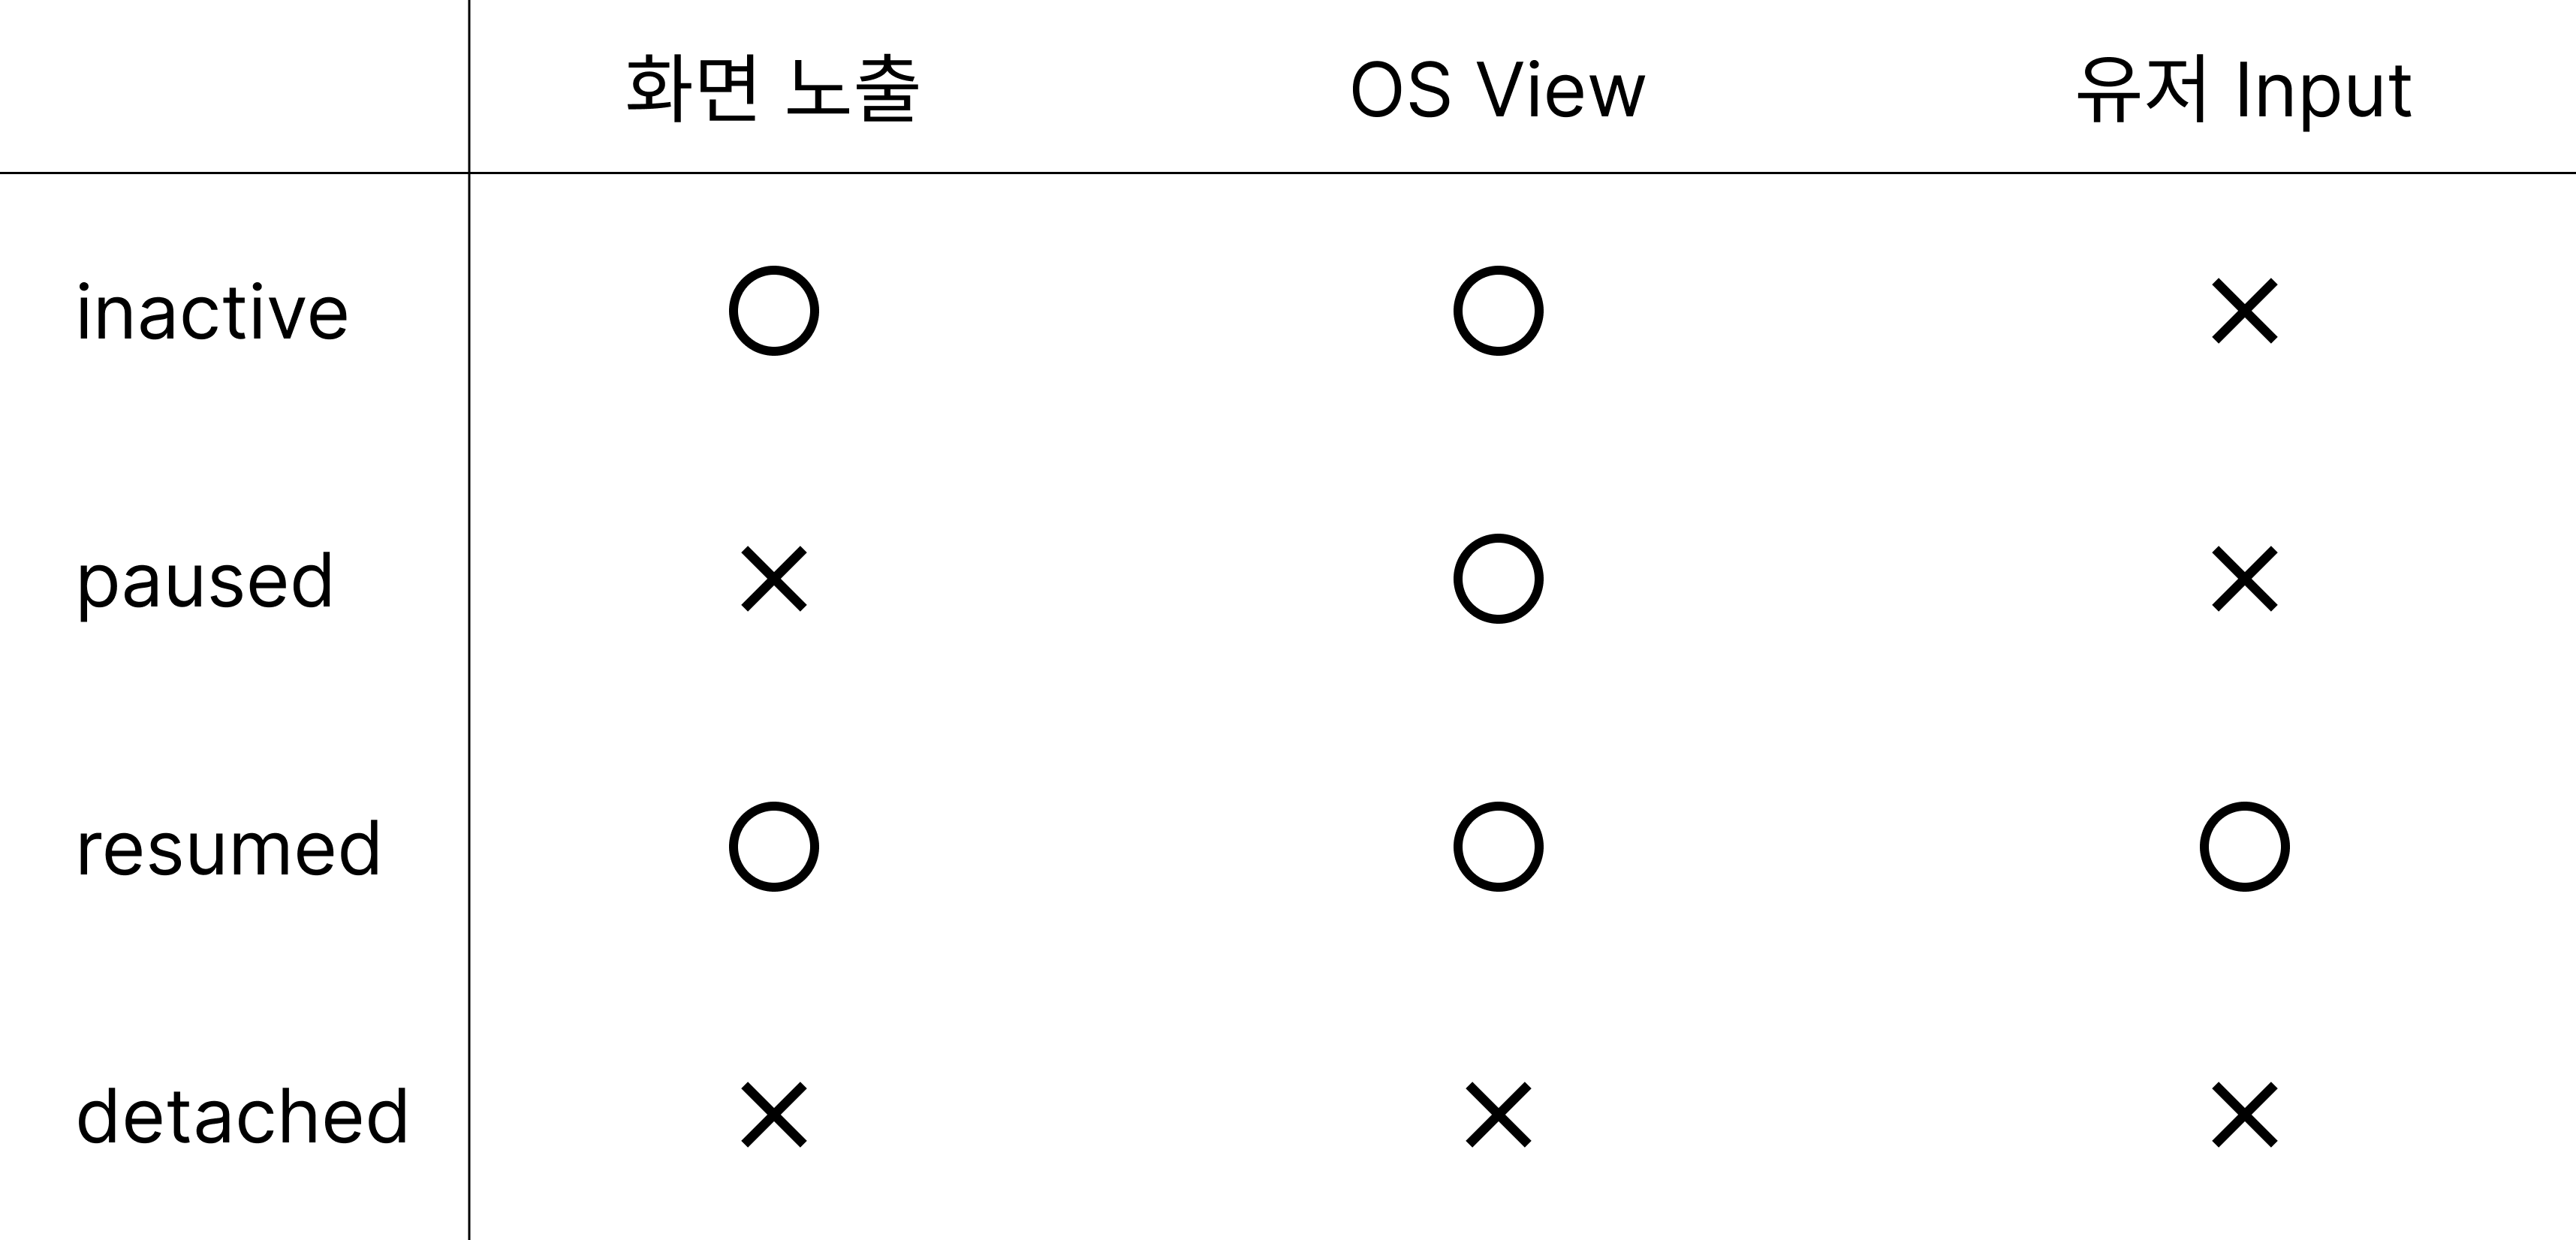
아래 resumed와 detached는 반대인 상태로,
resumed는 실행 중이고 포커스도 가지고 있는 상태이다.
반면 detached는 화면 노출, OS View에서 떨어진 상태이며, 유저가 다른 행동을 할 수 없다.
inactive는 앱 위에 무언가가 올려져 있는 상태로 백그라운드에서는 화면에 보이지만 유저가 다른 행동을 할 수 없는 상태이다. 마치 재난문자가 오면 아래 있는 앱을 사용하지 못하는 것과 같다.
paused는 간단하게 앱을 켜놓고 홈화면으로 나간 상태이다.
흔들기 앱
1. 코드
간단하게 앱을 흔들었을 때, 숫자가 올라가는 예제로 AppLifecycleState를 변경을 감지하고 그에 따라 처리하는 앱을 만들어보자.
프로젝트를 만들고 flutter에서 기본으로 제공되는 counter 기능을 사용할 것이기 때문에 거의 그대로 두면 된다.
흔드는 이벤트를 감지하기 위해 pub.dev에 있는 shake라이브러리를 사용하였다.
dependencies:
  flutter:
    sdk: flutter
  cupertino_icons: ^1.0.2
  shake: ^2.2.0
pub get을 완료한 후에 MyHomePage 위젯 코드를 작성하였다.
import 'package:flutter/material.dart';
import 'package:shake/shake.dart';
class MyHomePage extends StatefulWidget {
const MyHomePage({super.key, required this.title});
final String title;
State<MyHomePage> createState() => _MyHomePageState();
}
class _MyHomePageState extends State<MyHomePage>{
int _counter = 0;
void initState() {
ShakeDetector.autoStart(
onPhoneShake: () {
setState(() => _counter++);
},
shakeThresholdGravity: 1.5,
);
super.initState();
}
Widget build(BuildContext context) {
return Scaffold(
appBar: AppBar(
backgroundColor: Theme.of(context).colorScheme.inversePrimary,
title: Text(widget.title),
),
body: Center(
child: Column(
mainAxisAlignment: MainAxisAlignment.center,
children: <Widget>[
const Text(
'흔들어서 카운트를 올려보세요',
),
Text(
'$_counter',
style: Theme.of(context).textTheme.displayLarge,
),
],
),
)
);
}
}테스트 - 1
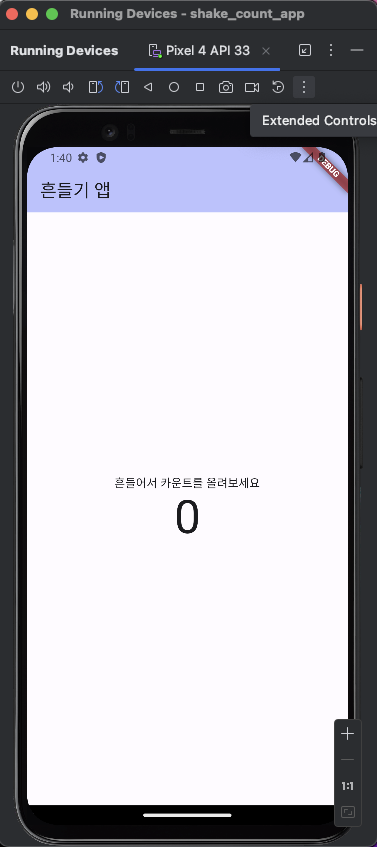
위에 Extended Controls 버튼을 클릭하고,
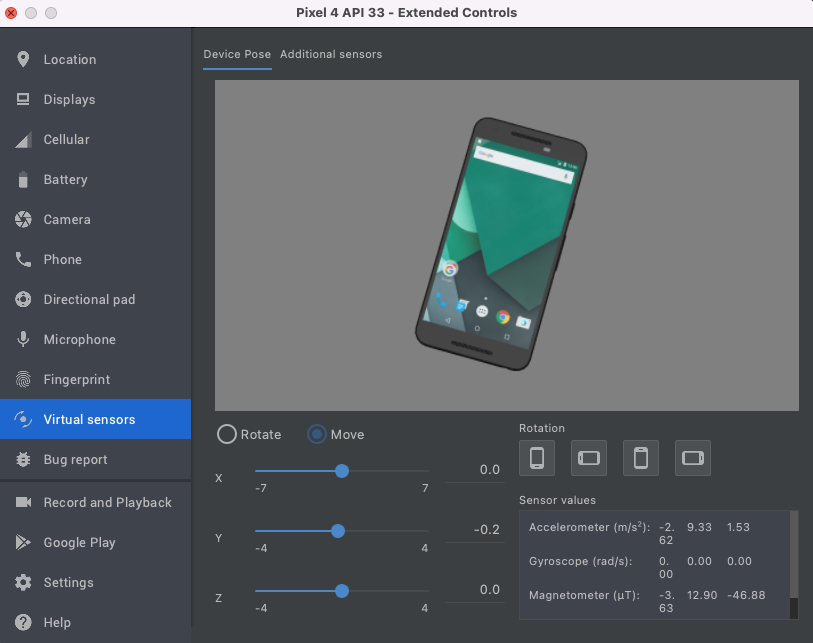
Virtual sensors의 Move를 선택하고 Y의 값을 움직이면 숫자가 올라간다.

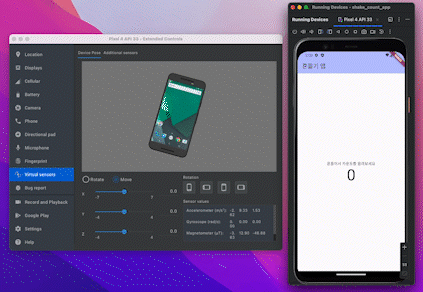
테스트 - 2
그럼 애뮬레이터를 홈화면을 나간 상태에서 똑같이 흔들면 어떻게 되는 지 확인해보자.

홈 화면에서도 흔들면 숫자가 올라갔다. 만약 백그라운드에서 흔드는 기능을 제어하고 싶다면 WidgetsBindingObserver를 통해 AppLifecycleState를 제어하면 된다.
아래 코드는 이 기능을 포함한 코드이다.
코드 - WidgetsBindingObserver 추가
class _MyHomePageState extends State<MyHomePage> with WidgetsBindingObserver{
int _counter = 0;
late ShakeDetector detector;
void initState() {
WidgetsBinding.instance.addObserver(this); // -- 1
...
}
void dispose() {
WidgetsBinding.instance.removeObserver(this); // -- 3
super.dispose();
}
Widget build(BuildContext context) {
...
}
// --2
void didChangeAppLifecycleState(AppLifecycleState state) {
switch(state) {
case AppLifecycleState.resumed:
detector.startListening();
break;
case AppLifecycleState.inactive:
break;
case AppLifecycleState.paused:
detector.stopListening();
break;
case AppLifecycleState.detached:
break;
}
}
}1. initState()
with WidgetsBindingObserver 를 통해 가져온 객체를
WidgetsBinding.instance.addObserver(this); 에 넣어줌으로써 위젯의 앱 라이프사이클 상태를 감지할 수 있다.
with는 여러 개의 부모 클래스를 가질 수 있으며, 각 메소드를 일일이 구현하지 않더라도 부모에서 구현된 메소드 호출을 할 수 있다.
2. didChangeAppLifecycleState
WidgetsBindingObserver에 있는 메서드를 오버라이딩해서 기능을 구현해주면 된다.
위에 표에서 알아본 듯이 라이프사이클 상태에는 4 가지 상태가 있고, 각 case에 맞게 기능을 구현해주면 된다.
이번 예제에서는 홈으로 나갔을 때, 라이프사이클 상태가 paused가 되기 때문에 AppLifecycleState.paused 상태일 때 detector 기능을 멈추었다.
3. dispose()
메모리 누수 방지를 위해 WidgetsBinding에서 인스턴스를 제거한다.
테스트
홈 화면에 나가있는 상태에서는 숫자가 오르지 않는 것을 확인할 수 있다.
앱 라이프사이클 상태에 대해서 알아보았다.
이 기능을 이용하여서 의도하지 않은 동작을 제어할 수 있고 혹은 의도적으로 동작하게 만들 수 있을 것이다.

꼭 필요한 내용인데 감사합니다