우아한 형제들의 Git Flow를 보고 참고하여 개인적으로 많이 쓰는 Git 명령어들을 추후 작성 예정이다.
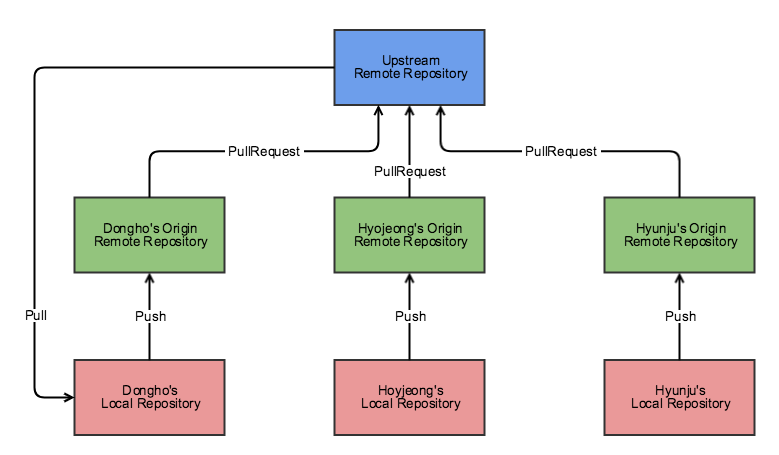
1. Git Repository
- Upstream Remote Repository
- Origin Remote Repository : Upstream Repository를 Fork한 원격 개인 저장소
- Local Repository : 내 컴퓨터에 저장되어 있는 개인 저장소
- Workflow
2. Git-flow
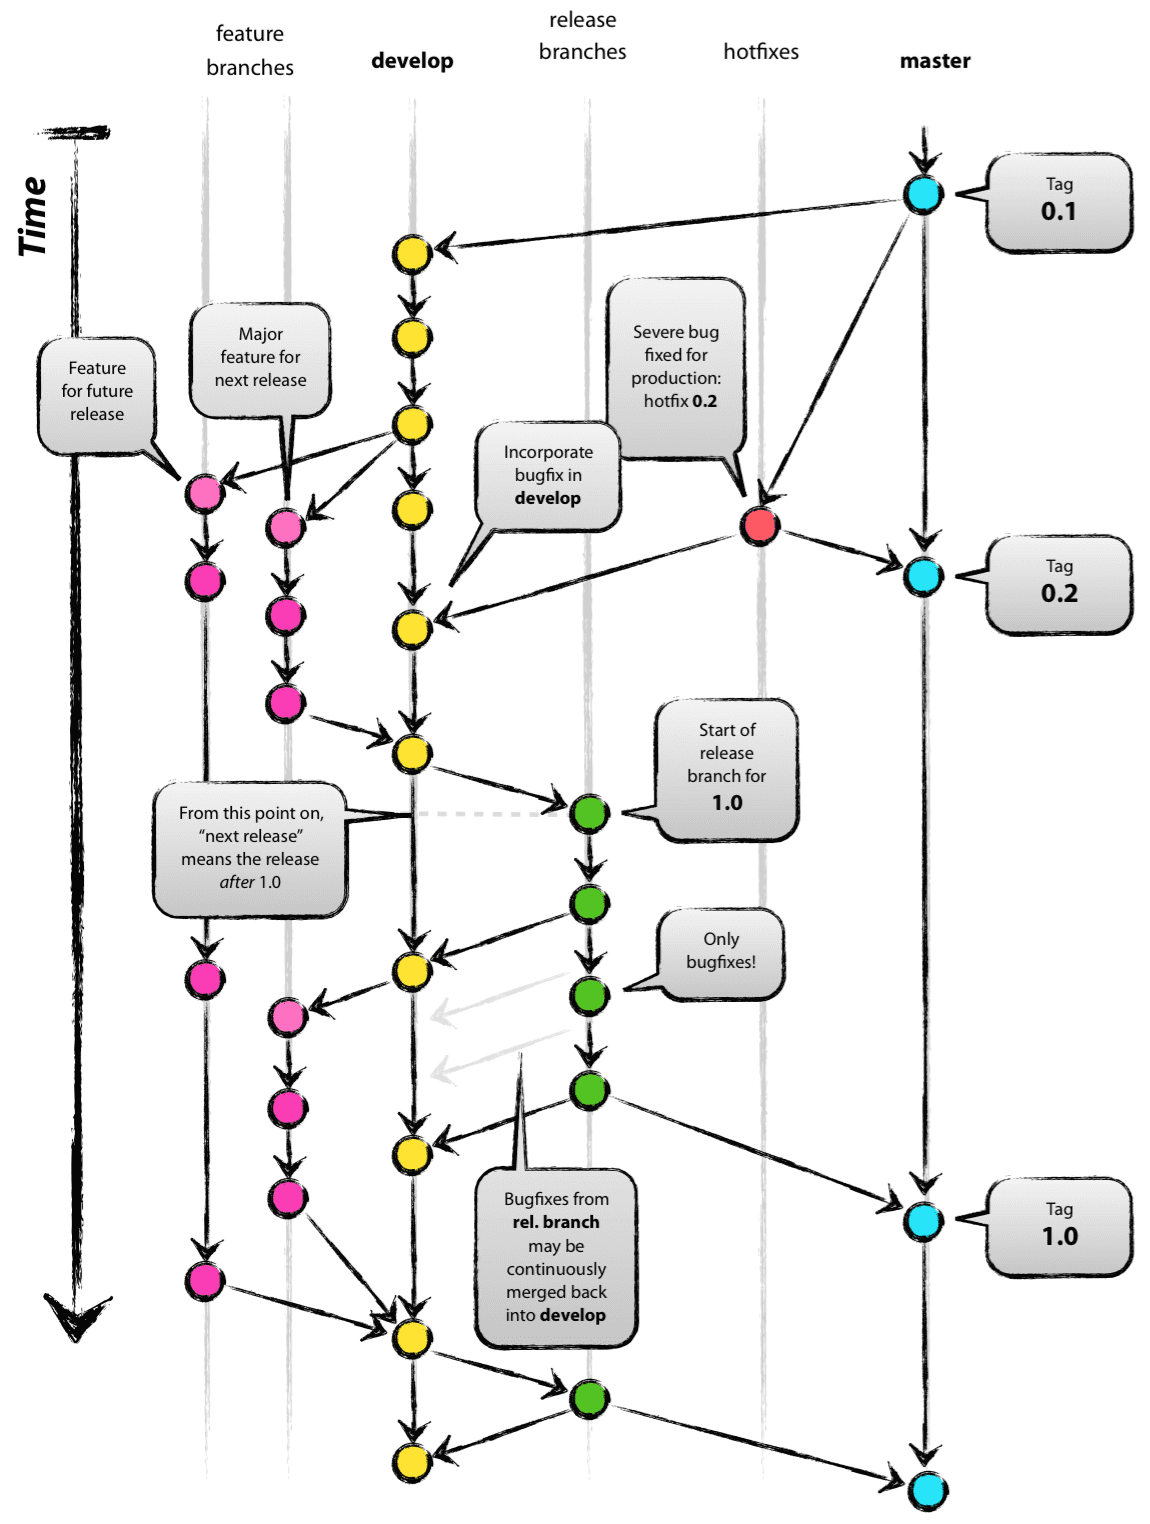
- main(과거 및 그림 상 master) : 제품으로 출시될 수 있는 branch
- develop : 다음 출시 버전을 개발하는 branch
- feature : 기능을 개발하는 branch
- release : 이번 출시 버전을 준비하는 branch
- hotfix : 출시 버전에서 발생한 버그를 수정 하는 branch
3. 작업 방식
1. branch 삭제
$ git branch -D(delete) {{ branch명 }} // branch 삭제2. 티켓 처리
2-1. repository 불러오기 및 로컬 브랜치 생성 및 체크아웃
$ git fetch upstream   // repository 불러오기
$ git checkout -b(branch) bfm-100_login_layout –t(track) upstream/feature-user   // 로컬 브랜치 생성 및 체크아웃
2-2. 수정 후 커밋 혹은 squash
$ git commit -m(message) "BFM-100 로그인 화면 레이아웃 생성"   // 커밋
$ git rebase -i HEAD~2 // squash-
squash를 하는 이유
-
without squash
-
with squash

-
2-3. 같은 branch에서 먼저 merge된 녀석을 rebase시켜서 먼저 불러옴
$ git pull –rebase upstream feature-user
2-4. Push $ PR(Pull Request)
$ git push origin bfm-100_login_layout3. While develop
3-1. develop to feature
$ git fetch upstream
$ git merge –no-ff upstream/develop
$ git push upstream feature-user
3-2. feature to develop
$ git fetch upstream
$ git merge –no-ff upstream/feature-user
$ git push upstream develop
4. Release
4-1. release
$ git fetch upstream
$ git checkout -b release-1.0.0 –track upstream/develop
$ git push upstream release-1.0.0
4-2. hotfix
$ git checkout -b bfm-101_bug_login_id_max_length
$ git commit -m "BFM-101 로그인 아이디 길이 제한 버그 수정"
$ git push origin bfm-101_bug_login_id_max_length
5. Deploy
5-1. 최신 상태로 pull
$ git pull upstream release-1.0.05-2. release 브랜치를 develop 브랜치에 merge
$ git checkout develop
$ git pull upstream develop
$ git merge –no-ff release-1.0.0
5-3. develop 브랜치를 upstream에 push
$ git push upstream develop5-4. release 브랜치를 main 브랜치에 merge
$ git checkout master
$ git pull upstream master
$ git merge –no-ff release-1.0.0
5-5. tag 추가
$ git tag 1.0.05-6. master 브랜치와 1.0.0 태그를 upstream에 push
$ git push upstream master 1.0.0
응애 난 애기 개발자