
개요
개인 웹사이트가 만들고 싶어져서 Next.js를 이용해 프로젝트를 시작하였습니다. 이번 포스팅에서는 학생이라면 무료로 받을 수 있는 .me 도메인과 Next.js 프로젝트를 자동 배포화하는 방법에 대해 소개하겠습니다.
Github 학생 인증을 통해 .me 도메인 무료로 받기
Github Education에 방문하면 받을 수 있는 혜택이 있습니다. 그 중 Github 학생 개발자 팩이 있습니다.
아래와 같은 과정을 진행하면 해당 혜택들을 무료로 받을 수 있습니다.
- 학생 인증하기
- Github Education 신청하기
위 과정까지는 완료했다고 가정하고 .me 도메인을 받는 방법을 설명드리겠습니다.
Namecheap
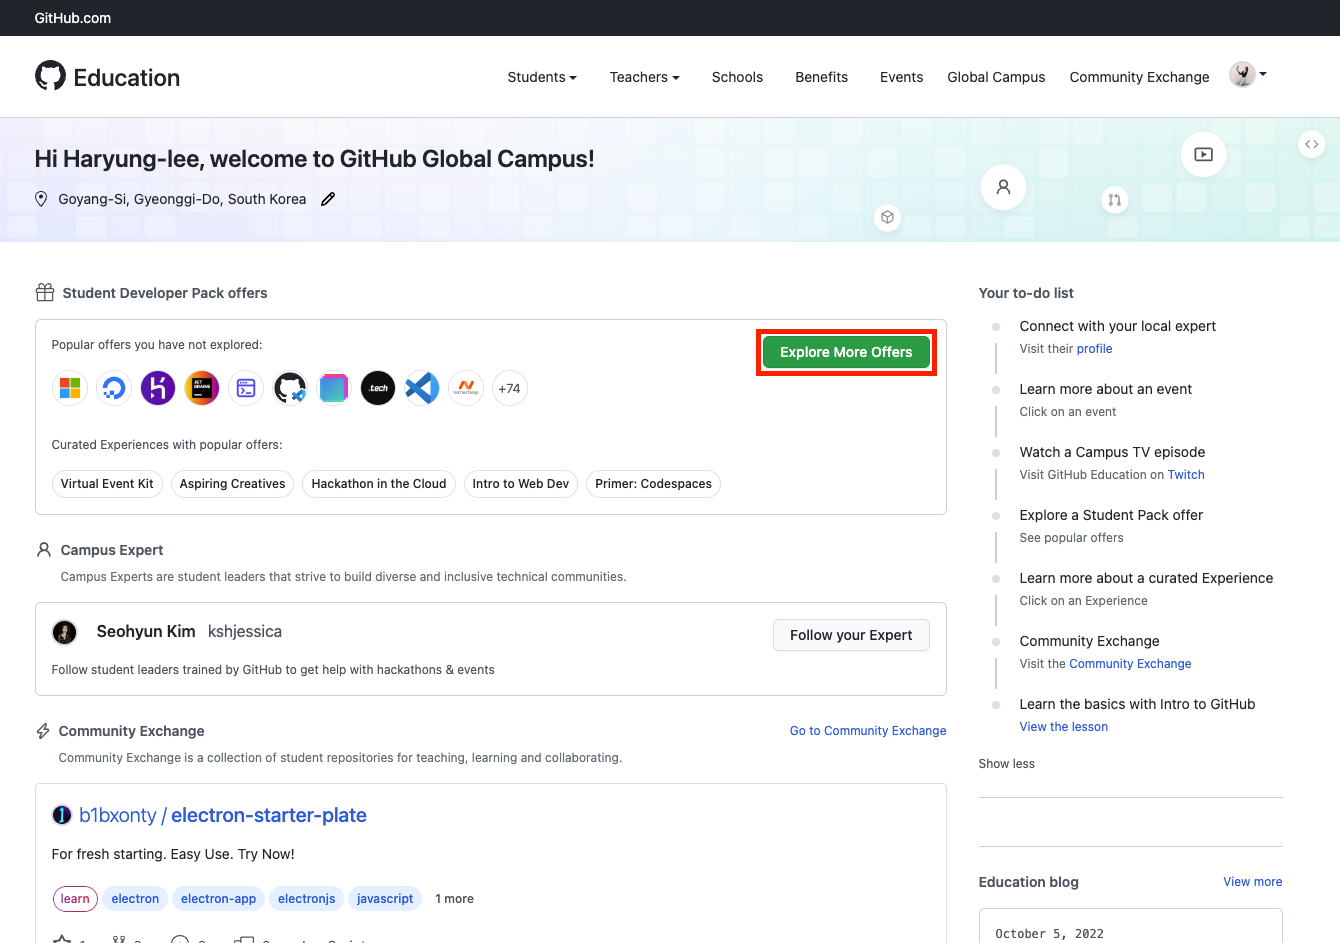
해당 페이지에 방문하여 사진에 보이는 Explore More Offers를 클릭해봅시다.

namecheap를 찾아 위 사진에 보이는 버튼을 클릭해줍니다.
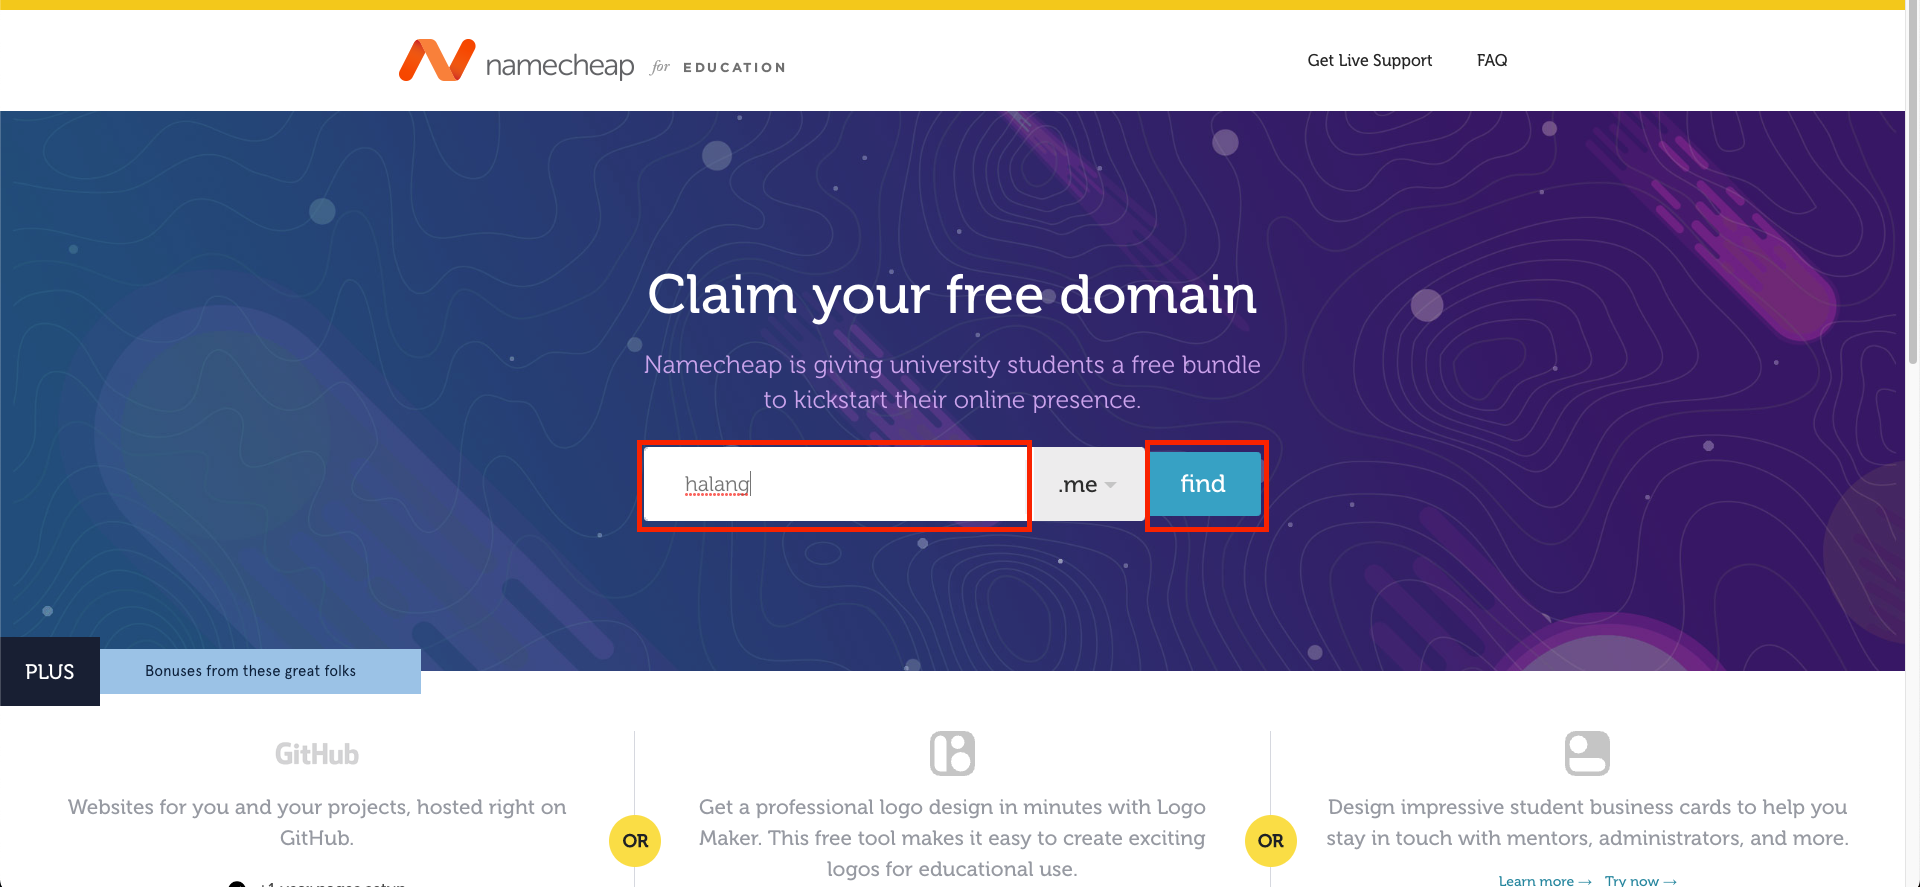
원하는 도메인을 입력하고 find 버튼을 누릅니다.
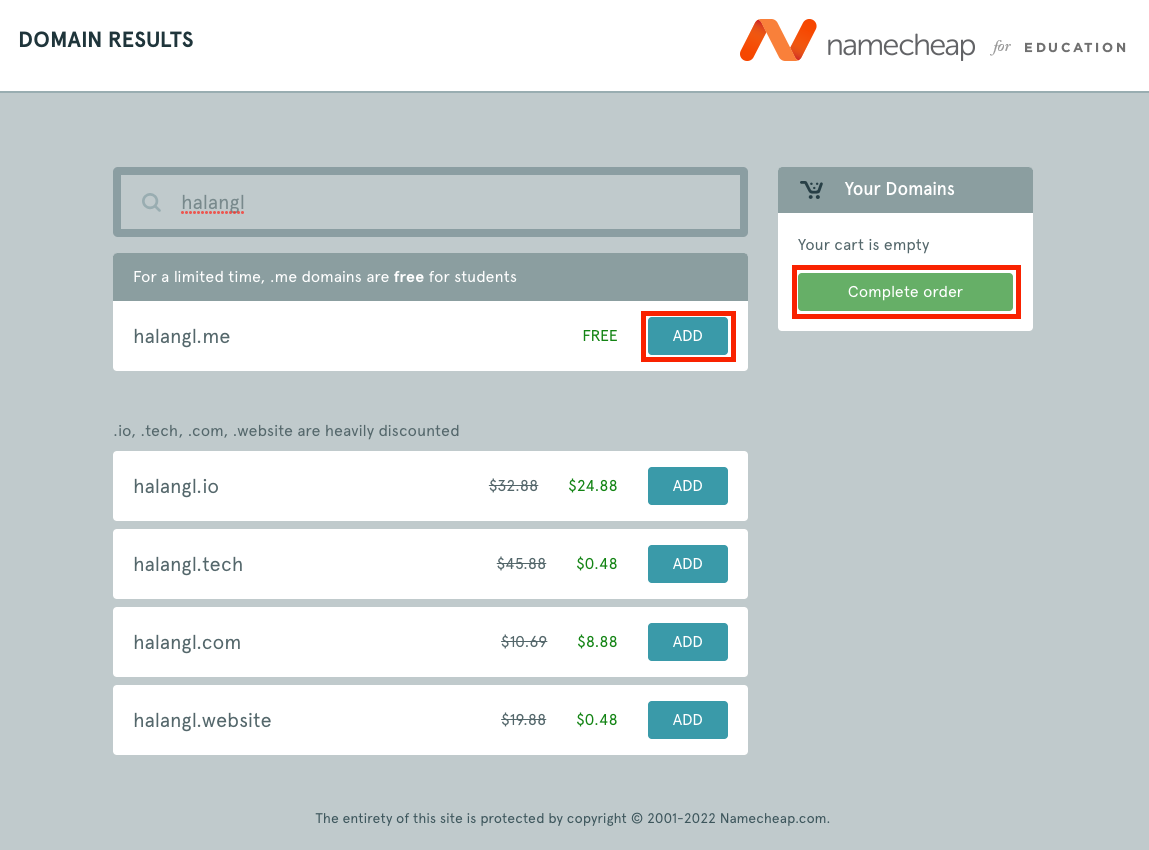
이미 해당 도메인이 사용중이라면 Taken이라고 나올 것입니다. 사용 가능한 도메인을 입력한 후 ADD 버튼을 누르고 Complete Order 버튼을 누릅니다.
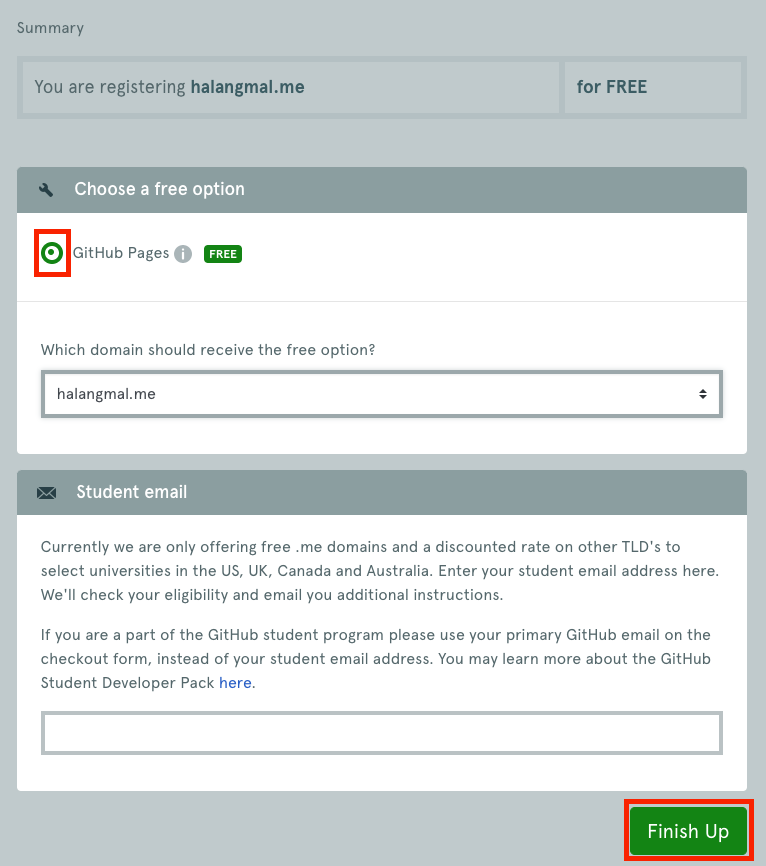
github Pages를 누르고 Finish Up 버튼을 누릅니다.
이후 로그인을 하고 Confirm Order 버튼을 누르면 끄읏!
프로젝트 세팅
Next.js 세팅
저는 next.js + typescript + styled-components를 이용해 세팅을 하였습니다.
새 레포를 만들고 clone한 후 next를 설치해줍니다.
# TS로 기본 세팅
npx create-next-app --typescript
# or
yarn create next-app --typescript
그 외 세팅
이후 기본 세팅 (eslint, prettier, styled-components)를 해줍니다.
arn add -D eslint
               prettier
               eslint-plugin-prettier
               eslint-config-prettier
               eslint-plugin-import
               eslint-plugin-react
               eslint-plugin-react-hooks
               @typescript-eslint/parser
               @typescript-eslint/eslint-plugin
// 기본 styled-components
yarn add styled-components @types/styled-components
// 문자열 안에 스타일 들어가는 것 처리를 위한 설치
yarn add -dev babel-plugin-styled-components
//전역 스타일링에서 이용하기 위함
yarn add styled-reset eslintrc.js
module.exports = {
  root: true,
  env: {
    browser: true,
    amd: true,
    node: true,
    es6: true,
  },
  extends: [
    "airbnb",
    "eslint:recommended",
    "plugin:prettier/recommended",
    "next",
    "next/core-web-vitals",
  ],
  rules: {
    "prettier/prettier": "error",
    "react/react-in-jsx-scope": "off",
    "react/prop-types": 0,
    "no-unused-vars": 0,
    "react/no-unescaped-entities": 0,
  },
};
prettierrc.json
{
  "singleQuote": true,
  "semi": true,
  "useTabs": false,
  "tabWidth": 2,
  "trailingComma": "all",
  "printWidth": 80,
  "arrowParens": "always",
  "orderedImports": true,
  "bracketSpacing": true,
  "jsxBracketSameLine": false,
  "endOfLine": "auto"
}
Deploy
package.json
먼저 package.json에서 아래코드를 scripts에 추가해줍니다.
"export": "next export"npm run build
npm run export이후 위 명령어를 실행하면 out 디렉터리에 빌드된 페이지가 생성됩니다.
깃허브 페이지에 호스팅하기 위해 다음과 같은 명령어를 입력합니다.
touch out/.nojekyll # jekyll 페이지 빌드를 막기 위함
git .
git commit -m 'chore: deploy to gh-pages'
git push
이후 깃허브 레포의 세팅에서 아래와 같이 설정해줍니다.
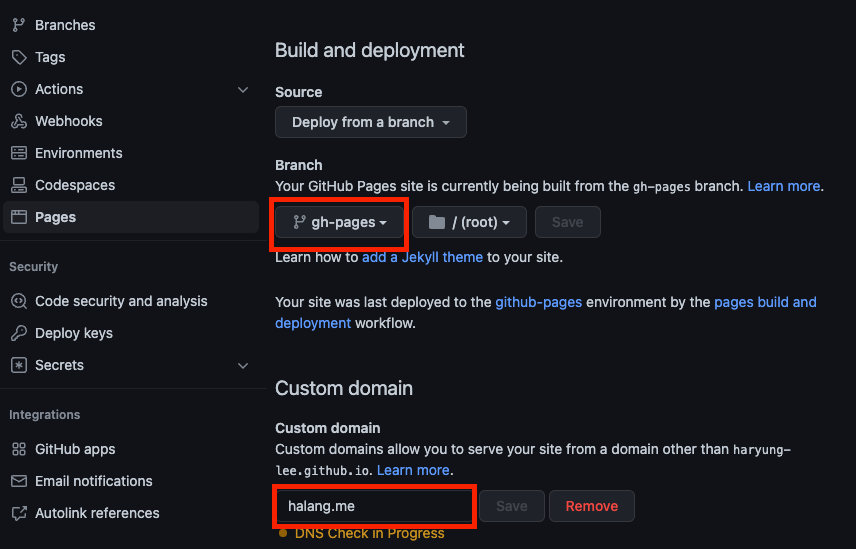
아까 무료로 받았던 domain도 입력해주었습니다.
Github Actions
이제 Github Actions를 사용하여 push할 때마다 자동으로 배포될 수 있도록 설정해봅시다.
Github Actions은 특정한 이벤트가 발생했을 때 내가 원하는 일을 자동으로 수행할 수 있도록 만들어주는 툴입니다.
이와 관련해 간략하게 소개드리겠습니다.
먼저 Github Actions에서 Event는 어떤 이벤트가 발생했는지를 지정해줄 수 있습니다.
ex)
main 브랜치로 merge를 할 때
commit을 push 했을 때
즉, 특정한 이벤트가 발생했을 때 어떤 일을 하고 싶은지 명시할 수 있게 됩니다. 그리고 이는 workflows에서 해줍니다.
예를들어, Event를 on:push라고 지정하였다면 push 라는 이벤트가 발생하면 workflows에 작성한 일들이 수행됩니다.
workflows는 하나 이상의 job으로 이루어져 있습니다. 하나의 job이 하나의 동작을 의미하며 Runner라는 vm에서 병렬적으로 실행됩니다. 각 job은 어떤 순서대로 실행이 되어야 하는지 steps를 명시해줄 수 있습니다.
또한 각 step에서는 Actions를 사용할 수 있습니다. (ex. action check out)
node.js.yml
.github/workflows안에 node.js.yml 파일을 만듭니다. (파일 명은 변경해도 됩니다.)
저는 Github에서 기본적으로 제공해주는 템플릿을 사용하였습니다.
# This workflow will do a clean installation of node dependencies, cache/restore them, build the source code and run tests across different versions of node
# For more information see: https://docs.github.com/en/actions/automating-builds-and-tests/building-and-testing-nodejs

name: Node.js CI

on:
  push:
    branches: ["main"]
  pull_request:
    branches: ["main"]

jobs:
  build:
	# runner, 어떤 vm을 사용할지 지정
    runs-on: ubuntu-latest

    strategy:
      matrix:
        node-version: [14.x]
        # See supported Node.js release schedule at https://nodejs.org/en/about/releases/

    steps:
      - uses: actions/checkout@v3
      - name: Use Node.js ${{ matrix.node-version }}
        uses: actions/setup-node@v3
        with:
          node-version: ${{ matrix.node-version }}
          cache: "npm"
      - run: npm ci
      - run: npm run build
      - run: npm run export
      - run: touch ./out/.nojekyll

      - name: Deploy 🚀
        uses: JamesIves/github-pages-deploy-action@v4.2.5
        with:
          branch: gh-pages # The branch the action should deploy to.
          folder: out # The folder the action should deploy.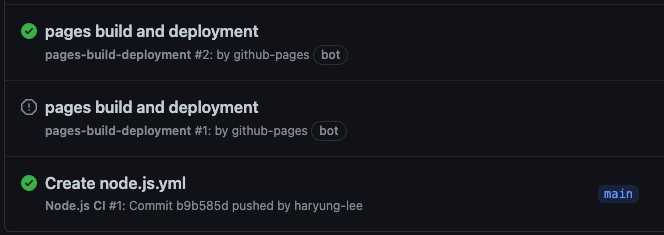
이제 main에 push를 하면 Github Actions이 자동으로 빌드해주고 해당 브랜치에 페이지가 올라가게 됩니다.
마무리
사실 도메인도 개인 사비로 사려 했는데 깃허브 학생 개발자팩을 알려준 Groot님께 감사 인사를 드립니다👏👍
