오늘 학습 진행 내용
C++와 Unreal Engine으로 3D 게임 개발
GameMode 적용 및 캐릭터 클래스 활용 캐릭터 구현
- GameMode
- 언리얼에서 제공하는 멀티플레이 기능 (세션, 플레이어 연결 로직 등)을 일부 포함하고 있으며, 싱글 플레이에서도 문제없이 사용
- GameMode는 게임의 전반적인 규칙과 흐름을 총괄 관리하는, 일종의 컨트롤 타워 역할을 하는 클래스
GameMode 생성
C++ 클래스에서 GameMode로 검색해서 생성
GameMode.h
// Fill out your copyright notice in the Description page of Project Settings.

#pragma once

#include "CoreMinimal.h"
#include "GameFramework/GameMode.h"
#include "CH2GameMode.generated.h"

/**
 *
 */
UCLASS()
class CH3_CLASS2_3_4_API ACH2GameMode : public AGameMode
{
	GENERATED_BODY()
public:
	//생성자 게임 시작 시 해당 부분 실행
	ACH2GameMode();

};
GameMode.cpp
// Fill out your copyright notice in the Description page of Project Settings.


#include "CH2GameMode.h"
#include "CH2Character1.h"
#include "CH2PlayerController.h"

ACH2GameMode::ACH2GameMode()
{
	//게임 모드에서 기본 캐릭터 스폰되도록 설정
	//:StaticClass()는 언리얼 엔진이 클래스의 정보를 런타임에 참조할 수 있도록 제공
	DefaultPawnClass = ACH2Character1::StaticClass();
	PlayerControllerClass = ACH2PlayerController::StaticClass();

}
해당 생성된 GameMode C++ 클래스를 블루프린트 클래스로 감싼 형태로 프로젝트 전역 혹은 레벨 설정에 Default GameMode로 잡아서 설정
Character 클래스 생성
C++클래스에서 Character 클래스 선택해서 생성
캐릭터 스폰의 경우 GameMode의 생성자에 등록해서 스폰
캐릭터 시점 및 카메라를 해당 클래스에 할당(Spring Arm, Camera 컴포넌트)
class USpringArmComponent; // 스프링 암 관련 클래스 헤더
class UCameraComponent; // 카메라 관련 클래스 전방 선언
언리얼 에디터에서 블루프린트 내에서 컴포넌트 할당 확인 위해
VisibleAnywhere, BlueprintReadOnly로 적용
Character.h
// Fill out your copyright notice in the Description page of Project Settings.

#pragma once

#include "CoreMinimal.h"
#include "GameFramework/Character.h"
#include "CH2Character1.generated.h"

class USpringArmComponent; // 스프링 암 관련 클래스 헤더
class UCameraComponent; // 카메라 관련 클래스 전방 선언

UCLASS()
class CH3_CLASS2_3_4_API ACH2Character1 : public ACharacter
{
	GENERATED_BODY()

public:
	// Sets default values for this character's properties
	ACH2Character1();

protected:
	// 스프링 암 컴포넌트
	UPROPERTY(VisibleAnywhere, BlueprintReadOnly, Category = "Camera")
	USpringArmComponent* SpringArmComp;
	// 카메라 컴포넌트
	UPROPERTY(VisibleAnywhere, BlueprintReadOnly, Category = "Camera")
	UCameraComponent* CameraComp;
	//VisibleAnywhere, BlueprintReadOnly: 블루프린트에서 보기만 가능하고, C++ 코드 쪽에서만 수정 가능하게 하는 속성

	virtual void SetupPlayerInputComponent(class UInputComponent* PlayerInputComponent) override;

	// Called when the game starts or when spawned
	virtual void BeginPlay() override;

public:
	// Called every frame
	virtual void Tick(float DeltaTime) override;


};
Character.cpp
// Fill out your copyright notice in the Description page of Project Settings.


#include "CH2Character1.h"
//카메라, 스프링 암 실제 구현이 필요한 경우라서 include
#include "Camera/CameraComponent.h"
#include "GameFramework/SpringArmComponent.h"

// Sets default values
ACH2Character1::ACH2Character1()
{
 	// Set this character to call Tick() every frame.  You can turn this off to improve performance if you don't need it.
	PrimaryActorTick.bCanEverTick = false;

	//스프링 암 생성
	SpringArmComp = CreateDefaultSubobject<USpringArmComponent>(TEXT("SpringArm"));
	//스프링 암을 루트 컴포넌트(캠슐 컴포넌트)에 부착
	SpringArmComp->SetupAttachment(RootComponent);
	//캐릭터와 카메라 사이의 거리 기본값 300으로 설정
	SpringArmComp->TargetArmLength = 700.0f;
	//컨트롤러 회전에 따랄 스프링 암도 회전하도록 설정
	SpringArmComp->bUsePawnControlRotation = true;

	SpringArmComp->SocketOffset = FVector(20.0f);
	//카메라 컴포넌트 생성
	CameraComp = CreateDefaultSubobject<UCameraComponent>(TEXT("Camera"));
	//스프링 암의 소켓 위치에 카메라를 부착
	CameraComp->SetupAttachment(SpringArmComp, USpringArmComponent::SocketName);
	//카메라는 스프링 암의 회전에 따르므로 PawnControlRotation은 꺼둠
	CameraComp->bUsePawnControlRotation = false;
}

// Called when the game starts or when spawned
void ACH2Character1::BeginPlay()
{
	Super::BeginPlay();

}

// Called every frame
void ACH2Character1::Tick(float DeltaTime)
{
	Super::Tick(DeltaTime);

}

// Called to bind functionality to input
void ACH2Character1::SetupPlayerInputComponent(UInputComponent* PlayerInputComponent)
{
	Super::SetupPlayerInputComponent(PlayerInputComponent);

}
Enhanced Input System 활용해서 입력 매핑 구현
PlayerController는 사용자가 키보드, 마우스, 게임패드 등에서 입력을 받으면, 그 입력을 해석하여 캐릭터나 다른 오브젝트에게 동작을 명령하는 핵심 클래스
PlayerController C++ 클래스 생성
PlayerCotroller를 생성해서 GameMode 생성자에서 등록해서 사용
PlayerController 블루프린트를 GameMode에서 BluePrint 생성한 걸로 할당해도 가능
Enhanced Input System란?
- 언리얼 엔진 5에는 이전 버전(UE4 등)에서 사용하던 전역
Project Settings → Input시스템을 대체하거나 확장하기 위해 Enhanced Input 시스템이 제공됩니다. - Enhanced Input은 입력 설정을 “입력 맵(Input Mapping Context, IMC)”과 “입력 액션(Input Action, IA)”이라는 개념으로 나누어 관리
그래서 추가적으로 InputAction에 해당하는 것들(Move,Jump,Sprint,Look) 같은 것들 생성 필요
각각 Action에 맞게 생성된 InputAction의 값 설정
- Value Type은 Input Action (IA)이 입력 동작을 발생시킬 때, 어떤 유형의 값을 제공할지 결정하는 옵션입니다.
Bool(참/거짓)- 단순 On/Off 토글 입력에 사용됩니다.
- 예) 점프(스페이스바), 공격(마우스 왼쪽 버튼)
Axis1D(1차원 축 값)- 단일 축 (-1~1 범위)의 입력에 사용됩니다.
- 예) 게임패드 트리거(가속 페달), 전진/후진(W/S)
Axis2D(2차원 축 값)- X, Y 두 축을 동시에 처리할 때 사용됩니다.
- 예) 캐릭터 이동(WASD), 마우스 이동(가로+세로)
Axis3D(3차원 축 값)- X, Y, Z 세 축을 동시에 처리합니다.
- 예) 비행 시뮬레이션에서 3축 제어
- 트리거 (Trigger)는 입력이 활성화되는 특정 조건을 말합니다.
- Pressed Trigger: 키를 누르는 순간에만 작동.
- Hold Trigger: 키를 일정 시간 눌렀을 때 작동.
- Released Trigger: 키를 뗄 때 작동.
- 모디파이어 (Modifier)는 입력 값을 수정하거나 변환하기 위한 설정입니다.
- Scale : 입력 값에 일정 배율을 곱해줌 (마우스 이동 속도 2배)
- Invert : 입력 값을 반전 (상하 반전 카메라)
- Deadzone : 일정 임계값보다 작은 입력은 무시 (게임패드 조이스틱 미세 떨림 방지)
생성된 InputAction들에 대한 매핑 설정 파일인 InputMappingContext를 생성해서 입력 키를 매핑
여기서도 입력 키에 따른 값 매핑 변화 제대로 적용시키기 위해 Modifier를 설정
예시)
- W 키 (전진)
- W 키를 누르면 입력 값이 X축 (앞뒤 방향)에 맞춰 정렬됩니다.
- 전진은 X축 +1 방향이므로 추가적인 변환은 필요 없습니다.
- S 키 (후진)
- S 키의 입력 값도 Swizzle을 통해 X축으로 정렬됩니다.
- 후진은 전진 (W)의 반대 방향이므로 Negate를 사용해 입력 값을 뒤집습니다. (X축 +1 → X축 -1)
- A 키 (왼쪽 이동)
- A 키를 누르면 입력 값이 Y축 (좌우 방향)에 맞춰 정렬됩니다.
- A키는 오른쪽 D 이동의 반대 방향이므로 Negate를 사용해 Y축의 값을 반전합니다. (Y축 +1 → Y축 -1)
- D 키 (오른쪽 이동)
- D 키의 입력값도 Swizzle을 통해 Y축으로 정렬됩니다.
- D 키는 Y축 (좌우 방향)의 +1 방향에 매핑되므로 추가 변환이 필요 없습니다.
생성한 InputAction, InputMappingContext를 PlayerController에 멤버 변수로 선언 및 리플렉션 처리해서 사용
언리얼 5의 Enhanced Input System은 Local Player Subsystem을 통해 Input Mapping Context를 활성화하거나 비활성화하므로
PlayerController 클래스에서 BeginPlay 오버라이드 해서 BluePrint에서 정해둔 IMC 활성화
PlayerController.h
// Fill out your copyright notice in the Description page of Project Settings.

#pragma once

#include "CoreMinimal.h"
#include "GameFramework/PlayerController.h"
#include "CH2PlayerController.generated.h"
class UInputMappingContext; //IMC 관련 전방 선언
class UInputAction; // IA 관련 전방 선언

/**
 *
 */
UCLASS()
class CH3_CLASS2_3_4_API ACH2PlayerController : public APlayerController
{
	GENERATED_BODY()

public:
	ACH2PlayerController();

	//에디터에서 세팅할 IMC
	UPROPERTY(EditAnywhere,BluePrintReadWrite,Category="Input")
	UInputMappingContext* InputMappingContext;
	//IA_Move를 저장할 변수
	UPROPERTY(EditAnywhere,BluePrintReadWrite,Category="Input")
	UInputAction* MoveAction;
	//IA_Jump를 저장할 변수
	UPROPERTY(EditAnywhere,BluePrintReadWrite,Category="Input")
	UInputAction* JumpAction;
	//IA_Look를 저장할 변수
	UPROPERTY(EditAnywhere,BluePrintReadWrite,Category="Input")
	UInputAction* LookAction;
	//IA_Sprint를 저장할 변수
	UPROPERTY(EditAnywhere,BluePrintReadWrite,Category="Input")
	UInputAction* SprintAction;

	//언리얼 5의 Enhanced Input System은 Local Player Subsystem을 통해 Input Mapping Context를 활성화하거나 비활성화
	//BluePrint에 지정해둔 IMC 활성화하는 코드 추가(BeginPlay Override)
	virtual void BeginPlay() override;
};
PlayerController.cpp
// Fill out your copyright notice in the Description page of Project Settings.


#include "CH2PlayerController.h"
#include "EnhancedInputSubsystems.h"
ACH2PlayerController::ACH2PlayerController()
	: InputMappingContext(nullptr),
	MoveAction(nullptr),
	JumpAction(nullptr),
	LookAction(nullptr),
	SprintAction(nullptr)
{
}

void ACH2PlayerController::BeginPlay()
{
	Super::BeginPlay();

	//현재 PlayerController에서 연결된 Local Player 객체를 가져옴
	if (ULocalPlayer* LocalPlayer = GetLocalPlayer())
	{
		//Local Player에서 EnhancedInputLocalPlayerSubSystem을 획득
		if (UEnhancedInputLocalPlayerSubsystem* SubSystem = LocalPlayer->GetSubsystem<UEnhancedInputLocalPlayerSubsystem>())
		{
			if (InputMappingContext)
			{
				//SubSystem을 통해 우리가 할당한 IMC를 활성화
				//우선 순위(Priority)는 0으로 가장 높은 우선 순위
				SubSystem->AddMappingContext(InputMappingContext, 0);
			}
		}
	}


}
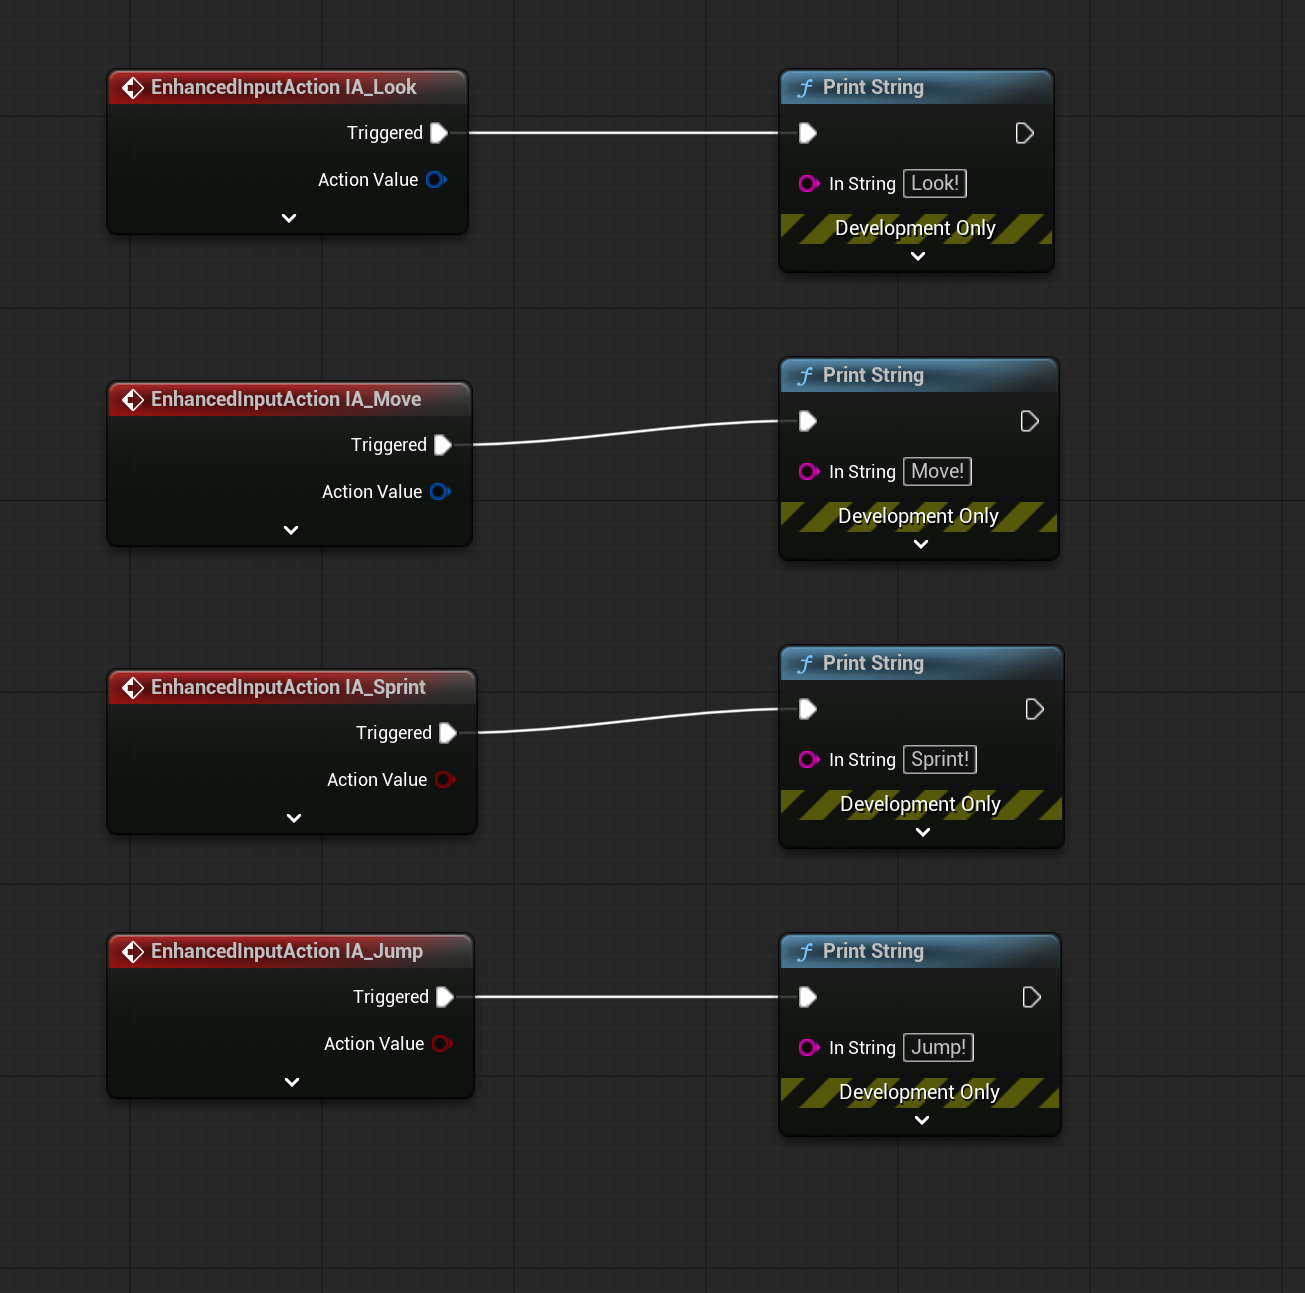
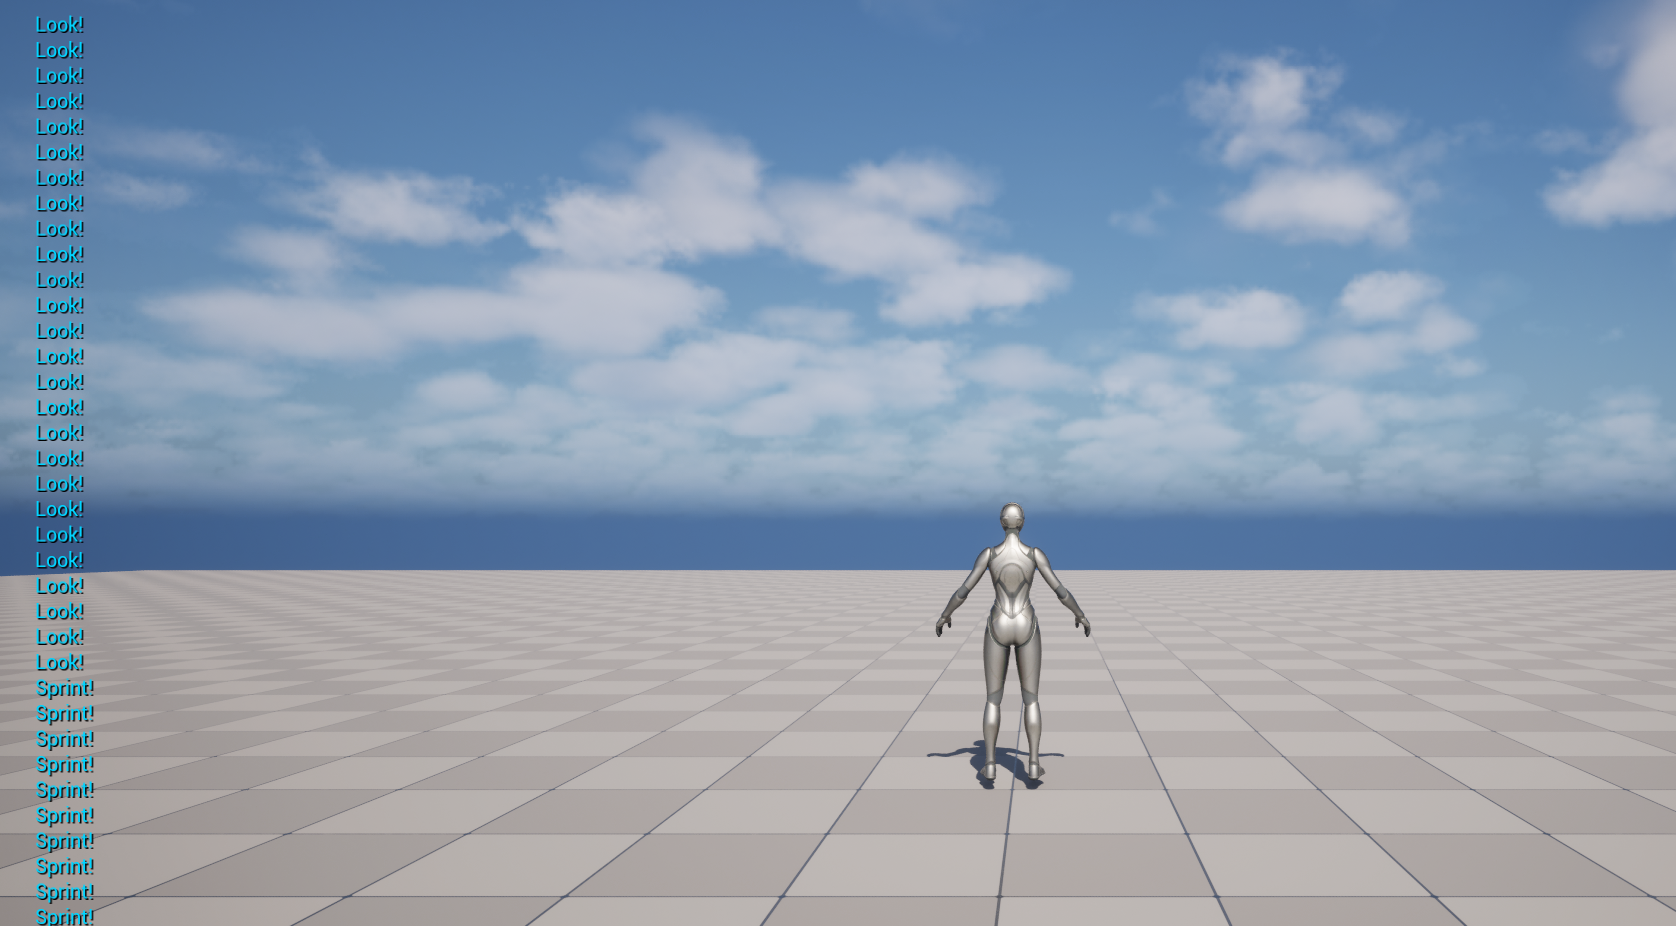
할당한 InputAction 실제 BluePrint에서 불러와서 동작 체크해보면 잘 출력되는것 확인 가능