지난번에 기본적인 워들 틀을 만들었는데요, 제대로 플레이하기 위해서는 더 추가해야할 기능들도 많았고 보완해야할 문제점들도 많았습니다.
- 페이지 새로고침 할때마다 새로운 5글자의 단어 무작위로 생성하기
- 입력한 단어가 유효한(실제로 존재하는) 단어일때만 다음칸으로 넘어가기
- 같은 알파벳이면 이미 단어에 존재하는지 확인했어도 중복되서 확인되는 점 고치기
Generating Random 5 Letter Word
매번 무작위로 5글자의 단어를 생성하기 위해서는 WordsAPI 라는 사전 API 를 이용했습니다(영어에서 자주 쓰이는 5글자 단어를 모두 긁어모아 인메로리 형식으로 저장하고, array 에서 랜덤으로 뽑아오는 방식도 생각해 보았지만 API를 사용하는 연습을 해보고 싶었음). 여러가지 기능들이 있는데 그중 요청을 보내면 답변으로 랜덤의 단어를 보내주는 기능을 사용했습니다.{2 items
"word":"deerberry"
"results":[1 item
0:{...}4 items
]
}이런식으로 답변이 옵니다. 요청을 보낼때 파라미터로 조건을 지정해 보낼 수 있습니다. 단어 길이를 5개로 지정해주고 품사는 동사로 한정해주었습니다.
    // generate today's word
    let todaysWord = "";

    const options = {
    method: 'GET',
    url: 'https://wordsapiv1.p.rapidapi.com/words/',
    params: {
        random: 'true',
        letterPattern: '^.{5}$',
        lettersMin: '5',
        lettersMax: '5',
        partOfSpeech:'verb'
        },
    headers: {
        'x-rapidapi-host': 'wordsapiv1.p.rapidapi.com',
        'x-rapidapi-key': 'c0f74f441cmsh567cad65aabece8p1aad19jsn4142e09a557d'
    }
    };

    axios.request(options).then(function (response) {
        // set today's word
        todaysWord = response.data.word.toUpperCase();
        console.log("today's word is >", todaysWord)
    }).catch(function (error) {
        console.error(error);
    });
axios 라이브러리를 이용해 요청을 보내주고 돌아온 답변을 이용해 <오늘의 단어>를 완성했습니다.
Is it a Valid Word?
다음은 입력한 단어가 유효한지 확인하는 유효성 검사 기능을 추가하였습니다.
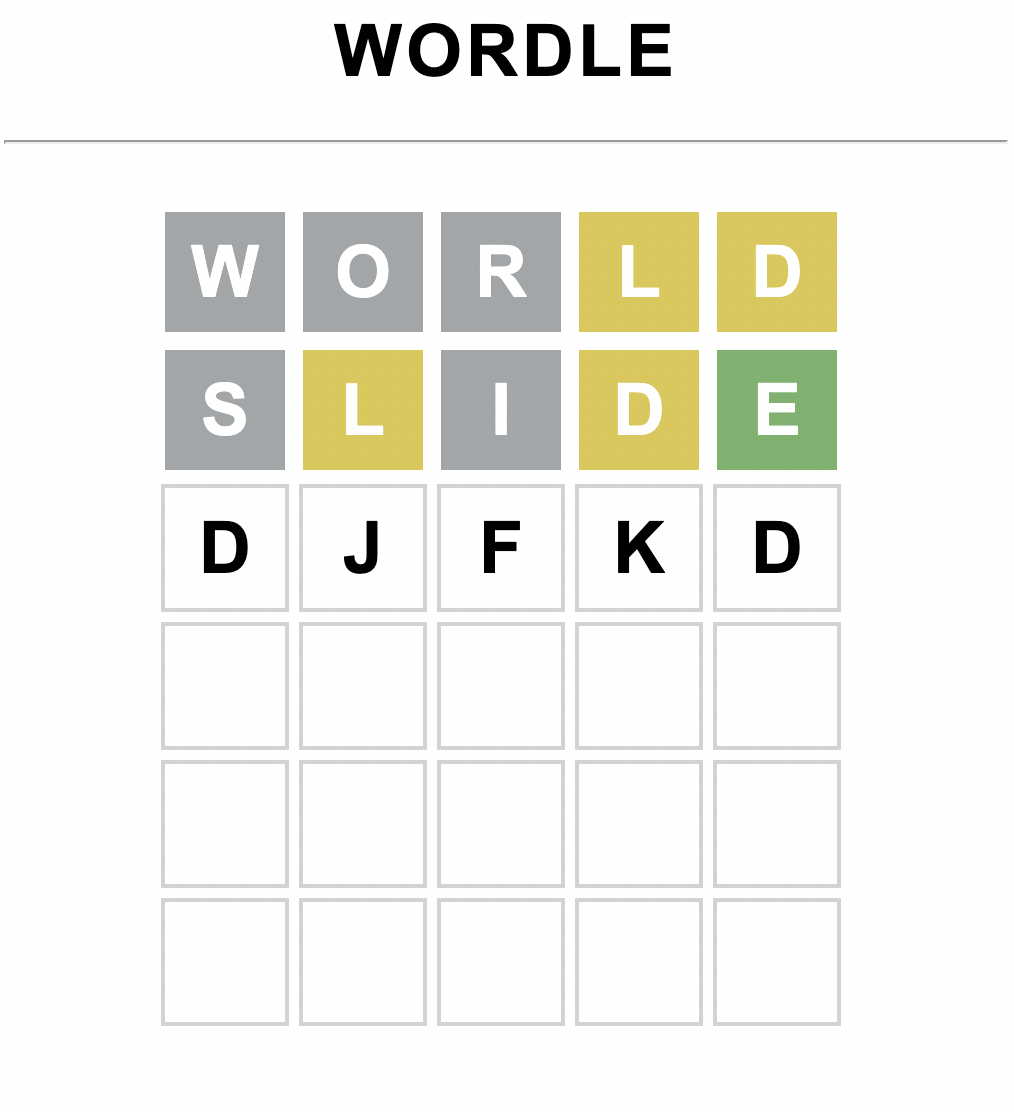
이런식으로 마구잡이로 입력하거나 존재하지 않는 단어를 입력할 시 다음 줄로 넘어가지 않게 해야합니다.
단어가 유효한지를 알아보기 위해서 Enter키를 누르면 isValid() 함수가 실행되게 하였습니다.
isValid()함수 안에서는 인자로 받은 단어를 위의 WordsAPI에 사전에 존재하는 단어인지 확인하는 요청을 보내도록 했습니다.
돌아온 답변으로 단어가 사전에 존재하면 update()함수를 실행하고 다음칸으로 넘어가고, 존재하지 않으면 현재 줄에 classList.add("invalid") 를 주어 css로 현재 줄이 흔들리는 효과를 주었습니다.
function isValid(checkWord, todaysWord) {
    // check if current word is valid
    const options = {
        method: 'GET',
        url: 'https://wordsapiv1.p.rapidapi.com/words/',
        params: { letterPattern: `^${checkWord.toLowerCase()}$`},
        headers: {
            'x-rapidapi-host': 'wordsapiv1.p.rapidapi.com',
            'x-rapidapi-key': 'c0f74f441cmsh567cad65aabece8p1aad19jsn4142e09a557d'
        }
        };

    axios.request(options).then(function (response) {
        // if the word exist in the dictionary
        if (response.data.results.total === 1) {
            update(todaysWord);
            row += 1; // start a new row
            col = 0;  // start at 0 for new word
            currWord = ""; // initialize current word
        } else {
            let currRow = document.getElementById("row" + row.toString())
            currRow.classList.add("invalid")
        }
    }).catch(function (error) {
        console.error(error);
    });
};
흔들리는 애니메이션
.invalid {
    /* Start the shake animation and make the animation last for 0.5 seconds */
    animation: shake 0.2s;
    /* When the animation is finished, start again */
    animation-iteration-count: 2;

}

@keyframes shake {
    0% { transform: translateX(0) }
    25% { transform: translateX(5px) }
    50% { transform: translateX(-5px) }
    75% { transform: translateX(5px) }
    100% { transform: translateX(0) }
   }
이전에 basic wordle framework 를 구성할 땐 개별 타일들만 span 태그로 넣어주었지만 유효성 검사 및 css 효과를 줄 마다 해줘야 하기 때문에 각 줄을 div 로 묶어주고 class 및 줄의 위치를 나타내는 id를 지정해주었습니다.
    // create the board
    for (let r = 0; r < height; r++) {
        //<div id="row0" class="rows"></div>
        let row = document.createElement("div");
        row.id = "row" + r.toString()
        row.classList.add("rows")
        document.getElementById("board").appendChild(row)

        for (let c = 0; c < width; c++) {
            //<span id="0-0" class="tile"></span>
            let tile = document.createElement("span"); //create a new html element
            tile.id = r.toString() + "-" + c.toString(); //generate id (0-0, 1-0)
            tile.classList.add("tile"); //generate class
            tile.innerText = "";
            document.getElementById(`row${r.toString()}`).appendChild(tile); //find board id and insert tile document
        }
    }
현재 단어를 엔터가 눌렸을 때 isValid()의 인자로 넘겨주어야 하기 때문에 currWord 를 선언해주고
let currWord = "";알파벳이나 backspace 를 누를 때 마다 currWord가 업데이트 되게 합니다.
// Listen for Key Press
    document.addEventListener("keyup", (e) => {
        if(gameOver) return;

        // alert(e.code) // The KeyboardEvent.code tells you what key was pressed
        // we only allow certain keys to be pressed within width range
        if ("KeyA" <= e.code && e.code <= "KeyZ") {
            if (col < width) {
                let currTile = document.getElementById(row.toString() + "-" + col.toString());
                let currRow = document.getElementById("row" + row.toString())
                currRow.classList.remove("invalid")

                if (currTile.innerText === "") {
                    currTile.innerText = e.code[3]; // e.code returns 4 character string (KeyA). "A" is at index 3
                    col += 1; // move to next tile
                    currWord += e.code[3]; // set current word
                }
            }
        }

        else if (e.code === "Backspace") {
            if (0 < col && col <= width) {
                col -= 1;
                currWord = currWord.slice(0, -1); // edit current word
            }
            let currTile = document.getElementById(row.toString() + '-' + col.toString());
            currTile.innerText = "";
        }

        else if (e.code === "Enter" && col === width) {
            isValid(currWord, todaysWord);
        }

        if (!gameOver && row === height) {
            gameOver = true;
            document.getElementById("answer").innerText = `Aww, the answer is ${todaysWord}`;
        }
    })

};
Overlapping letters
마지막으로 이전에 짠 코드는 알파벳이 단어에 존재하기만 하면 무조건 타일을 노란색으로 변하게 했었어요. 예를들면 오늘의 단어가 SLIDE 이고 내가 입력한 단어가 SLEEP 이라면 SLIDE 에는 E가 한개만 존재함에도 불구하고 SLEEP 의 E 두개 모두 노란색으로 변하는 것이었죠.이 문제를 해결하기 위해 update() 함수에서 for loop 으로 알파벳 하나씩 비교할 때마다 알파벳이 단어에 존재할 때마다 비교하는 단어를 수정해주었어요. 단어에서 해당 알파벳의 위치에 0을 넣어주었습니다. 반복확인을 막기 위함입니다.
예를들면 오늘의 단어 SLIDE 와 내가 입력한 단어 SLEEP 을 비교할 때
S: "SLIDE" > "0LIDE"
L: "0LIDE" > "00IDE"
E: "00IDE" > "00ID0"
E: nothing
P: nothing
이런 식으로 이미 비교한 알파벳은 비교대상에서 삭제해주는 작업을 해주었습니다.
function update(todaysWord) {
    let correct = 0;
    let word = todaysWord
    for (let c = 0; c < width; c++) {
        let currTile = document.getElementById(row.toString() + '-' + c.toString());
        let letter = currTile.innerText;
        let index = 0;

        // is it in the right position?
        if (word[c] === letter) {
            index = word.indexOf(letter)
            word = word.slice(0, index) + '0' + word.slice(index + 1)
            currTile.classList.add("correct");
            correct += 1;
        } // is it in the word?
        else if (word.includes(letter)) {
            index = word.indexOf(letter)
            word = word.slice(0, index) + '0' + word.slice(index + 1)
            currTile.classList.add("present");
        } // not in the word
        else {
            currTile.classList.add("absent");
        }

        if (correct === width) {
            gameOver = true;
            document.getElementById("answer").innerText = 'Congrats!';
        }
    }
};
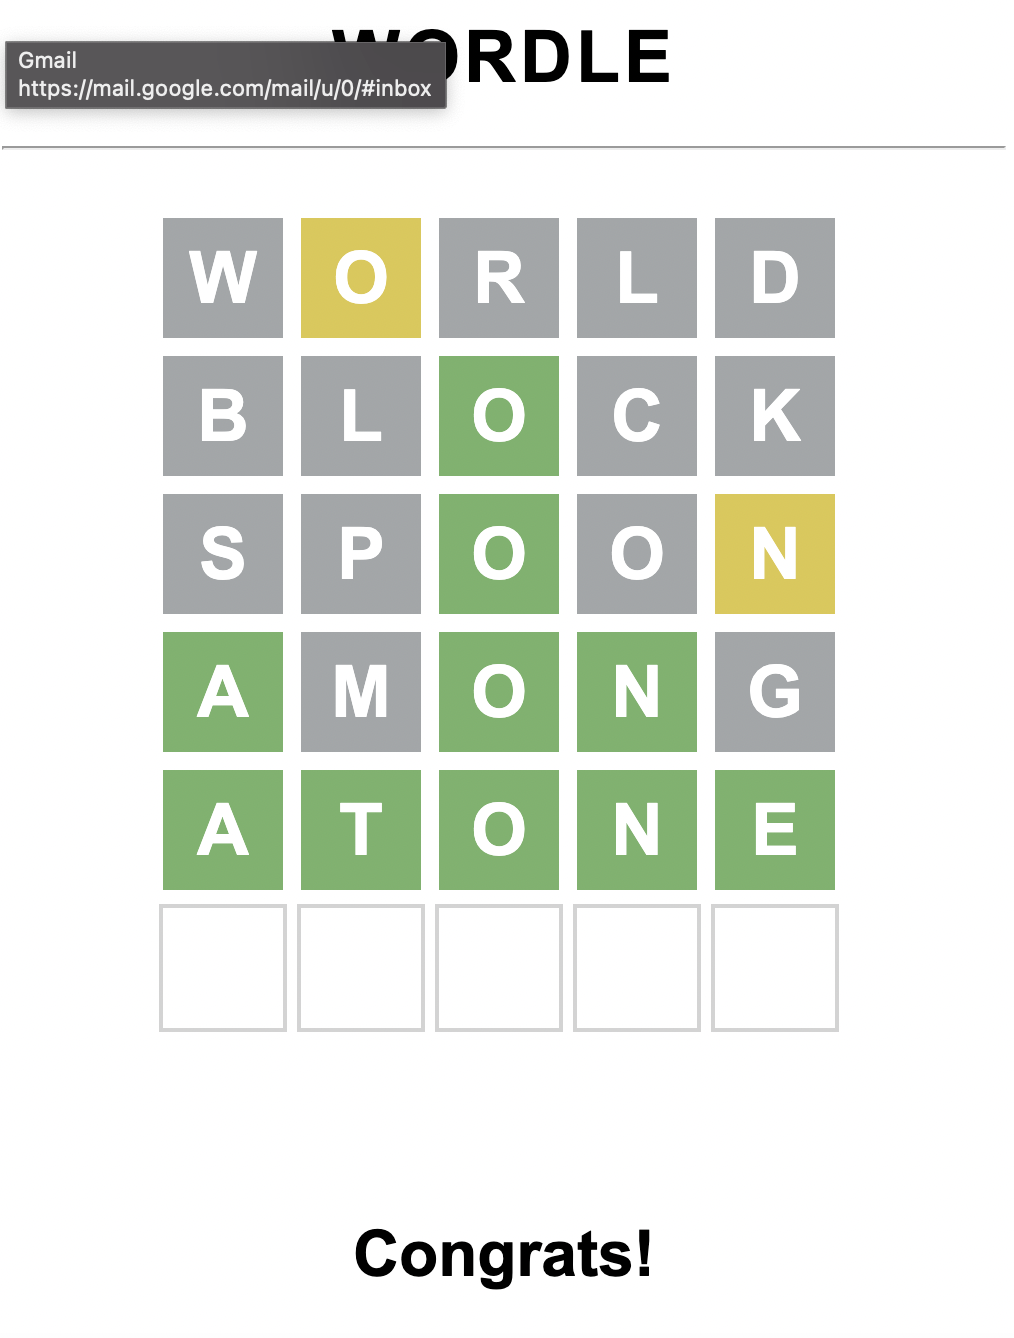
게임을 플레이해본 모습입니다

제가 좋아하는 게임을 처음부터 끝까지 스스로의 아이디어로 코드를 짜고 실행되는것을 보니 매우 뿌듯하고 재미있었습니다!
지금까지 배운것을 응용한 점:
- HTML 정보를 가져와 DOM 으로 조작할 수 있다.
- 이벤트리스너 함수를 element 에 적용할 수 있다.
- 적절한 API를 사용해 비동기적으로 요청을 보내고 응답을 받아 코드를 작성할 수 있다.
- 유효성 검사를 하고 그에 따라 다양한 css 속성을 적용할 수 있다.
