1. Version
💬
- IntelliJ : 2020.3.2.community
- spring boot : 2.6.1
2. 시작 전 확인사항
💬 gradle 추가
	implementation 'org.springframework.boot:spring-boot-starter'
	implementation 'org.springframework.boot:spring-boot-starter-web'
	implementation 'org.springframework.boot:spring-boot-starter-thymeleaf'
	testImplementation 'org.springframework.boot:spring-boot-starter-test'

	//lombok 관련
	compileOnly 'org.projectlombok:lombok'
	annotationProcessor 'org.projectlombok:lombok'

	testCompileOnly 'org.projectlombok:lombok:1.18.22' // 테스트 의존성 추가
	testAnnotationProcessor 'org.projectlombok:lombok:1.18.22' // 테스트 의존성 추가
3. Html 페이지 생성
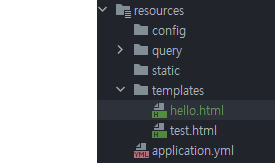
💬 html 페이지 경로
src/main/resources/templates/...html
💬 html 페이지 구현
<!DOCTYPE html>
<html lang="en" xmlns:th="http://www.w3.org/1999/xhtml">
<head>
<!-- 한글 utf-8 설정 -->
<meta http-equiv="content-type" content="text/html; charset=UTF-8">
<meta charset="UTF-8">
<title>$Title$</title>
</head>
<body>
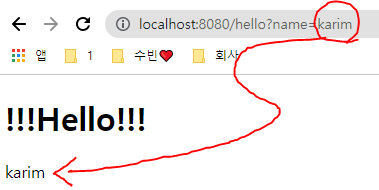
<h1>!!!Hello!!!</h1>
<div th:text="${name}"></div>
</body>
</html>4. Controller 구현
💬 Controller 구현
package com.karim.simpleBoard.controller;

import ch.qos.logback.classic.Logger;
import lombok.RequiredArgsConstructor;
import org.slf4j.LoggerFactory;
import org.springframework.stereotype.Controller;
import org.springframework.ui.Model;
import org.springframework.web.bind.annotation.GetMapping;

import java.util.List;

@Controller
@RequiredArgsConstructor
public class TestController {
    @GetMapping("/hello")
    public String hello(String name, Model model) {
        //http://localhost:8080/hello?name=karim
        model.addAttribute("name", name);
        logger.info("{} => {}", "name", name);
        //html 이름
        return "hello";
    }
}
💬 어노테이션 설명
- @Controller
템플릿을 이용해서 Html 페이지를 렌더링하고 표시하는 페이지에 사용 - @RequiredArgsConstructor
생성자 자동 생성해 준다. - @GetMapping
@RequestMapping(Method=RequestMethod.GET)과 같다.
5. 실행 및 결과화면
💬 WebApplication 구현
package com.karim.simpleBoard;

import org.springframework.boot.SpringApplication;
import org.springframework.boot.autoconfigure.SpringBootApplication;

@SpringBootApplication
public class WebApplication {

	public static void main(String[] args) {
		SpringApplication.run(WebApplication.class, args);
	}
}- 꼭 같은 pkg 안에 있어야 한다.!!!

💬 WebApplication 실행
- 기본 localhost:8080으로 띄어 진다.
📚 참고

나도 보기 위해 정리해 놓은 벨로그