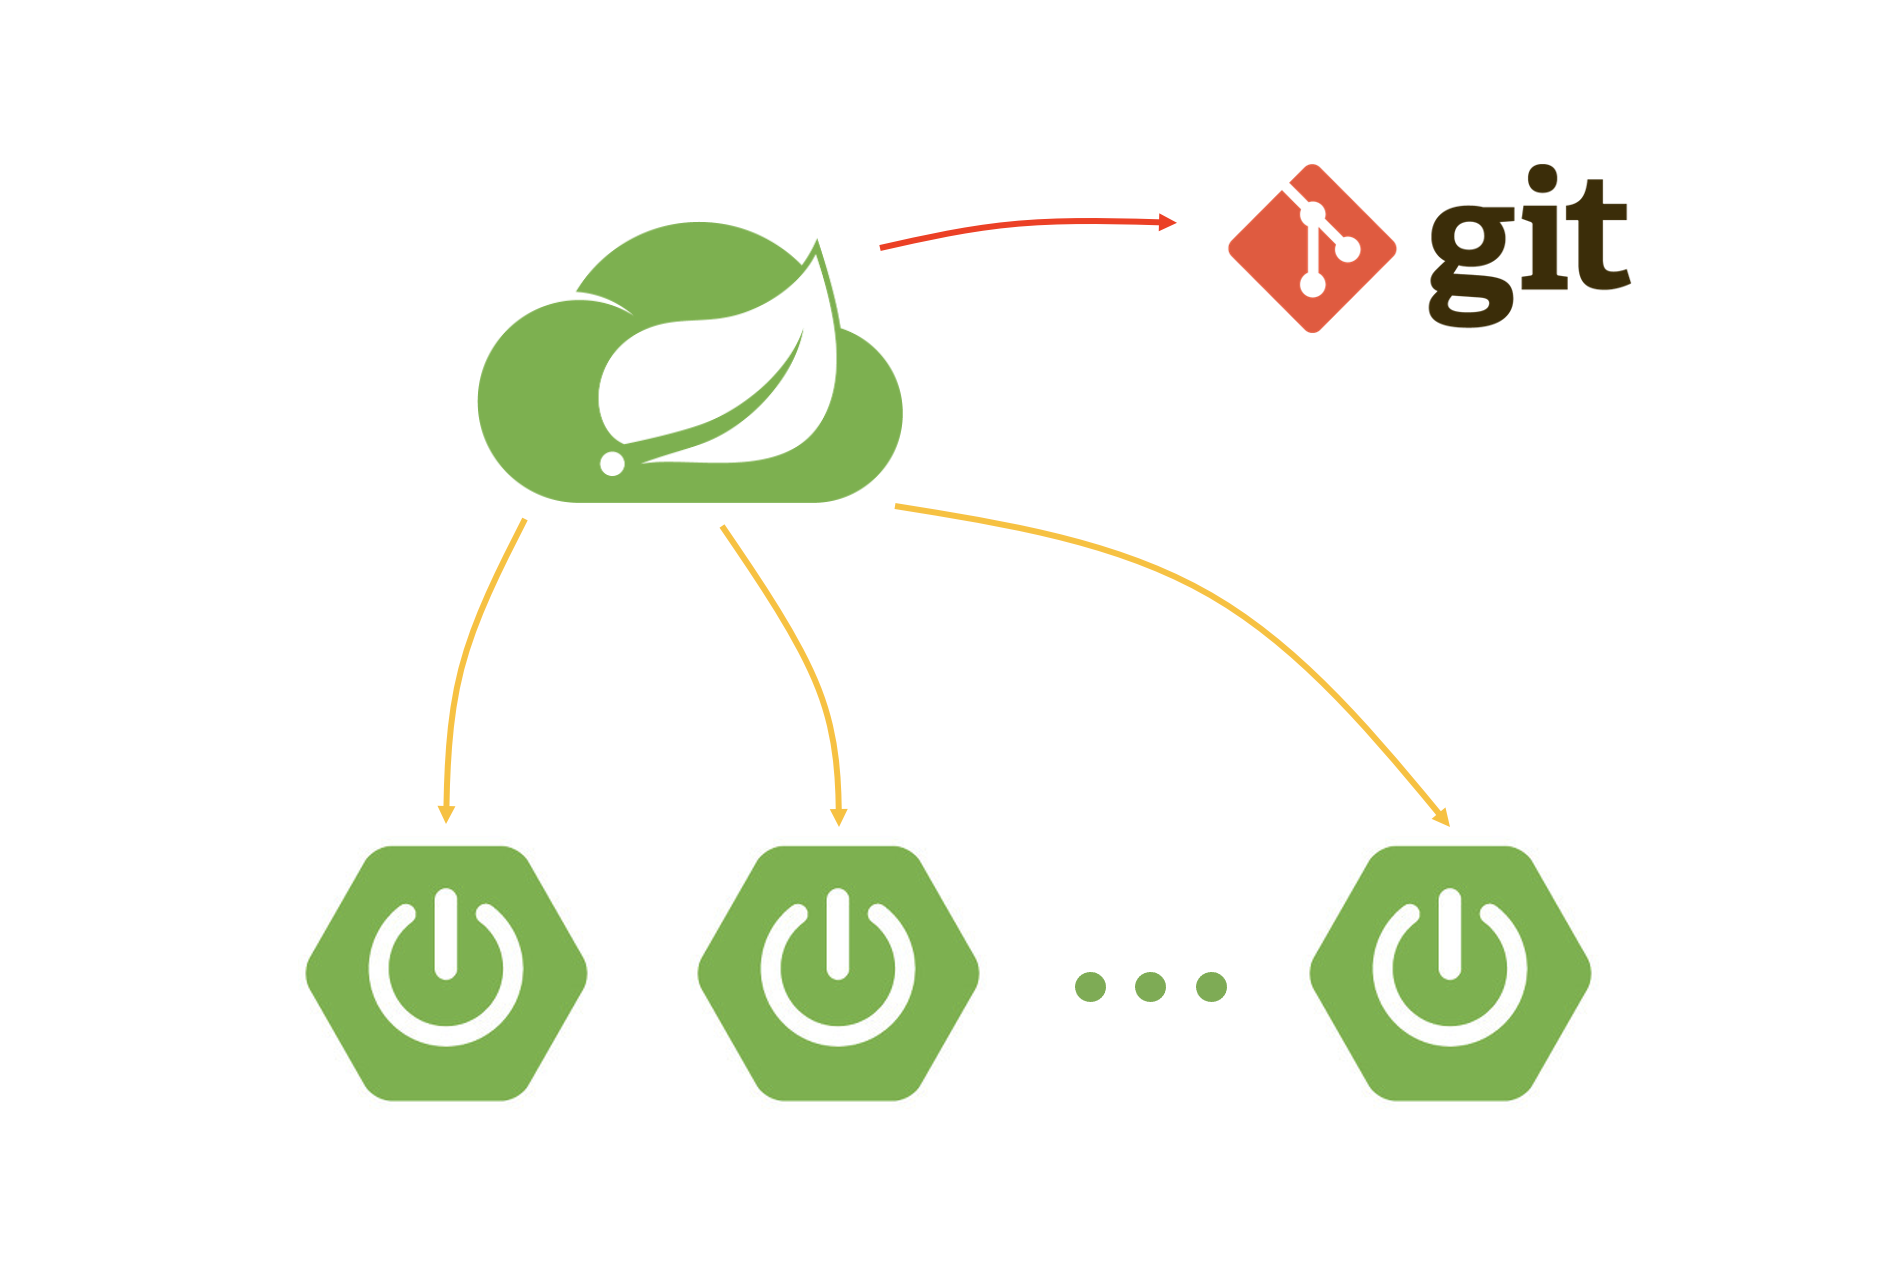
Spring Cloud Config는 MSA 같은 분산 시스템에서 설정 파일을 외부로 분리할 수 있도록 해준다. 그렇게 되면 많은 서버의 설정 파일들을 중앙 서버에서 관리하기에 편하고 서버를 재배포 하지 않고도 설정 파일의 변경사항을 반영할 수 있다.
장점은 운영 중에 설정값 변경이 필요시 Config-Server 변경하면 각 Client-Server(서비스 애플리케이션)들을 동적으로 설정정볼르 변경되기에 설정이 바뀔 때마다 빌드와 배포가 필요 없는 구조이다.
Client-Server가 Config-Server 에게 설정값을 요청하면 Config-Server는 설정파일이 저장된 Cloud-Config 설정값을 다시 Client-Server 에게 전달하게 된다.
1. 설정 파일 외부 처리(Cloud Config)
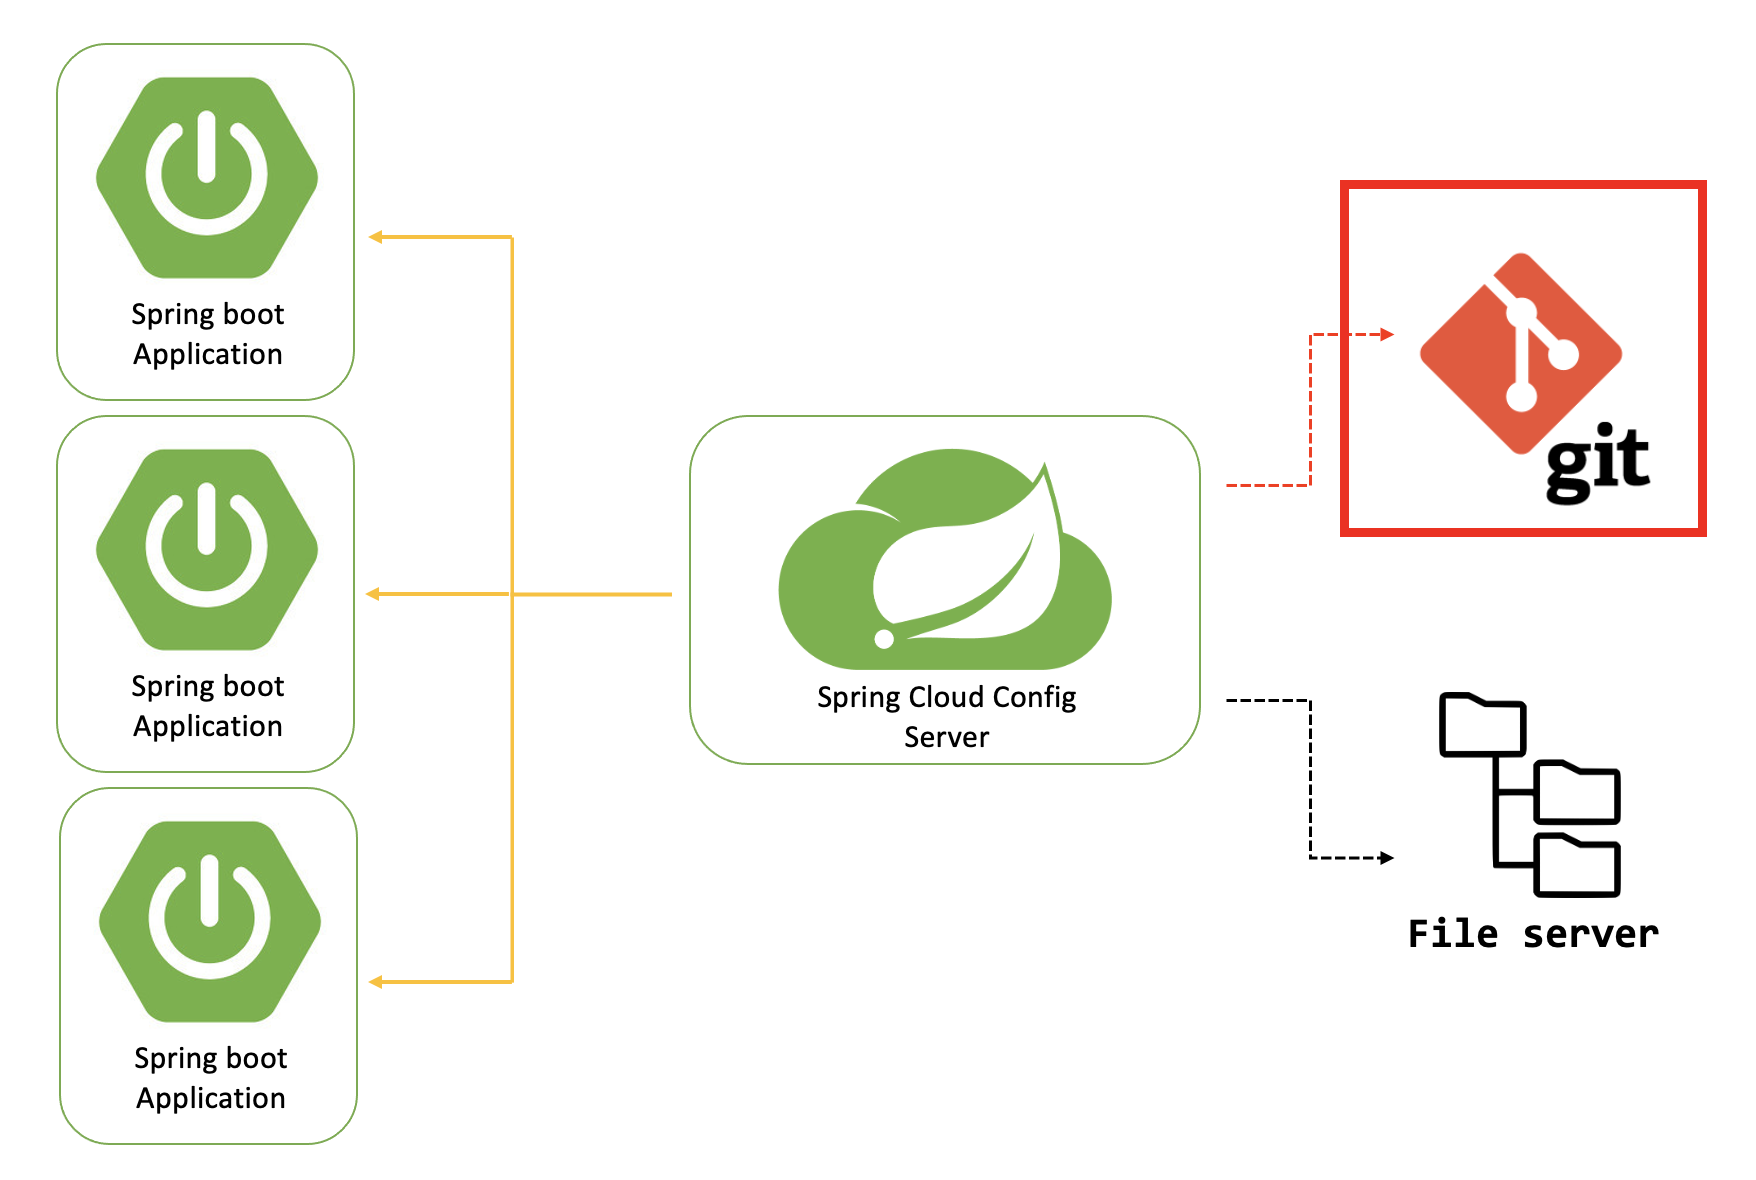
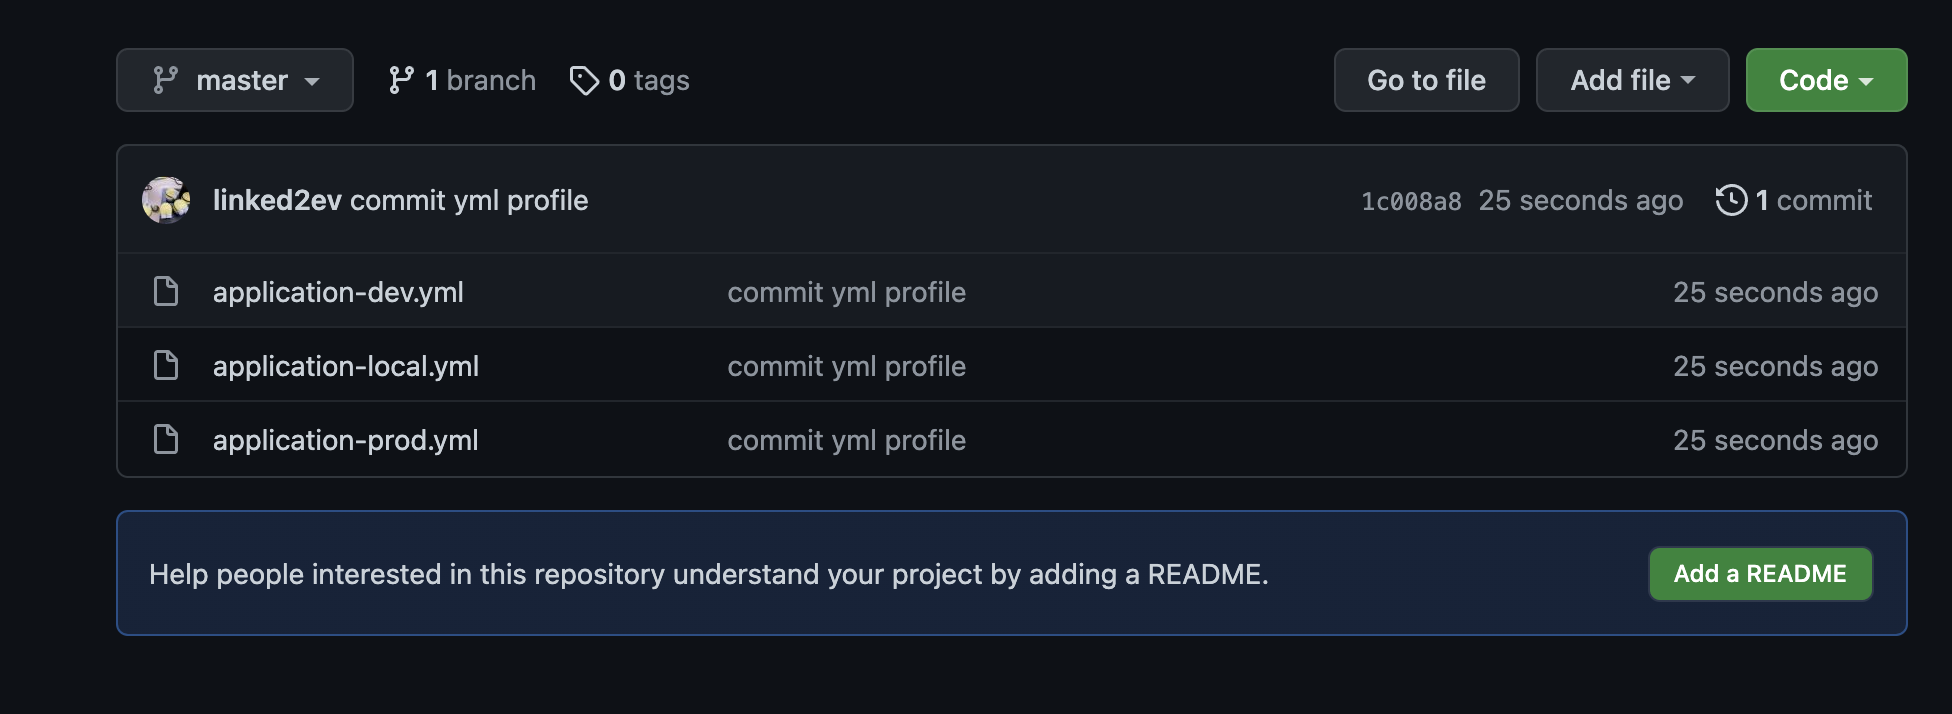
기존 서비스의 설정파일(application.yml)을 외부(gitlab, github, local file-system 등)로 분리 시키는 것이다. 해당 포스팅은 Github Repository 에 yml파일을 application-local, application-dev, application-prod 각각 설정파일을 저장해서 관리한 예제이다.
server:
  port: 8080

spring:
  #profiles: local, dev, prod
  config:
    activate:
      on-profile: dev # local, dev, prod

  datasource:
    hikari:
      connection-test-query: SELECT 1
      allow-pool-suspesion: true
      driver-class-name: net.sf.log4jdbc.sql.jdbcapi.DriverSpy
      jdbc-url: jdbc:log4jdbc:mysql://localhost:3306/demo_neo?useUnicode=true&characterEncoding=utf-8&serverTimezone=UTC
      username: root
      password: 1111

  thymeleaf:
    cache: false

  resources:
    cache:
      period: 0

  jpa:
    database: mysql
    database-platform: org.hibernate.dialect.MySQL5InnoDBDialect
    generate-ddl: true
    hibernate:
      use-new-id-generator-mappings: false

mybatis:
  configuration:
    map-underscore-to-camel-case: true
1-1. Github Repository 생성
"neo-spring-cloud-config"명으로 repository 생성 후에 생성 된 외부 설정 파일을 github에서 올린 모습이다.
2. Spring Cloud Config Server
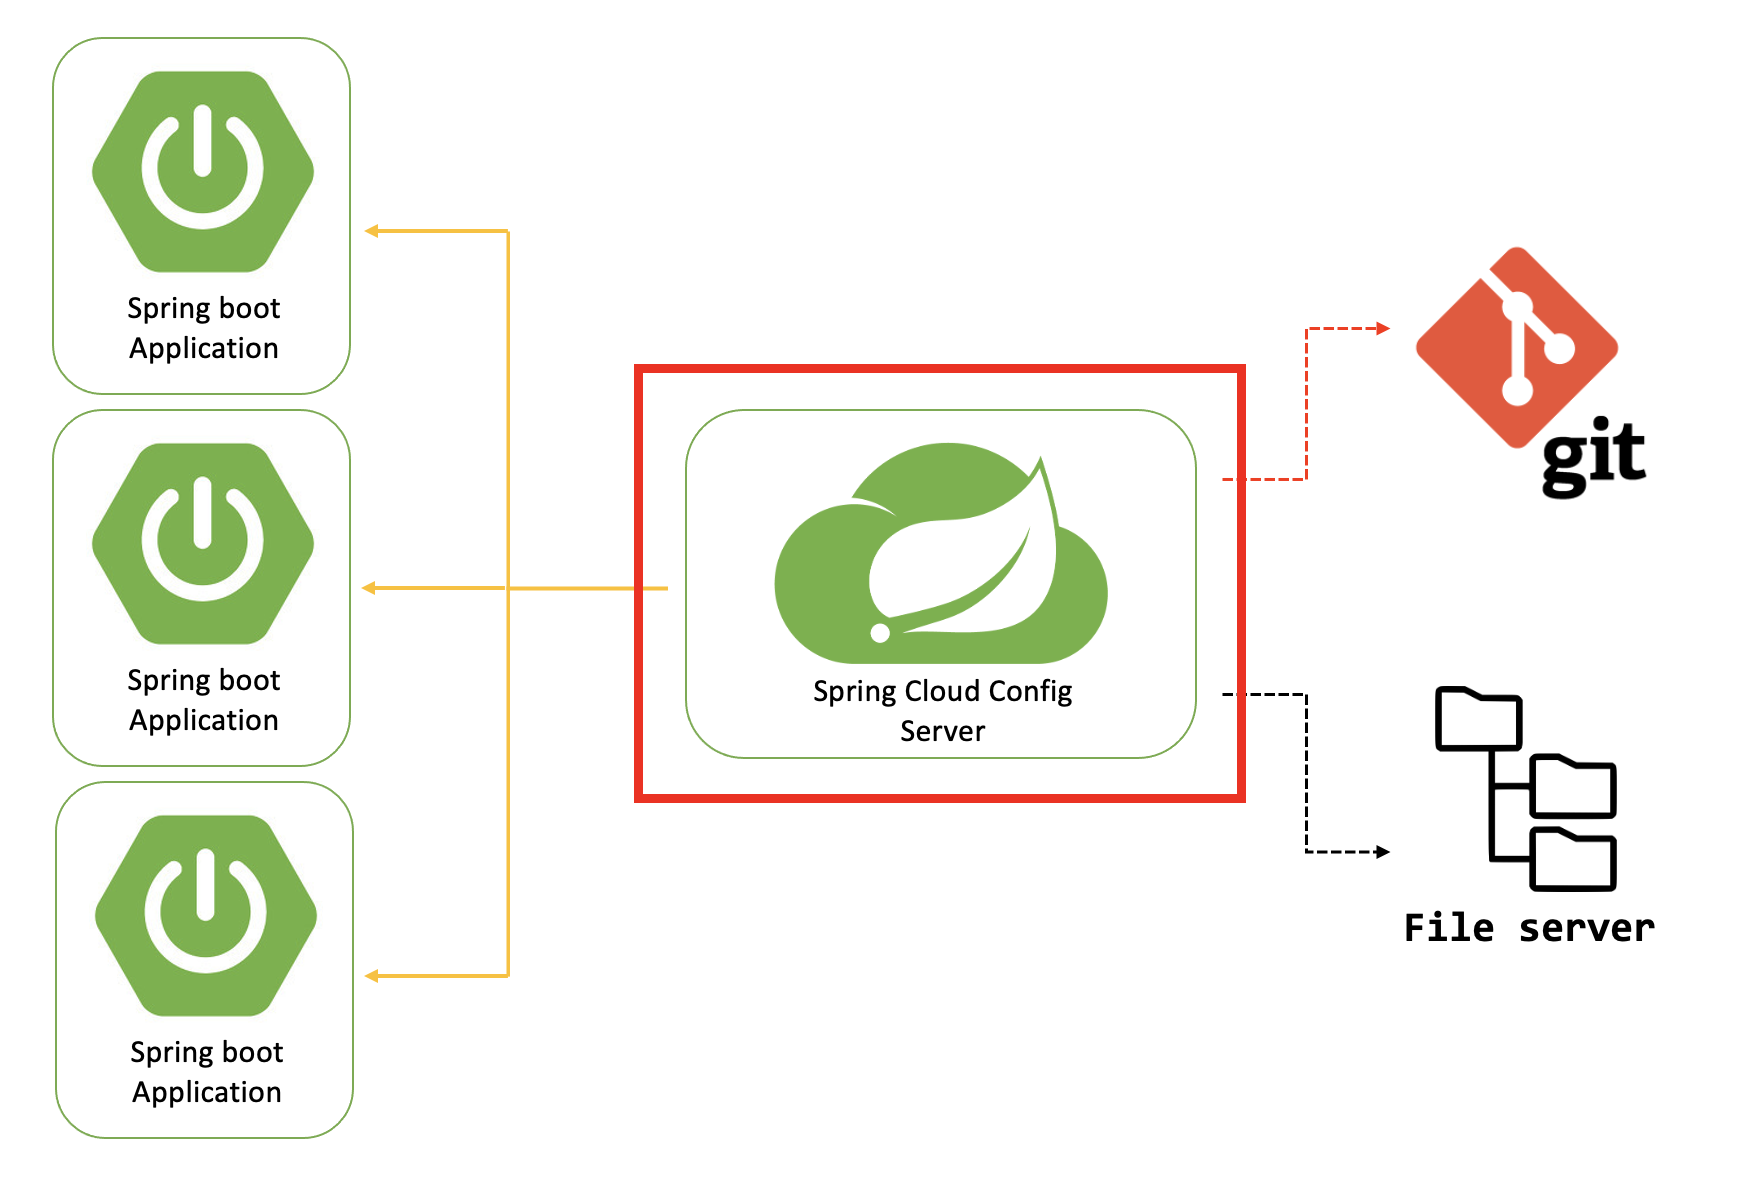
Spring Cloud Config Server는 Cloud Config 설정파일을 불러와서 설정 정보를 배포하는 역할을 한다. Spring Cloud Config Server 역할을 하는 서버를 생성해주자. Springboot로 config-server dependencies를 선택해서 새 프로젝트를 생성한다.
2-1. Config Server 설정
해당 Springboot App이 Cloud Config Server 역할을 한다는 것을 명시 @EnableConfigServer
ConfigServerApplication.java
@SpringBootApplication
@EnableConfigServer
public class ConfigServerApplication {

    public static void main(String[] args) {
        SpringApplication.run(ConfigServerApplication.class, args);
    }

}
build.gradle
plugins {
    id 'org.springframework.boot' version '2.6.3'
    id 'io.spring.dependency-management' version '1.0.11.RELEASE'
    id 'java'
    id 'war'
}

group = 'spring-cloud'
version = '0.0.1-SNAPSHOT'
sourceCompatibility = '11'

repositories {
    mavenCentral()
}

ext {
    set('springCloudVersion', "2021.0.0")
}

dependencies {
    implementation 'org.springframework.cloud:spring-cloud-config-server'
}

dependencyManagement {
    imports {
        mavenBom "org.springframework.cloud:spring-cloud-dependencies:${springCloudVersion}"
    }
}

tasks.named('test') {
    useJUnitPlatform()
}
application.yml
외부에 설정한 설정파일 경로를 설정한다.
server:
  port: 8888

spring:
  cloud:
    config:
      server:
        git:
          default-label: master
          uri: https://github.com/linked2ev/neo-spring-cloud-config
          #username: private 경우
          #password: private 경우
2-2. Config Server 구동
아래와 같이 서버 구동 시에 Config 자원을 가져와서 설정하는 로그가 올라온다.
o.s.c.c.s.e.NativeEnvironmentRepository : Adding property source: Config resource 'file [/var/folders/jt/xt8g5__92ms_k5xlf0w4l50r0000gn/T/config-repo-6373310396527221640/application-local.yml]' via location 'file:/var/folders/jt/xt8g5__92ms_k5xlf0w4l50r0000gn/T/config-repo-6373310396527221640/'2-3. Cloud Config 정보 확인
방금 만든 Spring Cloud Config Server 프로젝트를 실행 한 다음에
http://localhost:8888/cloud-config/local 로 접근하면 아래와 같이 설정파일 내용이 json 형태로 정보를 확인이 가능하다.
{
   "name":"cloud-config",
   "profiles":[
      "local"
   ],
   "label":null,
   "version":"1c008a86f383bd4cb76179052648ccc87cd7f3fd",
   "state":null,
   "propertySources":[
      {
         "name":"https://github.com/linked2ev/neo-spring-cloud-config/application-local.yml",
         "source":{
            "server.port":8080,
            "spring.config.activate.on-profile":"local",
            "spring.datasource.hikari.connection-test-query":"SELECT 1",
            "spring.datasource.hikari.allow-pool-suspesion":true,
            "spring.datasource.hikari.driver-class-name":"net.sf.log4jdbc.sql.jdbcapi.DriverSpy",
            "spring.datasource.hikari.jdbc-url":"jdbc:log4jdbc:mysql://localhost:3306/demo_neo?useUnicode=true&characterEncoding=utf-8&serverTimezone=UTC",
            "spring.datasource.hikari.username":"root",
            "spring.datasource.hikari.password":1111,
            "spring.thymeleaf.cache":false,
            "spring.resources.cache.period":0,
            "spring.jpa.database":"mysql",
            "spring.jpa.database-platform":"org.hibernate.dialect.MySQL5InnoDBDialect",
            "spring.jpa.generate-ddl":true,
            "spring.jpa.hibernate.use-new-id-generator-mappings":false,
            "mybatis.configuration.map-underscore-to-camel-case":true
         }
      }
   ]
}
3. Spring Cloud Client Server
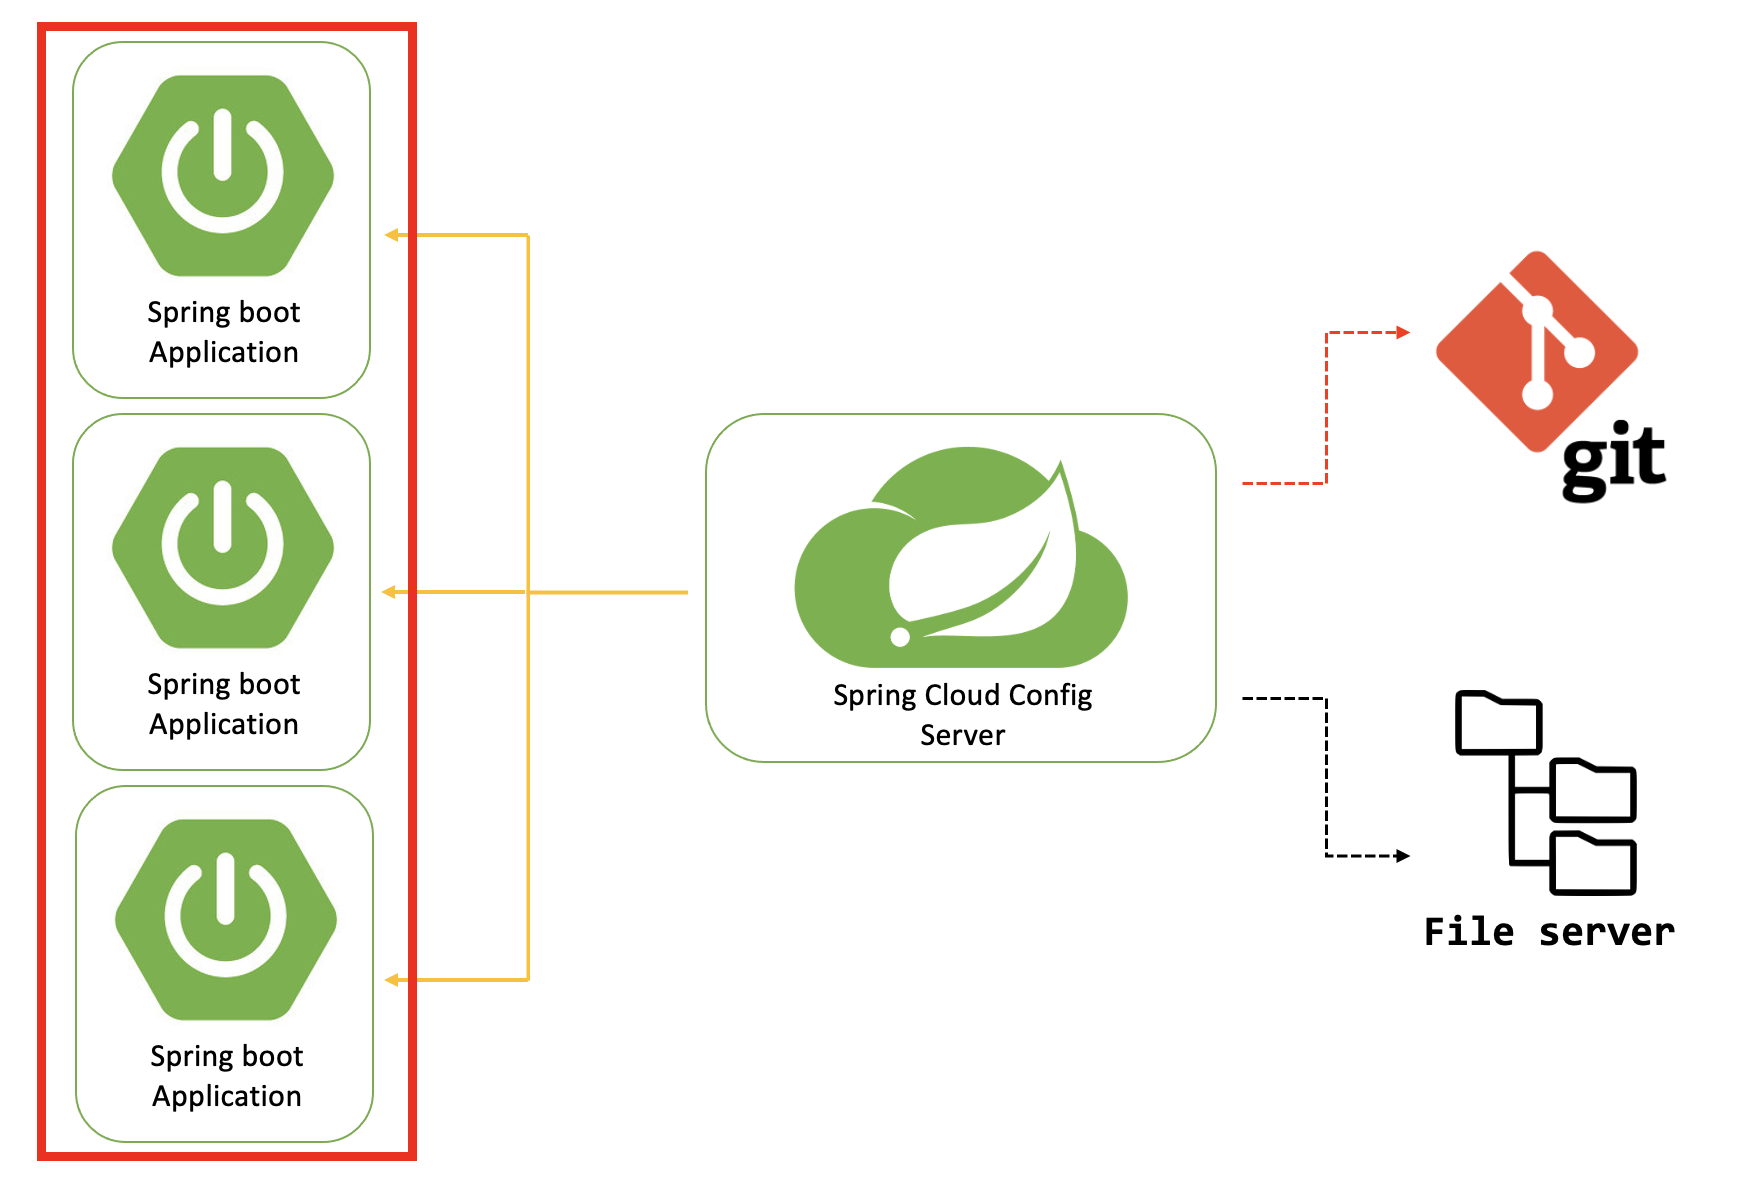
Client Server가 Spring Cloud Config Server에게 설정값을 요청하면 Server는 설정파일이 저장된 Config 저장소에 설정값을 Client 에게 전달하게 된다. 그래서 Client는 Cloud Config 설정파일 정보를 가져와서 서버를 구동하게 되는 형태이다.
build.gradle
Cloud Config Server와 마찬가지로 Spring Cloud 의존성 추가
implementation 'org.springframework.boot:spring-boot-starter-actuator'
implementation 'org.springframework.cloud:spring-cloud-starter-config'
application.yml
spring:
  profiles:
    active: dev
  cloud:
    config:
      uri: http://localhost:8888 #Config Server uri
4. Cloud Config 동적 변경
변경된 설정파일의 설정이 애플리케이션의 재배포 없이 동적으로 반영하기 위해서 아래와 같이 의손성과 RefreshScope 어노테이션이 필요하다.
implementation 'org.springframework.boot:spring-boot-starter-actuator'CloudConfigService.java
profile 설정파일 정보를 가져오기 위해서 설정정보를 관리(확인하기위해)하는 클래스를 생성
@Slf4j
@Configuration
@RefreshScope
public class CloudConfigService {

    @Value("${const.profile}")
    private String profile;

    @Value("${const.test-key}")
    private String testKey;

    @Bean
    public void profileConfig() {
        this.getConfig();
    }

    public Map<String, Object> getConfig() {
        Map<String, Object> configMap = new HashMap<>();
        log.info("==> config-info: profile={}, testKey={}", profile, testKey);

        configMap.put("profile", profile);
        configMap.put("testKey", testKey);

        return configMap;
    }

}
ConfigApiController.java
yml파일을 수정했을 떄 profile 정보를 동적으로 수정된 정보를 가져오는 역할을 하는
Controller를 생성
@Slf4j
@RestController
@RequestMapping("/v2/api/common")
public class ConfigApiController {

    @Autowired
    public CloudConfigService cloudConfigService;

    @GetMapping
    public void getConfig(HttpServletRequest request) throws Exception {
        cloudConfigService.getConfig();
    }
}
application-dev.yml
Github Repository 에 만들어 놓은 Spring Cloud Config 외부설정파일에 아래와 같이 테스트 하기 위해 추가 작성해준다.
const:
  profile: dev
  test-key: 1111
4-1. yml 파일 정보 가져오기
위와 같이 설정한 후에 서버 구동 및 localhost:8080/v2/api/common 호출 시에 아래와 같이
yml 파일 설정 정보를 가져오는것을 확인 할 수 있다.
[INFO ] [] (CloudConfigService :32 ) ==> config-info: profile=dev, testKey=11114-2. 동적 변경 확인
이제 동적으로 변경되는거를 테스트 하기 위해서 Github Repository 에 만들어둔 설정파일 내용을 수정하고
const:
  profile: dev
  test-key: 2222
설정파일을 수정한다고 저절로 어플리케이션에 동적으로 설정정보가 변하는게 아니고 어플리케이션에 POST요청을 해서 수정하는 개념이다. 아래 curl 명령어로 Config Client 서버에 POST요청을 해보자.
$ curl -X POST "http://localhost:8080/actuator/refresh"하여튼 POST 명령 후에 서버 재시작 없이 localhost:8080/v2/api/common 호출하면 @RefreshScope 선언에 의해 아래와 같이 test-key 값이 2222가 변한걸 볼 수 있다.
[INFO ] [] (CloudConfigService :32 ) ==> config-info: profile=dev, testKey=2222/actuator/refresh 호출로 각 클라이언트 서버를 재배포하지 않고도 설정정보를 갱신하는 것이다. 해당 포스팅에서는 수동으로 /actuator/refresh 호출로 Cloud Config 정보를 동적변경했지만, 브로드캐스팅 개념인 Spring Cloud Bus 기능을 통해 각 클라이언트 서버들에 일일이 /actuator/refresh 로 호출을 안하고도 자동으로 설정정보 변경이 가능하다.
[관련포스팅 시리즈]
[참고]
2개의 댓글
XCIPTV app is a versatile and easy-to-use app that allows users to play streaming video content in an efficient and personalized way.

If you can't access the website, check out our article on Wink Mod APK Video Retouching Tool. Currently the most rated video editor.s