1. 프론트서버를 왜 이중화해야할까?
- 장애 또는 재해시 빠른 서비스 재개를 위함
- 서비스의 일시적인 중단이 발생하더라도(다운타임 발생하더라도) 재빠르게 대응 가능
- 로드밸런싱을 통해 원활한 서비스의 성능을 보장 하기 위함
2. 오리탕 북스토어 프로젝트 서버를 nhncloud에 배포하면서 front 서버를 이중화해야하는 요구사항을 해결하기위해 다음과 같은 nginx.conf 파일을 ubuntu환경의 server에 작성함.
user www-data;
worker_processes auto;
pid /run/nginx.pid;
include /etc/nginx/modules-enabled/*.conf;

events {
        worker_connections 768;
        # multi_accept on;
}

http {

// upstream loadbalancer: 두 개의 백엔드 서버로 요청을 로드 밸런싱함.
        upstream loadbalancer{
                server 127.0.0.1:8081;
                server 127.0.0.1:8082;
        }

        server {
     //  listen 80;: HTTP 요청을 포트 80에서 수신.
                listen 80;
                server_name www.5ritang.store 5ritang.store;

                location / {
                        proxy_set_header X-Forwarded-For $remote_addr;
                        proxy_set_header X-Forwarded-Proto $scheme;
                        proxy_set_header Host $http_host;
                        proxy_pass http://loadbalancer;
                }


//HTTP에서 HTTPS로 리디렉션.
                if ($host = www.5ritang.store) {
                        return 301 https://$host$request_uri;
                } # managed by Certbot

                if ($host = 5ritang.store) {
                        return 301 https://$host$request_uri;
                } # managed by Certbot
        }

        server {
     //   HTTPS 요청을 포트 443에서 수신.
                listen 443 ssl;
                server_name www.5ritang.store 5ritang.store;

// SSL 인증서 및 키 파일 경로 설정.
                ssl_certificate /etc/letsencrypt/live/5ritang.store/fullchain.pem;
                ssl_certificate_key /etc/letsencrypt/live/5ritang.store/privkey.pem;
                include /etc/letsencrypt/options-ssl-nginx.conf;
                ssl_dhparam /etc/letsencrypt/ssl-dhparams.pem;

                location / {
                        proxy_set_header X-Forwarded-For $remote_addr;
                        proxy_set_header X-Forwarded-Proto $scheme;
               			proxy_set_header Host $http_host;
                        proxy_pass http://loadbalancer;
                }
        }

        ##
        # Basic Settings
        ##

        sendfile on;
        tcp_nopush on;
        tcp_nodelay on;
        keepalive_timeout 600;
        types_hash_max_size 2048;
        # server_tokens off;

        # server_names_hash_bucket_size 64;
        # server_name_in_redirect off;

        include /etc/nginx/mime.types;
        default_type application/octet-stream;

        ##
        # SSL Settings
        ##

        ssl_protocols TLSv1 TLSv1.1 TLSv1.2 TLSv1.3; # Dropping SSLv3, ref: POODLE
        ssl_prefer_server_ciphers on;

        ##
        # Logging Settings
        ##

        #access_log /var/log/nginx/access.log main;
        access_log /var/log/nginx/access.log;
        error_log /var/log/nginx/error.log;

        ##
        # Gzip Settings
        ##

        gzip on;

        # gzip_vary on;
        # gzip_proxied any;
        # gzip_comp_level 6;
        # gzip_buffers 16 8k;
        # gzip_http_version 1.1;
        # gzip_types text/plain text/css application/json application/javascript text/xml application/xml application/xml+rss text/javascript;

        ##
        # Virtual Host Configs
        ##

        include /etc/nginx/conf.d/*.conf;
        include /etc/nginx/sites-enabled/*;


}


#mail {
#       # See sample authentication script at:
#       # http://wiki.nginx.org/ImapAuthenticateWithApachePhpScript
#
#       # auth_http localhost/auth.php;
#       # pop3_capabilities "TOP" "USER";
#       # imap_capabilities "IMAP4rev1" "UIDPLUS";
#
#       server {
#               listen     localhost:110;
#               protocol   pop3;
#               proxy      on;
#       }
#
#       server {
#               listen     localhost:143;
#               protocol   imap;
#               proxy      on;
#       }
#}
3. 이렇게 파일을 작성하고 githubaction으로 frontserver 두개를 ci/cd적용하여 배포하면 다음과같이 ubuntu환경의 server에 배포된것을 확인가능함

4. 배포된 두개의 프론트서버를 관리하다 발생한 문제점
github action을 통해 서버를 배포했는데 문제는 2개의 서버를 죽이고 다시 서버를 키는 과정에서 둘다 서버가 죽으면 무중단배포가 의미가 없어짐. 따라서 순서대로 번갈아가면서 서버를 죽이고 키는 과정을 해야한다. 문제는 이러한 과정에서 서버가 죽었는지 안죽었는지 체크를 하고 만약 서버가 죽었는데 그 다음 이어서 서버를 죽이고 키는 과정을 한다면 또 무중단배포가 의미가없어진다.
5. 해결방안
   script: |
           echo "Checking if application is running by checking log file..."
           for i in {1..30}; do
             if grep -q "Started BookStoreFrontApplication" FRONT-A.log; then
               echo "Application is running"
               break
             else
               echo "Waiting for application to start..."
               sleep 5
             fi
           done
           if ! grep -q "Started BookStoreFrontApplication" FRONT-A.log; then
             echo "Application did not start in expected time" >&2
             exit 1
           fi
우리팀은 앞서 실행한 서버의 로그파일을 확인하여 프론트앱(A)이 실행되었는지 여부를 체크하게끔 조치했다.
이를 총 30번 반복하고 만약 앱이 실행할경우 루프를 종료하고 그다음 프론트앱(B)을 실행하는 방식을 사용하였다.
만약 프론트앱(A)이 실행되지 않는다면 5초를 대기하고 30번안에 실행되지 않는다면 for문 밖을 나가고 그 다음 if문의 exit가 실행되어
워크플로우가 종료되어 프론트앱(B)만 배포되어 무중단배포 유지가 가능하게 했다.
6. 추가적인 문제점
위에 있는 방식으로 할경우 결국엔 프론트앱(B)만 남게되고 해당 앱도 풀리퀘를 통한 배포가 온전히 이루어지지 않게된다. 따라서 이부분을 해결하기위한 추가적인 설정을 고려해보아야한다.
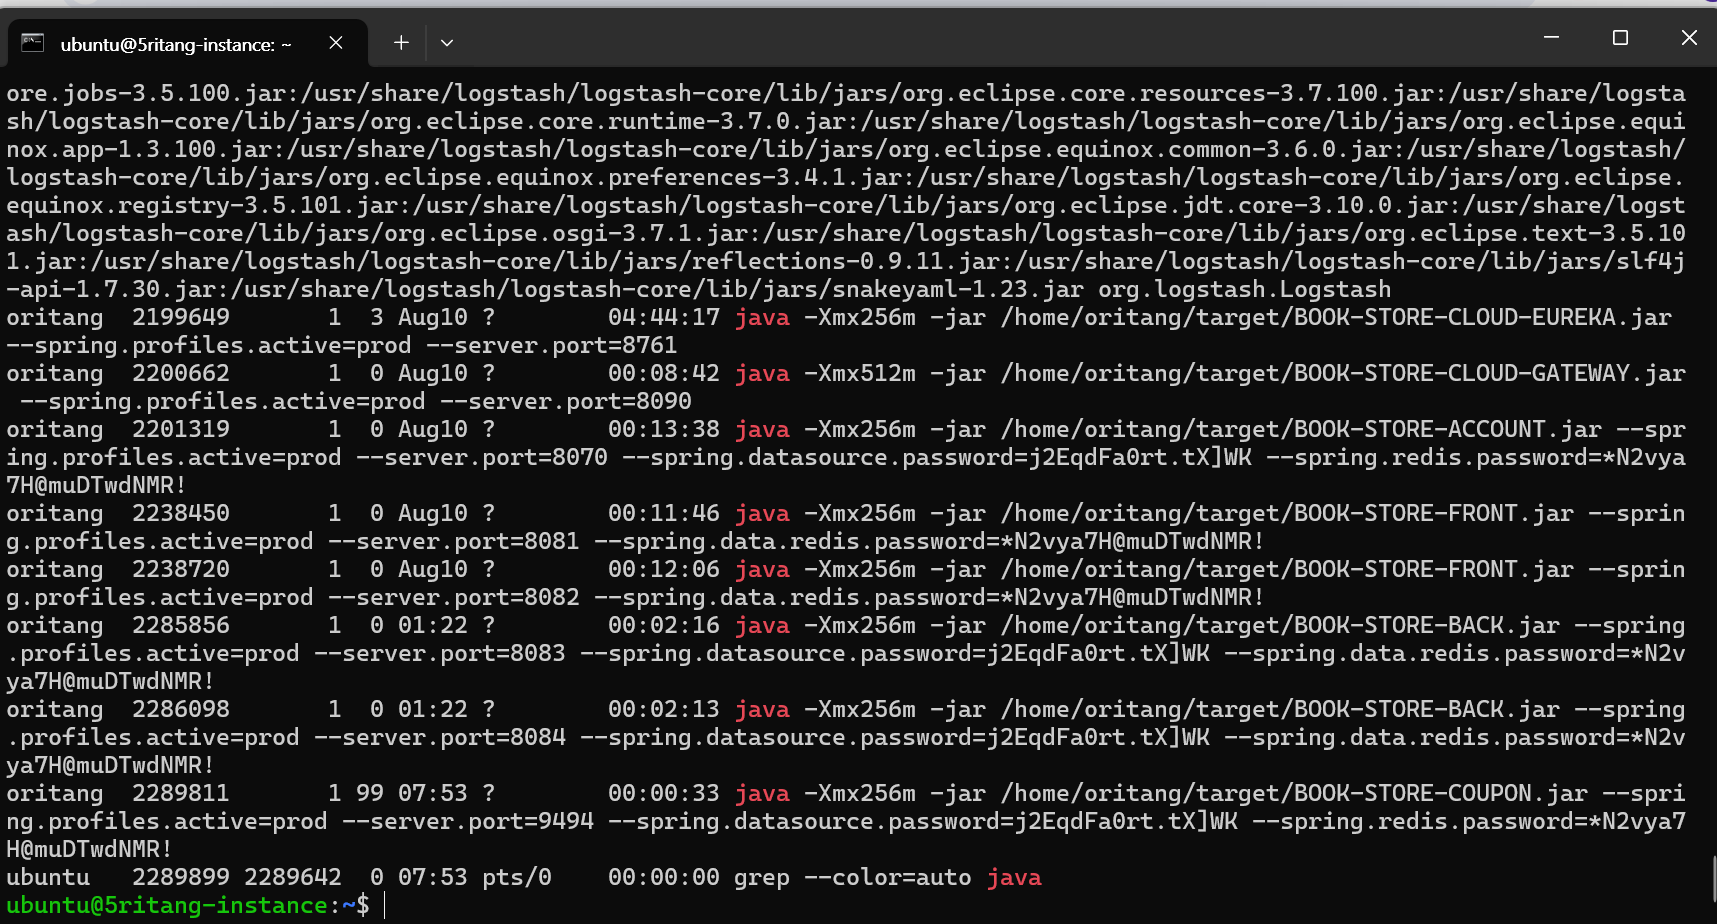
8월 중순 현재시점 백, 프론트서버 둘다 이중화 되어있는 것을 알 수 있음.