도커 설치
다음 공식문서의 명령어를 따른다.
https://docs.docker.com/engine/install/ubuntu/
- 도커 설치 준비(GPG 키 추가)
- 레포지토리 세팅
-
Update the apt package index and install packages to allow apt to use a repository over HTTPS:
sudo apt-get updatesudo apt-get install \ ca-certificates \ curl \ gnupg \ lsb-release -
Add Docker’s official GPG key:
curl -fsSL https://download.docker.com/linux/ubuntu/gpg | sudo gpg --dearmor -o /usr/share/keyrings/docker-archive-keyring.gpg- 도커 설치
sudo apt install docker.io명령어로 설치해야 오류가 발생하기 않는다.

도커 버젼 확인
docker -vDocker version 20.10.7, build 20.10.7-0ubuntu5~18.04.3
도커 권한부여
Got permission denied while trying to connect to the Docker daemon socket at unix:///var/run/docker.sock: Get http://%2Fvar%2Frun%2Fdocker.sock/v1.24/images/json: dial unix /var/run/docker.sock: connect: permission denied
위와 같은 에러가 발생한다.
이유는 무엇인가?
도커를 root 가 아닌 ubuntu 유저로 실행했기 때문이다.
따라서 해당 유저를 docker group 에 추가해주면 해결된다.
- 도커 그룹을 만든다.
- 유저를 도커 그룹에 추가한다.
- 로그아웃하고 재로그인한다.
- 확인한다.
명령어는 이것을 참고 : https://stackoverflow.com/questions/48957195/how-to-fix-docker-got-permission-denied-issue
도커의 원리
docker run hello-worldUnable to find image 'hello-world:latest' locally
latest: Pulling from library/hello-world
2db29710123e: Pull complete
Digest: sha256:97a379f4f88575512824f3b352bc03cd75e239179eea0fecc38e597b2209f49a
Status: Downloaded newer image for hello-world:latest
Hello from Docker!
This message shows that your installation appears to be working correctly.
To generate this message, Docker took the following steps:
1. The Docker client contacted the Docker daemon.
2. The Docker daemon pulled the "hello-world" image from the Docker Hub.
(amd64)
3. The Docker daemon created a new container from that image which runs the
executable that produces the output you are currently reading.
4. The Docker daemon streamed that output to the Docker client, which sent it
to your terminal.- 도커 클라이언트가 도커 데몬에 컨택
- 도커 데몬이 도커 허브로브터 이미지를 다운로드.
- 도커 데몬이 이미지로부터 새로운 컨테이너를 생성
- 도커 네몬이 결과물을 도커 클라이언트에 스트림
Nginx 설치
docker pull nginx도커 이미지 확인
docker images
Nginx 작동
docker container run --name webserver -d -p 80:80 nginxwebserver 라는 이름으로 nginx 이미지를 컨테이너화하여 실행하며
-d 옵션을 통해 detach, 즉 백그라운드로 실행한다.
-p 옵션을 통해 HTTP 80번 포트에 대한 액세스를 허가한다.
Jenkins 를 굳이 도커로 설치할 필요는 없다고 생각한다. EC2 자체에 설치해도 무리 없다. 도커 컴포즈로 한번에 쭉 실행하지 않는 이상 특별히 장점은 없는 듯하다. -> (수정) Jenkins 실행을 위해서는 자바를 설치해야 하는데, 도커로 설치하면 자바 설치 없이도 돌아간다!
Jenkins 이미지를 다운로드
docker pull jenkins/jenkinsJenkins 이미지를 실행
여기서 잠깐!
Jenkins 의 기본 실행포트는 8080이다. 톰캣을 기반으로 하기 때문이다.
이 기본포트를 바꿔주는것은 만약 도커로 설치하지 않고 직접 설치했다면 젠킨스 설정파일로 가서 바꿔주면 된다. 하지만 도커로 빌드한 경우에는 어떻게 하면 기본포트르르 변경할지 이렇다할 방법은 찾지 못했다.
다만 톰캣 서버에 스프링이 연결되던 젠킨스가 연결되던 톰캣 컨테이너는 하나의 톰캣 컨테이너니까 두 호스트로부터 연결되어도 괜찮지않나 생각한다.
그래서 호스트 포트만 8083으로 바꾸어 실행시켰다.
뒤의 50000 포트는 슬레이브 포트라 하여 앞 포트 충돌문제가 발생하면 저 포트로 연결된다고 한다.
홈에 jenkins 기본 경로를 만들자
mkdir jenkins_home추가로 권한도 부여한다. 컨테이너 내부에서 sudo 를 사용할 수 없기 때문이다.
sudo chown -R 1000:1000 $PWD/jenkins_home/
sudo chmod +x /var/run/docker.sock
jenkins/jenkins 이미지 실행
docker run --name jenkins -d --restart always -p 8083:8080 -p 50000:50000 -e TZ=Asia/Seoul -v $PWD/jenkins_home:/var/jenkins_home -v /var/run/docker.sock:/var/run/docker.sock -v /usr/bin/docker:/usr/bin/docker jenkins/jenkins-
jenkins/jenkins 라는 이미지를 jenkins라는 이름의 컨테이너로 실행
-
호스트 포트는 8083, 컨테이너 포트는 8080
-
--restart always: 컨테이너가 종료되면 재시작
-
-d 옵션을 통해 백그라운드로 실행
-
-e 옵션을 통해 jenkins 내의 timezone 을 설정하였다.
-
-v 옵션을 통해 $PWD/jenkins_home 디렉토리와 container volume의 /var/jenkins_home 디렉토리를 매핑하였다. -v 옵션을 사용하지 않으면 내부에서 사용한 정보가 유지되지 않으므로 필수로 설정해야한다.
workspace 는 따라서 /ubuntu/home/jenkins_home 이 되었다.
-
Jenkins image 를 가져와서 컨테이너를 실행한다.
-
Jenkins 에서 도커 이미지를 빌드하기 위해 호스트와 컨테이너의 볼륨을 묶어주었다.
-
그리고 도커 또한 컨테이너 안에서 실행하려면 권한이 필요하므로 chmod를 사용해서 접근할수 있게 만들었다.
This will store the jenkins data in /your/home on the host. Ensure that /your/home is accessible by the jenkins user in container (jenkins user - uid 1000) or use -u some_other_user parameter with docker run.
공홈과 다음 블로그를 참고:
https://hub.docker.com/_/jenkins?tab=description
https://sinawi.tistory.com/370
cf.
Docker Engine은 Host OS의 /var/run/docker.sock 아래에 마운트 된 Unix 소켓을 사용한다.
docker.sock은 도커 컨테이너 내부에서 데몬과 상호 작용을 할 수 있게 해주는 Unix 소켓이다.
방화벽 설정(안먹힘)
sudo ufw enable
sudo ufw allow 22 (소름....)
sudo ufw allow 80
sudo ufw allow 8083
sudo ufw allow 50000
sudo ufw reload
sudo ufw status
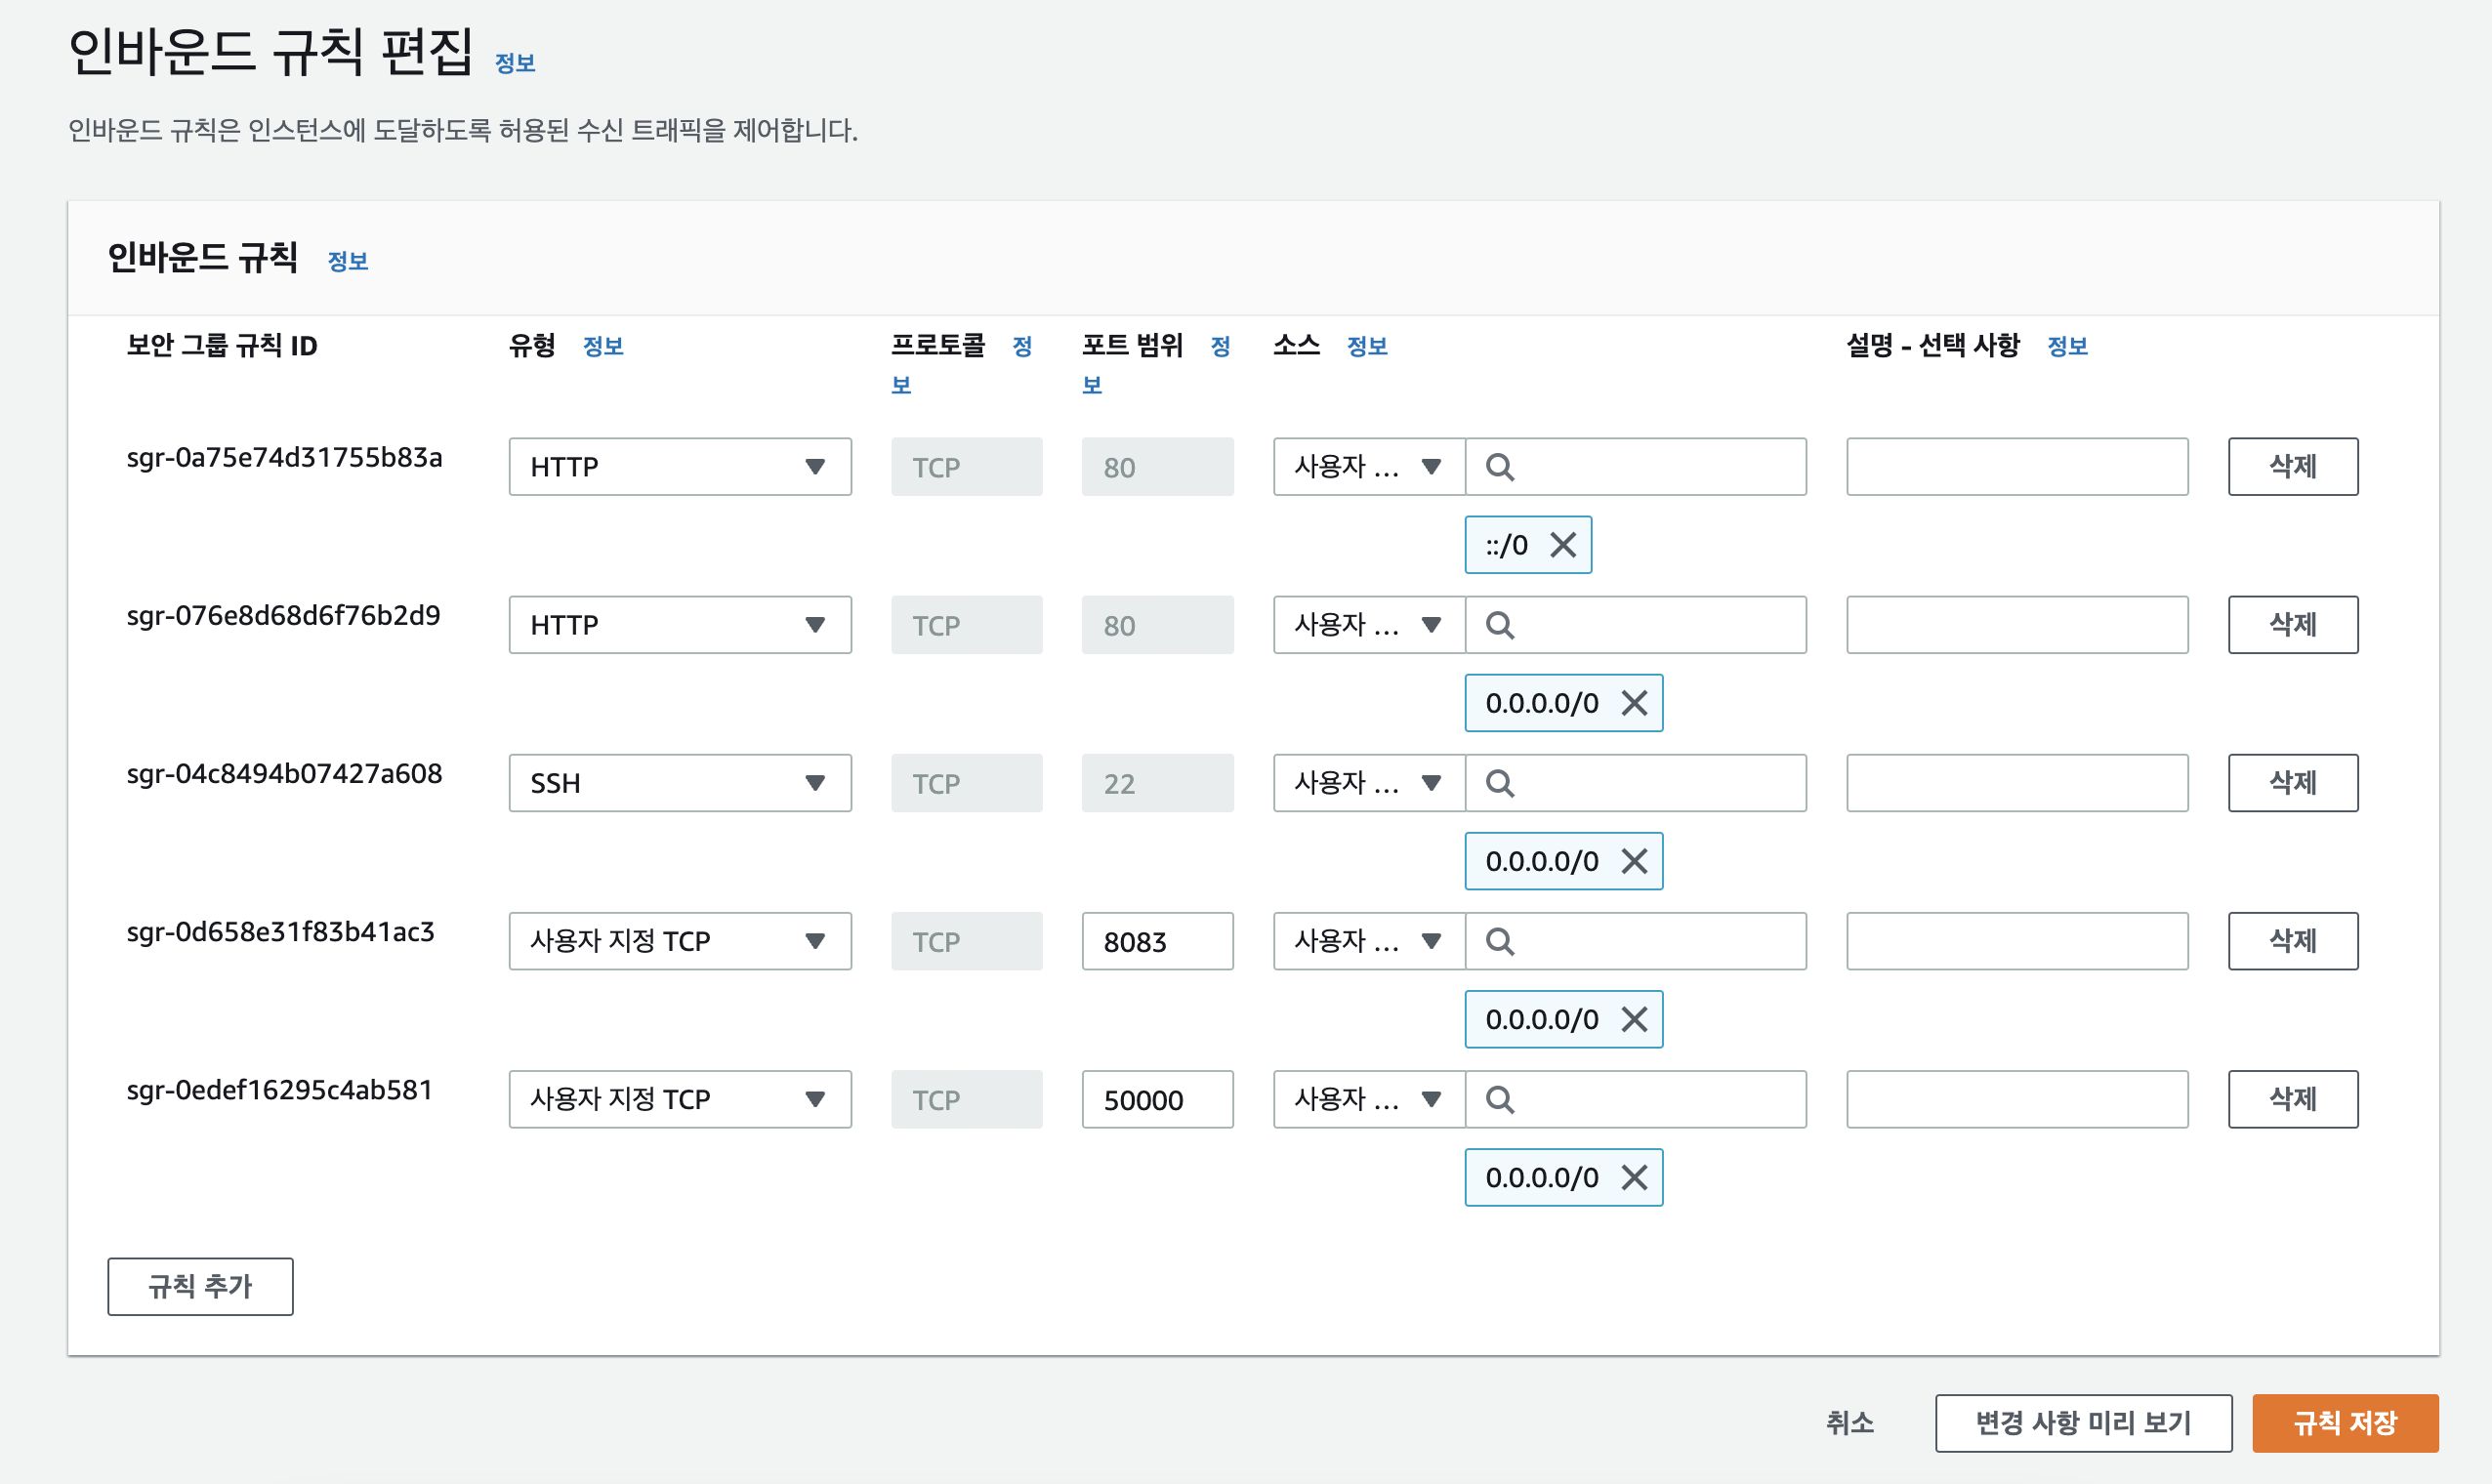
직접 EC2 들어가서 인바운드 규칙 추가

jenkins password 경로
/var/jenkins_home/secrets/initialAdminPasswordpublic ip:8083 으로 접속
성공!
