블록
타임리프자체태그
th:block 타임리프의 유일한 자체 태그
개발자가 원하는 속성을 지정할 수 있는 단순한 속성 컨테이너로 속성을 실행한 다음 블록을 사라지게 만들지만 속성은 그대로 남아있다.
예를들어, 사용자 이름과 나이를 같은 열에 두고 요약을 다른 열에 두고 싶을 때 사용할 수 있습니다.

<!DOCTYPE html>
<html xmlns:th="http://www.thymeleaf.org">
<head>
...
</head>
<body>
<table border="1">
	<th:block th:each="user : ${users}">
		<tr>
			<td th:text="|사용자 이름 : ${user.username}|"></td>
			<td th:text="|요약 : ${user.username} / ${user.age}|"></td>
		</tr>
		<tr>
			<td th:text="|사용자 나이 : ${user.age}|"></td>
		</tr>
	</th:block>
</table>
</body>
</html>th:block이 없었다면 사용자 나이를 출력하는 th:text에서는 ${user.age}를 사용하지 못했을 것이다.
📚자바스크립트 인라인
자바스크립트 인라인
사용법 : th:inline="javascript" 명시적으로 활성화해야 한다.
타임리프에서 자바스크립트를 편리하게 사용할 수 있도록 도와주는 기능
<!DOCTYPE html>
<html xmlns:th="http://www.thymeleaf.org">
<head>
<meta charset="UTF-8">
<title>Title</title>
</head>
<body>
<!-- 자바스크립트 인라인 사용 전 -->
<script>
	var username = [[${user.username}]];
	var age = [[${user.age}]];
//자바스크립트 내추럴 템플릿
	var username2 = /*[[${user.username}]]*/ "test username";
//객체
	var user = [[${user}]];
	</script>
<!-- 자바스크립트 인라인 사용 후 -->
<script th:inline="javascript">
	var username = [[${user.username}]];
	var age = [[${user.age}]];
//자바스크립트 내추럴 템플릿
	var username2 = /*[[${user.username}]]*/ "test username";
//객체
	var user = [[${user}]];
</script>
</body>
</html>th:inline="javascript"를 사용하면 타임리프의 문법을 그대로 사용할 수 있다.
데이터를 넣어줄 때 타입을 추론해서 넣어주고 주석도 사용가능하다.
객체는 알아서 JSON으로 변환을 한다. 자바스크립트 인라인을 사용하기 전의 객체는 그냥 toString()으로 처리한다.
자바스크립트 인라인 each
타임리프 th:each를 <script>안에서 사용할 수 있게 해주는 문법
[# th:each="user, stat : ${users}]: 반복문 시작[/]: 반복문 종료(명시적으로 작성해줘야 Thymeleaf 표현식을 올바르게 처리할 수 있다)
<script th:inline="javascript">
	[# th:each="user, stat : ${users}"]
	var user[[${stat.count}]] = [[${user}]];
	[/]
</script>
템플릿 레이아웃
Template Layout
Header, Footer등 공통 영역이 많은 페이지의 경우 기본적인 틀을 짜고 다른 페이지에서 가져와서 사용할 수 있게 합니다.
템플릿 조각
템플릿을 아주 작은 단위로 정의하고 다른 페이지에서 템플릿 조각을 불러와서 사용할 수 있다.
th:fragment="이름"
templates/template/fragment/footer.html
<!doctype html>
<html xmlns:th="http://www.thymeleaf.org">
<head>
...
</head>
<body>
<footer th:fragment="copy">
	여기는 푸터 입니다.
</footer>
...
</body>
</html>
fragment를 정의한 footer를 만들었으니 다른 페이지에서 fragment를 가져와서 사용해보자.
templates/template/fragment/fragmentMain.html
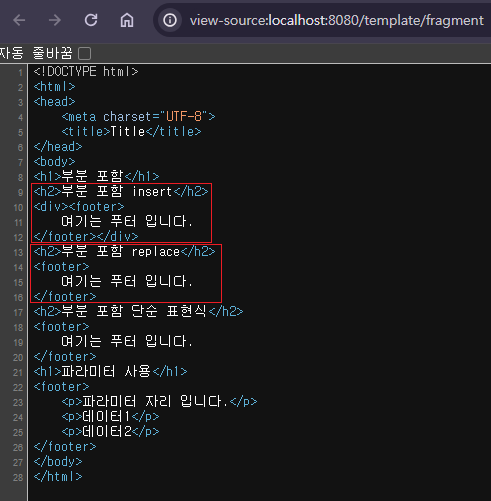
<!DOCTYPE html>
<html xmlns:th="http://www.thymeleaf.org">
<head>
<meta charset="UTF-8">
<title>Title</title>
</head>
<body>
<h1>부분 포함</h1>
<h2>부분 포함 insert</h2>
<div th:insert="~{template/fragment/footer :: copy}"></div>
<h2>부분 포함 replace</h2>
<div th:replace="~{template/fragment/footer :: copy}"></div>
<h2>부분 포함 단순 표현식</h2>
<div th:replace="template/fragment/footer :: copy"></div>
<h1>파라미터 사용</h1>
<div th:replace="~{template/fragment/footer :: copyParam ('데이터1', '데이터2')}"></div>
</body>
</html>th:insert: 태그를 대체하지 않고 th:insert 속성이 있는 태그 안으로 들어온다.th:replace: 태그를 대체한다.
th:insert를 한 부분은 div가 그대로 살아있고 footer가 들어왔습니다.
th:replace를 한 부분은 footer가 div를 대체하였습니다.
th:replace = "~{template/fragment/footer :: copy}" 를 단순하게 template/fragment/footer :: copy 표현할 수도 있다.
templates/template/fragment/footer.html
footer에서 파라미터를 받아서 처리할 수도 있다.
<!doctype html>
<html xmlns:th="http://www.thymeleaf.org">
<head>
...
</head>
<body>
...
<footer th:fragment="copyParam (param1, param2)">
	<p>파라미터 자리 입니다.</p>
	<p th:text="${param1}"></p>
	<p th:text="${param2}"></p>
</footer>
</body>
</html>
templates/template/fragment/fragmentMain.html
th:replace="~{template/fragment/footer :: copyParam('데이터1', '데이터2')}
<!DOCTYPE html>
<html xmlns:th="http://www.thymeleaf.org">
<head>
...
</head>
<body>
...
<h1>파라미터 사용</h1>
<div th:replace="~{template/fragment/footer :: copyParam ('데이터1', '데이터2')}"></div>
</body>
</html>
템플릿 레이아웃 2
아주작은 단위보다 좀 더 확장된 범위를 템플릿 조각으로 만들어서 사용할 수 있습니다.
<head>같은 조금 더 큰 범위의 태그도 템플릿 조각으로 만들 수 있다.
base.html의 <head>를 layoutMain.html <head>에 사용해 보겠습니다.
위에서 배운 th:fragment를 사용해서 title과 links를 받습니다.
base.html의 <head th:fragment="common_header(title, links)"> 을 추가해서 받아줍니다.
templates/template/layout/base.html
<html xmlns:th="http://www.thymeleaf.org">
<head th:fragment="common_header(title,links)">
<title th:replace="${title}">레이아웃 타이틀</title>
<!-- 공통 -->
<link rel="stylesheet" type="text/css" media="all" th:href="@{/css/awesomeapp.css}">
<link rel="shortcut icon" th:href="@{/images/favicon.ico}">
<script type="text/javascript" th:src="@{/sh/scripts/codebase.js}"></script>

<!-- 추가 -->
<th:block th:replace="${links}" />
</head>
받아온 title, links를 th:replace와 th:block을 사용해서 추가, 대체합니다.
th:block th:replace="${links}": layoutMain.html에서 넘어온 links를 한 개씩 추가합니다.
templates/template/layout/layoutMain.html
<!DOCTYPE html>
<html xmlns:th="http://www.thymeleaf.org">
<head th:replace="template/layout/base :: common_header(~{::title},~{::links})">
<title>메인 타이틀</title>
<link rel="stylesheet" th:href="@{/css/bootstrap.min.css}">
<link rel="stylesheet" th:href="@{/themes/smoothness/jquery-ui.css}">
</head>
<body>
메인 컨텐츠
</body>
</html>
th:replace 를 통해서 base에 title, links를 넘겨줍니다. 태그를 넘길때 ~{::}문법을 사용합니다.

base.html에 파라미터로 전달한 title, links를 포함하여 base.html의 <head>가 layoutMain.html의 <head>로 교체가 되었습니다.
base.html에 공통으로 사용할 <head>를 만들고 layoutMain.html에서 필요한 부분만 파라미터로 보내서 맞춤 페이지를 만들 수 있었다.
템플릿 레이아웃 3
이번에는 더 확장된 개념으로 공통으로 사용할 html을 만들고 공유해보겠습니다.
먼저 공통으로 사용할 layoutFile.html을 생성합니다.
templates/template/layoutExtend/layoutFile.html
<!DOCTYPE html>
<html th:fragment="layout (title, content)" xmlns:th="http://www.thymeleaf.org">
<head>
<title th:replace="${title}">레이아웃 타이틀</title>
</head>
<body>
<h1>레이아웃 H1</h1>
<div th:replace="${content}">
	<p>레이아웃 컨텐츠</p>
</div>
<footer>
	레이아웃 푸터
</footer>
</body>
</html>
layoutFile.html을 가져와서 사용할 layoutExtendMain.html을 생성합니다.
templates/template/layoutExtend/layoutExtendMain.html
<!DOCTYPE html>
<html th:replace="template/layoutExtend/layoutFile :: layout(~{::title}, ~{::section})" xmlns:th="http://www.thymeleaf.org">
<head>
	<title>레이아웃 3 타이틀</title>
</head>
<body>
<section >
	<p>메인 페이지 컨턴츠</p>
	<div>메인 페이지 포함 내용</div>
</section>
</body>
</html>