
1. build.gradle 추가
레이아웃을 사용하기 위해서는 다음 그래들을 추가해주어야 한다.
implementation 'org.springframework.boot:spring-boot-starter-thymeleaf'
implementation group: 'nz.net.ultraq.thymeleaf', name: 'thymeleaf-layout-dialect'
2. 조각만들기
레이아웃을 시작하기 전에 레이아웃에 사용할 조각(fragment)먼저 만든다.
- head.html
변화가 없는 것은 그냥 두고 변화가 있는 것을 th:block으로 만들어 준다. th:block을 사용하면 다른 페이지에서 내가 자유롭게 사용할 수 있다.<!DOCTYPE html> <html lang="en"xmlns:th="http://www.thymeleaf.org"> <head th:fragment="headFragment"> <meta charset="UTF-8"> <th:block layout:fragment="title"> <!-- 각 페이지의 title --> </th:block> <th:block layout:fragment="css"> <!-- 각 페이지의 css --> </th:block> <th:block layout:fragment="javascript"> <!-- 각 페이지의 javascript --> </th:block> </head> </html> - header.html
<!DOCTYPE html> <html lang="en" xmlns:th="http://www.thymeleaf.org" xmlns:sec="http://www.thymeleaf.org/extras/spring-security"> <div class="header" th:fragment="headerFragment"> <div class="nav"> <h1 class="logo"> <a th:href="@{/}"><img th:src="@{/images/logo.png}" alt="logo"></a> </h1> <div class="gnb"> <ul> <li><a th:href="@{/}">HOME</a></li> <li><a th:href="@{/}">BEST</a></li> <li><a th:href="@{/}">SEASON</a></li> <li><a th:href="@{/}">MAN</a></li> <li><a th:href="@{/}">WOMAN</a></li> </div> </div> </div> </html> - footer.html
<!DOCTYPE html>
<html lang="en" xmlns:th="http://www.thymeleaf.org">

  <div class="footer" th:fragment="footerFragment">
    <div class="fcon">
      <ul>
        <li>
          <h1 class="title">Address</h1>
          <p>주소</p>
        </li>
        <li>
          <h1 class="title">CopyRight</h1>
          <p>저작권</p>
        </li>
      </ul>
    </div>
  </div>
</html>
3. 레이아웃 시작
1) BaseLayout 만들기
타임리프의 레이아웃을 위해 다음 th:xmlns를 추가한다.
th:xmlns는 타임리프의 th속성을 사용하기 위해 선언된 네임스테이스이다.
th:layout은 타임리프의 layout을 사용하기 위해 선언된 네임스테이스다.
xmlns:th="http://www.thymeleaf.org"
xmlns:layout="http://www.ultraq.net.nz/thymeleaf/layout"
레이아웃에 사용될 조각들은 th:replace로 가져다 쓴다. th:replace는 th:fragment 조각을 해당 .html에 import하는 역할을 한다.
- th:replace 사용방법 👉
<div th:replace="~{layouts/header :: header}"></div>- ~{경로 :: 템플릿조각 이름}와 같이 사용하면 된다.
- 템플리조각 이름은 header.html에 th:fragment=”headerFragment”의 headerFragment를 의미한다.
- 경로 작성에 주의해야되는데, Thymeleaf에 특정한 설정이 없다면 기본 default 최상위 경로는 templates/ 로 시작한다.
<!DOCTYPE html>
<html lang="en" xmlns:th="http://www.thymeleaf.org"
                xmlns:layout="http://www.ultraq.net.nz/thymeleaf/layout">
<head th:replace="~{fragments/common/head :: headFragment}"></head>
<body>
  <div th:replace ="~{fragments/common/header :: headerFragment}" ></div>
  <div th:replace ="~{fragments/common/footer :: footerFragment}" ></div>
</body>
</html>
조각 이외에 추가하고 싶다면 th:block을 이용한다. 다른 html에서도 th:block으로 받아야 한다.
- 📝 th:block 이란?
- <th:block>은 HTML 태그가 아닌 타임리프의 유일한 자체 태그이다.
- 다른 태그를 쓰기 애매할 때 사용한다.
- 타임리프의 특성상 HTML 태그 안에 속성으로 기능을 정의해서 사용한다.
- 만약 태그가 따로 없을 때 블록을 사용한다.
- 렌더링 시 th:block은 제거되고 블록 안에 있는 내용만 남는다.
<!DOCTYPE html>
<html lang="en" xmlns:th="http://www.thymeleaf.org"
                xmlns:layout="http://www.ultraq.net.nz/thymeleaf/layout">
<head th:replace="~{fragments/common/head :: headFragment}"></head>
<body>
  <div th:replace ="~{fragments/common/header :: headerFragment}" ></div>
  <th:block layout:fragment = "containerFragment">
    <!-- 각각의 페이지에서 구현하고자 하는 컨텐츠를 작성 -->
  </th:block>
  <div th:replace ="~{fragments/common/footer :: footerFragment}" ></div>
</body>
</html>
2) 이제 BaseLayout을 사용해보자
BaseLayout을 사용할 index.html을 만들어 보겠다.
타임리프의 레이아웃과 베이스레이아웃을 사용하기 위해 다음을 추가한다.
xmlns:th="http://www.thymeleaf.org"
xmlns:layout="http://www.ultraq.net.nz/thymeleaf/layout"
layout:decorate="~{fragments/layout/baseLayout}"
<!DOCTYPE html>
<html lang="en" xmlns:th="http://www.thymeleaf.org"
                xmlns:layout="http://www.ultraq.net.nz/thymeleaf/layout"
                layout:decorate="~{fragments/layout/baseLayout}">

</html>
역시 추가하고 싶다면 th:block을 사용해서 추가하면 된다.
<!DOCTYPE html>
<html lang="en" xmlns:th="http://www.thymeleaf.org"
                xmlns:layout="http://www.ultraq.net.nz/thymeleaf/layout"
                layout:decorate="~{fragments/layout/baseLayout}">

    <th:block layout:fragment="title">
        <title>index page</title>
    </th:block>

    <th:block layout:fragment="css">
        <link rel="stylesheet" href="@{/css/index.css}">
    </th:block>

    <th:block layout:fragment="javascript">
        <script th:src="@{/js/index.js}"></script>
    </th:block>

    <th:block layout:fragment="containerFragment">
        <div class="container">
            <div class="index">
                <div class="index-con">
                    index page
                </div>
            </div>
        </div>
    </th:block>

</html>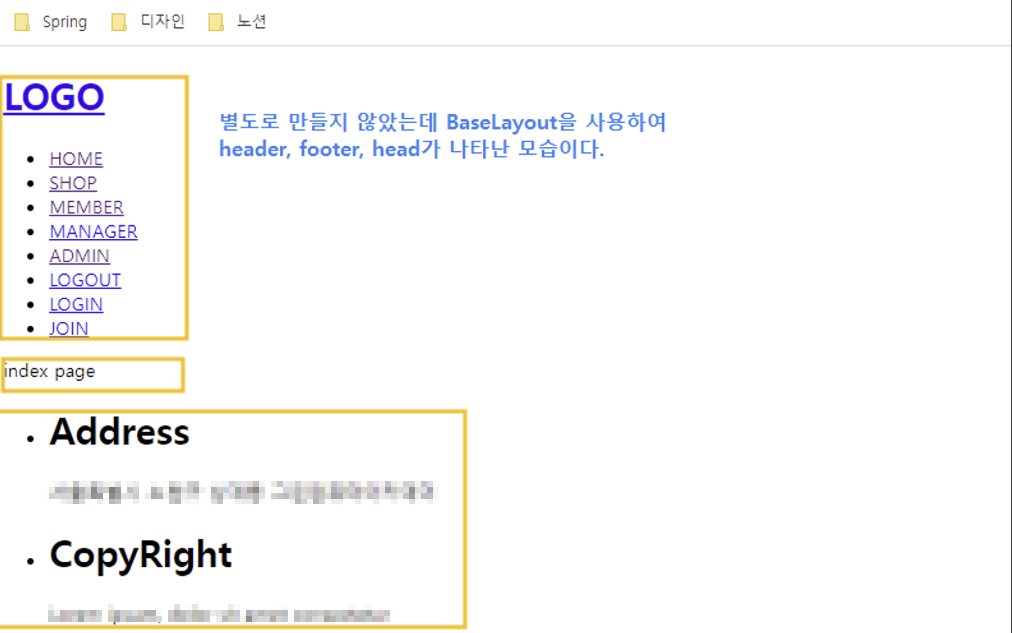
지금까지 레이아웃을 사용하는 방법에 대해서 배웠다. 레이아웃을 사용한다면 불필요한 코드를 줄일 수 있고 유지보수가 편해지니 공통되는 부분이라면 레이아웃을 사용해보자.

개발을 개발괴발하지 않기 위한 노력