CICD 태그에 있는 AWS S3 버킷 생성 방법을 보고 만드신 다음 필요한 코드를 작성해보겠습니다.
https://velog.io/@m_moon_c/AWS-S3-%EB%B2%84%ED%82%B7-%EC%83%9D%EC%84%B1-%EB%B0%8F-%EA%B6%8C%ED%95%9C-%EC%84%A4%EC%A0%95
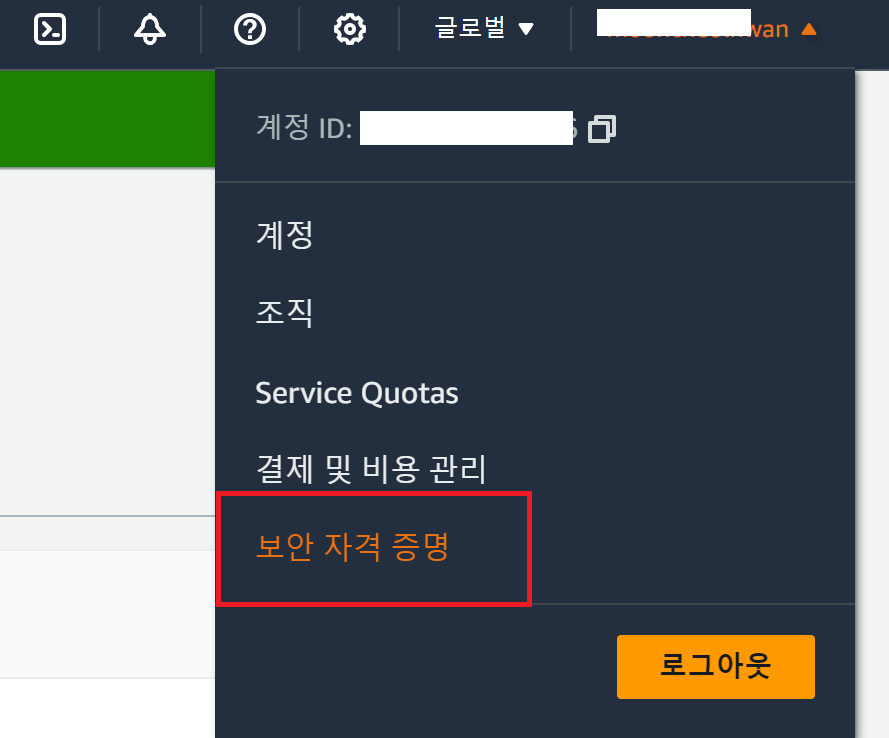
IAM 사용자 생성
- 액세스 관리 -> 사용자 -> 사용자 생성

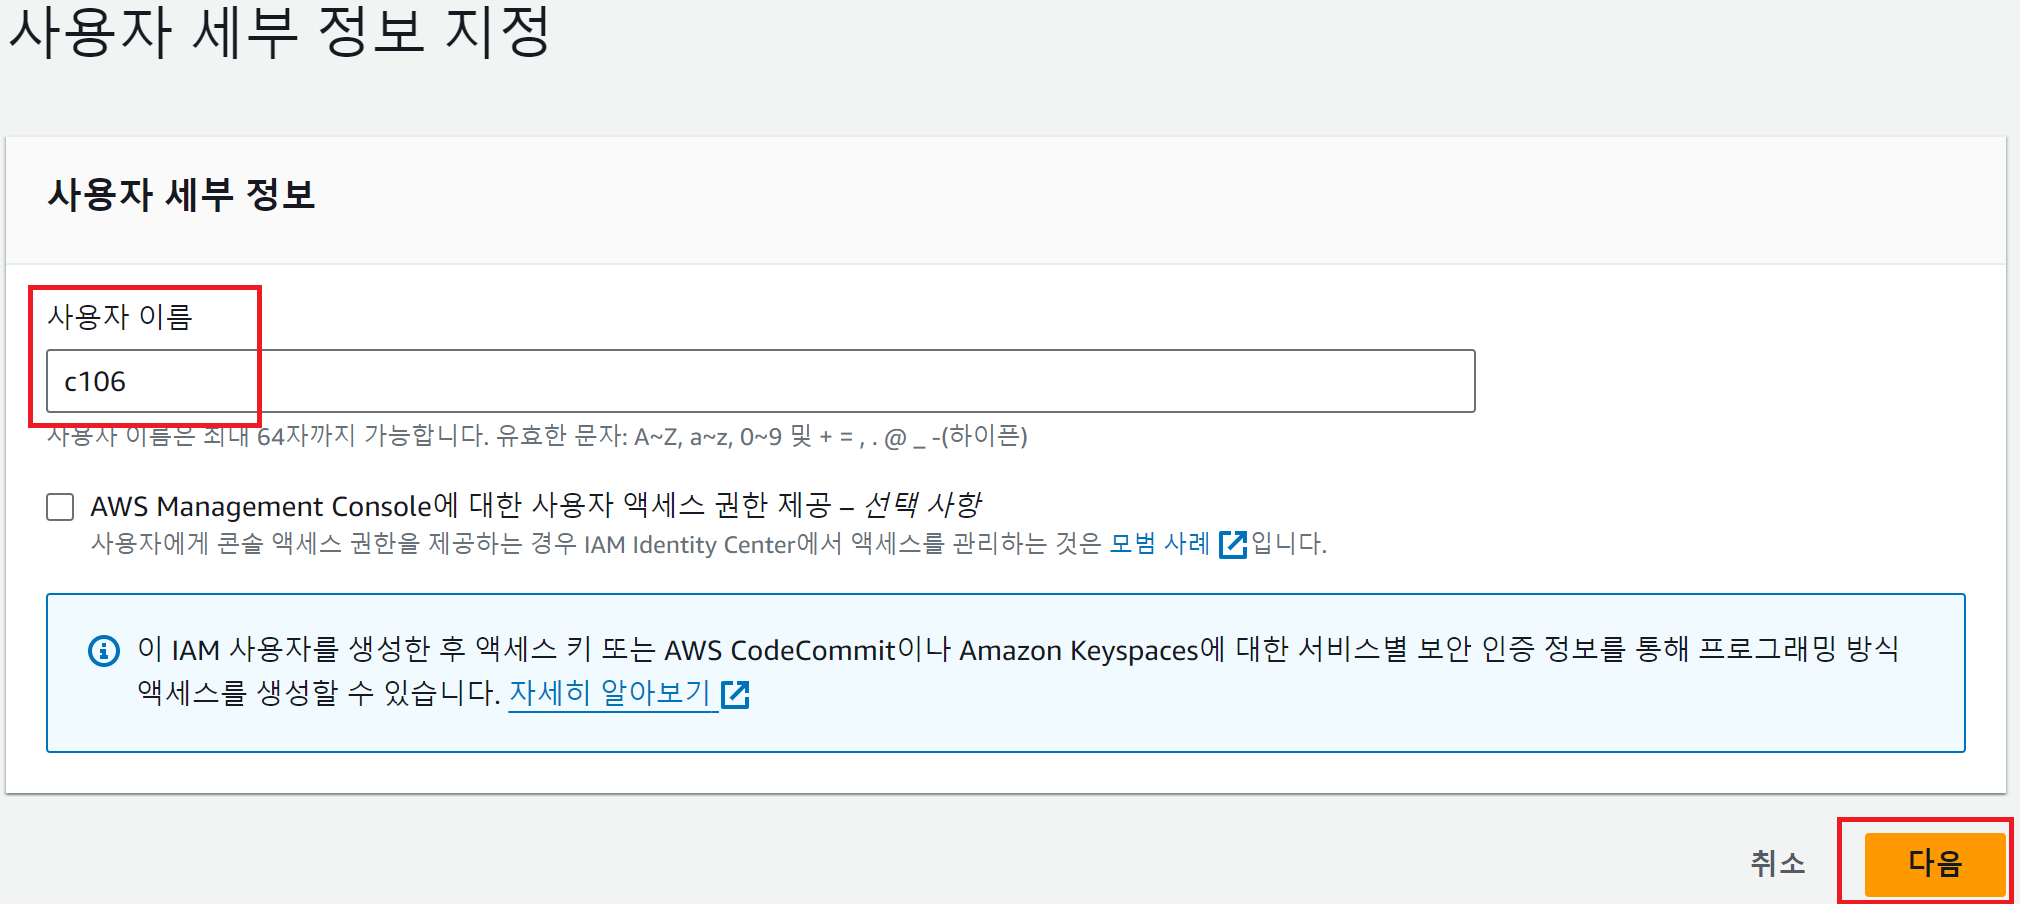
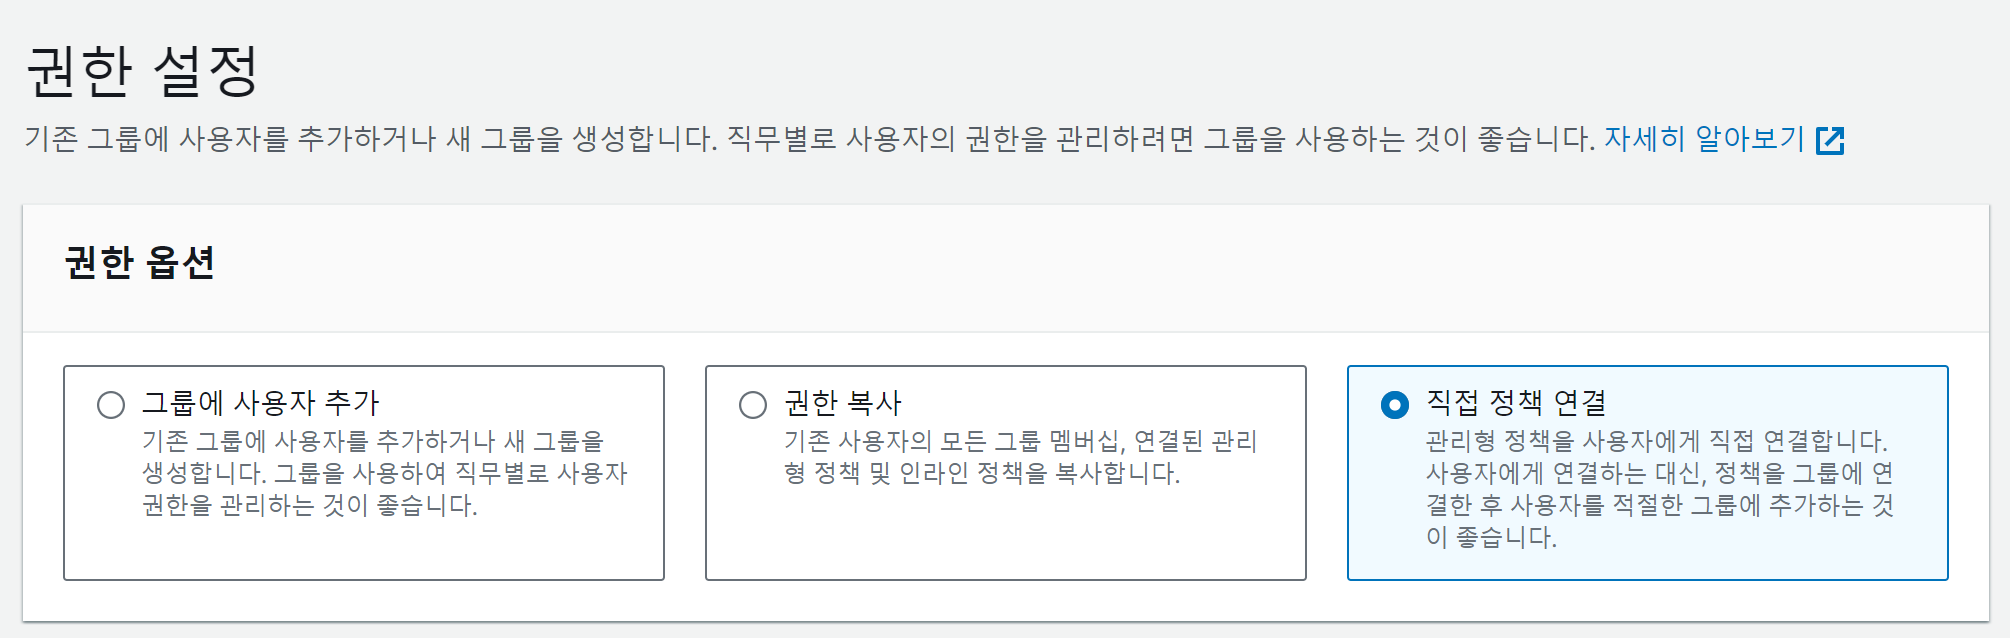
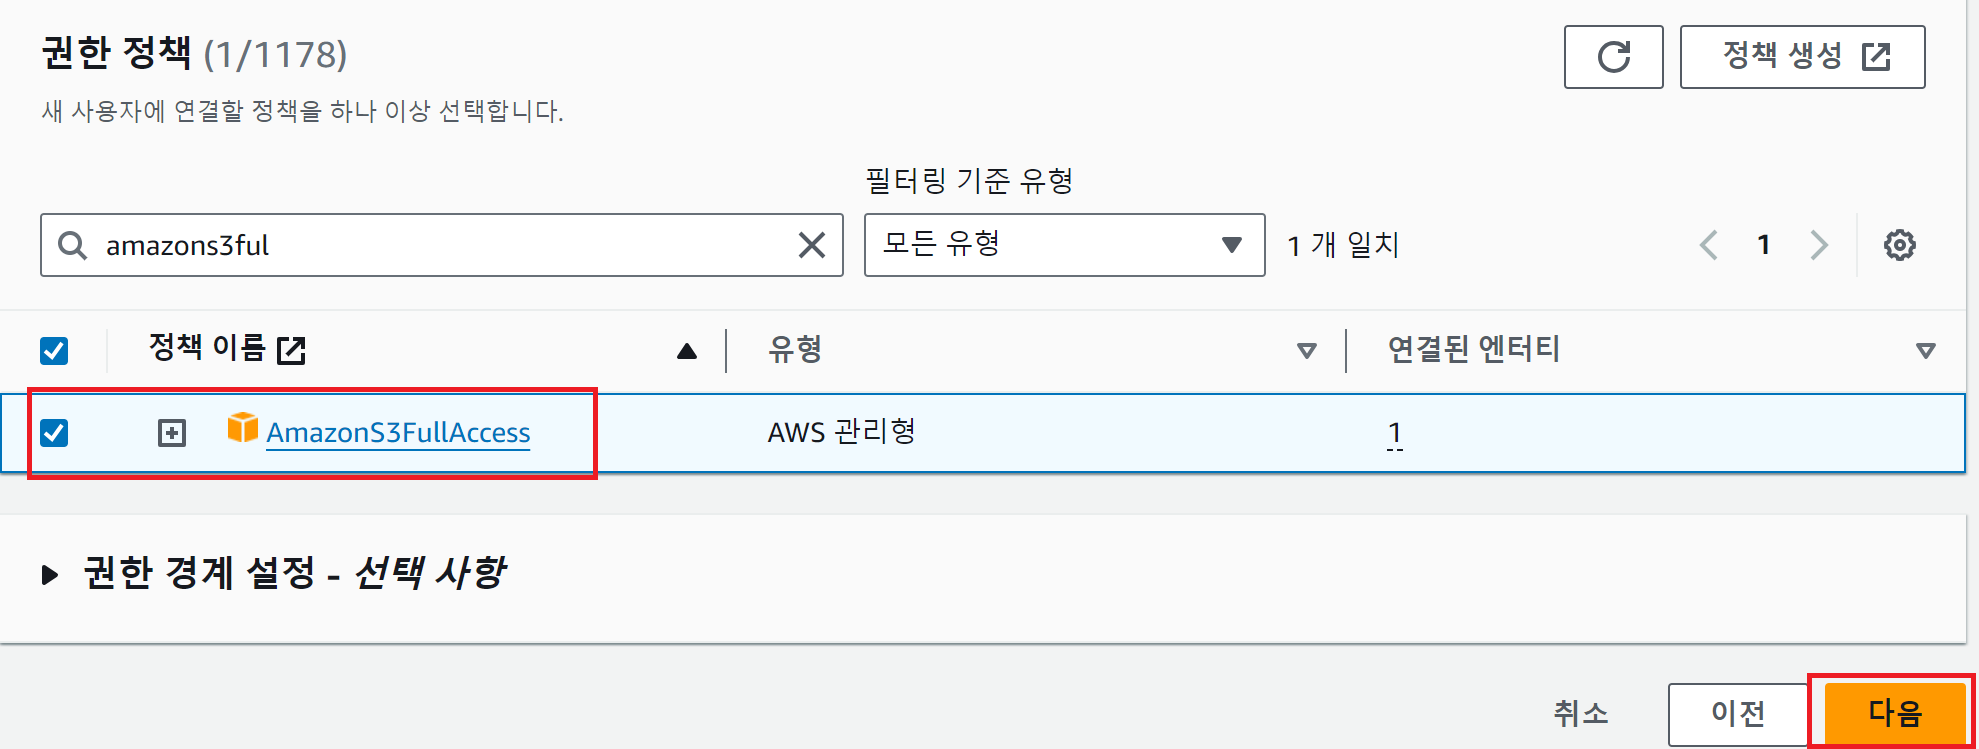
- 위 사진 다음을 누른 뒤, 사용자 생성을 누르면 사용자가 생깁니다.
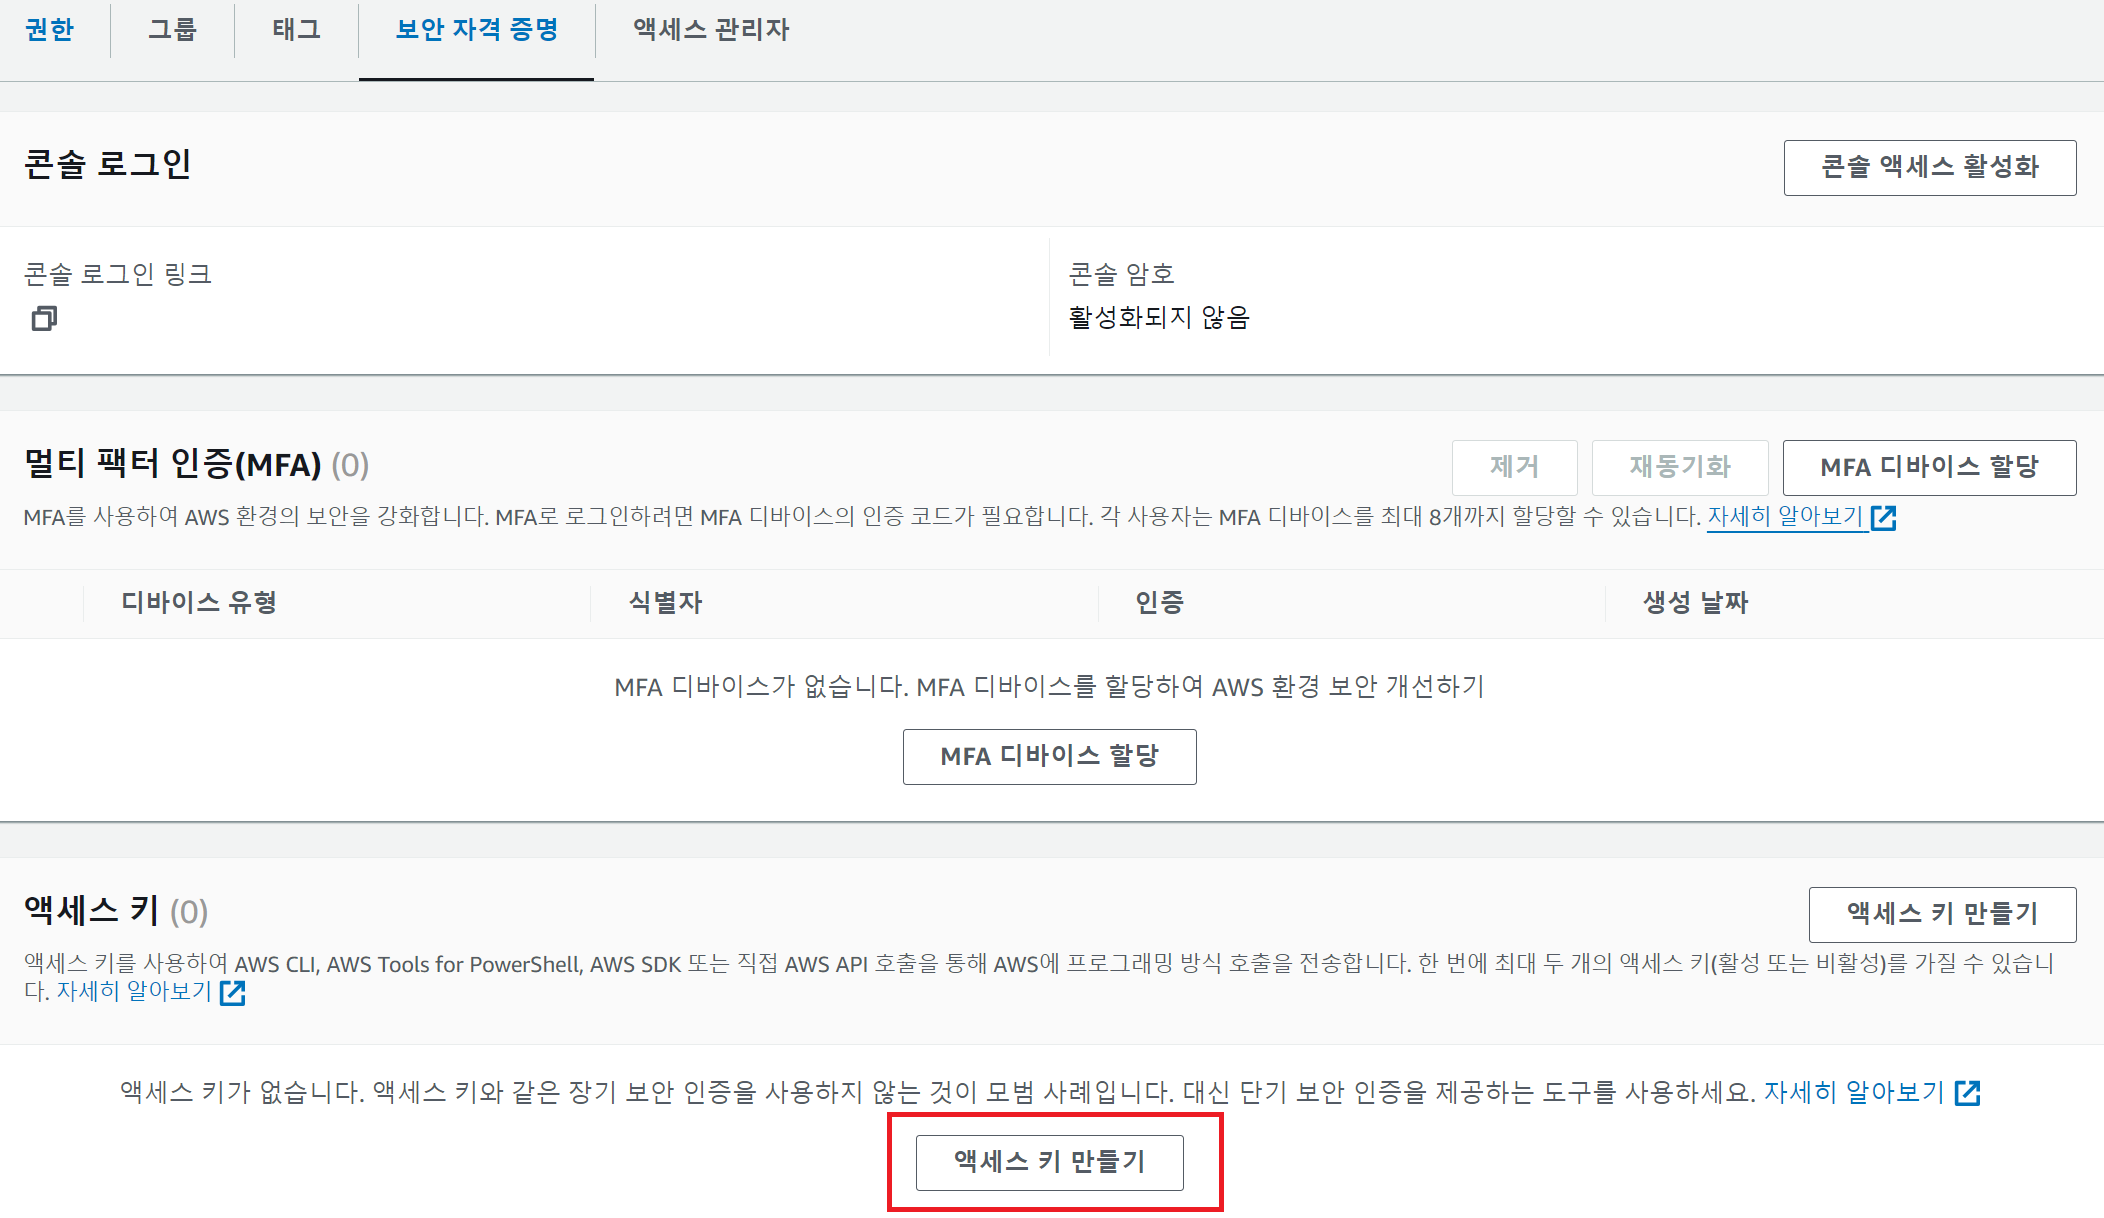
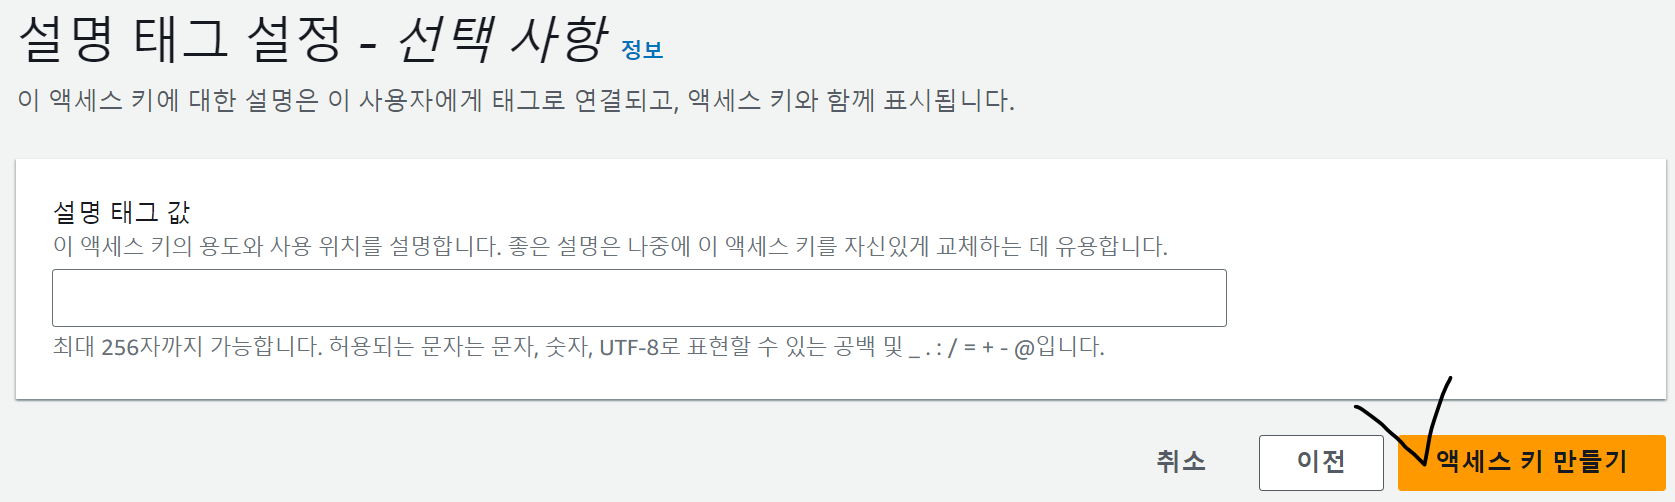
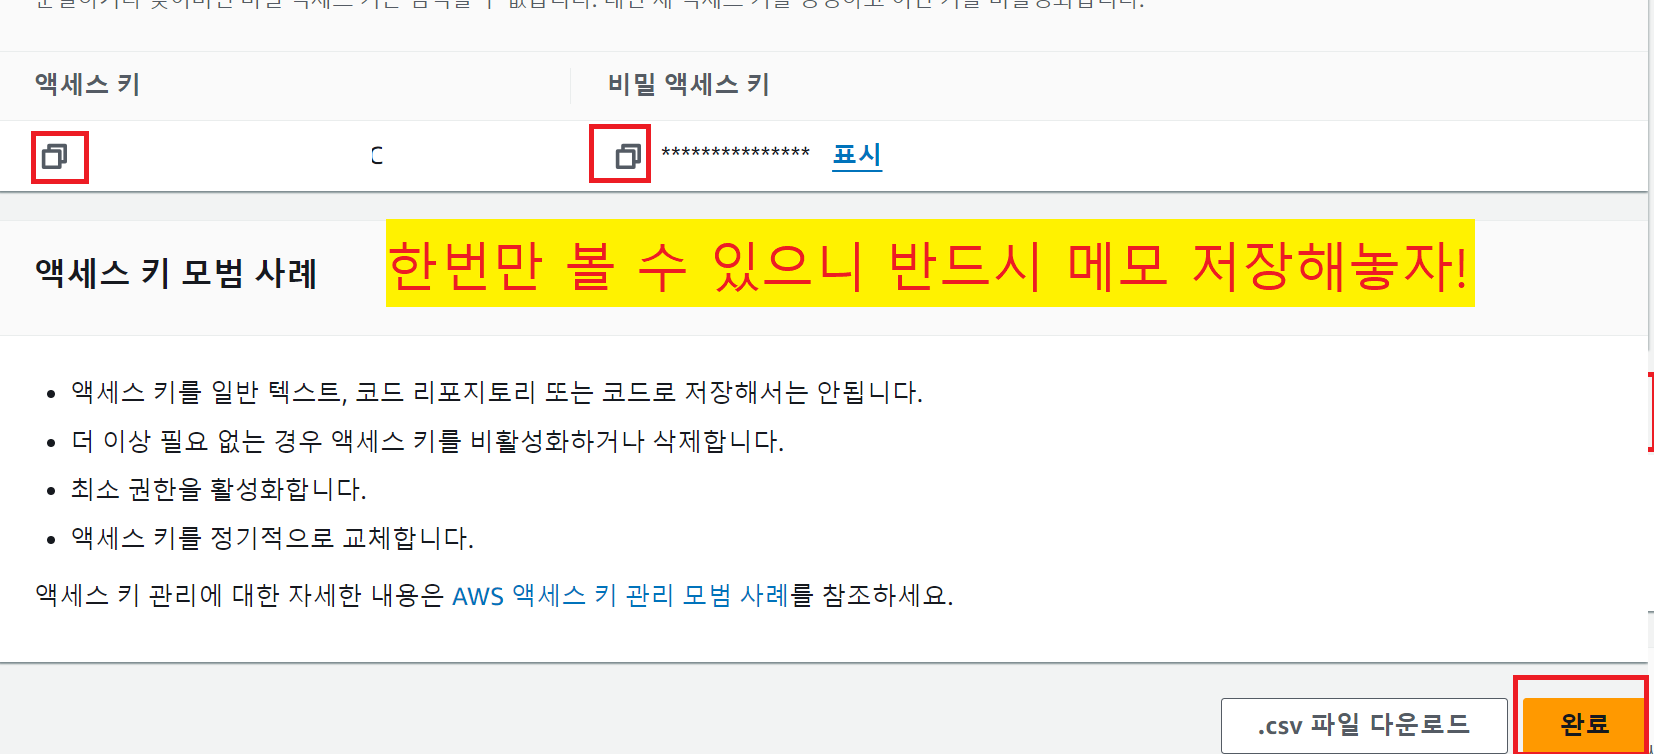
IAM 사용자에 대한 Access Key 생성
- IAM 콘솔 -> 액세스 관리 -> 사용자 -> 생성한 사용자 이름 클릭

Spring Boot 연동
- build.gradle에 implement 추가
implementation 'org.springframework.cloud:spring-cloud-starter-aws:2.2.6.RELEASE'- application.yml에 내용 추가
cloud:
  aws:
    s3:
      bucket: c106
      base-url: https://c106.s3.ap-northeast-2.amazonaws.com/
    credentials:
      access-key: // 발급받은 키 입력
      secret-key: // 발급받은 키 입력
    region:
      static: ap-northeast-2 // 한국리전사용
      auto: false
    stack:
auto: false //오류 발생을 막기위해,- 위에서 stack.auto를 false로 하는 이유
- EC2에서 스프링 클라우드 프로젝트를 실행시키면 CloudFormation 구성을 시작하기 때문에, 설정한 클라우드포매팅이 없으면 프로젝트가 실행 되지 않습니다. 해당 기능을 false해주어 오류를 해결합니다.
- AWSS3Config.java 추가
package com.ssafy.coach.gi.awss3.config;

import com.amazonaws.auth.AWSStaticCredentialsProvider;
import com.amazonaws.auth.BasicAWSCredentials;
import com.amazonaws.services.s3.AmazonS3Client;
import com.amazonaws.services.s3.AmazonS3ClientBuilder;
import org.springframework.beans.factory.annotation.Value;
import org.springframework.context.annotation.Bean;
import org.springframework.context.annotation.Configuration;

@Configuration
public class AWSS3Config {
    @Value("${cloud.aws.credentials.access-key}")
    private String accessKey;
    @Value("${cloud.aws.credentials.secret-key}")
    private String secretKey;
    @Value("${cloud.aws.region.static}")
    private String region;

    @Bean
    public AmazonS3Client amazonS3Client() {
        BasicAWSCredentials awsCredentials = new BasicAWSCredentials(accessKey, secretKey);
        return (AmazonS3Client) AmazonS3ClientBuilder.standard()
                .withRegion(region)
                .withCredentials(new AWSStaticCredentialsProvider(awsCredentials))
                .build();
    }
}- Upload Controller 추가
package com.ssafy.coach.gi.awss3.controller;

import com.amazonaws.services.s3.AmazonS3Client;
import com.amazonaws.services.s3.model.CannedAccessControlList;
import com.amazonaws.services.s3.model.ObjectMetadata;
import com.amazonaws.services.s3.model.PutObjectRequest;
import lombok.RequiredArgsConstructor;
import org.springframework.beans.factory.annotation.Autowired;
import org.springframework.beans.factory.annotation.Value;
import org.springframework.http.HttpStatus;
import org.springframework.http.ResponseEntity;
import org.springframework.web.bind.annotation.PostMapping;
import org.springframework.web.bind.annotation.RequestMapping;
import org.springframework.web.bind.annotation.RequestParam;
import org.springframework.web.bind.annotation.RestController;
import org.springframework.web.multipart.MultipartFile;

import java.io.IOException;

@RestController
@RequestMapping("/upload")
public class FileUploadController {
    @Autowired
    AmazonS3Client amazonS3Client;

    @Value("${cloud.aws.s3.bucket}")
    private String bucket;

    @Value("${cloud.aws.s3.base-url}")
    private String baseUrl;

    @PostMapping
    public ResponseEntity<String> uploadFile(@RequestParam("file") MultipartFile file) {
        try {
            String fileName = file.getOriginalFilename();
            String fileUrl = baseUrl + fileName;
            ObjectMetadata metadata = new ObjectMetadata();
            metadata.setContentType(file.getContentType());
            metadata.setContentLength(file.getSize());

            PutObjectRequest putObjectRequest = new PutObjectRequest(
                    bucket, fileName, file.getInputStream(), metadata
            );
            putObjectRequest.withCannedAcl(CannedAccessControlList.PublicRead);
            amazonS3Client.putObject(putObjectRequest);

            return ResponseEntity.ok(fileUrl);
        } catch (IOException e) {
            e.printStackTrace();
            return ResponseEntity.status(HttpStatus.INTERNAL_SERVER_ERROR).build();
        }
    }
}- Error ) The bucket does not allow ACLs
- 버킷 -> 권한 -> 객체 소유권 -> 편집

- ACL 활성화에 체크
- ACL 복원 된다는 것 확인 체크- 변경 사항 저장

- 버킷 -> 권한 -> 객체 소유권 -> 편집

밝고 빛나게