LCD
LCD(Liquid Crystal Display)는 액정 표시장치라고도 불림.
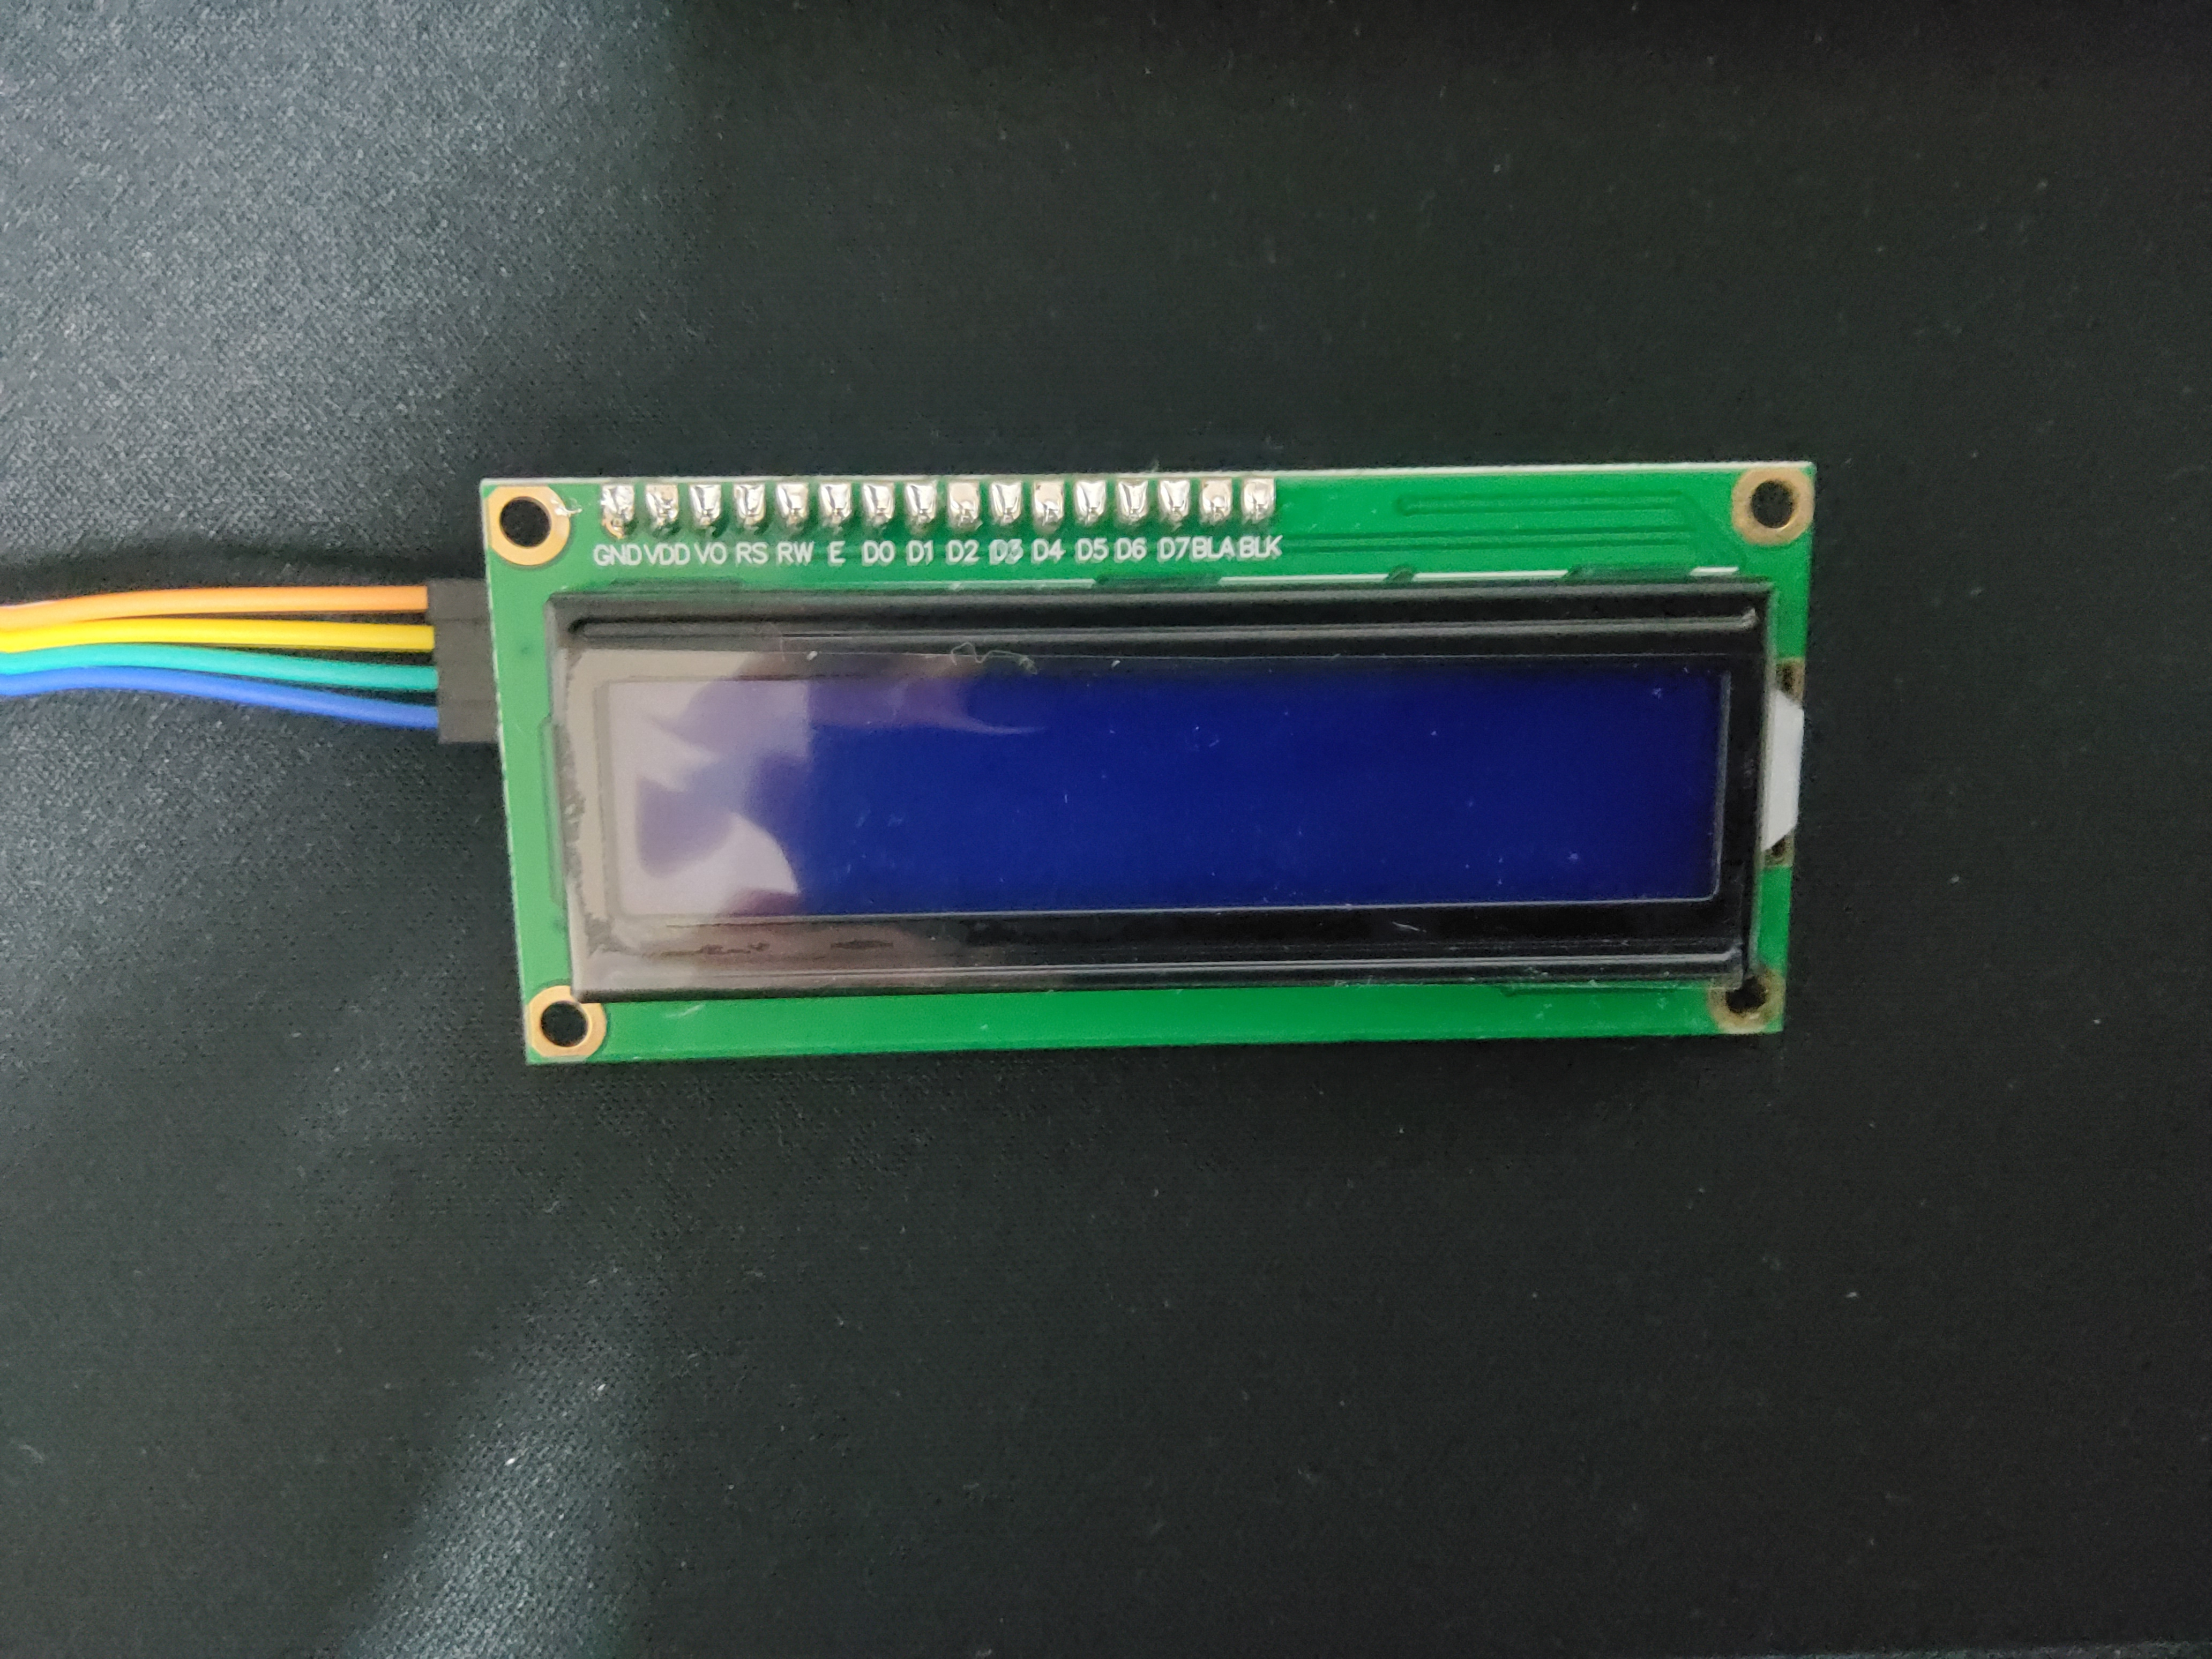
아두이노에서는 주로 16 * 2 character LCD를 사용함.
LCD 모듈에 I2C 모듈이 함께 붙어 입출력 핀을 줄일 수 있게 되어 효율성이 높아짐.
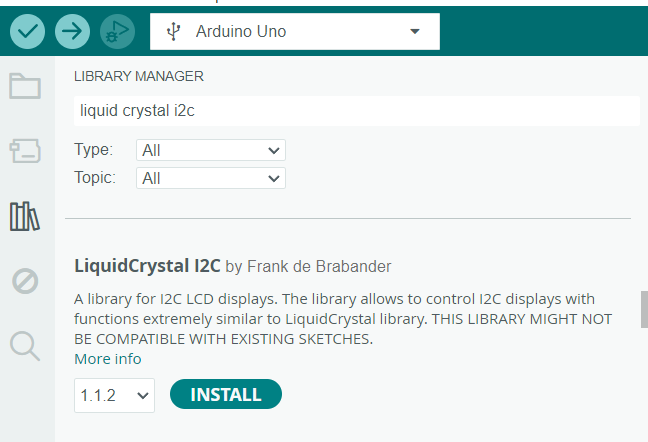
I2C LCD를 아두이노에서 편하게 사용하기 위해 LiquidCrystal_I2C 라이브러리를 설치해야 함.

LCD 함수
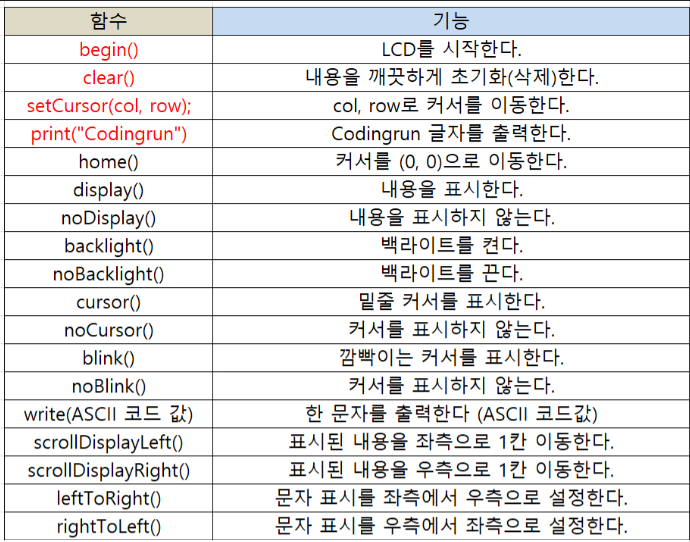
출처 : https://codingrun.com/119#google_vignette
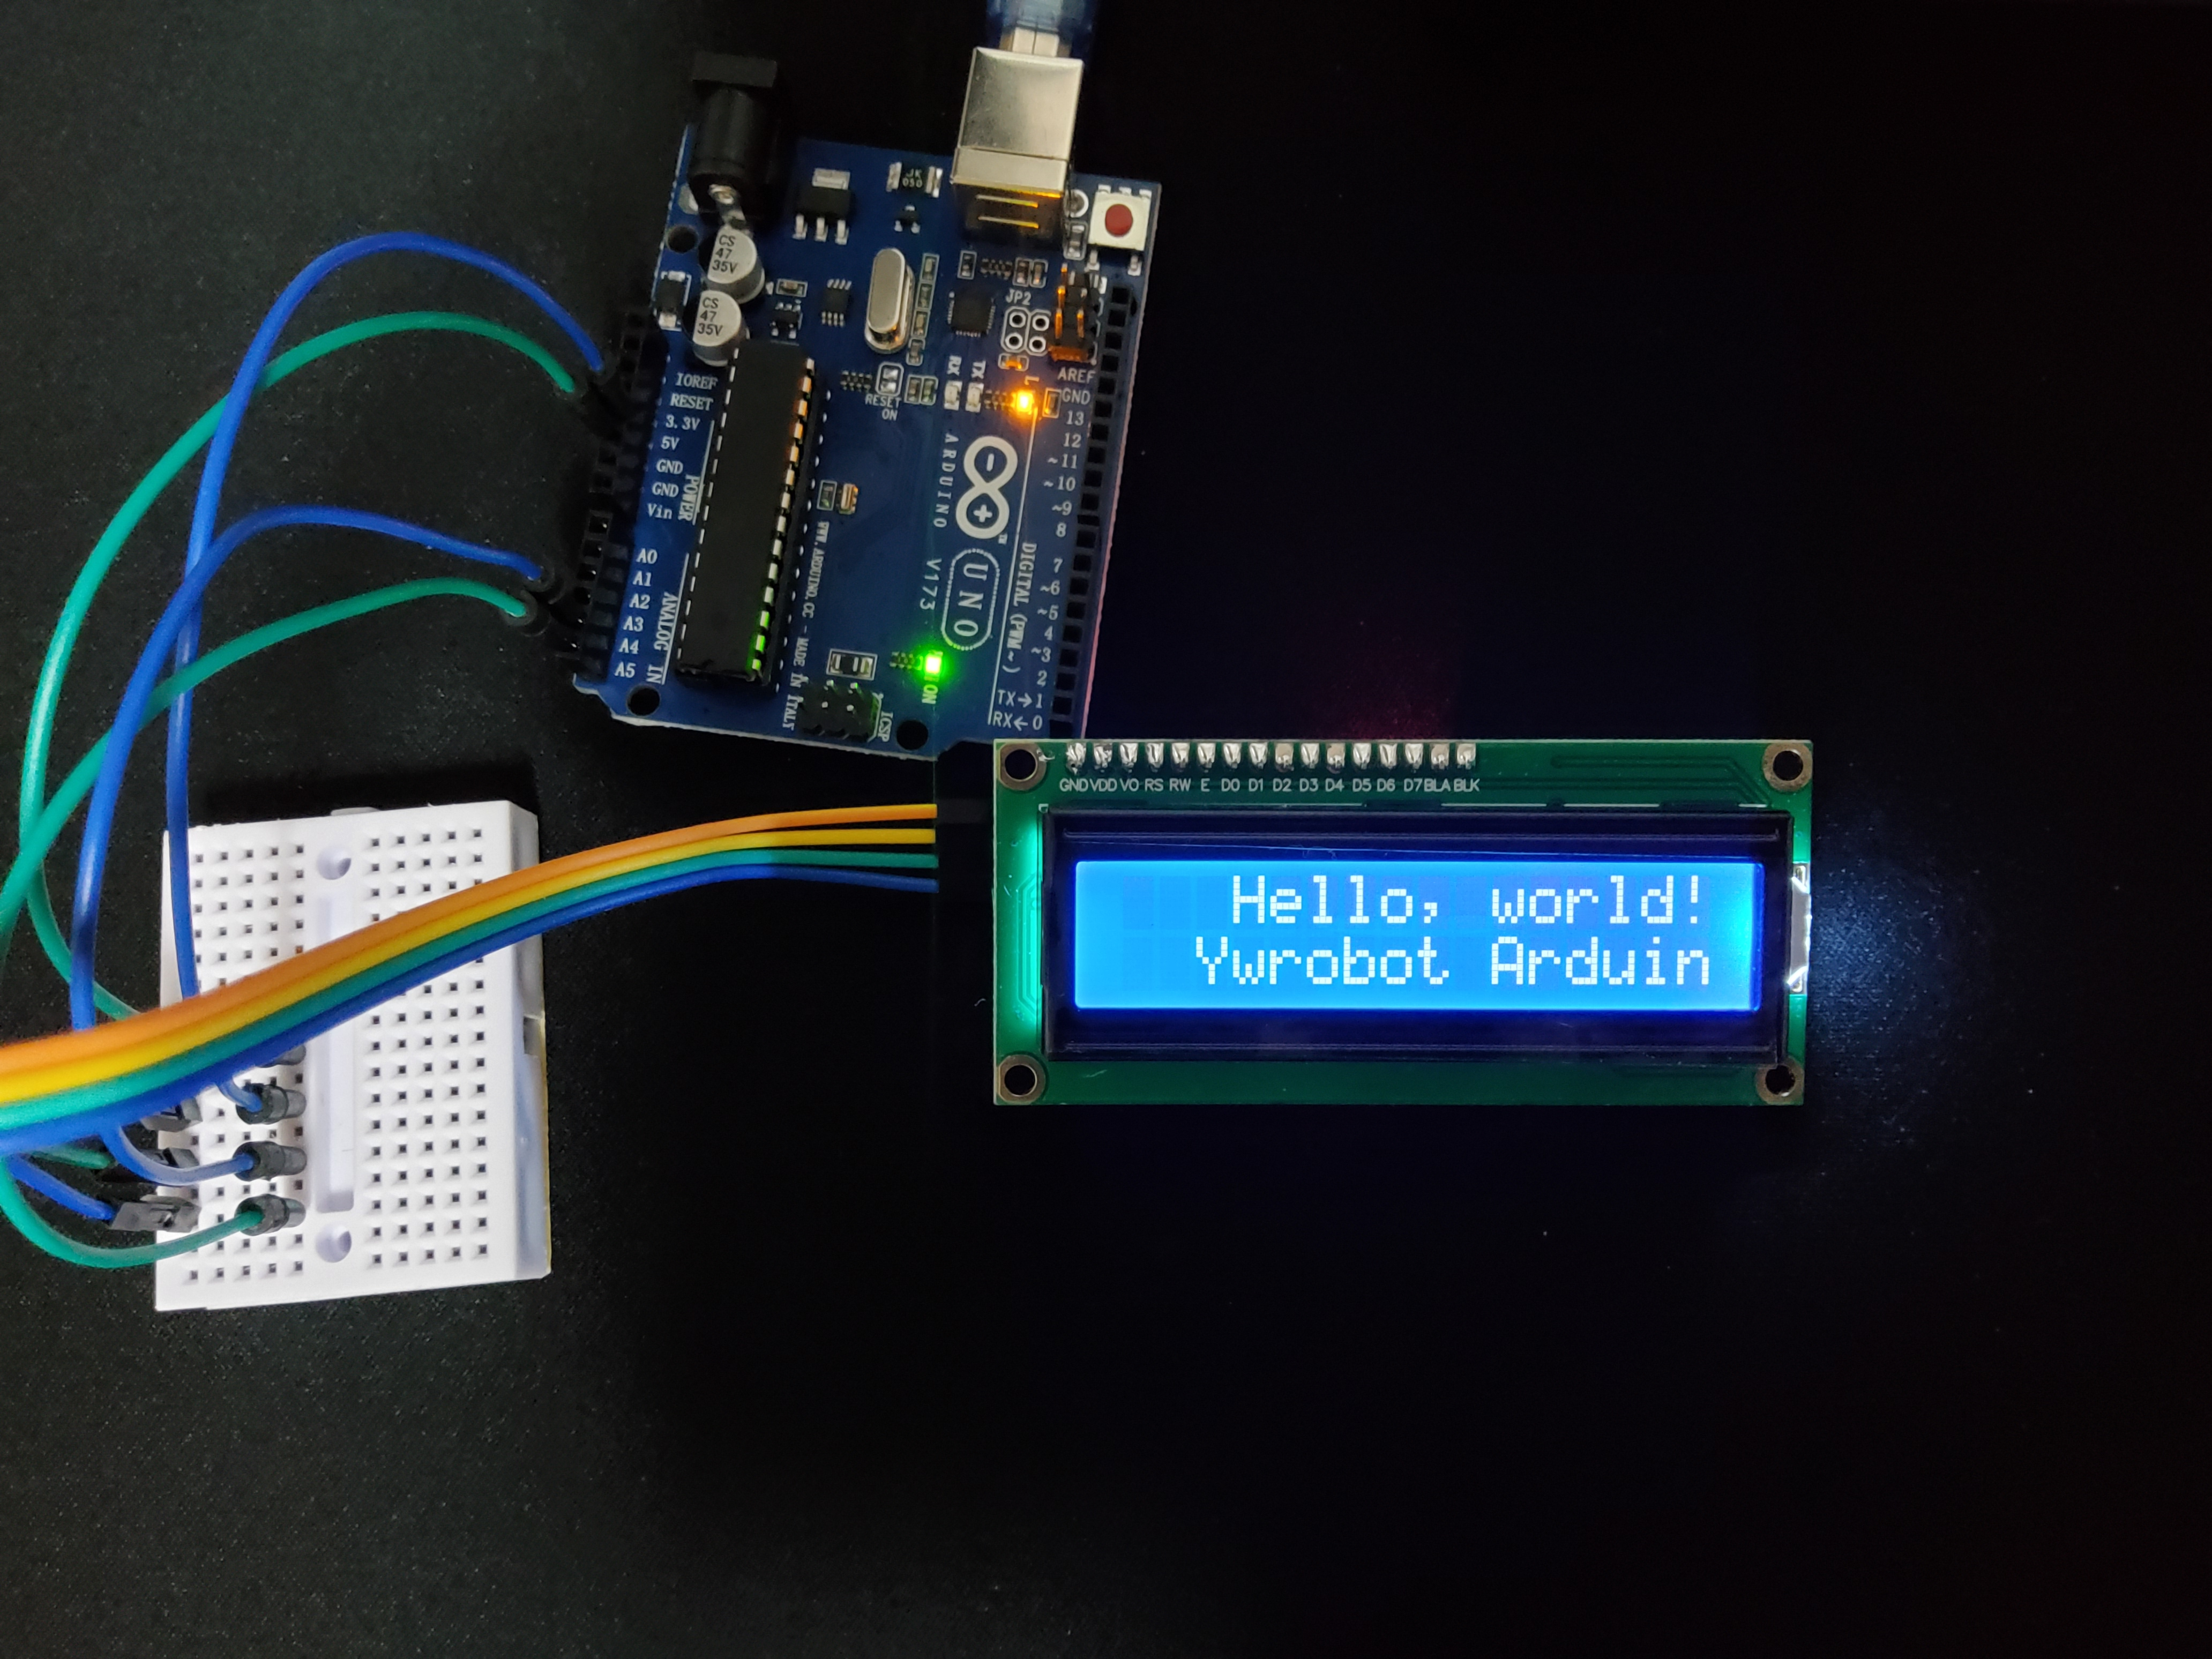
HelloWorld 예제
//YWROBOT
//Compatible with the Arduino IDE 1.0
//Library version:1.1
#include <Wire.h>
#include <LiquidCrystal_I2C.h>

LiquidCrystal_I2C lcd(0x27,20,4);  // set the LCD address to 0x27 for a 16 chars and 2 line display

void setup()
{
  lcd.init();                      // initialize the lcd
  lcd.init();
  // Print a message to the LCD.
  lcd.backlight();
  lcd.setCursor(3,0);
  lcd.print("Hello, world!");
  lcd.setCursor(2,1);
  lcd.print("Ywrobot Arduino!");
   lcd.setCursor(0,2);
  lcd.print("Arduino LCM IIC 2004");
   lcd.setCursor(2,3);
  lcd.print("Power By Ec-yuan!");
}


void loop()
{

}
아두이노 IDE에 있는 예제이다. 16,2 LCD가 아니라 20,4 LCD이기 때문에 글자가 잘린다.
SerialDisplay 예제
/*
 * Displays text sent over the serial port (e.g. from the Serial Monitor) on
 * an attached LCD.
 * YWROBOT
 *Compatible with the Arduino IDE 1.0
 *Library version:1.1
 */
#include <Wire.h>
#include <LiquidCrystal_I2C.h>

LiquidCrystal_I2C lcd(0x27,20,4);  // set the LCD address to 0x27 for a 16 chars and 2 line display

void setup()
{
  lcd.init();                      // initialize the lcd
  lcd.backlight();
  Serial.begin(9600);
}

void loop()
{
  // when characters arrive over the serial port...
  if (Serial.available()) {
    // wait a bit for the entire message to arrive
    delay(100);
    // clear the screen
    lcd.clear();
    // read all the available characters
    while (Serial.available() > 0) {
      // display each character to the LCD
      lcd.write(Serial.read());
    }
  }
}
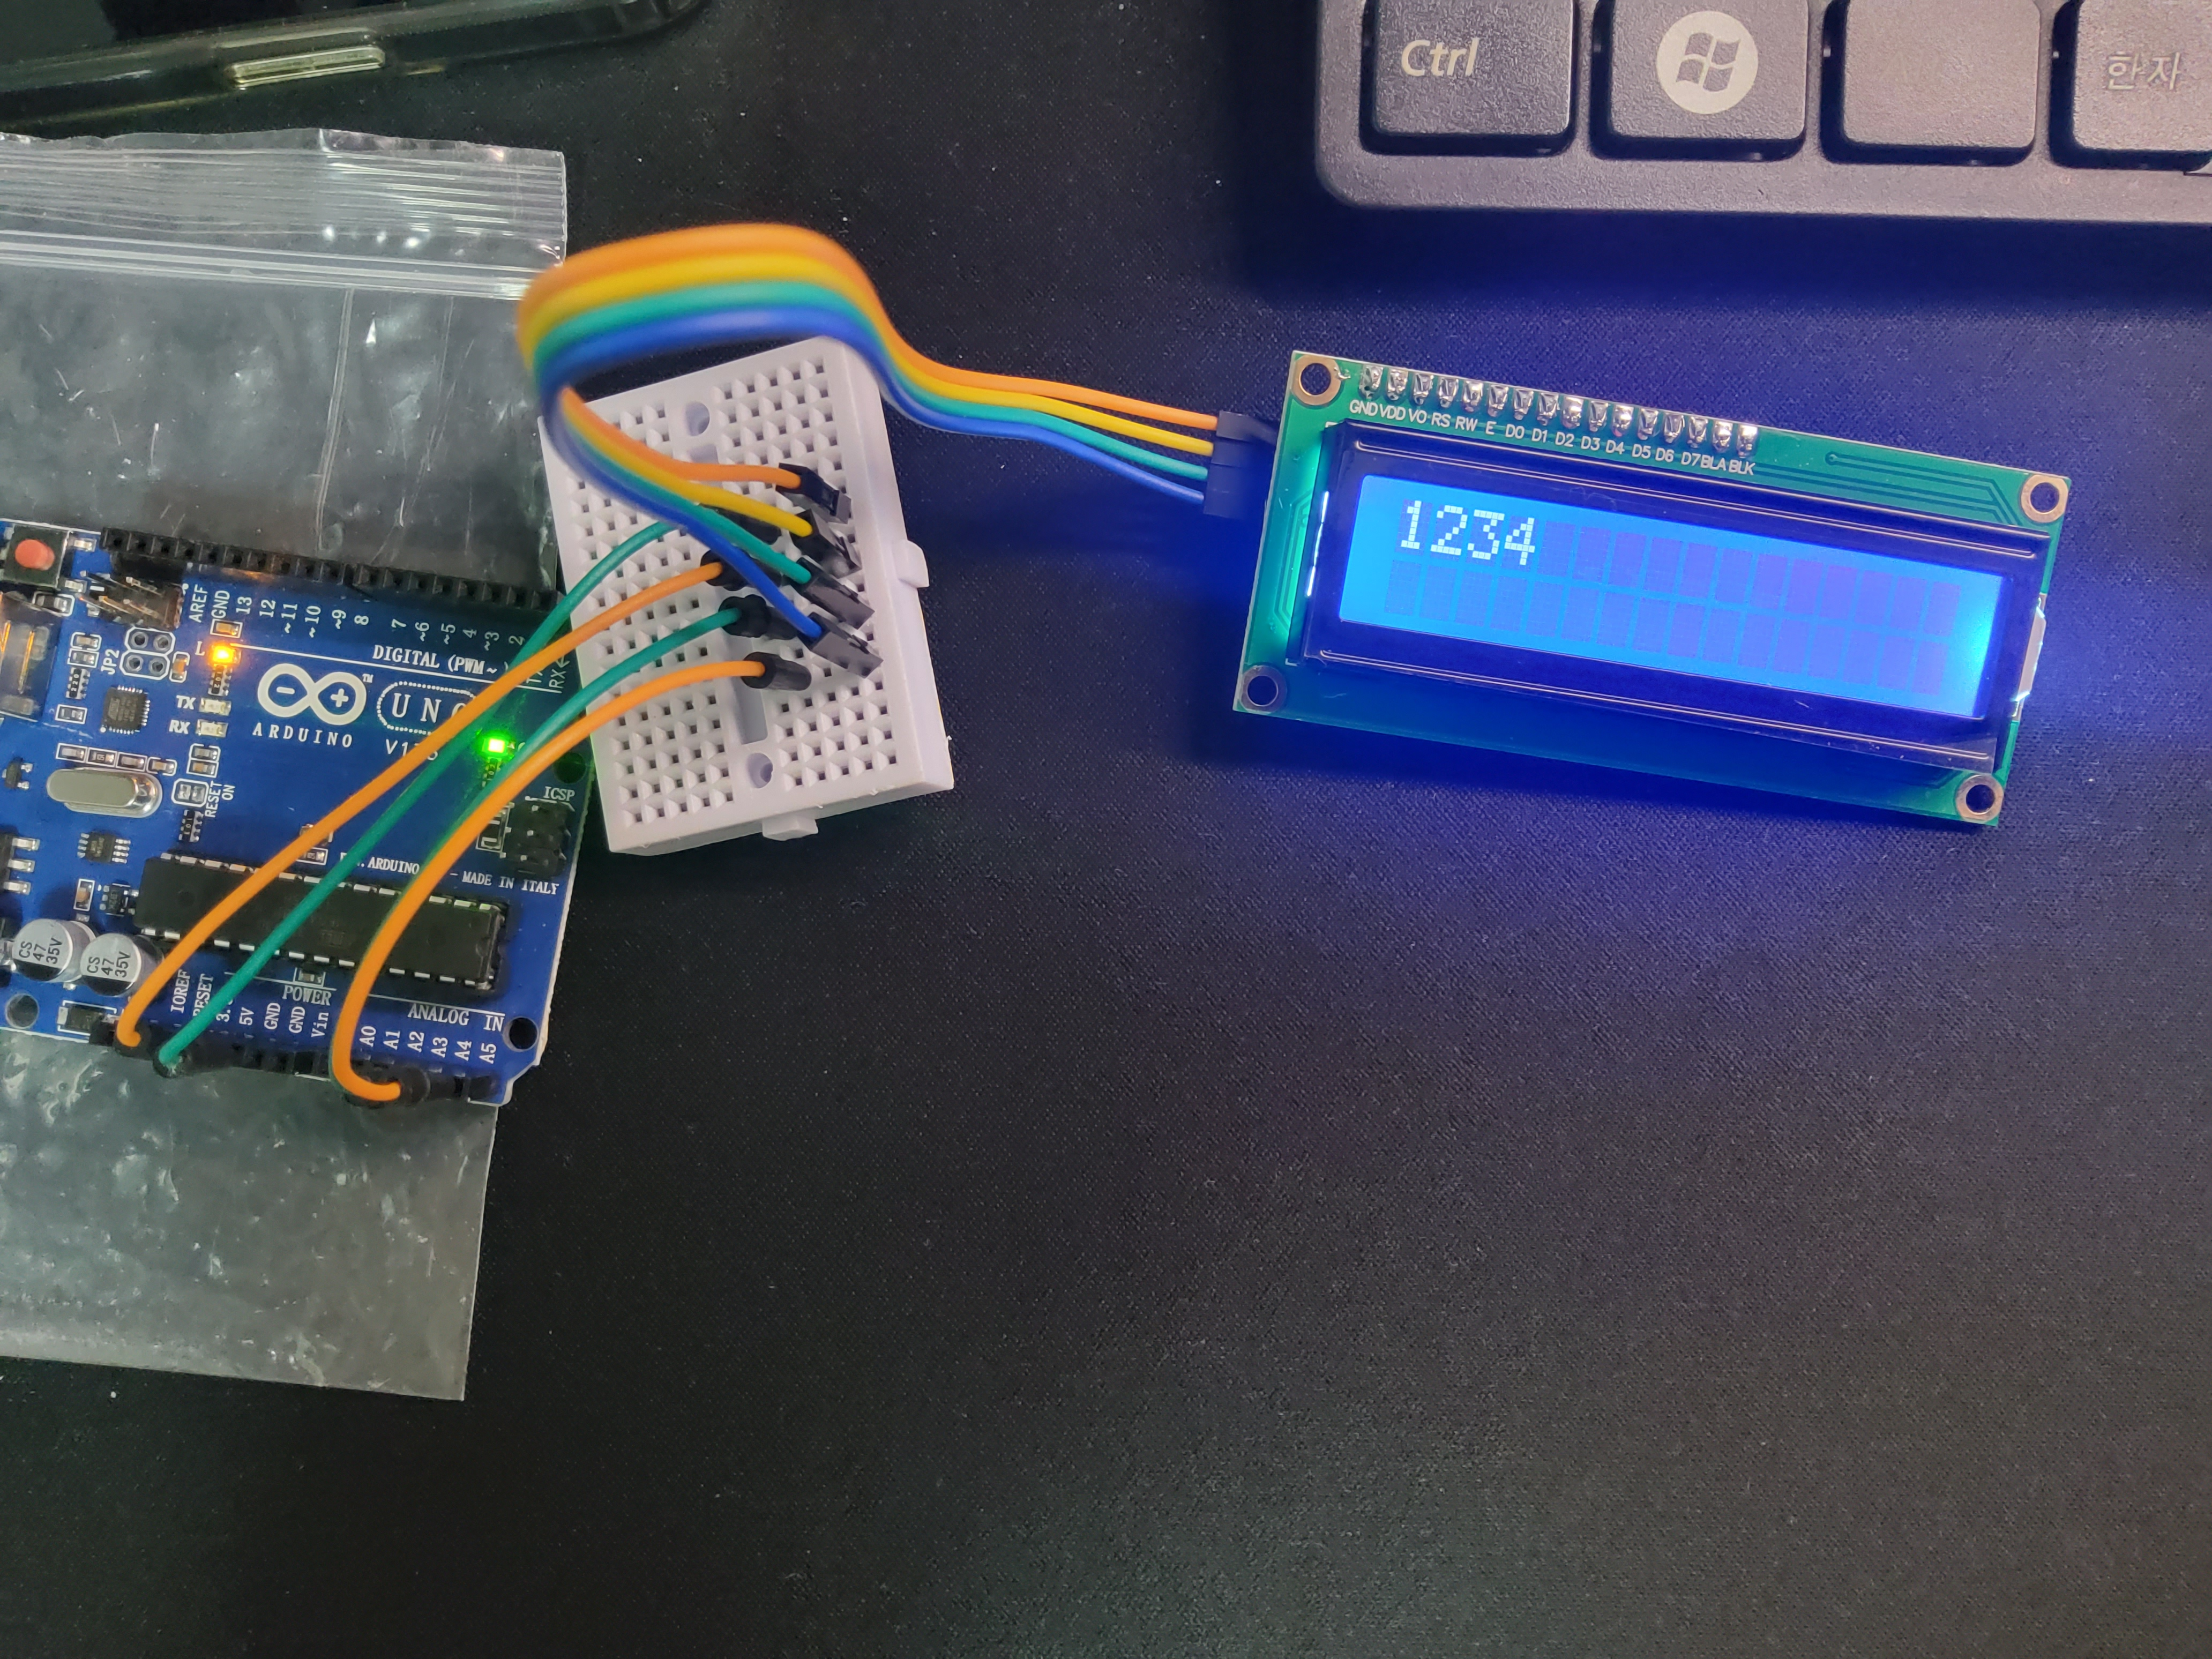
아두이노에 있는 SerialDisplay 예제인데, 교재 속 예제와 의도가 유사하다. 수정해 보겠다.
/*
* Displays text sent over the serial port (e.g. from the Serial Monitor) on
* an attached LCD.
* YWROBOT
*Compatible with the Arduino IDE 1.0
*Library version:1.1
*/
#include <Wire.h>
#include <LiquidCrystal_I2C.h>
LiquidCrystal_I2C lcd(0x27, 16, 2); // set the LCD address to 0x27 for a 16 chars and 2 line display
// -> LCD 크기를 16, 2로 바꾼다.
void setup() {
lcd.init(); // initialize the lcd
lcd.backlight();
Serial.begin(9600);
}
void loop() {
// when characters arrive over the serial port...
if (Serial.available()) {
// wait a bit for the entire message to arrive
delay(100);
// clear the screen
lcd.clear();
// read all the available characters
String message = "";
while (Serial.available() > 0) {
// display each character to the LCD
char val = Serial.read();
if (val != '\n' && val != '\r') {
message += val;
}
}
message.trim();
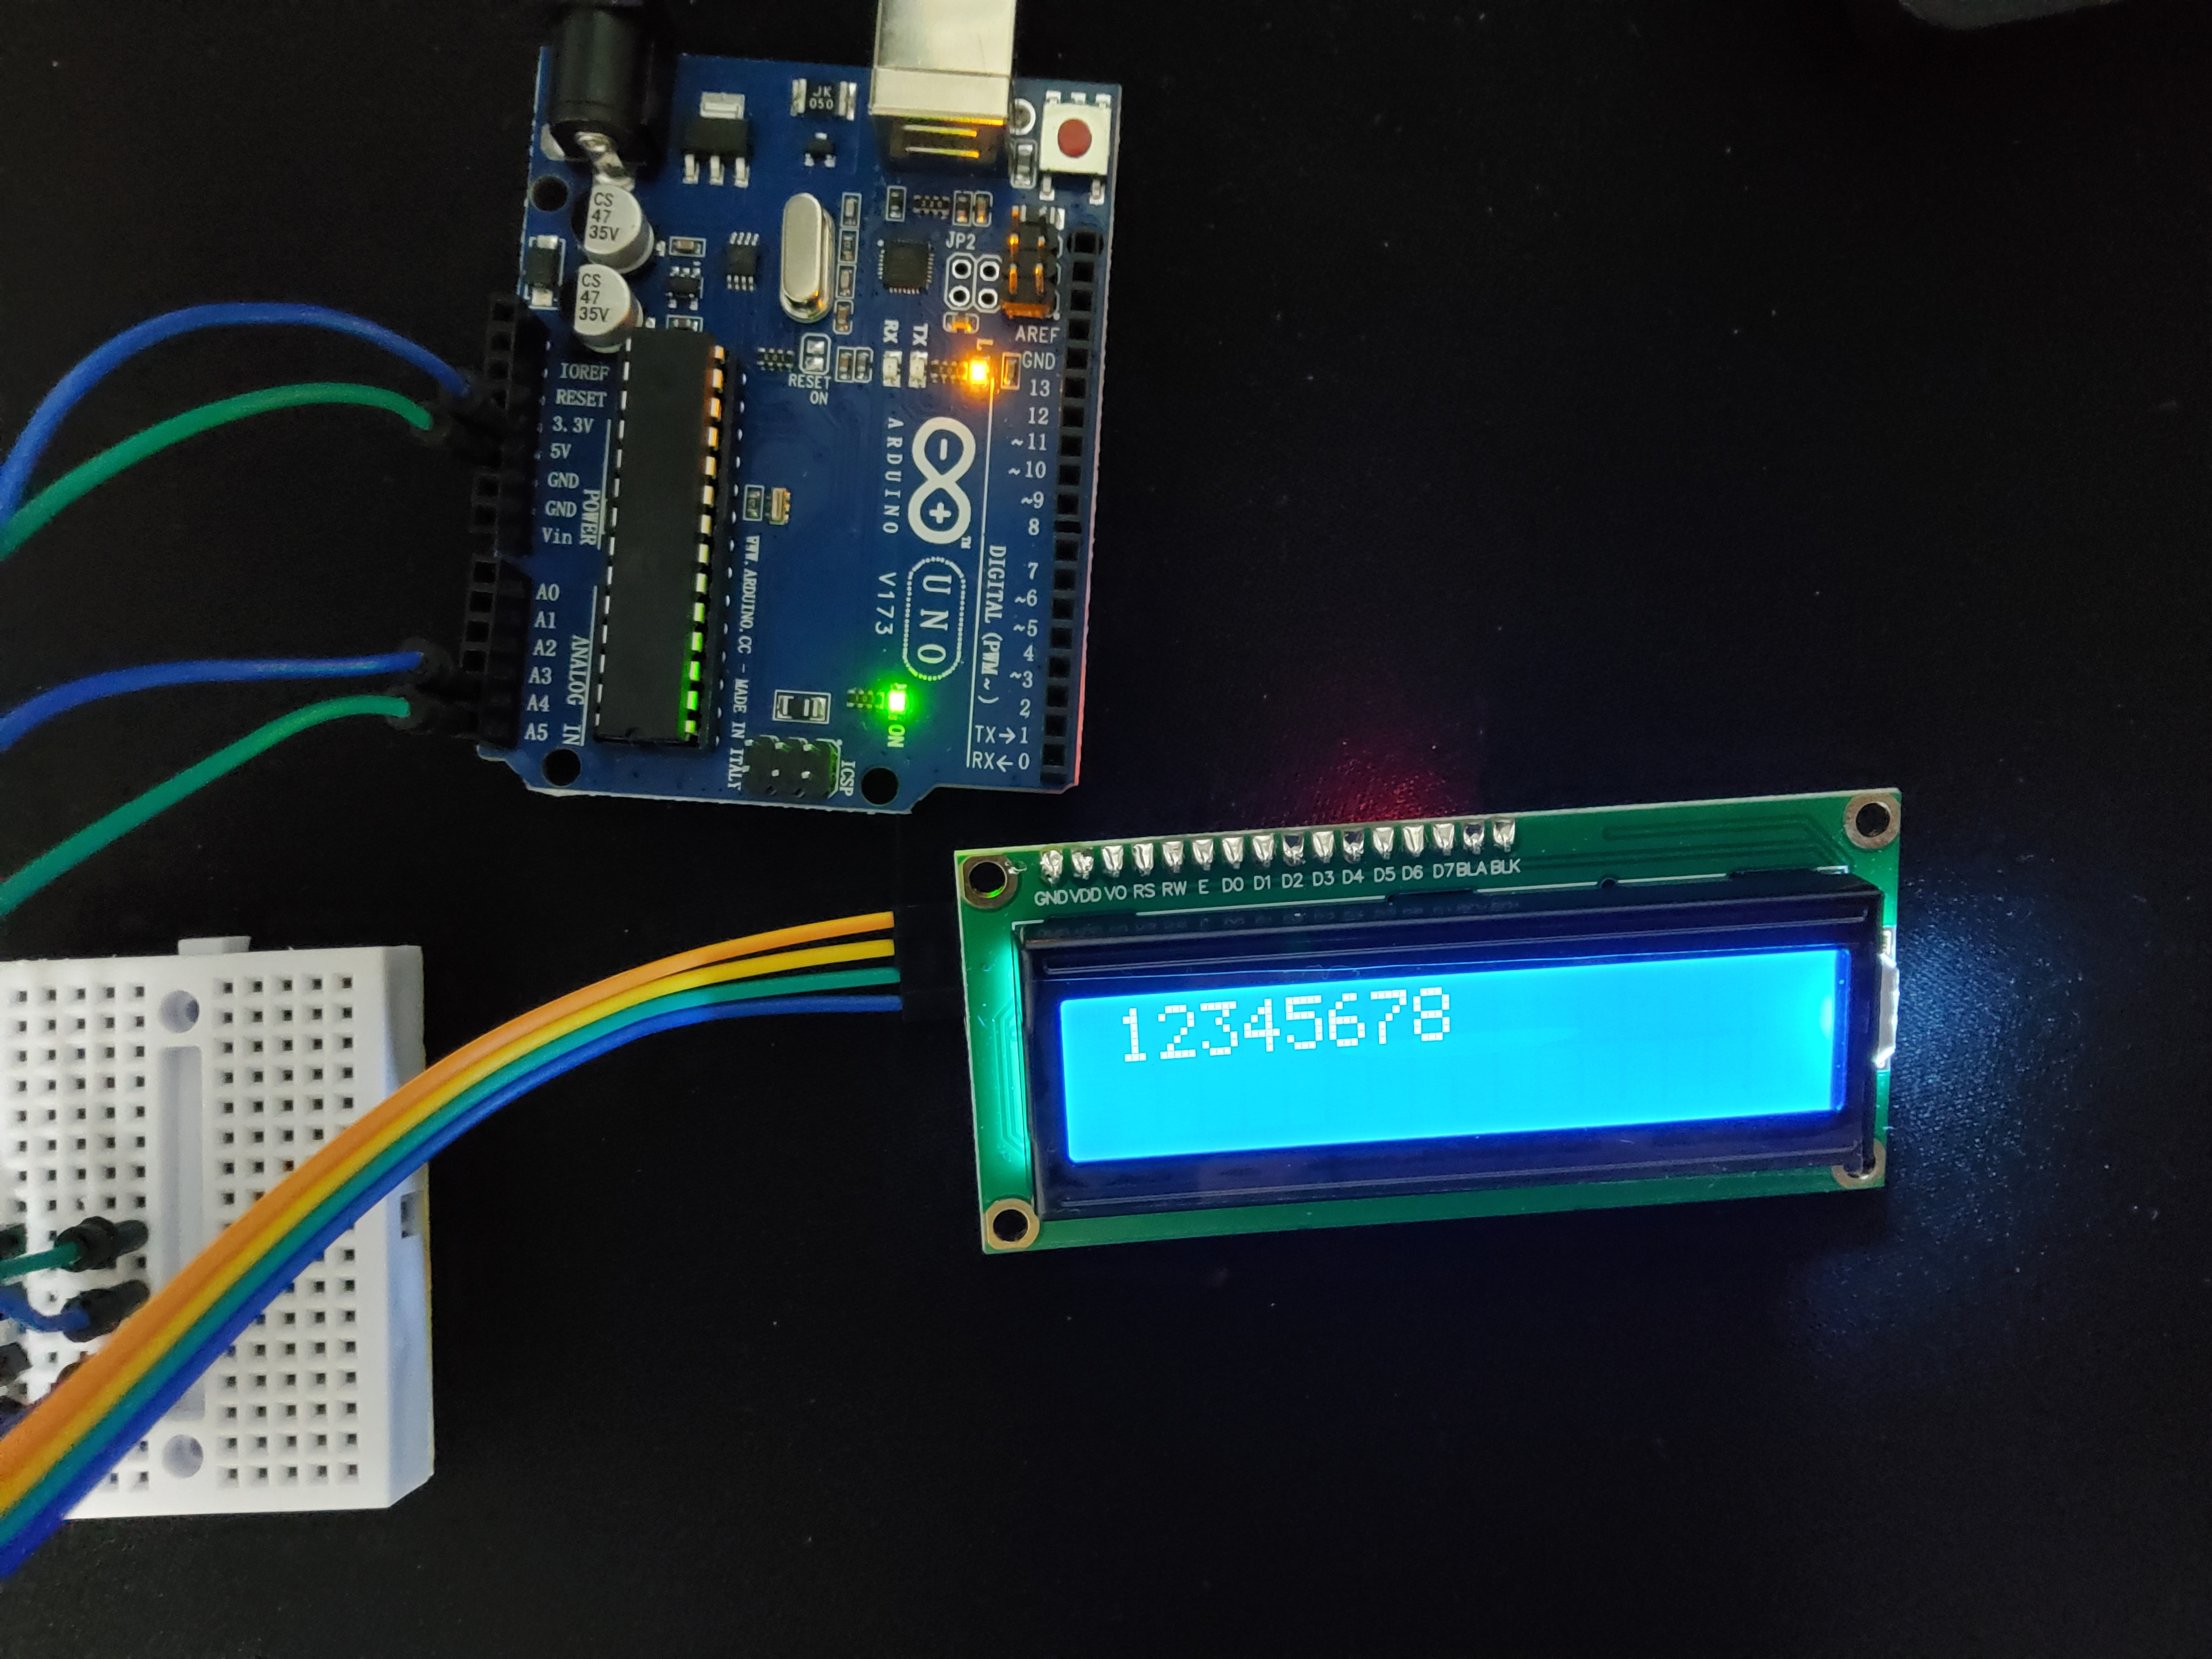
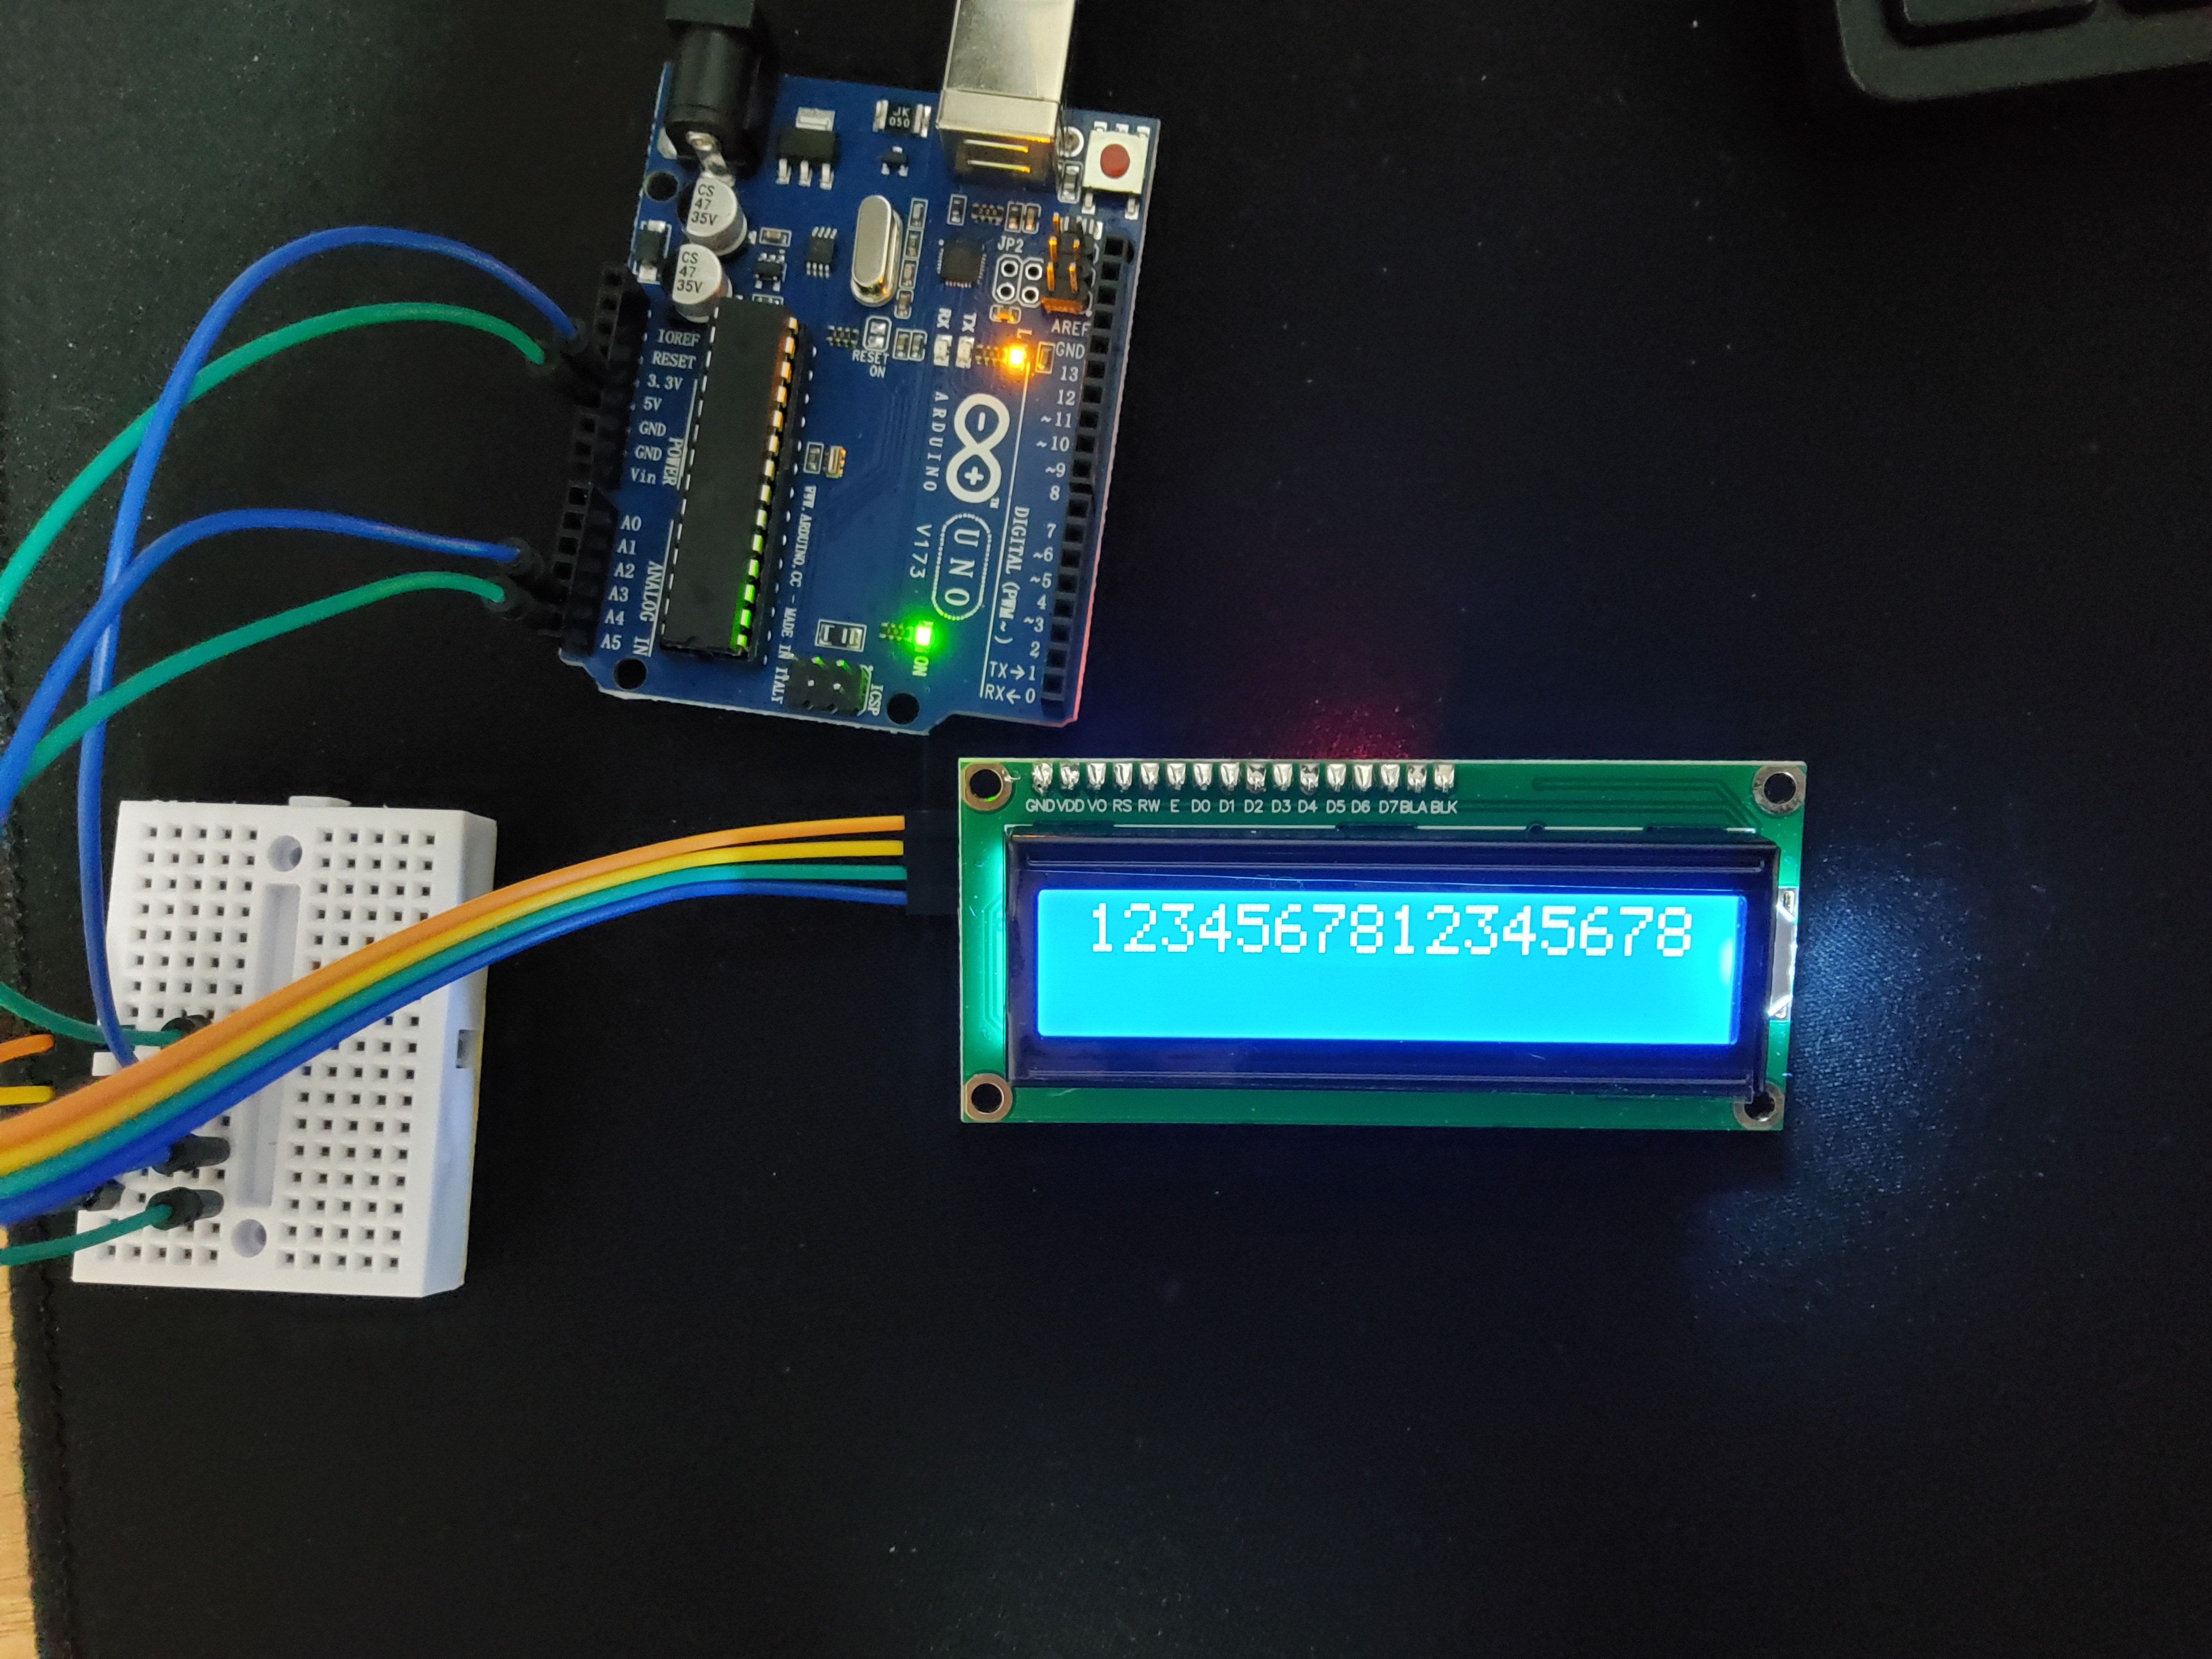
if (message.length() <= 16) {
lcd.print(message);
} else {
lcd.print("plz 16char below");
}
}
}

lcd.print()와 lcd.write()의 차이?
lcd.print()는 문자열을 출력한다. 그렇기 때문에 괄호 내부 값을 문자열로 바꾸어 출력할 수도 있다.
lcd.write()는 단일 문자를 출력한다. 만약 정수가 들어가 있을 경우 대응하는 아스키코드로 변환해서 출력할 수도 있다.
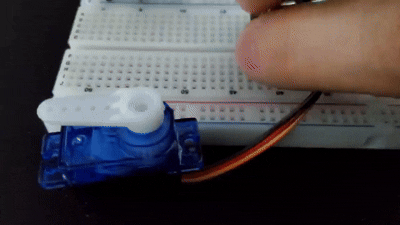
서보 모터
서보 모터는 사용자가 원하는 속도나 각도를 지정해주면 그대로 동작하는 모터를 말한다.
주로 3pin으로 구성되어 있으며, 키트 내에 잇는 SG-90은 0~180도로 동작한다.
아두이노에서 전원을 공급할 때 5v에서 최대 500mA, 9v에서 최대 800mA의 전류를 출력할 수 있다. 그러나 그 이상의 전류가 필요할 경우 서보모터 전원을 외부 전원으로 해결해야 한다.
#include <Servo.h>

Servo myservo;

int potentialmeter = A0;
int val;

void setup() {
  // put your setup code here, to run once:
  Serial.begin(9600);
  myservo.attach(9);//servo 모터를 9번에 연결
}

void loop() {
  // put your main code here, to run repeatedly:
  val = analogRead(potentialmeter);

  val = map(val, 0, 1023, 0, 180);// val에서 읽은 0~1023값을 0~180도로 변환
  myservo.write(val);
  delay(20);
}
myservo.attach()
servo.attach(핀번호, 최소값, 최대값)의 형식으로 사용된다. 핀번호는 pwm 출력이 가능한 핀을 선택한다.
최소값, 최대값은 서보의 최대 각도에 해당하는 펄스폭이다. 생략하는 경우 최소 544, 최대 2400 마이크로 초로 설정된다.chat gpt
✔️ min과 max는 서보 모터의 최소/최대 각도에 대한 펄스 폭 설정값
✔️ 기본값(544~2400μs)을 사용해도 대부분 동작하지만, 서보 모터마다 다를 수 있음
✔️ 만약 서보 모터가 정확한 0°~180°로 움직이지 않으면 min/max를 조정하면 됨! 🚀
myservo.write()
servo.write(각) 형식으로 사용한다. 서보 모터의 각도값을 넣어주는 함수로 angle에 원하는 각도 값을 넣는다.
만약 360 회전이 가능한 연속 회전 서보모터일 경우 각도가 아닌 서보의 속도와 방향을 설정한다.
0은 정방햔 최고속도, 180은 역방향 최고속도, 90은 정지이다.
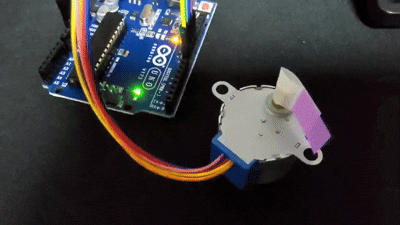
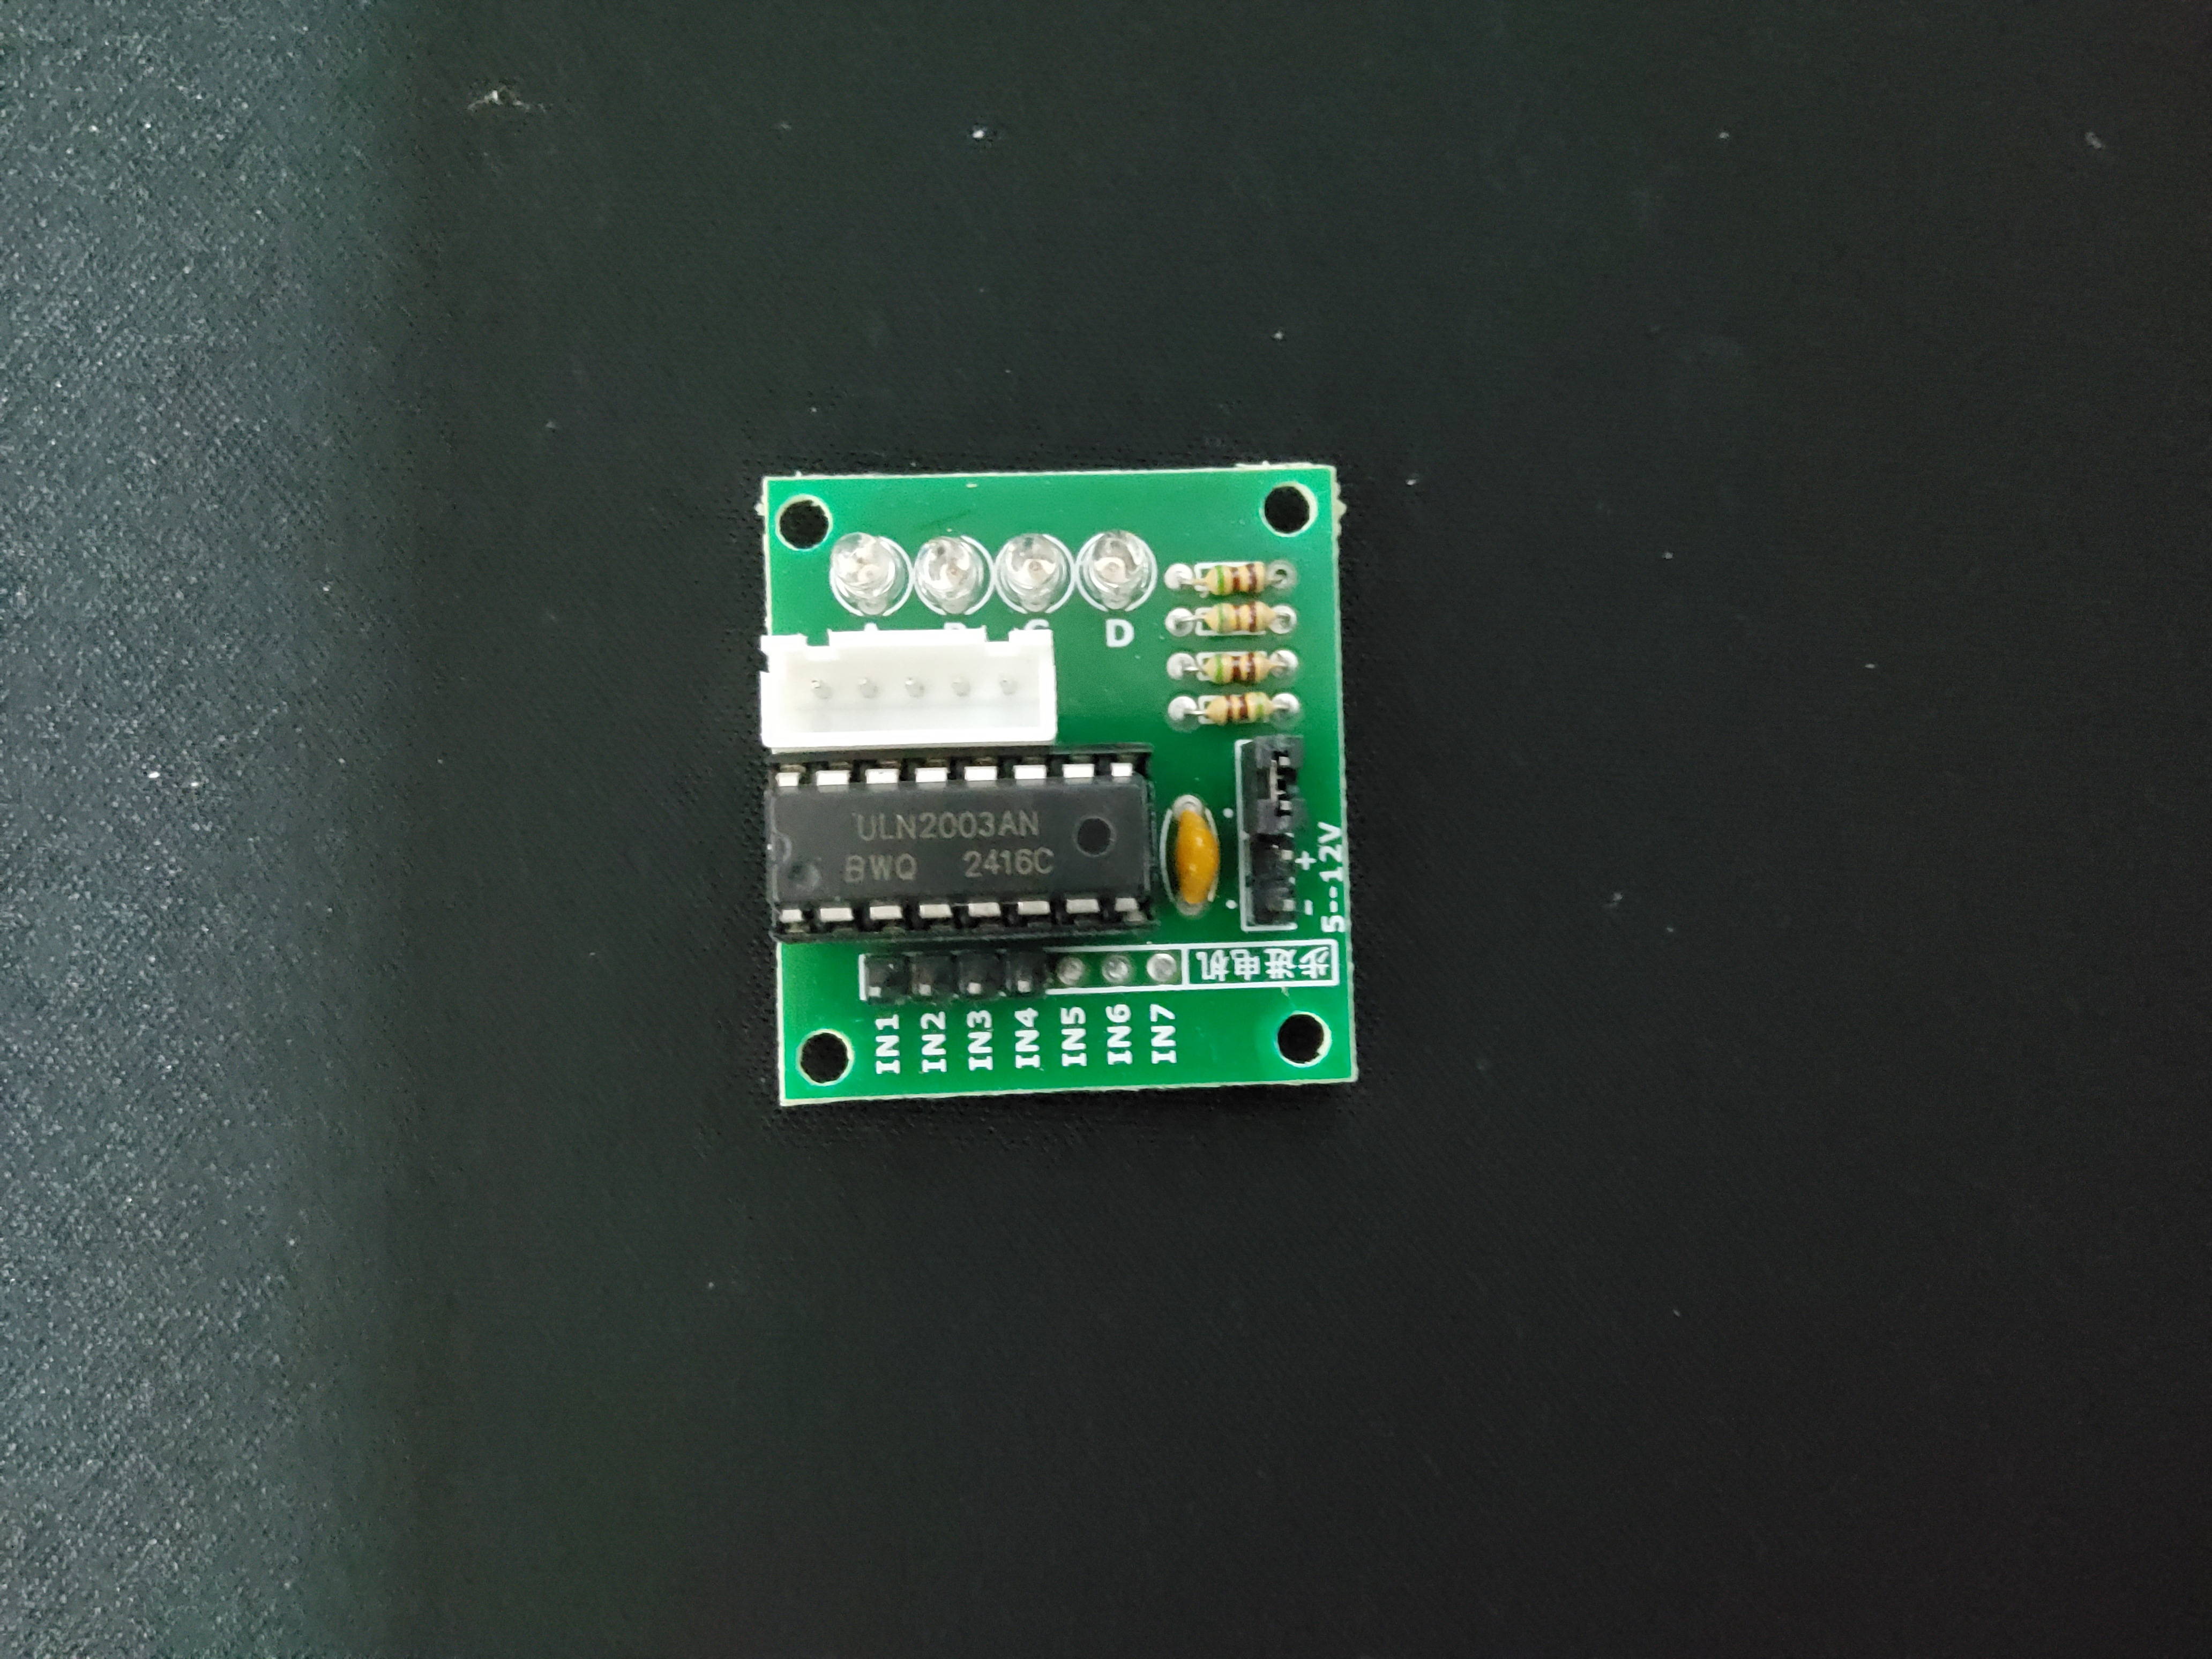
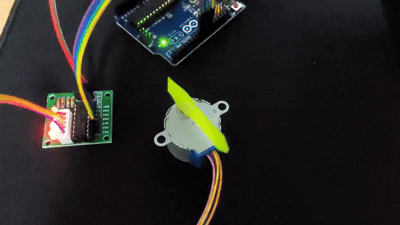
스테퍼모터
스테퍼 모터는 펄스신호에 의해 작동하는데 입력 펄스 수와 모터의 회전 각도가 정확히 비례한다. 펄스제어를 통해 모터를 특정 각도 단위로 정밀하게 제어할 때 사용한다.
서보모터의 경우 모터드라이버가 내장되어 있기 때문에 아두이노에 직접 연결이 가능하지만, DC모터, 스테퍼모터, BLDC 모터 등은 모터드라이버를 통해 연결해야 한다.
아두이노 -> 모터드라이버 -> 모터
아두이노와 같은 컨트롤러에서 모터드라이버를 제어하고, 모터드라이버가 모터를 제어한다. 스테퍼모터에는 스테퍼모터 드라이버를 사용한다.
#include <Stepper.h>

const int steps = 2048;//모터의 스텝 수

Stepper myStepper(steps, 11, 9, 10, 8);//스텝 수, IN1 핀, IN2 핀, IN3 핀, IN4 핀

void setup() {
  // put your setup code here, to run once:
  Serial.begin(9600);
  myStepper.setSpeed(15);//스테퍼 모터 속도(rpm)설정 : 스텝 수와 연결되어 있음
}

void loop() {
  // put your main code here, to run repeatedly:
  Serial.println("시계방향");
  myStepper.step(steps);//시계방향으로 스텝 수만큼 이동
  delay(500);
  Serial.println("반시계방향");
  myStepper.step(-steps);//반시계방향으로 스텝 수만큼 이동
  delay(500);
}
Page 158 Example
#include <Stepper.h>

const int steps = 2048; // 스테퍼 모터의 한 바퀴 회전에 필요한 스텝 수 설정

Stepper myStepper(steps, 11, 9, 10, 8);

void setup() {
  // put your setup code here, to run once:
  Serial.begin(9600);
  myStepper.setSpeed(10); // 모터 회전 속도를 10 RPM(분당 회전 수)로 설정
}

void loop() {
  // put your main code here, to run repeatedly:
  int one_sec = map(1, 0, 60, 0, steps);//0~60을 0~2048로 매핑함 -> 1초동안 회전하는 스텝
  myStepper.step(one_sec);

  delay(900);
}