
앞서 Node.js의 http 모듈을 가지고 간단한 TODO CRUD 기능이 있는 서버를 만들어 보았다.(아래 링크 참조)
https://velog.io/@mainfn/Node.js-http-%EB%AA%A8%EB%93%88%EB%A1%9C-RESTful-API-%EC%84%9C%EB%B2%84-%EB%A7%8C%EB%93%A4%EA%B8%B0
이 작은 TODO 서버를 express로 리팩토링하여 코드의 가독성과 구조가 얼마나 개선되는지 확인해보자.
function newID() {
    return Math.floor(Math.random() * 1000000).toString();
}

const db = new Map();
db.set(newID(), {
    title: 'TODO1',
    content: 'DO SOMETHING',
});
임의의 ID를 만드는 newID 함수와 Map으로 임시 인메모리 DB를 만드는 코드는 이전과 동일하다.
const express = require('express');

const app = express();
// json parser
app.use(express.json());
// form parser
app.use(express.urlencoded({ extended: true }));
http 대신 express로 서버 인스턴스를 만들고, json과 x-www-form-urlencoded 방식의 Request Body를 파싱하기 위해 파서를 미리 등록한다.
용어를 언급하지는 않았는데, 이렇게 app.use() 메소드에 등록해서 라우터가 실행되기 이전, 파싱 등의 전처리를 담당하는 함수들을 미들웨어라고도 부른다.
이 미들웨어들은 연결 리스트 형태로 등록되어 순차적으로 실행되는데,
파서 미들웨어 2개가 위에 등록되어 있고, 그 다음에 get 라우터가 위치한 상태라면,
리스트에 [json parser, form parser, get('/')] 3개의 요소가 담겨있는 상태라고 보면 된다.
그래서 json 파싱을 처리하고 form 파싱을 처리한 다음 라우터가 실행되는데, 이 때문에 자동으로 req.body에 파싱이 이미 완료된 상태의 JS 객체가 들어있던 것이다.
이 때문에 순서가 뒤바뀌면 오류가 발생했던 것이다.
[get('/'), json parser, form parser]
파싱이 처리되기 전에 라우터가 이미 실행되기 때문에 Request Body에 담긴 것이 form이던 아무 처리도 일어나지 않았으므로, json이던 req.body에 파싱된 객체가 들어있을 수가 없다.
미들웨어에 대한 자세한 것은 나중에 다시 살펴보도록 하고, express로 리팩토링 된 코드를 기존 코드와 비교해보자.
--
1. Read All TODOs
app.get('/', (req, res) => {
    let buf = '<h1>TODOS</h1>';
    buf += '<ul>';
    for (const [id, {title, content}] of db) {
        buf += `<li>[id(${id})]${title}: ${content}</li>`;
    }
    buf += '</ul>';
    res.setHeader('Content-Type', 'text/html');
    res.status(200).send(buf);
});
GET /에 접속하면 Map에 저장된 모든 TODO를 보여준다.
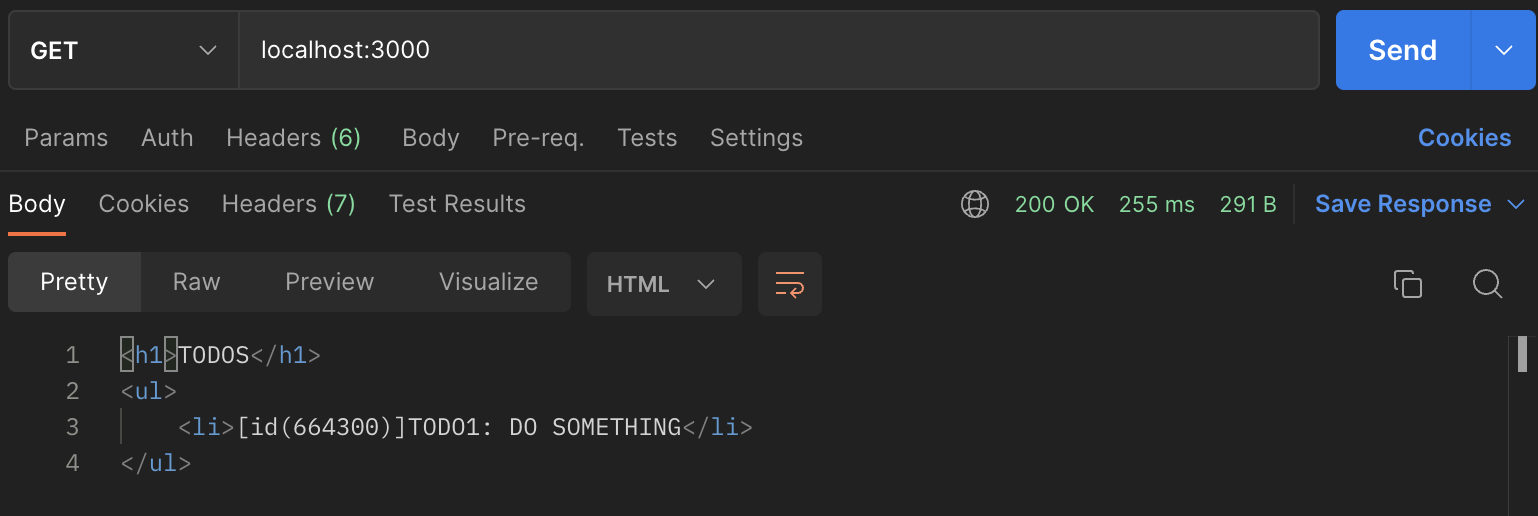
미리 1개의 TODO를 생성하기 때문에 초기에 1개의 TODO만 들어있는 모습이다.
기존 코드와 별 차이가 없기 때문에 비교 없이 넘어가겠다.
2. Read TODO By ID
기존 코드는 다음과 같다.
    if (req.url.split('/')[1] === 'todos') {

        // get todo by id
        if (req.method === 'GET') {
            const id = req.url.split('/')[2];
            const todo = db.get(id);
            if (!todo) {
                res.writeHead(400);
                res.end('id not found');
                return;
            }

            res.writeHead(200, {
                'Content-Type': 'text/html',
            });
            res.end(`<h1>id: ${todo.id}, title: ${todo.title}, content: ${todo.content}</h1>`);
            return;
// ...
그리고 express로 리팩토링한 코드이다.
app.get('/todos/:id', (req, res) => {
    const { id } = req.params;
    const todo = db.get(id);
    if (!todo) {
        res.status(400).send('id not found');
        return;
    }
    res.setHeader('Content-Type', 'text/html');
    res.status(200).send(`<h1>id: ${todo.id}, title: ${todo.title}, content: ${todo.content}</h1>`);
});
기존 코드는 if (req.url.split('/')[1] === 'todos') { 부분으로 URI가 /todos 임을 확인한다.
express는 app.get('/todos:id') 형식으로 작성되어 가독성도 더 좋고, Route Parameter로 id가 주어진다는 것을 한 눈에 확인할 수 있다는 장점이 있다.
처음에 자동으로 생성된 id가 664300인 TODO를 가져와보자.
GET /todos/132345로 요청을 보내면 된다.

3. Create New TODO
body에 json 형식으로 title, content를 첨부하여 해당 데이터를 기반으로 새로운 TODO를 만드는 라우터다.
기존 코드는 다음과 같다.
 else if (req.method === 'POST') {
            // create todo
            let data = {};
            req.on('data', chunk => {
                data = JSON.parse(chunk);
            });

            req.on('end', () => {
                db.set(newID(), data);
                res.writeHead(200, {
                    'Content-Type': 'text/html',
                });
                res.end('<h1>ok</h1>');
                return;
            });

            req.on('error', () => {
                res.writeHead(400);
                res.end('something went wrong');
                return;
            })
        }
스트림으로 body를 받아와서 JSON.parse()로 직접 파싱해줬다.
app.post('/todos', (req, res) => {
    const { title, content } = req.body;
    db.set(newID(), {
        title,
        content,
    });
    res.setHeader('Content-Type', 'text/html');
    res.status(200).send('<h1>ok</h1>');
});express는 app.use()에 express.json() 파서를 등록하면 자동으로 req.body에 파싱된 데이터가 담기기 때문에 코드가 훨씬 간결해진 것을 볼 수 있다.
기존 코드는 URI 따로, Method 따로 나뉘어져 있었기 때문에 URI를 결정하는 코드 부분이 멀어질수록 파악하기가 어렵다.
if (req.url.split('/')[1] === 'todos') 조건문을 통해 URI가 todos임을 알 수 있었는데, 코드가 길어지면서 이번 라우터의 시작 부분인 else if (req.method === 'POST')과 너무 멀어진 상태이다.
고로 정확한 URI 확인을 위해서는 코드를 상당히 거슬러 올라갈 필요가 있어서 쓸데없이 정신력과 시간이 소요될 수 있다.
반면 express로 작성한 코드는 app.post('/todos') 부분에 Method, URI가 뭉쳐 있어서 한 눈에 볼 수 있다는 장점이 있다.
가독성도 훨씬 올라가고 시간도 절약되는 느낌이다.
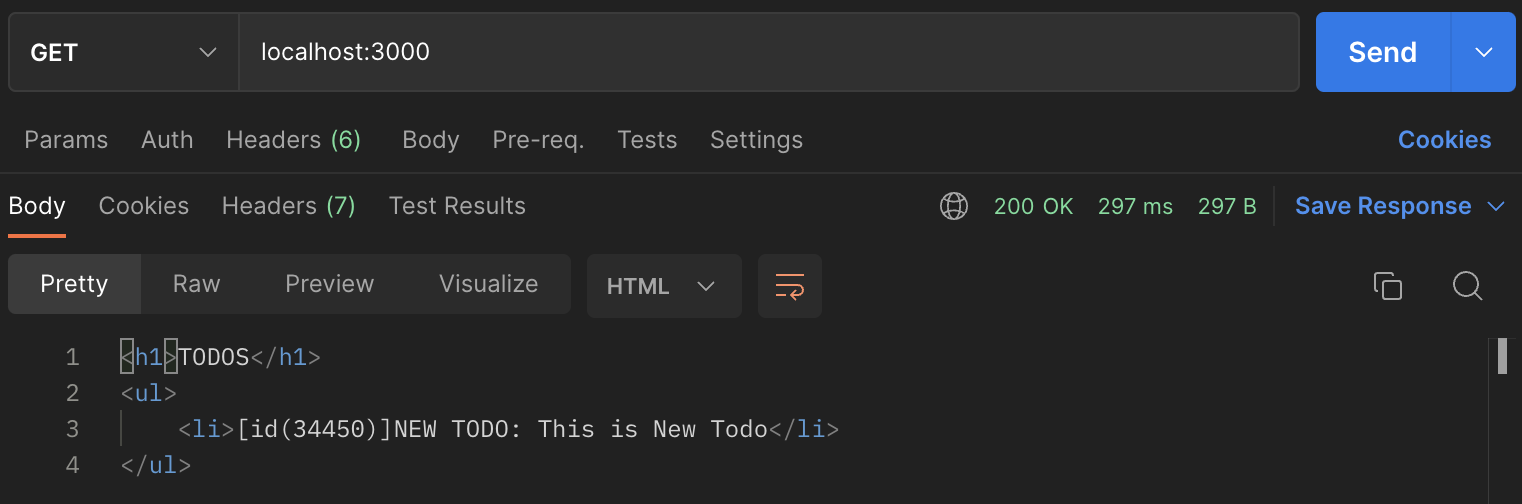
이제 새로운 TODO를 만들기 위한 요청을 보내보자.
title은 "NEW TODO", content는 "This is New Todo"로 json body로 주었다.

응답으로 <h1>ok</h1>를 받았다.
정말로 새로운 TODO가 잘 저장되었는지 확인하기 위해 모든 TODO를 렌더링 해주는 GET /으로 요청을 보내보자.
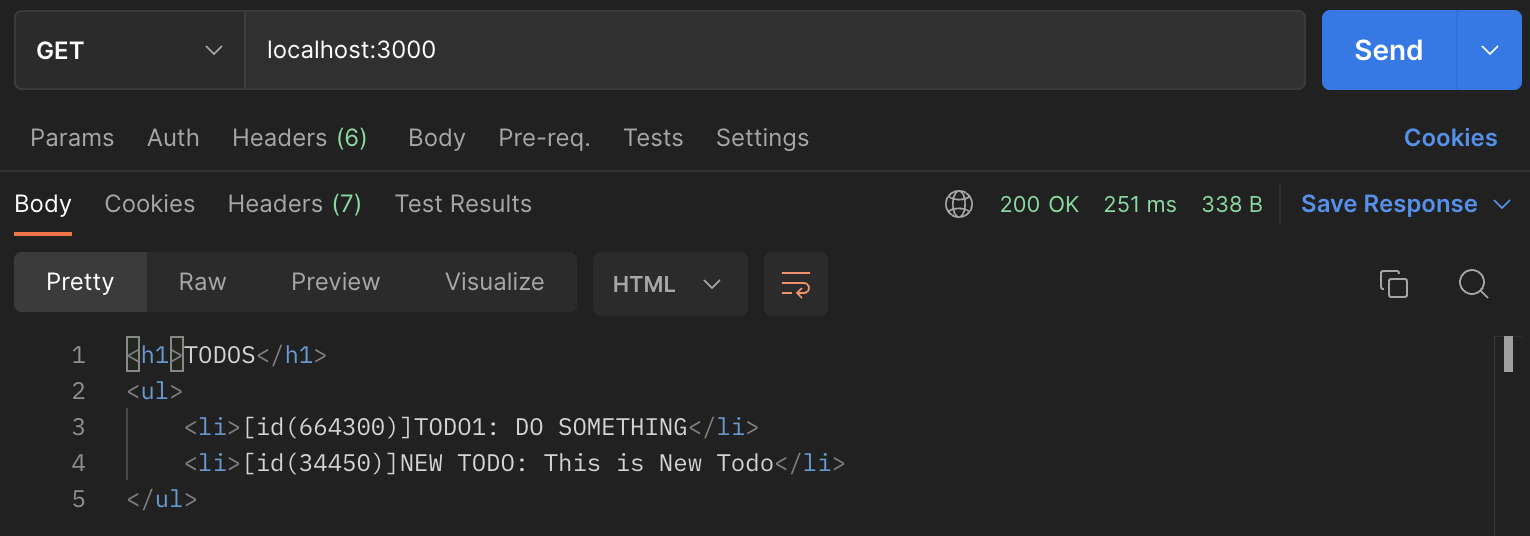
새로운 TODO가 정상적으로 추가된 것을 확인할 수 있다.
4. UPDATE TODO
전체 코드 중 가장 긴 부분이다.
id는 Route Parameter로 전달하고,
변경할 데이터는 title, content 혹은 둘 다 json body로 전달한다.
만약 존재하는 id라면 기존 데이터를 변경한다.
 else if (req.method === 'PUT') {
            const id = req.url.split('/')[2];
            const todo = db.get(id);
            if (!todo) {
                res.writeHead(400);
                res.end('id not found');
                return;
            }

            req.on('data', chunk => {
                data = JSON.parse(chunk);
            });

            req.on('end', () => {
                const newTodo = {
                    ...todo,
                };
                if (data.title) {
                    newTodo.title = data.title;
                }
                if (data.content) {
                    newTodo.content = data.content;
                }
                db.set(id, newTodo);
                res.writeHead(200, {
                    'Content-Type': 'text/html',
                });
                res.end('<h1>OK</h1>');
                return;
            });

            req.on('error', () => {
                res.writeHead(400);
                res.end('something went wrong');
                return;
            })
        }
새로운 TODO를 생성할 때와 마찬가지로, 스트림을 통해 json 데이터를 받아 JS 객체로 파싱하고, 파싱된 데이터로 기존 TODO를 업데이트 해준다.
app.put('/todos/:id', (req, res) => {
    const { id } = req.params;
    const todo = db.get(id);
    if (!todo) {
        res.status(400).send('id not found');
        return;
    }

    const data = req.json;
    const newTodo = { ...todo };
    if (data?.title) {
        newTodo.title = data.title;
    }
    if (data?.content) {
        newTodo.content = data.content;
    }

    db.set(id, newTodo);
    res.setHeader('Content-Type', 'text/html');
    res.status(200).send('<h1>OK</h1>');
});express로 재작성된 코드는 역시 한 눈에 :id를 Route Parameter로 받는다는 사실을 파악할 수 있다는 점이 정말 좋다.
게다가 req.on()을 통해 작성된 코드는 위에서 아래로 순차 실행되는 것이 아니라, 이벤트가 발생할 때 실행되기 때문에 express로 작성된 코드의 흐름이 보다 직관적이다.
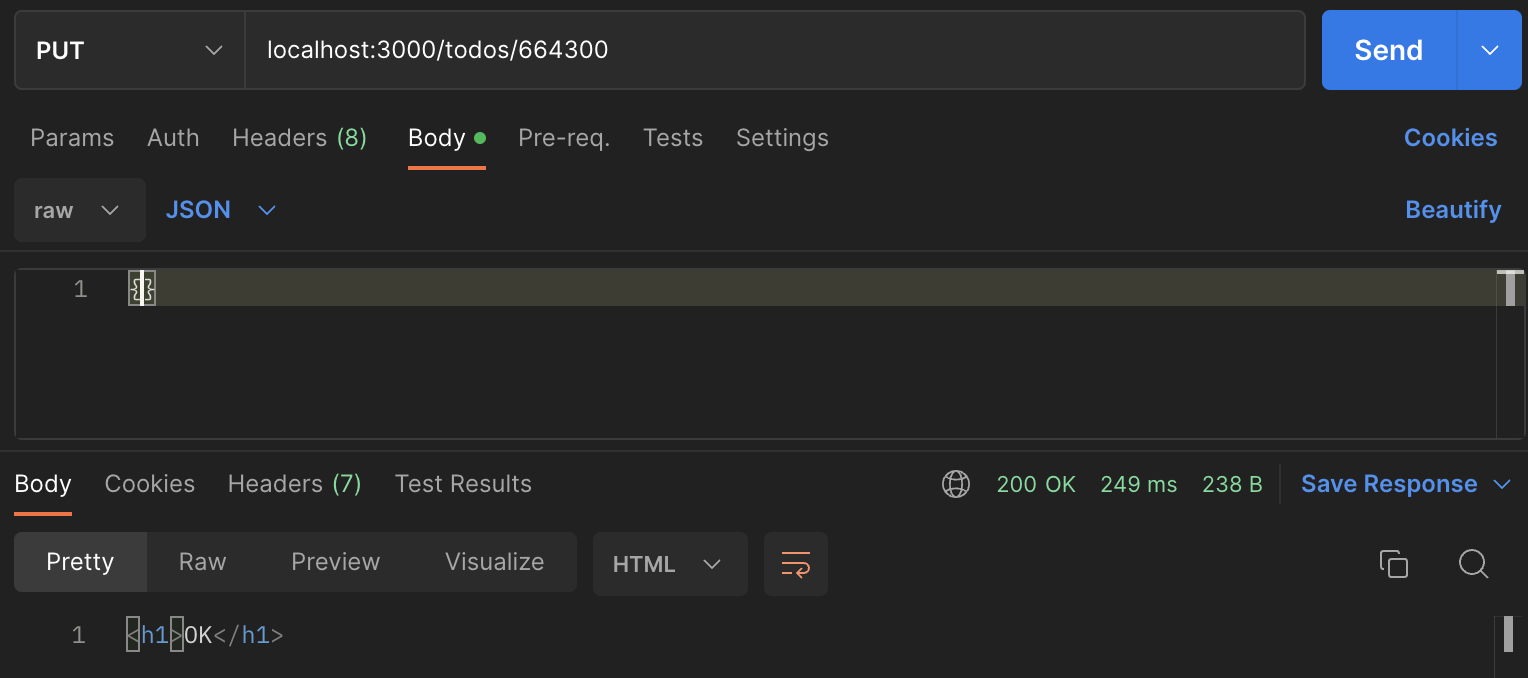
코드의 흐름을 살펴보면, id를 가진 TODO의 존재 여부를 먼저 체크하고 없으면 상태 코드 400과 함께 id not found를 응답으로 보내준다.
존재하는 id라면, express.json()에 의해 파싱된 json body에 담긴 데이터로 TODO의 제목과 내용을 수정한다.
직접 요청을 보내보자.
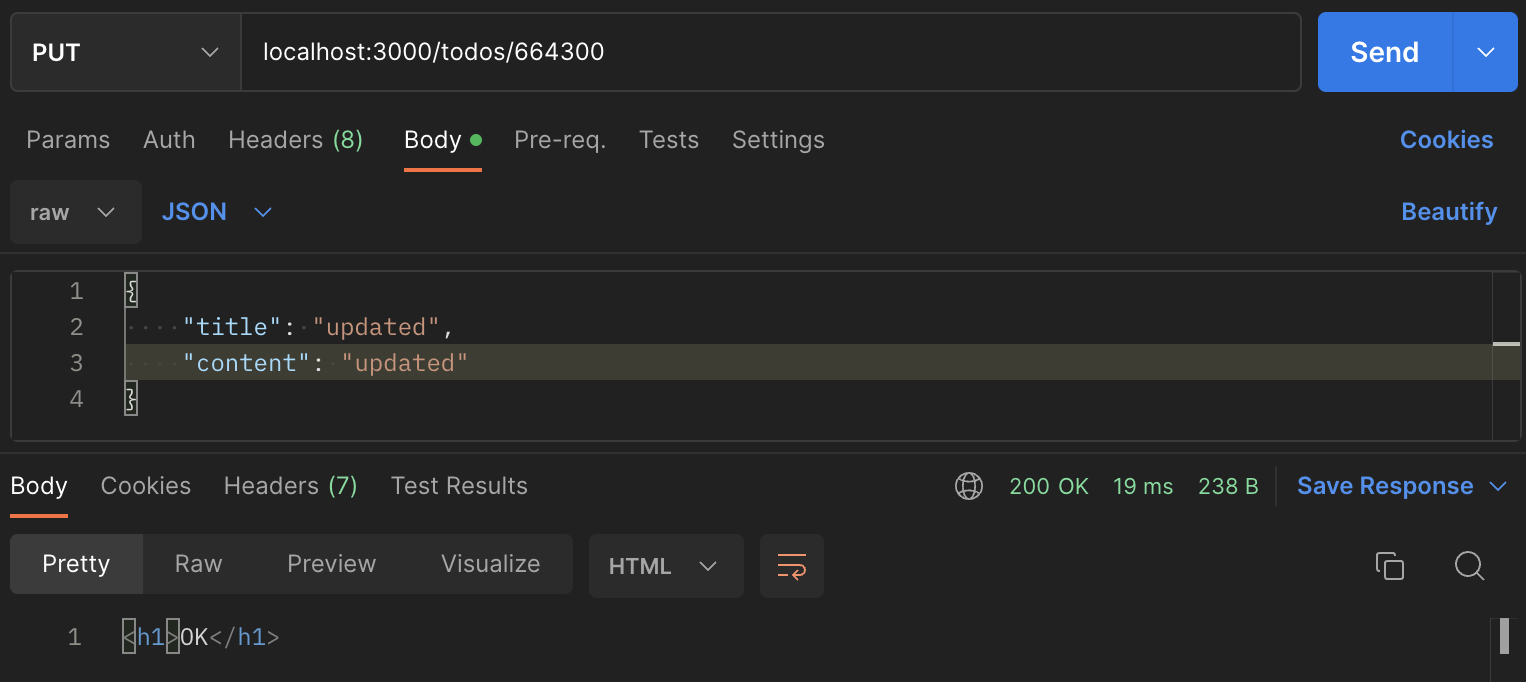
title과 content를 모두 "updated"로 설정하여 PUT /todos/664300로 요청을 보냈다.(최초로 생성된 TODO의 id)
title과 content 모두 잘 변경되었다.
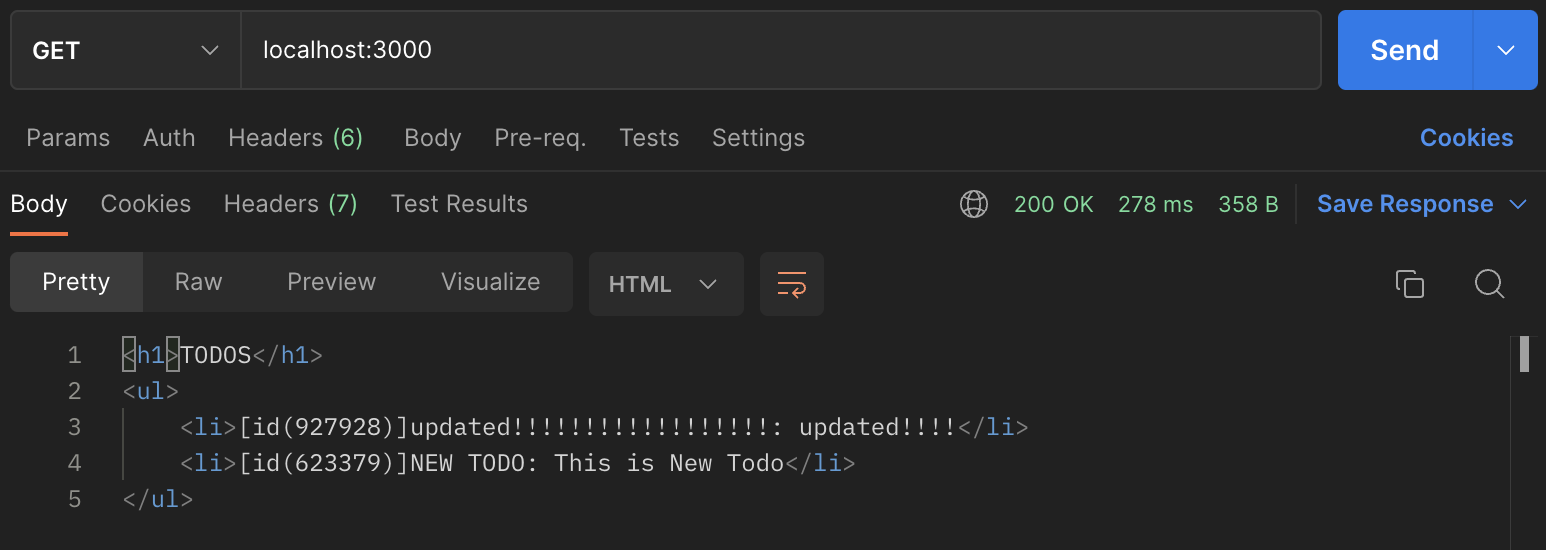
빈 객체를 json body로 보내면 200 OK 응답을 받지만, 아무 것도 변경되지 않는다.
이전에 작성한 코드와 동작이 일치한다.
5. DELETE TODO
마지막으로 id를 Route Paramter로 전달하여 해당 id와 일치하는 TODO를 삭제하는 기능이다.
 else if (req.method === 'DELETE') {
            const id = req.url.split('/')[2];
            const todo = db.get(id);
            if (!todo) {
                res.writeHead(400);
                res.end('id not found');
                return;
            }

            db.delete(id);
            res.writeHead(200);
            res.end(`todo id ${id} deleted`);
        }
Route Parameter만 받으면 되기 때문에 이전 코드도 그리 길지는 않다.
app.delete('/todos/:id', (req, res) => {
    const { id } = req.params;
    const todo = db.get(id);
    if (!todo) {
        res.status(400).send('id not found');
        return;
    }

    db.delete(id);
    res.status(200).send(`todo id ${id} deleted`);
});
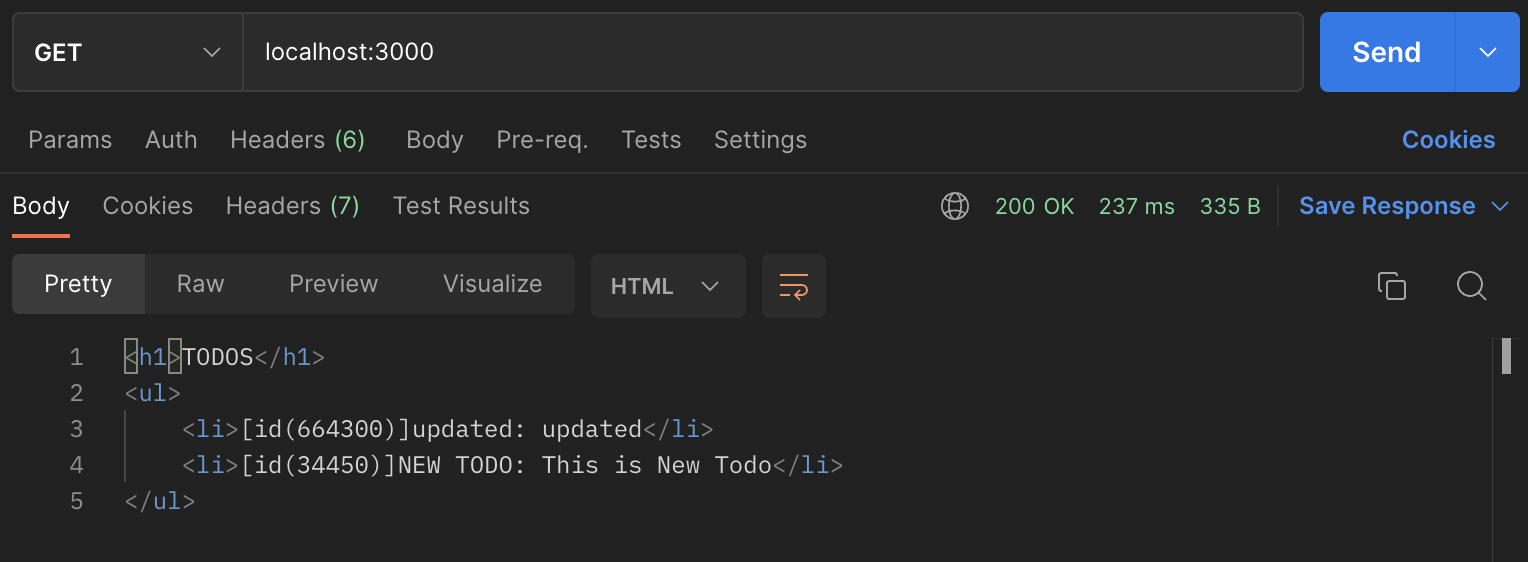
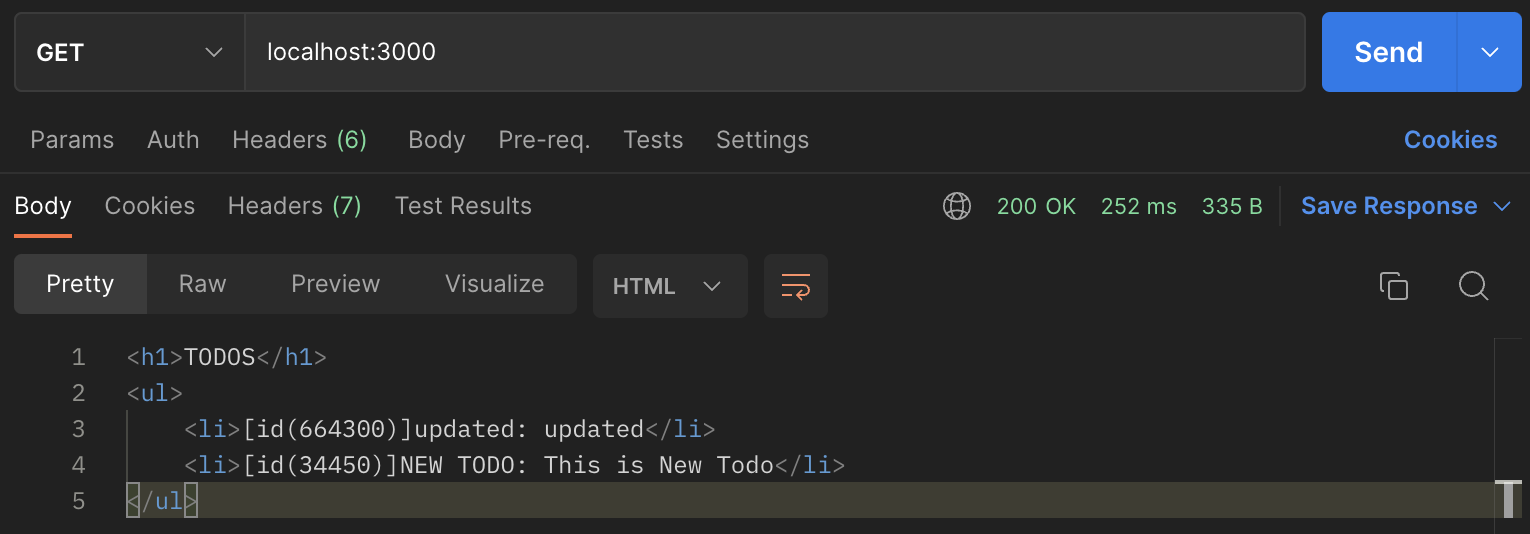
DELETE /todos/664300으로 요청을 보내고 모든 TODO를 확인하면,
정상적으로 id가 664300인 최초의 TODO가 제거된 것을 확인할 수 있다.
이렇게 Node.js의 기본 모듈만 가지고 작성된 코드를 express로 리팩토링하여 비슷하게 동작하도록 만들어 보았다.
그 과정에서 라우팅과 파싱이 훨씬 간단해졌고, Http Method와 URI를 한 눈에 찾을 수 있다는 장점과 가독성 향상.
json, form body를 가져올 때의 코드 흐름이 보다 일관적이어서 파악하기 편하다는 점도 알 수 있었다.
매우 간단한 서버를 만들면서도 코드 작성이 편하다는 느낌을 받았는데, 이는 규모가 커질수록 더 크게 와닿을 것이다.
전체 코드는 다음과 같다.
const express = require('express');

function newID() {
    return Math.floor(Math.random() * 1000000).toString();
}

const db = new Map();
db.set(newID(), {
    title: 'TODO1',
    content: 'DO SOMETHING',
});

const app = express();
app.use(express.json());
app.use(express.urlencoded({ extended: true }));

app.get('/', (req, res) => {
    let buf = '<h1>TODOS</h1>';
    buf += '<ul>';
    for (const [id, {title, content}] of db) {
        buf += `<li>[id(${id})]${title}: ${content}</li>`;
    }
    buf += '</ul>';
    res.setHeader('Content-Type', 'text/html');
    res.status(200).send(buf);
});

app.get('/todos/:id', (req, res) => {
    const { id } = req.params;
    const todo = db.get(id);
    if (!todo) {
        res.status(400).send('id not found');
        return;
    }
    res.setHeader('Content-Type', 'text/html');
    res.status(200).send(`<h1>id: ${id}, title: ${todo.title}, content: ${todo.content}</h1>`);
});

app.post('/todos', (req, res) => {
    const { title, content } = req.body;
    db.set(newID(), {
        title,
        content,
    });
    res.setHeader('Content-Type', 'text/html');
    res.status(200).send('<h1>ok</h1>');
});

app.put('/todos/:id', (req, res) => {
    const { id } = req.params;
    const todo = db.get(id);
    if (!todo) {
        res.status(400).send('id not found');
        return;
    }

    const data = req.body;
    const newTodo = { ...todo };
    if (data?.title) {
        newTodo.title = data.title;
    }
    if (data?.content) {
        newTodo.content = data.content;
    }

    db.set(id, newTodo);
    res.setHeader('Content-Type', 'text/html');
    res.status(200).send('<h1>OK</h1>');
});

app.delete('/todos/:id', (req, res) => {
    const { id } = req.params;
    const todo = db.get(id);
    if (!todo) {
        res.status(400).send('id not found');
        return;
    }

    db.delete(id);
    res.status(200).send(`todo id ${id} deleted`);
});

app.listen(3000);