
안녕하세요, 오늘은 Spring Annotation 에 대해 정리해보았습니다.
💡 우리가 이미 과제와 강의를 통해 사용하고 있는 Spring의 다양한 기능들이 있다. 어떤 기능들이 있고 어떻게 사용하는지 알아보자.Spring의 다양한 기능
대표적인 기능들
- 로깅
Log Level 설정을 통하여 Error 메세지만 출력하도록 하도록 하기도 하고
로그 메세지를 일자별로 모아서 저장하여 AWS에 보관하기도 한다.
@Slf4j → Slf4j는 인터페이스이고 그 구현체로 Logback같은 라이브러리를 선택한다.
Spring Boot가 기본으로 제공하는 Logback을 대부분 사용한다.
- @Controller Annotation을 사용하여 Spring Bean Component 등록
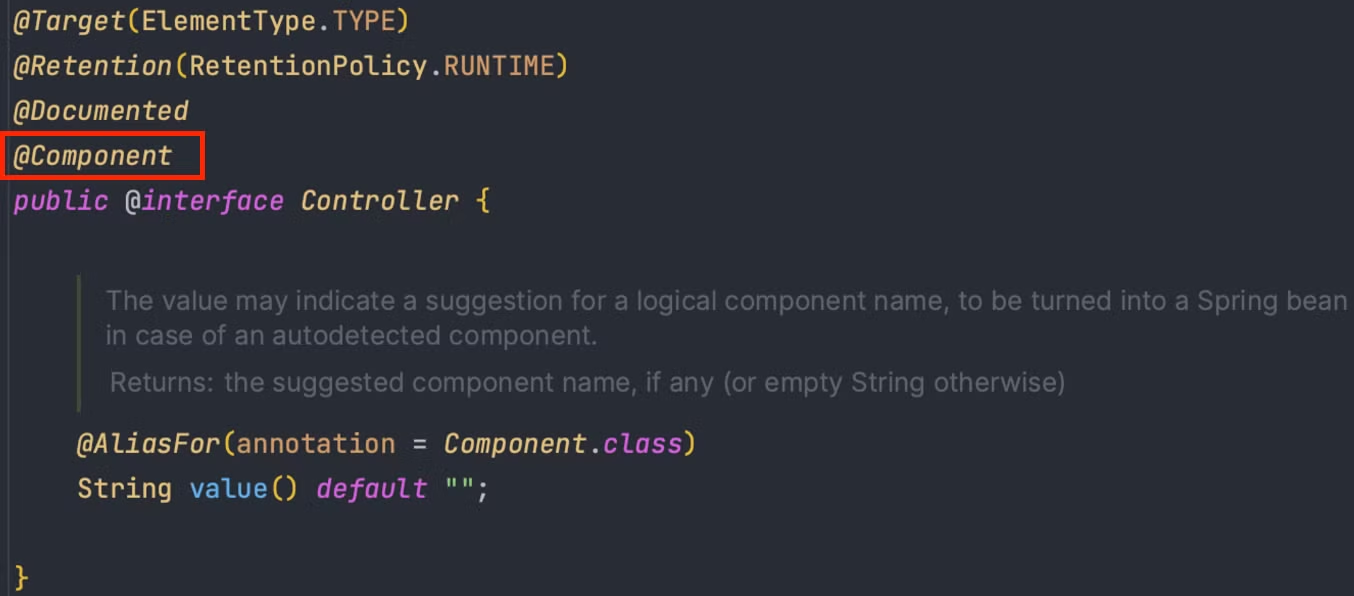
- @Controller 내부의 @Component를 통해 Spring Bean에 등록한다.
- Model을 Controller의 Parameter로 받을 수 있다
- ViewName을 return 하여도 View가 rendering 된다(지난 수업 내용)
→ viewResolver 가 해주는 역할 - @RequestParam Annotation을 사용하여 HTTP 요청 파라미터를 받는다
→ Servlet의 request.getParameter(”username”)과 거의 같다 - @RequestMapping → 현재는 @Post, Get, Put, Patch ,Delete Mapping 직관적으로 변함
→ 아래에서 설명
💡 우리가 사용하고 있는 @Controller와 @RestController는 분명한 차이점이 있다.@Controller VS @RestController
-
@Controller는 View가 있는 경우에 사용한다.
→ return 값이 String이면 viewResolver에 의해 View Name으로 인식된다. -
@RestController는 응답할 Data가 있는 경우에 사용한다.
→ 현재는 대부분 @RestController를 사용하여 API가 만들어진다.
→ return 값으로 View를 찾는것이 아니라 HTTP Message Body에 Data를 입력한다.
→ View가 아닌 HTTP Message Body에 Data가 들어가는 이유는 @Responsebody와 관련이 있다.
요청 매핑
💡 Client로부터 요청이 왔을 때 어떤 Controller가 호출될지 Mapping하는것 단순히 URL로 Mapping 하는것이 아니라 여러가지 요소를 조합하여 Mapping한다
- Spring에서의 요청 매핑은 어노테이션 기반으로 동작하고 있다.
- 각각의 어노테이션에 대해 알아보자.
@RestController
💡 @Controller에 @ResponseBody가 결합된 어노테이션 즉, @RestController는 @Controller와 달리 각 메서드마다 @ResponseBody를 추가하지 않아도 된다- RestController 어노테이션 내부 구조
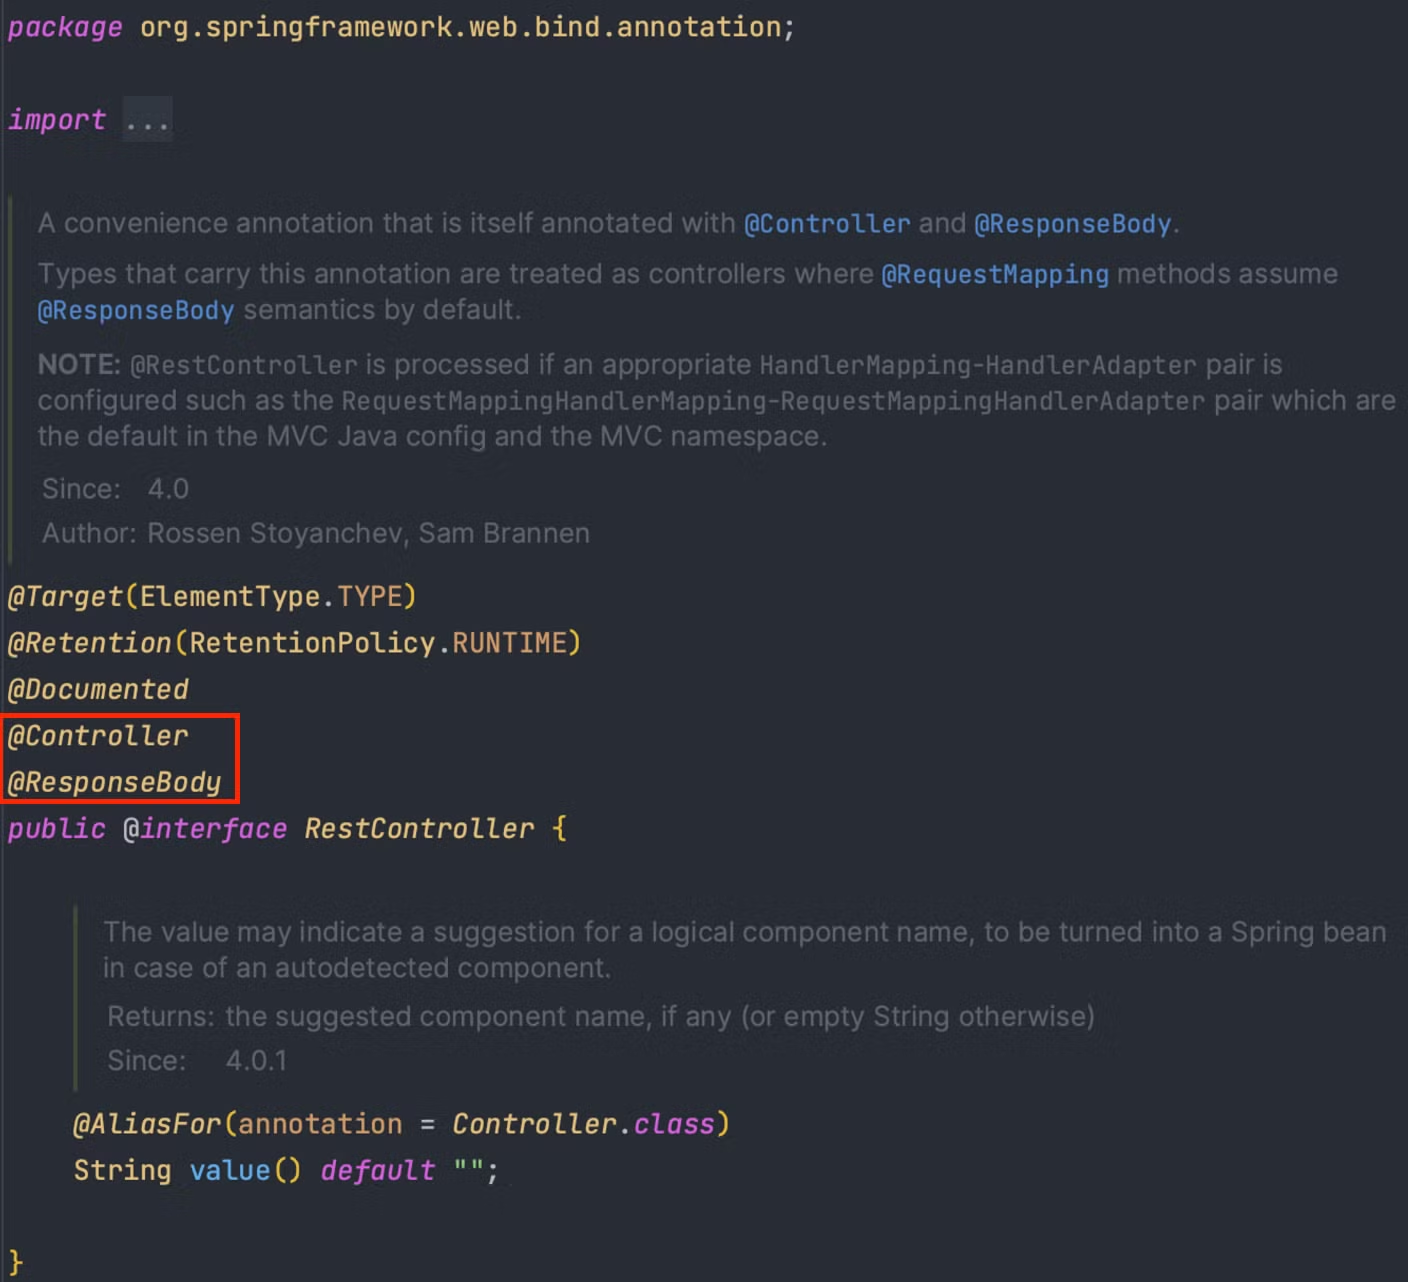
- 내부적으로 @Controller 를 사용하고 있다.
- 내부적으로 @Response Body를 사용하고 있다.
- 코드 예시
@RestController
public class MappingController {

	@RequestMapping("/example")
	public String example() {
		// logic
		return "hello-world";
	}

}- @RestController
- @Controller는 return 값이 String이면 View Name으로 인식한다.
→ View Resolver가 View를 찾고 View가 Rendering 하게된다. - @RestController 는 return 값으로 View를 찾는것이 아니라,
Response Body에 바로 Data를 입력한다.
- @Controller는 return 값이 String이면 View Name으로 인식한다.
@RequestMapping
💡 특정 URL로 Request를 보내면 Controller에서 어떤 방식으로 처리할지 정의한다. 이때 들어온 요청을 Controller 내부의 특정 Method와 Mapping 하기위해 사용하는것이 @RequestMapping이다.- @RequestMapping(”/example”)
- Spring 3.0 버전 이하 : URL path /example, /example/ 모두 허용(Mapping)한다.
- Spring 3.0 버전 이상 : URL path /example 만 허용(Mapping)한다.
- 위 URL로 요청이 오면 @RequestMapping 아래의 Method가 실행되도록 Mapping 한다
- 속성값들을 설정할 때 배열 형태로 다중 설정이 가능하다
ex)@RequestMapping**({**”/example”, “/example2”, “/example3”**})** - HTTP Method POST, GET, PUT, PATCH, DELETE, HEAD 모두 허용한다
→ method 속성으로 HTTP 메서드를 지정하면 지정된것만 허용한다
@RestController
public class MappingController {

	@RequestMapping(value = "/example-v1", method = RequestMethod.GET)
	public String exampleV1() {
		// logic
		return "hello-world";
	}

}-
만약, 속성으로 설정된 method로 요청이 오지 않는다면?
→ HTTP 응답 상태코드 405(Client측 에러), Method Not Allowed Exception -
@GetMapping
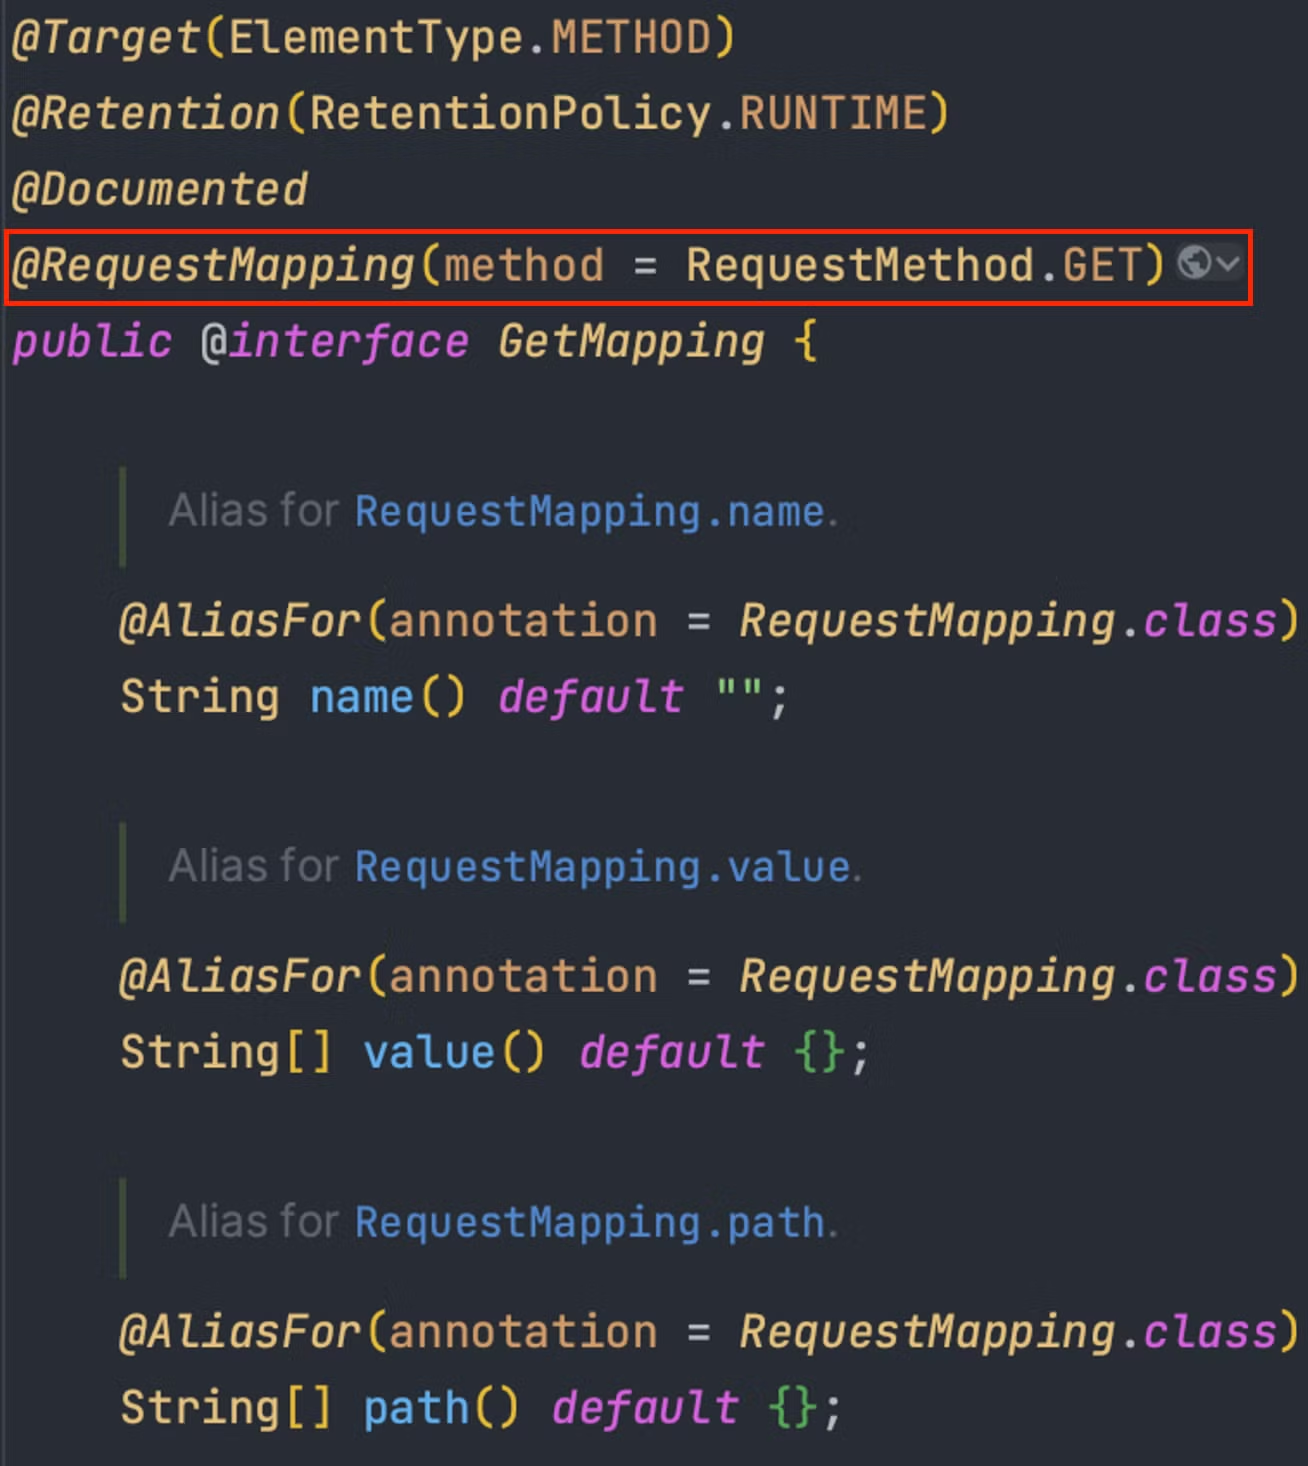
Target(ElementType.METHOD)Method Level에 해당 어노테이션을 적용한다 라는 의미- 내부적으로
@RequestMapping(method = RequestMethod.GET)을 사용하고 있다.
- 코드예시
@RestController
public class MappingController {
	// Post, GET, Put, Patch, Delete 모두 가능
	@GetMapping(value = "/example-v2")
	public String exampleV2() {
		// logic
		return "hello-world";
	}

}- 사실 Spring이 제공하는 Annotation들의 내부에 다 선언되어 있다
- 직관적이고 축약된 @GetMapping, @PostMapping 형식을 대부분 사용한다
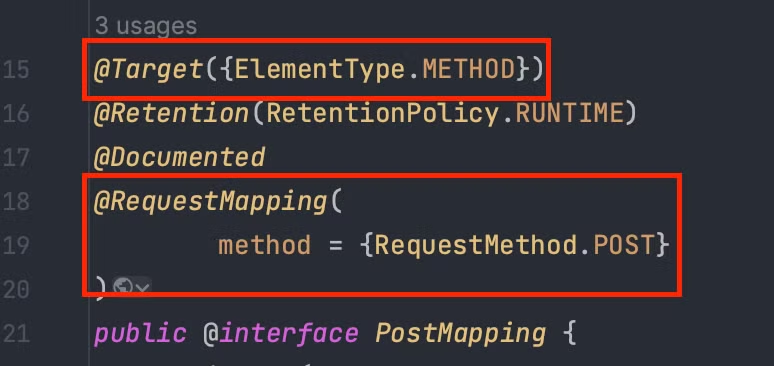
@PostMapping, @PutMapping, @DeleteMapping, @PatchMapping
모두 위의 @GetMapping과 같은 구조를 가지고 있다.
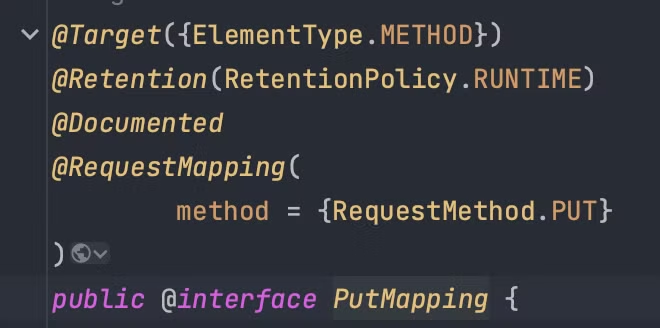
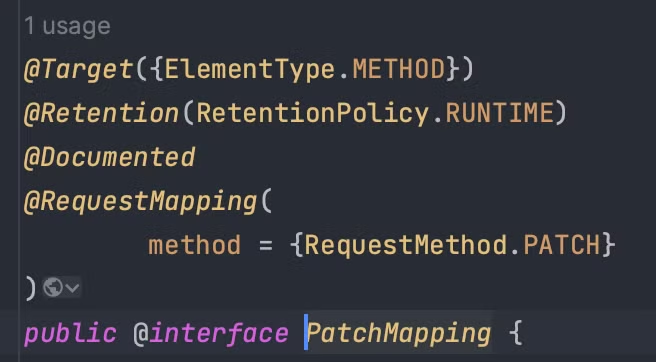
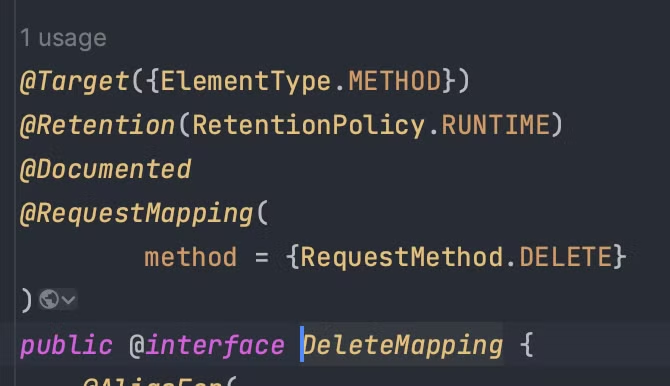
PathVariable
💡 HTTP 특성중 하나인 비연결성을 극복하여 데이터를 전달하기 위한 방법중 하나이다. URL로 전달된 값을 파라미터로 받아오는 역할을 한다.- 해당 어노테이션으로 경로 변수를 중괄호에 둘러싸인 값으로 사용할 수 있다.
- ex)
user/{id}
- ex)
- 기본적으로
@PathVariable로 설정된 경로 변수는 반드시 값을 가져야하며
값이 없으면 응답 상태코드 404 Not Found Error가 발생한다.
ex) users/{id}/posts/{postid} - 최근 Restful API를 설계하는것이 API의 기준이되며 해당 어노테이션의 사용 빈도가 높아졌다.
- Restful API를 설계하게되면 URL path 만으로 어떤 Resource을 사용하는지,
HTTP Method 만으로 어떤 기능이 동작되는지 쉽게 알아볼 수 있다.
- 예시
- postId글의 commentId 댓글 작성 : POST+ posts/{postId}/comments
- postId글의 commentId 댓글 전체 조회 : GET+ posts/{postId}/comments
- postId글의 commentId 댓글 단건 조회 : GET+ posts/{postId}/comments
- postId글의 commentId 댓글 수정 : PUT+ posts/{postId}/comments/{commentId}
- postId글의 commentId 댓글 삭제 : DELETE+ posts/{postId}/comments/{commentId}
@PathVariable 규칙
- 파라미터 변수명과 PathVariable 변수명이 같으면 속성값 생략 가능
@GetMapping("/path/{variable}")
public String pathVariable(@PathVariable("variable") String data) {
	// logic
	return "path-variable";
}

// 변수명과 같다면 생략가능
@GetMapping("/path/{variable}")
public String pathVariable(@PathVariable String variable) {
	// logic
	return "path-variable";
}
최근에는 Restful API 를 사용하기 때문에 해당 방법을 많이 사용한다.
ex) /users/{id}, /memo/{id}
- @PathVariable 다중 사용 → 실제로 많이 사용함
@GetMapping("/users/{userId}/posts/{postId}")
public String pathVariable(
														@PathVariable String userId,
														@PathVariable String postId
													) {
	// logic
	return "path-variable";
}
특정 파라미터 조건 매핑
💡 속성 설정을 통하여 특정 헤더, 특정 파라미터와 Mapping 할수있다.- Parameter 추가 매핑
@GetMapping("/path/{variable}", params = "level=test")
public String pathVariable(@PathVariable String variable) {
	// logic
	return "path-variable";
}- 속성값 작성 방법
params = "level" -> level이 아니여도됨 커스텀 하는것, 값은 없어도됨
params = "!level" -> level이 없어야한다.
params = "level=test" -> level=test 이어야한다.
params = "level!=test" -> test가 아니여야한다.
params = {"level=test", "level2=test2"} -> 배열로 설정 가능 - 실제 URL 입력에 GET http://localhost:8080/path/1`?level=test` 파라미터가 있어야 호출된다
- 파라미터가 없다면? 400 Bad Request
- 특정 Header 매핑
@GetMapping("/path/{variable}", headers = "level=test")
public String pathVariable(@PathVariable String variable) {
	// logic
	return "path-variable";
}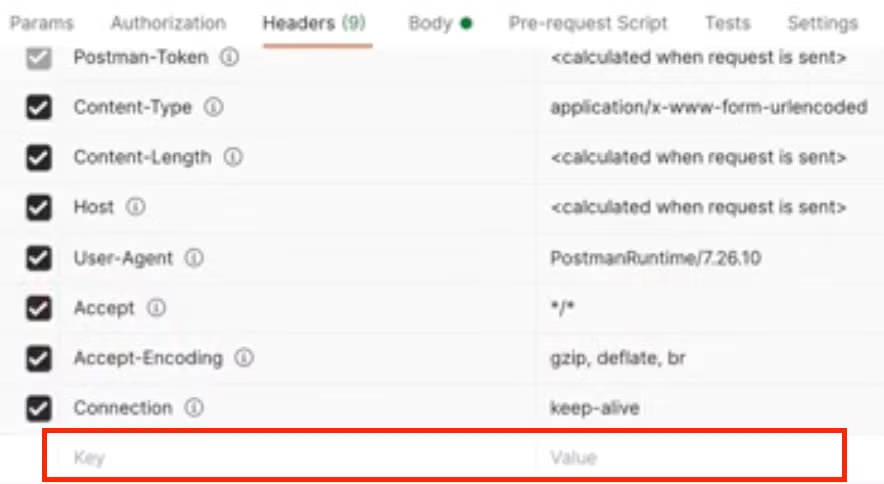
- HTTP Header를 사용하기 때문에 Postman으로 테스트 해야한다
ex) key=level, Value=test - 속성 사용 방법은 위 Parameter 추가 매핑의 params 속성값과 같다
- MediaType 매핑, consume(수용)
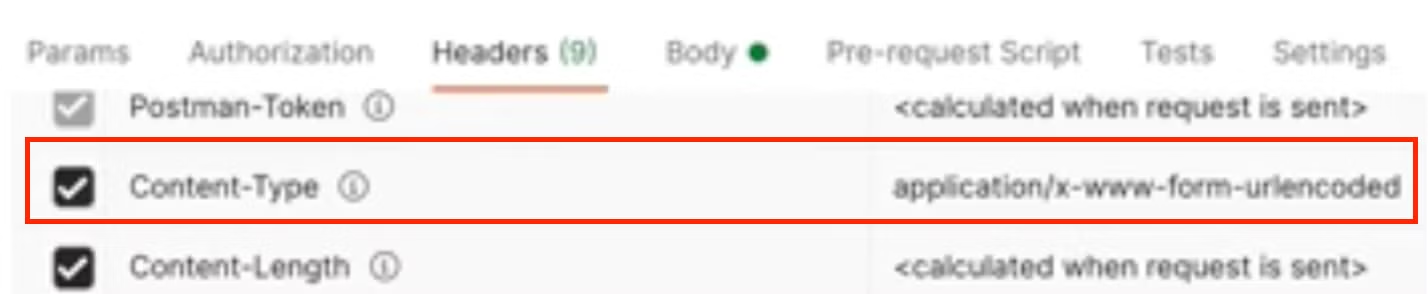
HTTP Header Content-Type(요청)과 Mapping 된다.
@PostMapping("/media-type", consumes = "application/json") // MediaType.APPLICATION_JSON_VALUE
public String mediaTypeConsumes() {
	// logic
	return "media-type";
}
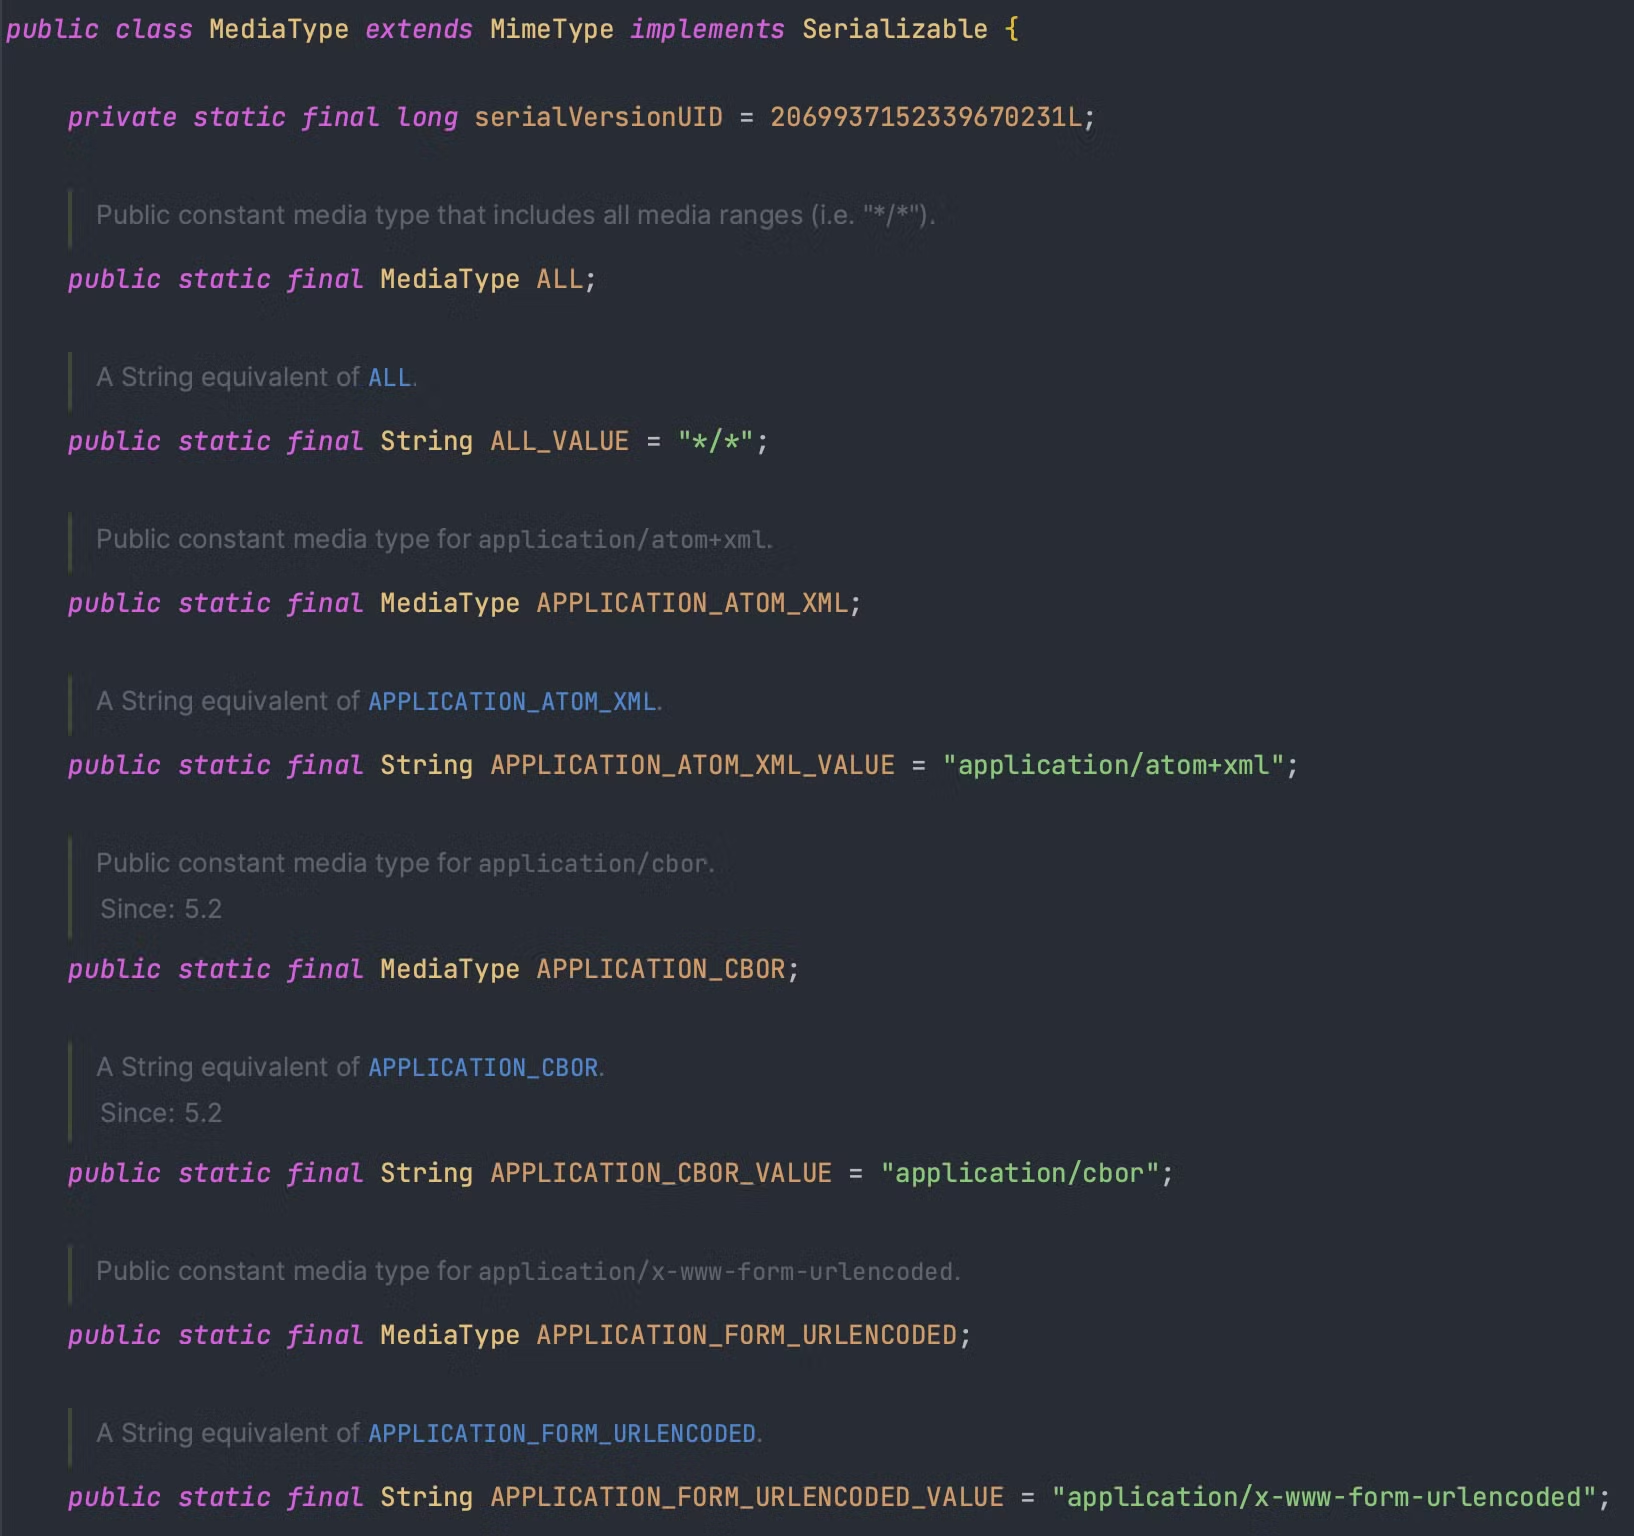
consumes 속성 value값으로는
이미 Spring에서 제공되는 Enum인 MediaType.APPLICATION_JSON_VALUE 형태로 사용한다.
Postman → Headers → Content-Type 의 Value 설정
- consumes=”application/json” → application/json 미디어 타입
- consumes=”!application/json” → application/json 제외 미디어 타입
- consumes=”application/*” → application/ 모든 미디어 타입
- consumes=”\/” → All 허용
맞지 않으면 HTTP 상태코드 415 Unsupported Media Type Exception 발생
3-2. MediaType 매핑 produces(제공)
위 consumes 속성 사용법과 같음
@PostMapping("/media-type", produces = "text/html")
public String mediaTypeProduces() {
	// logic
	return "media-type";
}
HTTP 요청 Accept Header Media Type이 있어야함
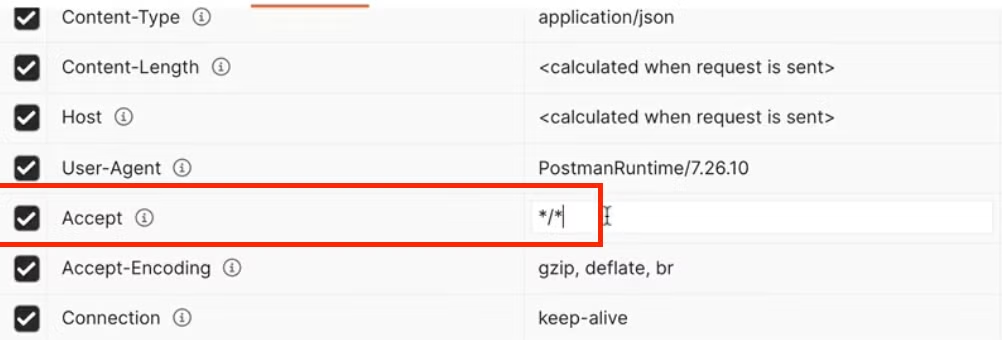
- 요청 헤더의 Accept 값에 따라서 produce 하는 값이 변함
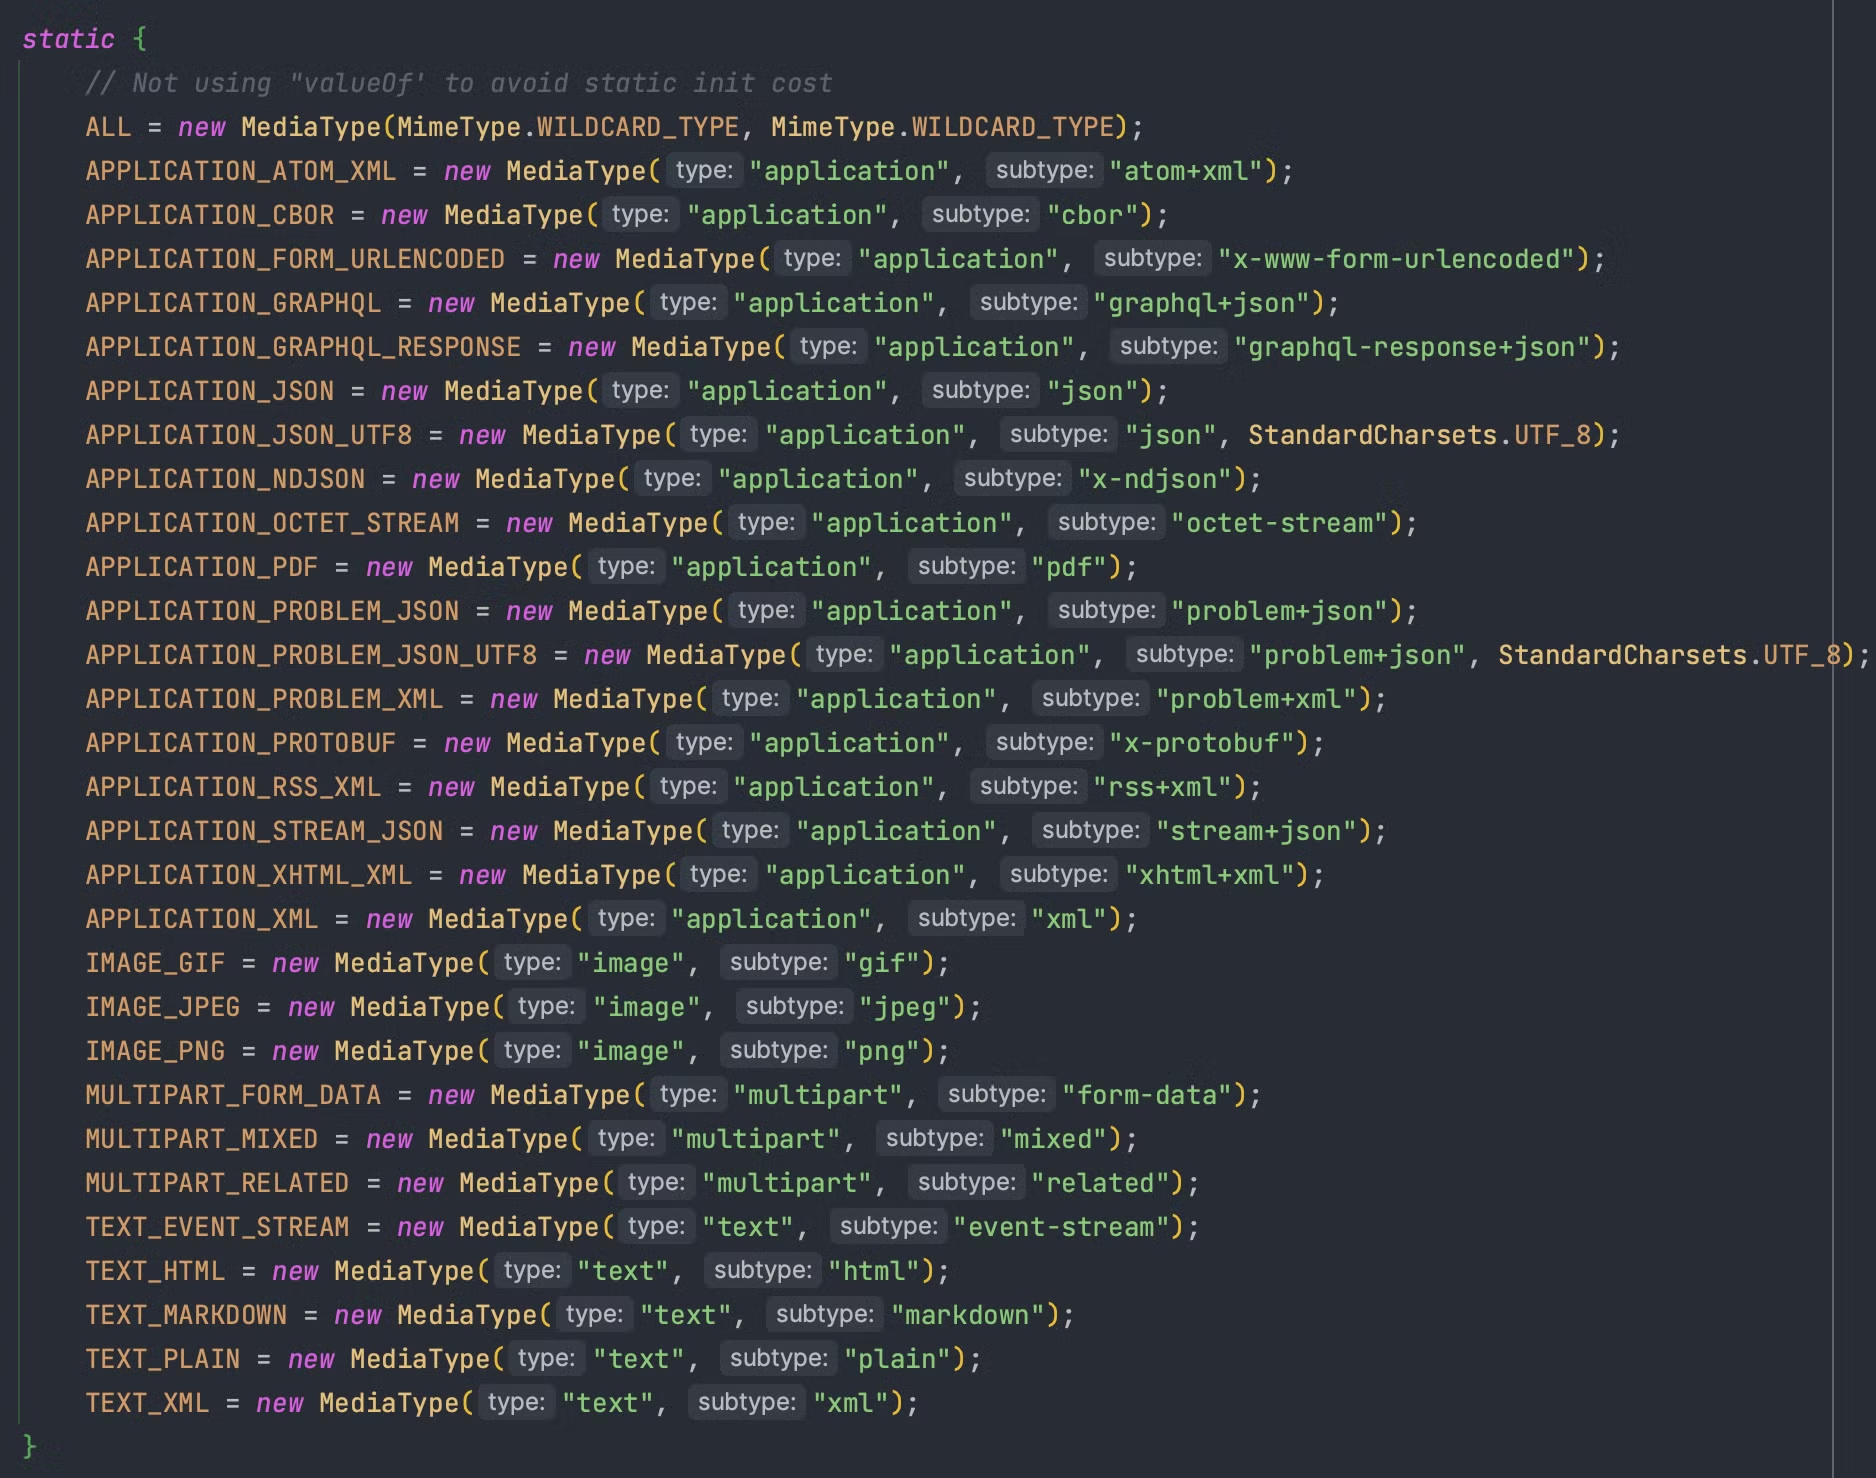
위에 나온 모든 MediaType은 Spring이 제공하는 Enum을 사용한다.
ex) (produces = “application.json”) → (produces = MediaType.APPLICATION_JSON_VALUE)
HTTP Request Parameter
💡
어노테이션 기반 Spring의 Controller는 다양한 파라미터를 지원한다
어떤 파라미터들을 지원하는지 알아보자
HTTP 헤더 조회
💡 Servlet을 사용할 때 HttpServletRequest 객체로 요청 Header에 쉽게 접근하는것을 보았다. Spring에서는 어떻게 Header 정보를 조회하는지 알아보자- Controller 예시
@Slf4j
@RestController
public class RequestHeaderController {

    @GetMapping("/request/headers")
    public String headers(
            HttpServletRequest request, // Servlet에서 사용한것과 같음
            HttpServletResponse response, // Servlet에서 사용한것과 같음
            @RequestHeader MultiValueMap<String, String> headerMap,
            @RequestHeader("host") String host,
            @CookieValue(value = "cookie", required = false) String cookie,
            HttpMethod httpMethod,
            Locale locale
    ) {
        log.info("request={}", request);
        log.info("response={}", response);
        log.info("headerMap={}", headerMap);
        log.info("host={}", host);
        log.info("cookie={}", cookie);
        log.info("httpMethod={}", httpMethod);
        log.info("Locale={}", locale);

        return "success";
    }
}
Postman API 호출
log 출력 결과
- request : Servlet에서 사용한것과 같음
- response : Servlet에서 사용한것과 같음
- headerMap :
hashMap={
	user-agent=[PostmanRuntime/7.35.0],
	accept=[*/*],
	postman-token=[5f324c1c-7902-4750-9e01-2c4d093e8ad6],
	host=[localhost:8080],
	accept-encoding=[gzip, deflate, br],
	connection=[keep-alive]
}- host : host 정보
- cookie : Header의 Cookie
- httpMethod : 호출에 사용한 HttpMethod
- locale : 위치정보를 나타내는 헤더 우선순위가 존재한다.
한국기준 1순위 : ko, 2순위 : eng
Query Parameter, HTML Form Data
💡 위 두가지 경우의 요청 파라미터는 Spring에서 어떻게 Mapping 하는가?
HttpServletRequest.getParameter(”key”)- @RequestParam 어노테이션
Client에서 Server로 Data를 전달하는 세가지 방법
💡 Servlet Request에서 `HttpServletRequest.getParameter(”key”);`를 사용하면 아래 1번, 2번의 경우 모두 해당값에 접근할 수 있었다. 아래 예시를 보면 데이터 형식이 같기때문에 구분없이 가능한것이다.1. GET - Query Param
- URL의 쿼리 파라미터를 사용하여 데이터 전달
http://localhost:8080/param?key1=value1&key2=value2예시 Controller
@Slf4j
@Controller
public class RequestParamController {

    @GetMapping("/request/params")
    public void params(
						            HttpServletRequest request,
												HttpServletResponse response
											 ) throws IOException {
        String key1Value = request.getParameter("key1");
				String key2Value = request.getParameter("key2");
				log.info("key1Value={}, key2Value={}", key1Value, key2Value);
        response.getWriter().write("success");
    }
}
Postman 요청
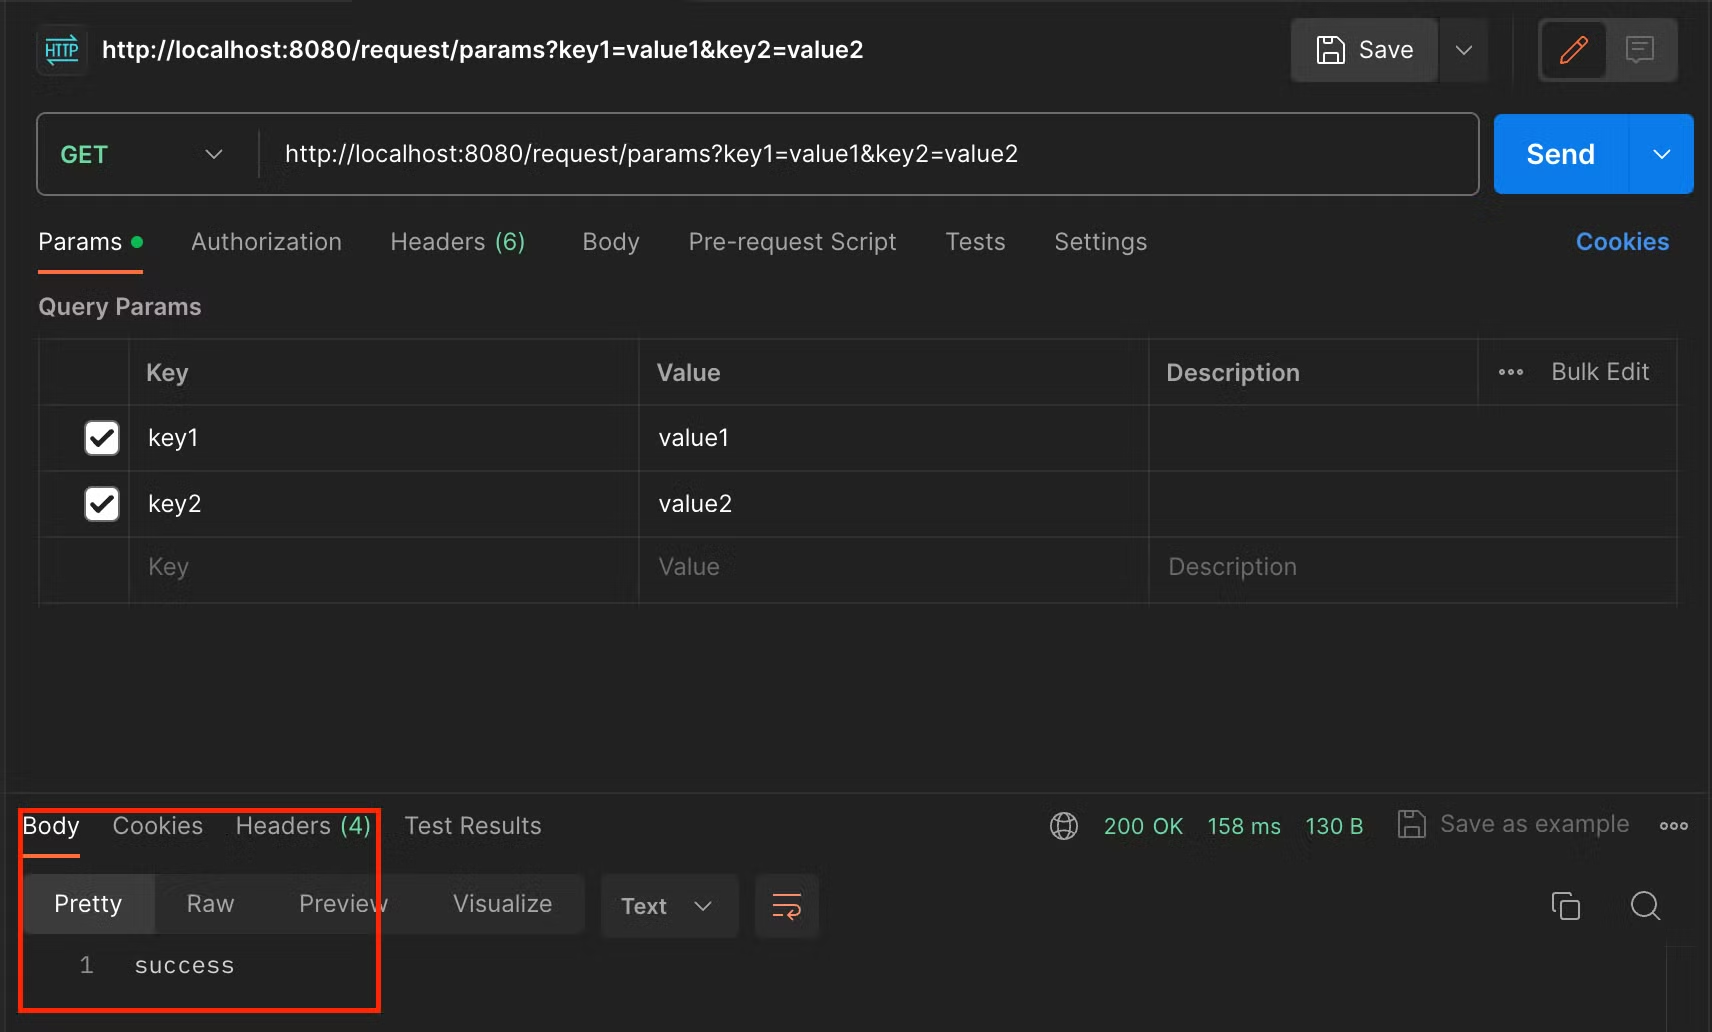
log 출력결과

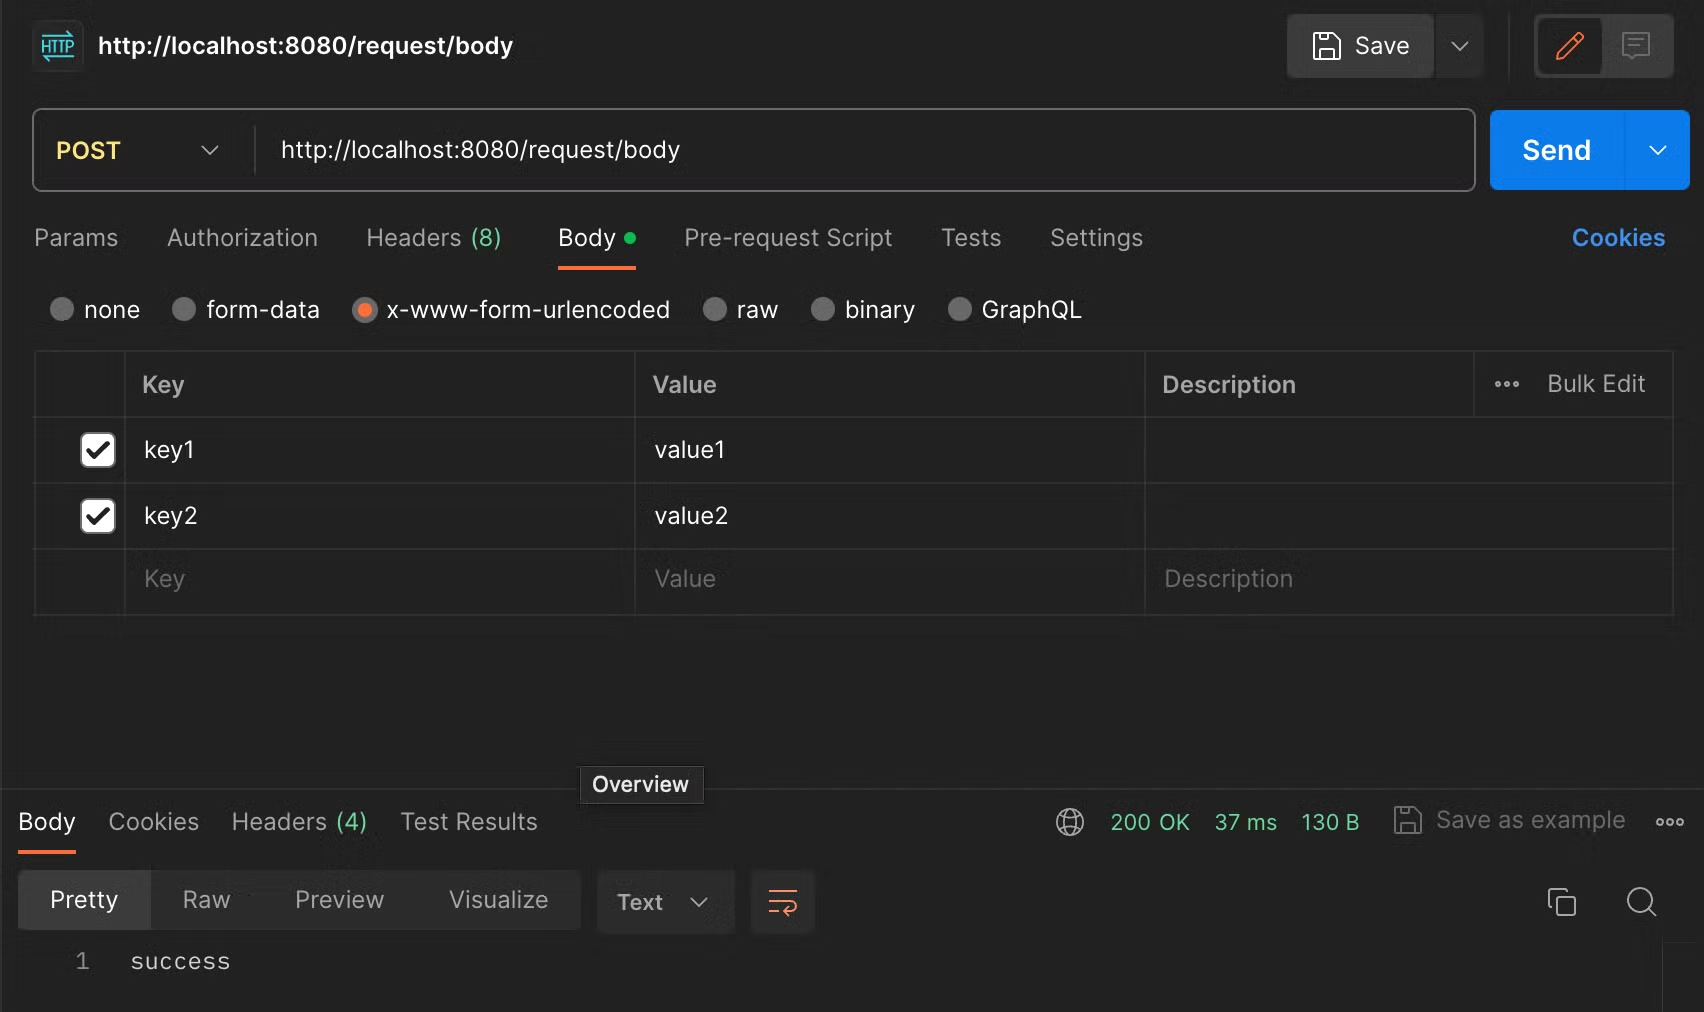
. POST - HTML Form(x-www-form-urlencoded)
- Request Body에 쿼리 파라미터 형태로 전달
POST /param
content-type: application/x-www-form-urlencoded

key1=value1&key2=value2
예시 Controller
@Slf4j
@Controller
public class RequestBodyController {

    @PostMapping("/request/body")
    public void requestBody(
						            HttpServletRequest request,
												HttpServletResponse response
											 ) throws IOException {
        String key1Value = request.getParameter("key1");
				String key2Value = request.getParameter("key2");
				log.info("key1Value={}, key2Value={}", key1Value, key2Value);
        response.getWriter().write("success");
    }
}
Postman

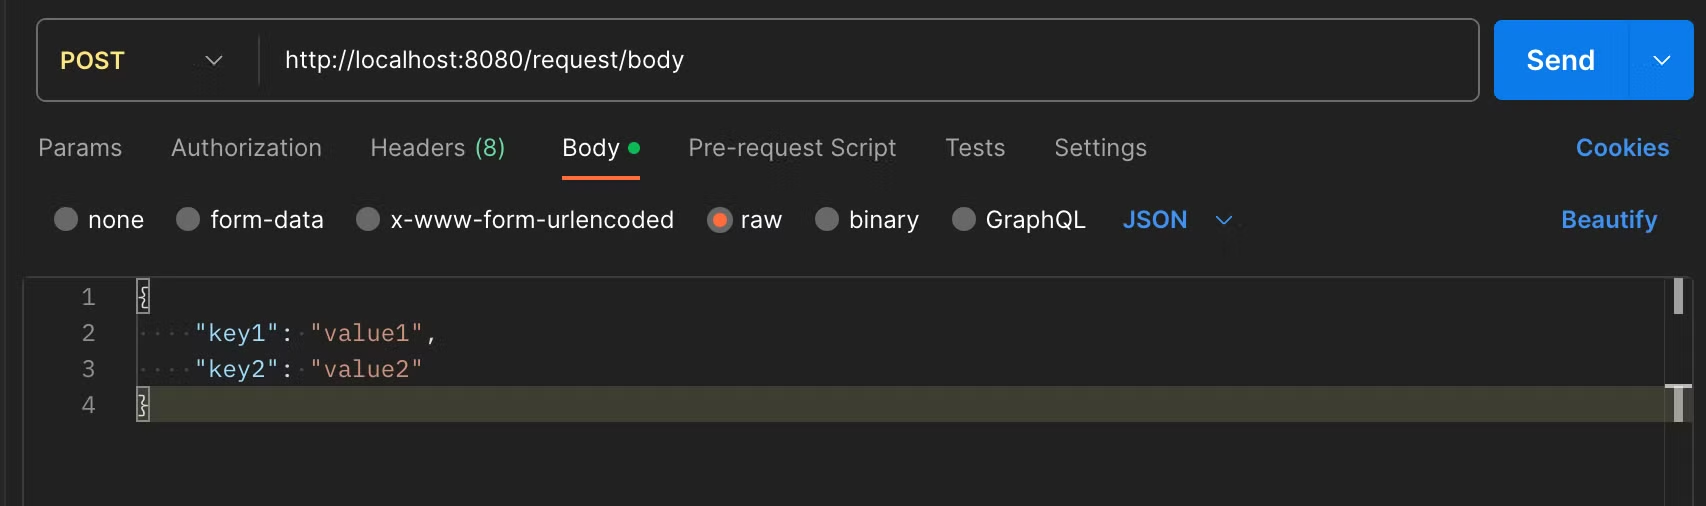
HTTP Request Body - 데이터(JSON, TEXT, XML 등)를 직접 담아서 사용
- 주로 RestController에서 사용한다, 대부분 JSON으로 데이터 전달
ex) POST, PUT, PATCH Method에서 사용 GET, DELETE는 거의 Body가 없음 → 권장X
- 코드는 평소에 작성하니 예시 생략
- Postman
@RequestParam
💡 URL에서 파라미터 값과 이름을 함께 전달하는 방식으로 주로 HTTP 통신 Method 중 GET 방식의 통신을 할 때 많이 사용한다. Spring이 제공하는 해당 어노테이션을 사용하면 요청 파라미터값에 아주 쉽고 간편하게 접근(바인딩)할 수 있다.- 예시코드
@Controller
public class RequestParamController {

	@ResponseBody
	@GetMapping("/request/param")
	public String requestParam (
					@RequestParam("name") String userName,
					@RequestParam("age") int userAge
	) {
		// logic
		return "success";
	}

}
-
@Controller 이지만 Method에 @ResponseBody를 붙이게되면
View를 찾는것이 아니라 ResponseBody 데이터에 “success”가 들어간다.
→ 위 코드가 @RestController의 원본코드라 생각하시면 됩니다. -
@RequestParam : 파라미터 이름으로 바인딩
-
@RequestParam(”속성값”): 속성값이 파라미터 이름으로 매핑된다 -
“속성값”과 변수명이 같으면 생략이 가능하다.
ex)@RequestParam(name) String name
// GET http://localhost:8080/request/param?name=wonuk&age=100
@Controller
public class RequestParamController {

	@ResponseBody
	@GetMapping("/request/param")
	public String requestParam (
					@RequestParam String name,
					@RequestParam int age
	) {
		// logic
		return "success";
	}

}
충격적이게도 사실 모두 생략해도된다.
참고 : 생략하면 (required=false) 속성이 default로 설정된다
// GET http://localhost:8080/request/param?name=wonuk&age=100
@Controller
public class RequestParamController {

	@ResponseBody
	@GetMapping("/request/param")
	public String requestParam (
					String name,
					int age
	) {
		// logic
		return "success";
	}

}- 단, 요청 파라미터와 이름이 완전히 같아야함
- 단순 타입(int, String, Integer 등)이어야 한다
하지만 위의 방식은 권장하지 않는다, 명시적으로 표시되어있지 않으면
팀의 협의가 있지 않다면, 다른 개발자들에게 혼동을주기 충분하다.
@RequestParam이 있어야 요청 파라미터에서 데이터를 읽는구나..! 하게된다
-
파라미터 필수 여부 설정 required 속성
💡 API 스펙을 규정할 때 사용한다. 필수값 설정
@Controller
public class RequestParamController {

	@ResponseBody
	@GetMapping("/request/param")
	public String requestParam (
					@RequestParam(required = true) String name, // 필수
					@RequestParam(required = false) int age	// 필수가 아님
			 // @RequestParam(required = false) Integer age
	) {
		// logic
		return "success";
	}

}-
@RequestParam을 사용하면 기본 Default값은 True이다.
- True 설정된 파라미터에 값이 존재하지 않으면 400 BadRequest Error
- ex)
http://localhost:8080/request/param?age=100 - ex)
http://localhost:8080/request/param
-
required = false설정이 되어있으면 해당 파라미터는 없어도 된다.-
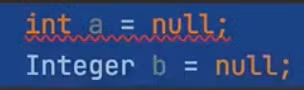
하지만! 여기서 만약
http://localhost:8080/request/param?name=wonuk로 요청한다면? -
500 Error가 발생한다
-
int Type에는 null을 넣을 수 없기 때문에! 0이라도 들어가야한다
-
따라서 보통 null을 허용하는 Integer로 사용하거나 default 옵션을 사용한다.
-
-
파라미터 Key값만 있고 Value가 없는 경우
http://localhost:8080/request/param?name=- null과 빈 문자열 “”은 다르다!
- 위 형태는 빈 문자열 “” 로 인식한다, True지만 통과가 되어버린다. 주의해야함
- default 속성 적용 (기본값)
@Controller
public class RequestParamController {

	@ResponseBody
	@GetMapping("/request/param")
	public String requestParam (
					@RequestParam(required = true, defaultValue = "wonuk") String name,
			    @RequestParam(required = false, defaultValue = "1") int age
	) {
		// logic
		return "success";
	}

}- name Parameter 의 값이 없으면 기본적으로 “wonuk”으로 설정한다
- ex)
http://localhost:8080/request/param?age=100 - ex)
http://localhost:8080/request/param
- ex)
- age Parameter의 값이 없으면 기본적으로 0 으로 설정한다
- ex)
http://localhost:8080/request/param?name=wonuk - ex)
http://localhost:8080/request/param
- ex)
- defaultValue 속성을 설정하게 되면 “” 빈문자열의 경우에도 기본값이 설정된다. 주의
- Map으로 조회
@Controller
public class RequestParamController {

	@ResponseBody
	@GetMapping("/request/param")
	public String requestParam (
					@RequestParam Map<String, Object> paramMap
	) {
		// logic
		String name = paramMap.get("name");
		Integer age = paramMap.get("age");

		return "success";
	}

}- Map 형태로 조회가 가능하다
- ex)
key=value - ex)
http://localhost:8080/request/param?name=wonuk&age=100
- ex)
- MultiValueMap 형태로 조회가 가능하다
- ex)
key=[value1, value2] - ex)
http://localhost:8080/request/param?name=wonuk1&name=wonuk2&name=wonuk3
- ex)
파라미터 Map의 Value가 1개인 경우에는 Map,
여러개인 경우 MultiValueMap을 사용한다
하지만 대부분 한개인 경우로 구성되어 있다.
오늘의 코드카타
class Solution {

    public int[][] solution(int n) {
        int[][] answer = new int[n][n];
        int value = 1;
        int row = 0;
        int col = 0;
        int direction = 0;

        while (value <= n * n) {
            answer[row][col] = value++;

            if (direction == 0) {
                if (col == n - 1 || answer[row][col + 1] != 0) {
                    direction = 1;
                    row++;
                } else {
                    col++;
                }
            } else if (direction == 1) {
                if (row == n - 1 || answer[row + 1][col] != 0) {
                    direction = 2;
                    col--;
                } else {
                    row++;
                }
            } else if (direction == 2) {
                if (col == 0 || answer[row][col - 1] != 0) {
                    direction = 3;
                    row--;
                } else {
                    col--;
                }
            } else if (direction == 3) {
                if (row == 0 || answer[row - 1][col] != 0) {
                    direction = 0;
                    col++;
                } else {
                    row--;
                }
            }
        }

        return answer;
    }
}
import java.util.Arrays;
public class Main {
public static void main(String[] args) {
Solution solution = new Solution();
System.out.println(Arrays.deepToString(solution.solution(4)));
System.out.println(Arrays.deepToString(solution.solution(5)));
}
}정수를 나선형으로 배치하기