0. workflow
필자는 아래와 같이 카톡 형식으로 ChatGPT와 대화하는 앱을 만들고자 한다.
0-1. 기본 설정
- 외부 모듈 implementation
- 권한 부여
- round button 커스텀
- icon 추가
0-2. Adapter 설정
- RecyclerView에 띄울 item 생성
- RecyclerView adapter 구현
0-3. GPT와 응답 주고받기
- gpt-4o
- 채팅을 주고받을 수 있는 xml 페이지 생성
- Open AI API key 발급받기
- GPT와 통신하여 RecyclerView에 응답 띄우기
1. 기본 설정
1-1. 외부 모듈 implementation
- build.gradle (app)
dependencies {
    ...

    implementation 'com.squareup.okhttp3:okhttp:4.10.0'
}
build.gradle 수정 후 오른쪽 상단 위에 Sync now 클릭
1-2. 권한 부여
chatGPT와 대화하기 위해서 통신을 해야 하므로, 인터넷 권한을 부여해줘야 한다.
- AndroidManifest.xml
<manifest xmlns:android="http://schemas.android.com/apk/res/android"
xmlns:tools="http://schemas.android.com/tools">
<uses-permission android:name="android.permission.INTERNET" />
...
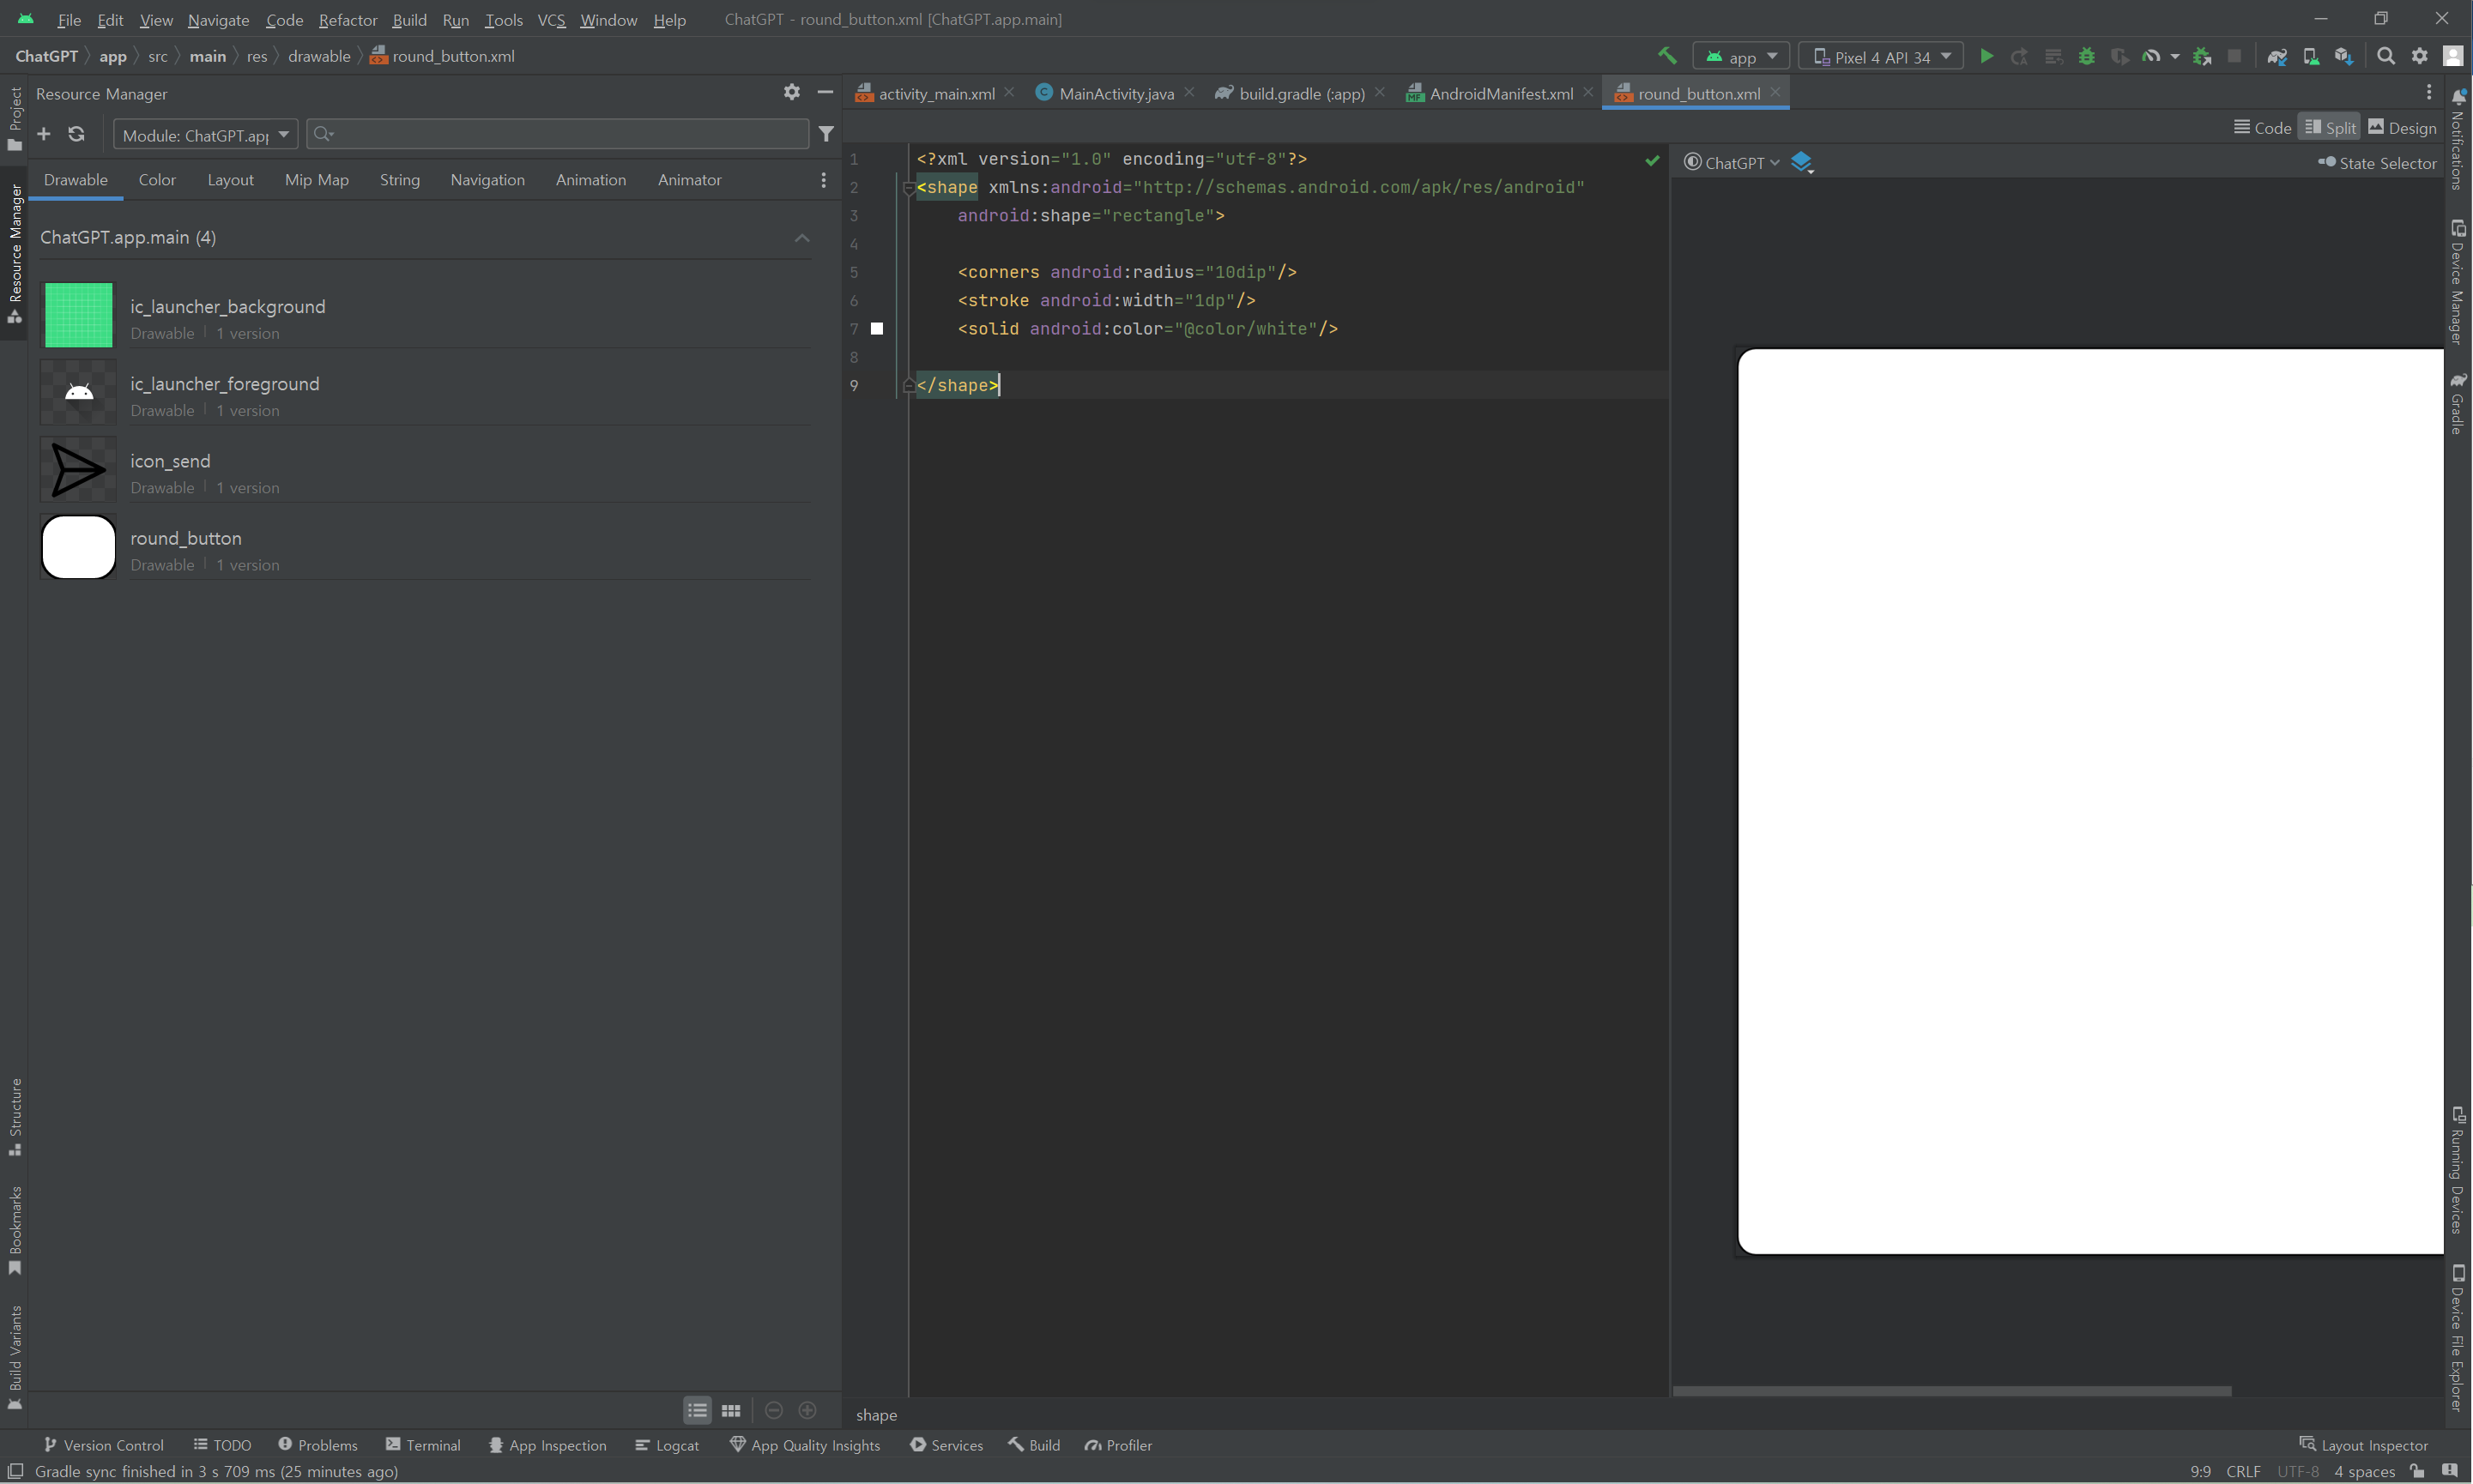
</manifest>1-3. round 커스텀 (선택)
editText를 커스텀하기 위해 사용하였다.
- res/drawable/round_botton.xml
<?xml version="1.0" encoding="utf-8"?>
<shape xmlns:android="http://schemas.android.com/apk/res/android"
    android:shape="rectangle">

    <corners android:radius="10dip"/>
    <stroke android:width="1dp"/>
    <solid android:color="@color/white"/>

</shape>
1-4. icon 추가 (선택)
응답을 보내기 위한 icon을 추가하였다.
왼쪽 탭의 Resource Manager > + 버튼 > Import Drawables 누른 후, 다운받은 이미지 추가 > Next 버튼 > Import 버튼 차례로 클릭
Resource Manager에 이미지(icon_send) 추가되었는지 확인
2. adapter 설정
2-1. RecyclerView에 띄울 item 생성
GPT용 채팅 말풍선과 유저용 채팅 말풍선을 동시에 생성하고, GPT와 유저를 판단하여 visibility 속성을 통해 가린다.
- chat_item.xml
<?xml version="1.0" encoding="utf-8"?>
<RelativeLayout xmlns:android="http://schemas.android.com/apk/res/android"
    android:layout_width="match_parent"
    android:layout_height="wrap_content"
    android:padding="8dp">

    <LinearLayout
        android:layout_width="wrap_content"
        android:layout_height="wrap_content"
        android:id="@+id/left_chat_view"
        android:background="@drawable/round_button"
        android:backgroundTint="#FFBB86FC"
        android:layout_marginEnd="80dp"
        android:padding="8dp">

        <TextView
            android:layout_width="wrap_content"
            android:layout_height="wrap_content"
            android:id="@+id/left_chat_tv"
            android:textColor="@color/white"
            android:textSize="18sp"
            android:text="Hello World"/>

    </LinearLayout>

    <LinearLayout
        android:layout_width="wrap_content"
        android:layout_height="wrap_content"
        android:id="@+id/right_chat_view"
        android:background="@drawable/round_button"
        android:backgroundTint="#069E8E"
        android:layout_marginStart="80dp"
        android:layout_alignParentEnd="true"
        android:padding="8dp">

        <TextView
            android:layout_width="wrap_content"
            android:layout_height="wrap_content"
            android:id="@+id/right_chat_tv"
            android:textColor="@color/white"
            android:textSize="18sp"
            android:text="Hello World"/>

    </LinearLayout>

</RelativeLayout>
2-2. RecyclerView adapter 구현
Message Adpater Class를 생성한다. Message Adapter Class에는 ViewHolder Class와 Message Class를 추가로 생성해줘야 한다.
Message Class에는 아래의 기능들을 구현하다.
- 유저/GPT 판단할 수 있는 변수(
SENT_BY_ME,SENT_BY_BOT) - 주고받을 메시지와 누가 보냈는지 묶어서 저장할 수 있는 생성자(
Message)
코드는 아래와 같다.
public static class Message {
    public String SENT_BY_ME = "me";
    public String SENT_BY_BOT = "bot";

    private String message;
    private String sentBy;

    public Message(String message, String sentBy) {
        this.message = message;
        this.sentBy = sentBy;
    }
}
ViewHolder Class는 RecyclerView에서 했던 것과 별반 다르지 않다. 다만, message의 보낸 주체에 따라서 gpt 말풍선 및 유저 말풍선을 적절히 unvisible, visible 해주는 과정이 필요하다.
전체 코드는 아래와 같다.
- MessageAdapter.java
package com.example.chatgpt;

import android.view.LayoutInflater;
import android.view.View;
import android.view.ViewGroup;
import android.widget.LinearLayout;
import android.widget.TextView;

import androidx.recyclerview.widget.RecyclerView;

import java.util.ArrayList;

public class MessageAdapter extends RecyclerView.Adapter<MessageAdapter.ViewHolder>{
    public ArrayList<Message> items;

    public MessageAdapter(ArrayList<Message> messageList) {
        this.items = messageList;
    }

    public static class ViewHolder extends RecyclerView.ViewHolder {
        public TextView chatgpt, user;
        public LinearLayout chatgpt_layout, user_layout;

        public ViewHolder(View view) {
            super(view);
            chatgpt = view.findViewById(R.id.left_chat_tv);
            user = view.findViewById(R.id.right_chat_tv);
            chatgpt_layout = view.findViewById(R.id.left_chat_view);
            user_layout = view.findViewById(R.id.right_chat_view);
        }

        public void setItem(Message message) {
            if (message.sentBy.equals(message.SENT_BY_ME)) {
                chatgpt_layout.setVisibility(View.INVISIBLE);
                chatgpt.setVisibility(View.INVISIBLE);
                user_layout.setVisibility(View.VISIBLE);
                user.setVisibility(View.VISIBLE);

                chatgpt.setText("");
                user.setText(message.message);

            } else if (message.sentBy.equals(message.SENT_BY_BOT)) {
                user_layout.setVisibility(View.INVISIBLE);
                user.setVisibility(View.INVISIBLE);
                chatgpt_layout.setVisibility(View.VISIBLE);
                chatgpt.setVisibility(View.VISIBLE);

                user.setText("");
                chatgpt.setText(message.message);
            }
        }
    }

    @Override
    public ViewHolder onCreateViewHolder(ViewGroup viewGroup, int viewType) {
        View view = LayoutInflater.from(viewGroup.getContext())
                .inflate(R.layout.chat_item, viewGroup, false);

        return new ViewHolder(view);
    }

    @Override
    public void onBindViewHolder(ViewHolder viewHolder, int position) {
        Message message = items.get(position);
        viewHolder.setItem(message);
    }


    @Override
    public int getItemCount() {
        return items.size();
    }

    public static class Message {
        public String SENT_BY_ME = "me";
        public String SENT_BY_BOT = "bot";

        private String message;
        private String sentBy;

        public Message(String message, String sentBy) {
            this.message = message;
            this.sentBy = sentBy;
        }
    }
}
3. GPT와 응답 주고받기
3-0. gpt-4o
GPT API 공식문서에 따르면, gpt-4o의 request format은 아래와 같다.
curl https://api.openai.com/v1/chat/completions \
  -H "Content-Type: application/json" \
  -H "Authorization: Bearer $OPENAI_API_KEY" \
  -d '{
    "model": "gpt-4o",
    "messages": [
      {
        "role": "developer",
        "content": "You are a helpful assistant."
      },
      {
        "role": "user",
        "content": "Hello!"
      }
    ]
  }'
위의 형식을 살펴보면, Content-Type과 Authorization을 지정해주고, model및 message로 구성된 json을 가지고 gpt와 통신한다는 것을 알 수 있다. 이 때, Authorization의 $OPENAI_API_KEY가 사용자의 API Key에 해당한다.
또한, 위의 문서에서 gpt-4o의 response format은 아래와 같다.
{
  "id": "chatcmpl-123",
  "object": "chat.completion",
  "created": 1677652288,
  "model": "gpt-4o-mini",
  "system_fingerprint": "fp_44709d6fcb",
  "choices": [{
    "index": 0,
    "message": {
      "role": "assistant",
      "content": "\n\nHello there, how may I assist you today?",
    },
    "logprobs": null,
    "finish_reason": "stop"
  }],
  "usage": {
    "prompt_tokens": 9,
    "completion_tokens": 12,
    "total_tokens": 21,
    "completion_tokens_details": {
      "reasoning_tokens": 0,
      "accepted_prediction_tokens": 0,
      "rejected_prediction_tokens": 0
    }
  }
}
따라서 우리는 chatGPT에게 request format에 맞추어 요청을 보내고, 응답을 받아와 response format을 기준으로 응답받은 메시지 "\n\nHello there, how may I assist you today?" 등을 가져오면 된다.
3-1. 채팅을 주고받을 수 있는 xml 페이지 생성
RecyclerView와 EditText, ImageView를 적절히 배치하여 채팅을 주고받을 수 있는 xml 파일을 생성한다.
EditText의 속성으로 inputType="textMultiLine"과 maxLines="5"를 추가하여 실제 카톡처럼 여러줄을 입력하면 EditText의 높이가 높아지도록 하였다.
- activity_main.xml
<?xml version="1.0" encoding="utf-8"?>
<androidx.constraintlayout.widget.ConstraintLayout xmlns:android="http://schemas.android.com/apk/res/android"
    xmlns:app="http://schemas.android.com/apk/res-auto"
    xmlns:tools="http://schemas.android.com/tools"
    android:layout_width="match_parent"
    android:layout_height="match_parent"
    tools:context=".MainActivity">

    <EditText
        android:id="@+id/editText"
        android:layout_width="0dp"
        android:layout_height="wrap_content"
        android:layout_marginLeft="16dp"
        android:layout_marginRight="16dp"
        android:layout_marginBottom="16dp"
        android:background="@drawable/round_button"
        android:ems="10"
        android:hint="write here"
        android:inputType="textMultiLine"
        android:maxLines="5"
        android:padding="10dp"
        android:privateImeOptions="defaultInputmode=korean"
        app:layout_constraintBottom_toBottomOf="parent"
        app:layout_constraintEnd_toStartOf="@+id/imageView"
        app:layout_constraintStart_toStartOf="parent" />

    <ImageView
        android:id="@+id/imageView"
        android:layout_width="40dp"
        android:layout_height="40dp"
        android:layout_marginEnd="16dp"
        android:layout_marginBottom="16dp"
        app:layout_constraintBottom_toBottomOf="parent"
        app:layout_constraintEnd_toEndOf="parent"
        app:srcCompat="@drawable/icon_send" />

    <androidx.recyclerview.widget.RecyclerView
        android:id="@+id/recyclerView"
        android:layout_width="match_parent"
        android:layout_height="0dp"
        android:layout_marginBottom="16dp"
        app:layout_constraintBottom_toTopOf="@+id/editText"
        app:layout_constraintEnd_toEndOf="parent"
        app:layout_constraintStart_toStartOf="parent"
        app:layout_constraintTop_toTopOf="parent" />
</androidx.constraintlayout.widget.ConstraintLayout>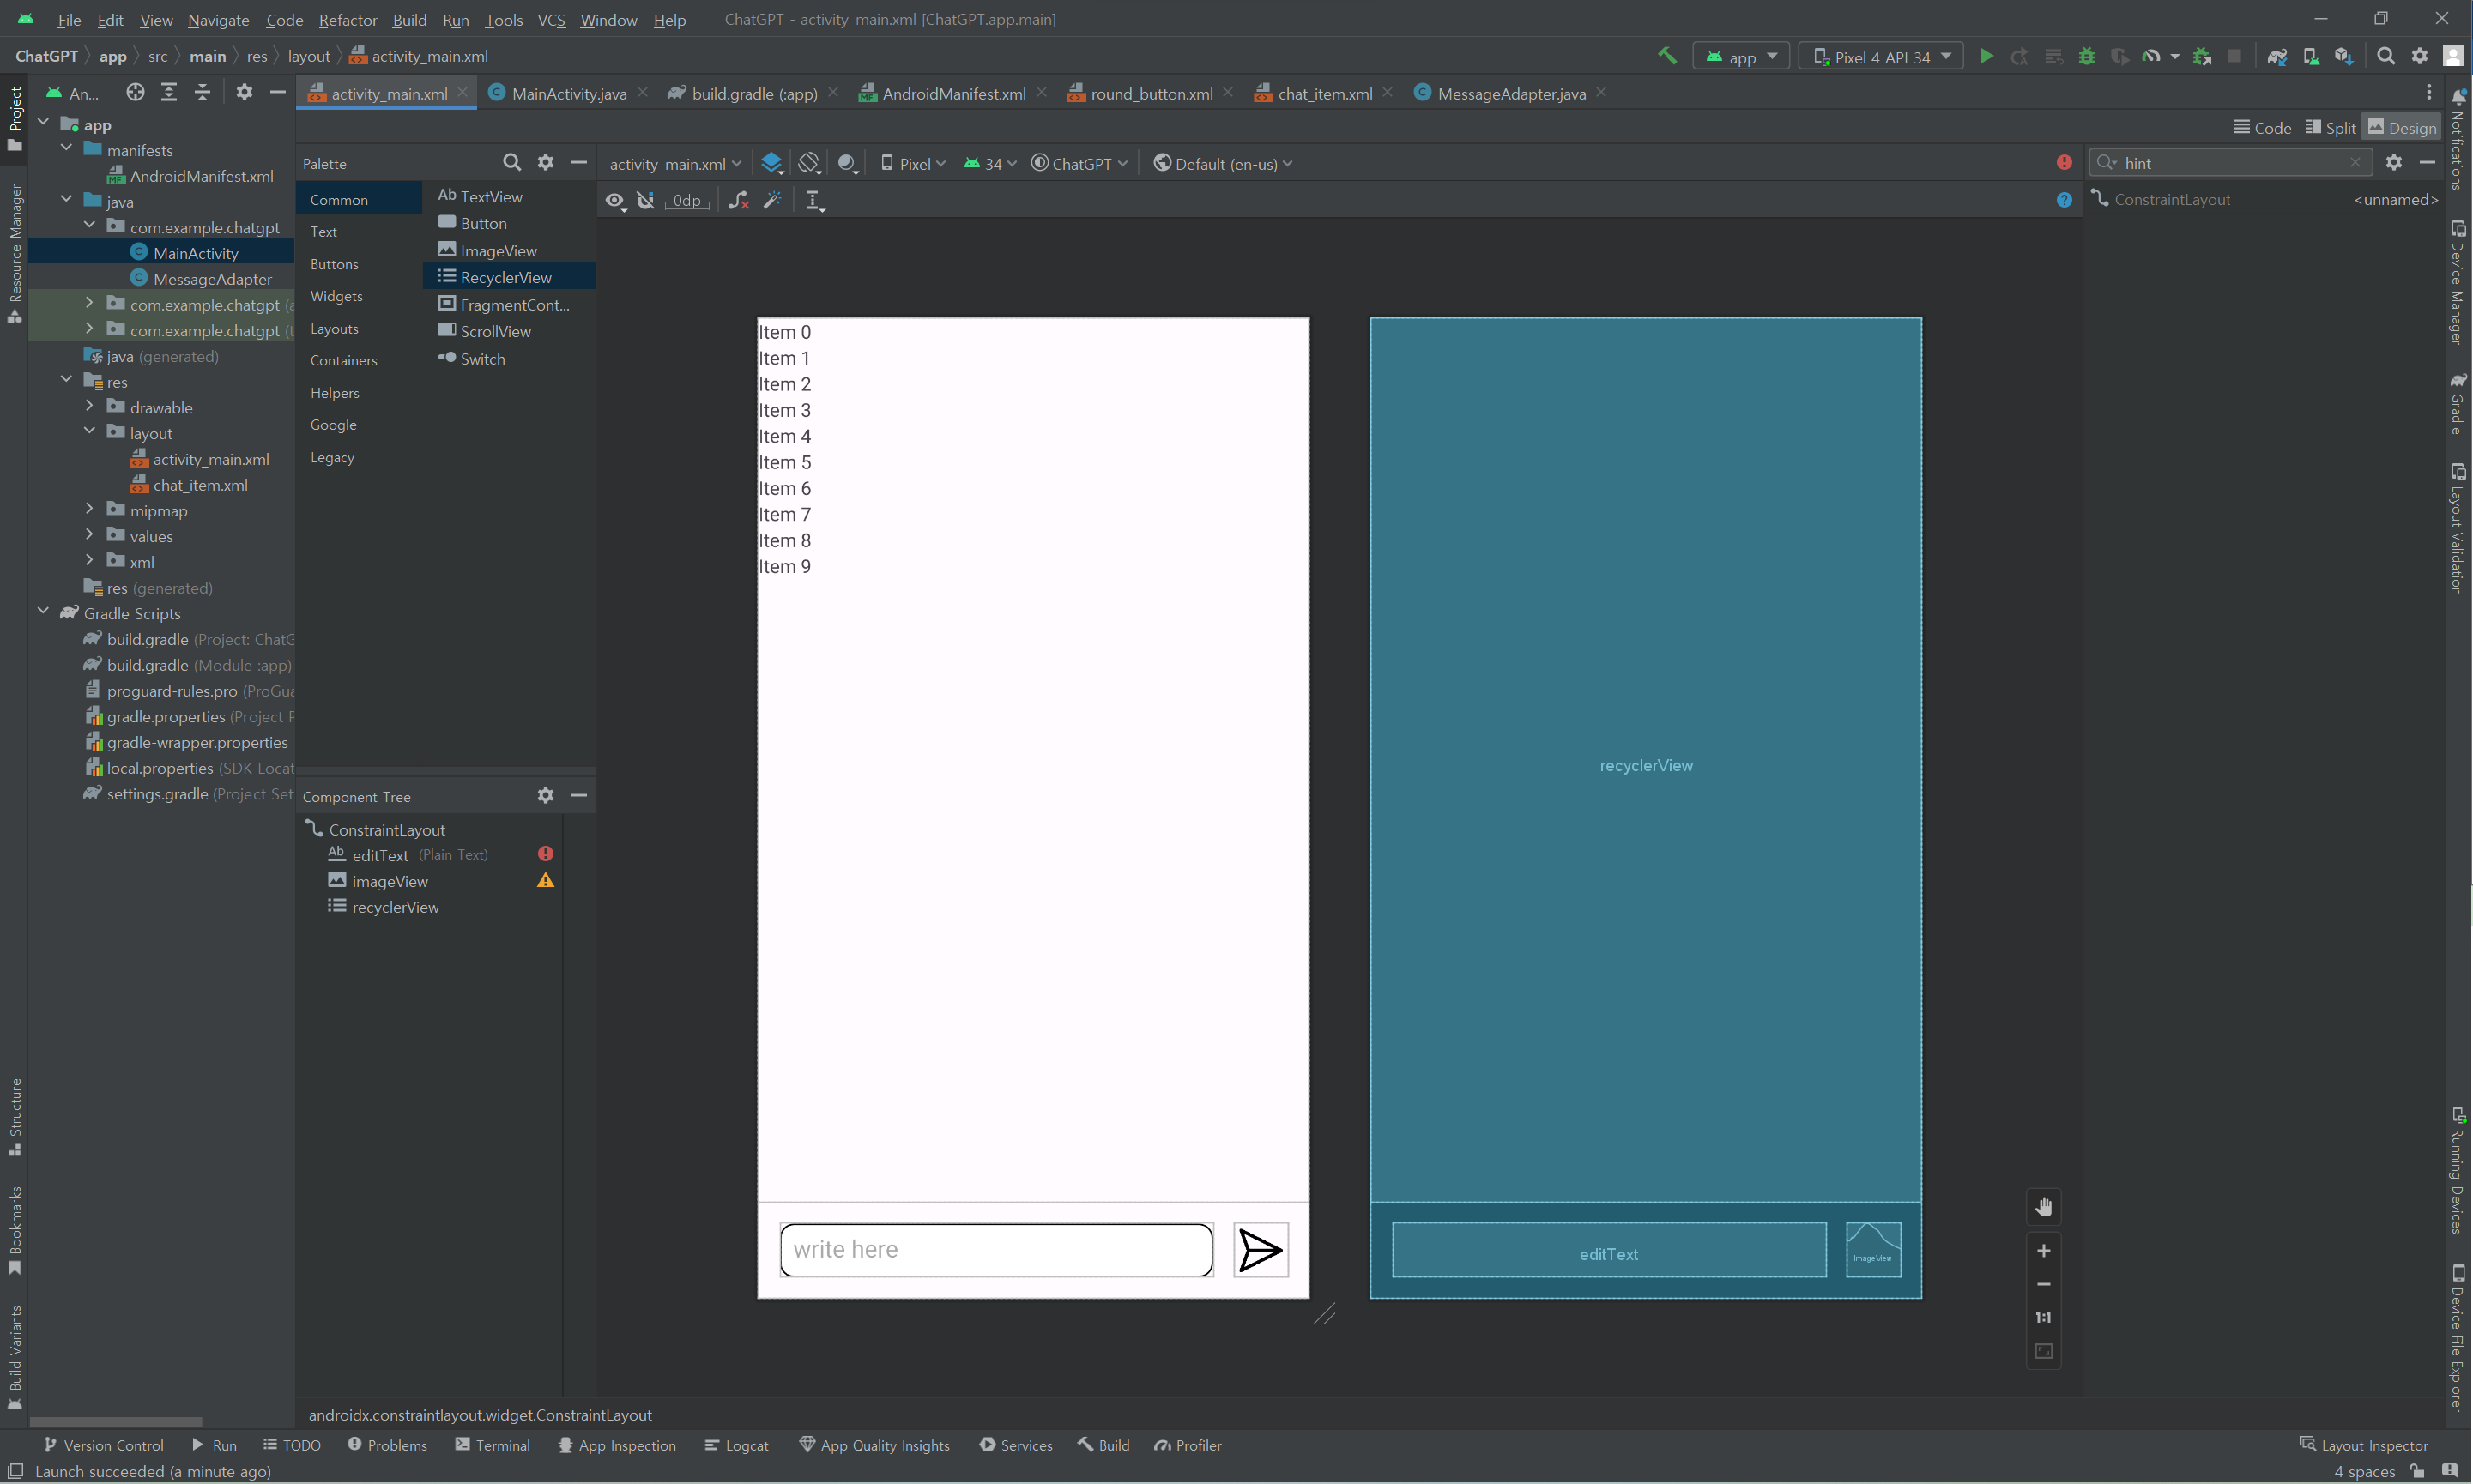
3-2. Open AI API key 발급받기
chatGPT를 사용하기 위해선 API key를 발급받아야 한다.
GPT-API key 사이트로 접속하여 Create new secret key 버튼을 클릭하여 API key를 발급받는다. 발급받은 key는 다시 확인할 수 없으니 메모장에 반드시 복사-붙여넣기 해야한다.
또한, key를 발급받아도 결제를 하지 않으면 GPT와 응답을 주고받을 수 없으므로 GPT billing 사이트로 접속하여 add payment details 버튼을 클릭하여 카드를 등록하고, 기본요금 $5.5를 결제한다.
3-3. GPT와 통신하여 RecyclerView에 응답 띄우기
해당 과정에서 구현해야 할 것은 크게 아래와 같이 구분할 수 있다.
1. onCreate함수
2. addToChat함수
3. addResponse함수
4. callAPI함수
먼저 MainActivity의 onCreate함수에서 RecyclerView와 MessageAdapter를 연결한다. 또한 앞서 설정한 send 버튼을 클릭 시 editText의 내용을 지움과 동시에 chat 기록에 남기고 gpt에게 응답을 보내는 코드를 구현한다. 아래의 코드에서 addToChat함수와 callAPI함수는 나중에 구현한다.
또한, client는 http 통신을 위해 반드시 구현되어야 한다.
protected void onCreate(Bundle savedInstanceState) {
    super.onCreate(savedInstanceState);
    setContentView(R.layout.activity_main);

    recyclerView = findViewById(R.id.recyclerView);
    editText = findViewById(R.id.editText);
    imageView = findViewById(R.id.imageView);

    recyclerView.setHasFixedSize(true);
    LinearLayoutManager linearLayoutManager = new LinearLayoutManager(this);
    linearLayoutManager.setStackFromEnd(true);
    recyclerView.setLayoutManager(linearLayoutManager);

    messageList = new ArrayList<>();
    messageAdapter = new MessageAdapter(messageList);
    recyclerView.setAdapter(messageAdapter);

    imageView.setOnClickListener(new View.OnClickListener() {
        @Override
        public void onClick(View view) {
            String question = editText.getText().toString().trim();
            addToChat(question, "me");

            editText.setText("");
            callAPI(question);
        }
    });

    client = new OkHttpClient().newBuilder()
            .connectTimeout(60, TimeUnit.SECONDS)
            .writeTimeout(120, TimeUnit.SECONDS)
            .readTimeout(60, TimeUnit.SECONDS)
            .build();
}
다음으로 addToChat함수를 구현한다. 해당 함수는 전달받은 message와 누가 보냈는지를 messageList에 추가하여 adapter를 업데이트시켜 화면에 응답 결과 및 질문을 띄울 수 있게 한다. 이 함수는 runOnUiThread함수를 이용하여 다른 thread에서도 view에 접근 및 수정이 가능하다(addToChat함수 없이 바로 추가할 경우 에러 발생). 또한 전달받은 응답과 질문을 쉽게 보기 위하여 smoothScrollToPosition함수를 사용하였다.
void addToChat(String message, String sentBy){
    runOnUiThread(new Runnable() {
        @Override
        public void run() {
            messageList.add(new MessageAdapter.Message(message, sentBy));
            messageAdapter.notifyDataSetChanged();
            recyclerView.smoothScrollToPosition(messageAdapter.getItemCount());
        }
    });
}addResponse함수는 chatGPT로부터 응답을 받을 때까지 기다릴 때 출력하는 "..."문자를 삭제하고, 받은 응답을 messageList에 추가하여 adapter를 업데이트시키는 역할을 한다.
void addResponse(String response){
    messageList.remove(messageList.size()-1);
    addToChat(response, "bot");
}
마지막으로 callAPI함수는 위에서 살펴봤던 request format에 맞추어 GPT에게 응답을 보내고, GPT로부터 응답을 받아오는 역할을 한다. 함수 내부 내용을 요약하면 아래와 같다.
objectJSONObject에는 GPT가 요구하는 세팅을 미리 작성해둔 json 파일을 읽어온다. 이후content부분을 사용자가 원하는 질문으로 편집한 뒤, GPT에게 전송한다.- client의 Callback 함수에서
jsonArray.getJSONObject(0).getJSONObject("message").getString("content")부분이 GPT의 response format에 맞추어 답변 내용을 가져오는 코드이다.
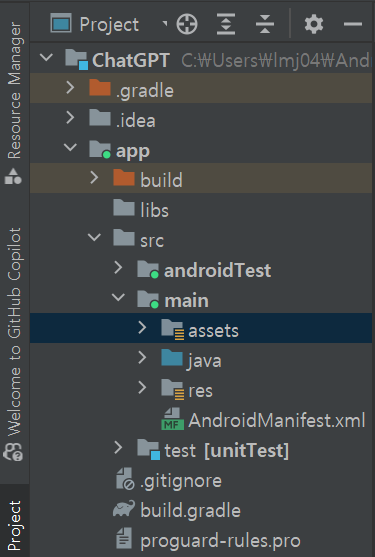
우선 GPT request format에 맞춘 json 파일을 생성한다. 안드로이드 스튜디오 내부에서 생성한 파일을 읽고/쓰기 위해서는 assets 폴더 내부에 파일이 위치하여야 한다. Project > app > src > main 폴더 안에 assets 폴더를 생성한다.
아래와 같이 model.json 파일을 앞서 생성한 assets 폴더 내부에 생성한다. 추후 java 파일에서 질문 내용 예시에 해당하는 부분을 수정한 후 GPT에게 전송할 것이다.
- model.json
{
  "model": "gpt-4o",
  "messages": [
    {
      "role": "developer",
      "content": "너는 사용자의 질문에 친절하게 답하는 AI야."
    },
    {
      "role": "user",
      "content": "질문 내용 예시"
    }
  ]
}
위의 json 파일을 유심히 살펴보면 현재까지의 대화 내역을
messages에 넣는다는 것을 알 수 있다. 따라서 지금까지의 대화 내역을 바탕으로 대화를 이어나가고 싶으면 다음과 같이 대화 내역을 저장한 후 전송하면 된다.{ "model": "gpt-4o", "messages": [ { "role": "developer", "content": "너는 사용자의 질문에 친절하게 답하는 AI야." }, { "role": "user", "content": "안녕?" }, { "role": "assistant", "content": "안녕하세요! 사용자님. 무엇을 도와드릴까요?" }, { "role": "user", "content": "오늘 날씨가 어때?" }, { "role": "assistant", "content": "오늘은 맑은 날씨입니다. 기분 좋은 하루 되세요!" }, { "role": "user", "content": "질문 내용 예시" } ] }
아래는 callAPI함수이다. 앞서 설명한 대로, model.json 파일에서 값을 읽어와 질문 내용 예시를 수정한 후 GPT에게 전송하고, 그 응답을 가져와 채팅에 추가하는 작업을 수행한다. (항상 질문은 가장 마지막에 위치하므로, object.getJSONArray("messages").length() - 1를 통해 가져온다.)
void callAPI(String question) throws JSONException {
    messageList.add(new MessageAdapter.Message("...", "bot"));

    JSONObject object = new JSONObject();
    try {
        BufferedReader reader = new BufferedReader(
                new InputStreamReader(getAssets().open("model.json"))
        );
        StringBuilder stringBuilder = new StringBuilder();
        String line;
        while ((line = reader.readLine()) != null) {
            stringBuilder.append(line);
        }
        reader.close();
        String jsonString = stringBuilder.toString();

        object = new JSONObject(jsonString);
        object.getJSONArray("messages")
                .getJSONObject(object.getJSONArray("messages").length() - 1)
                .put("content", question);
    } catch (Exception e) {
        e.printStackTrace();
    }

    RequestBody body = RequestBody.create(object.toString(), JSON);
    Request request = new Request.Builder()
            .url("https://api.openai.com/v1/chat/completions")
            .header("Authorization", "Bearer "+MY_SECRET_KEY)
            .post(body)
            .build();

    client.newCall(request).enqueue(new Callback() {
        @Override
        public void onFailure(@NonNull Call call, @NonNull IOException e) {
            addResponse("Failed to load response due to " + e.getMessage());
        }

        @Override
        public void onResponse(@NonNull Call call, @NonNull Response response) throws IOException {
            if (response.isSuccessful()) {
                JSONObject jsonObject = null;
                try {
                    jsonObject = new JSONObject(response.body().string());
                    JSONArray jsonArray = jsonObject.getJSONArray("choices");

                    String result = jsonArray.getJSONObject(0).getJSONObject("message").getString("content");
                    addResponse(result.trim());
                } catch (JSONException e) {
                    e.printStackTrace();
                }
            } else {
                addResponse("Failed to load response due to " + response.body().string());
            }
        }
    });
}
전체 코드는 아래와 같다.
- MainActivity.java
import androidx.annotation.NonNull;
import androidx.appcompat.app.AppCompatActivity;
import androidx.recyclerview.widget.LinearLayoutManager;
import androidx.recyclerview.widget.RecyclerView;
import android.os.Bundle;
import android.view.View;
import android.widget.EditText;
import android.widget.ImageView;
import org.json.JSONArray;
import org.json.JSONException;
import org.json.JSONObject;
import java.io.IOException;
import java.util.ArrayList;
import java.util.List;
import java.util.concurrent.TimeUnit;
import okhttp3.Call;
import okhttp3.Callback;
import okhttp3.MediaType;
import okhttp3.OkHttpClient;
import okhttp3.Request;
import okhttp3.RequestBody;
import okhttp3.Response;
public class MainActivity extends AppCompatActivity {
RecyclerView recyclerView;
EditText editText;
ImageView imageView;
ArrayList<MessageAdapter.Message> messageList;
MessageAdapter messageAdapter;
public static final MediaType JSON = MediaType.get("application/json; charset=utf-8");
OkHttpClient client;
private static final String MY_SECRET_KEY = "your-api-key";
@Override
protected void onCreate(Bundle savedInstanceState) {
super.onCreate(savedInstanceState);
setContentView(R.layout.activity_main);
recyclerView = findViewById(R.id.recyclerView);
editText = findViewById(R.id.editText);
imageView = findViewById(R.id.imageView);
recyclerView.setHasFixedSize(true);
LinearLayoutManager linearLayoutManager = new LinearLayoutManager(this);
linearLayoutManager.setStackFromEnd(true);
recyclerView.setLayoutManager(linearLayoutManager);
messageList = new ArrayList<>();
messageAdapter = new MessageAdapter(messageList);
recyclerView.setAdapter(messageAdapter);
imageView.setOnClickListener(new View.OnClickListener() {
@Override
public void onClick(View view) {
String question = editText.getText().toString().trim();
addToChat(question, "me");
editText.setText("");
callAPI(question);
}
});
client = new OkHttpClient().newBuilder()
.connectTimeout(60, TimeUnit.SECONDS)
.writeTimeout(120, TimeUnit.SECONDS)
.readTimeout(60, TimeUnit.SECONDS)
.build();
}
void addToChat(String message, String sentBy){
runOnUiThread(new Runnable() {
@Override
public void run() {
messageList.add(new MessageAdapter.Message(message, sentBy));
messageAdapter.notifyDataSetChanged();
recyclerView.smoothScrollToPosition(messageAdapter.getItemCount());
}
});
}
void addResponse(String response){
messageList.remove(messageList.size()-1);
addToChat(response, "bot");
}
void callAPI(String question){
messageList.add(new MessageAdapter.Message("...", "bot"));
JSONArray arr = new JSONArray();
JSONObject baseAi = new JSONObject();
JSONObject userMsg = new JSONObject();
try {
baseAi.put("role", "user");
baseAi.put("content", "너는 사용자의 질문에 친절하게 답하는 AI야.");
userMsg.put("role", "user");
userMsg.put("content", question);
arr.put(baseAi);
arr.put(userMsg);
} catch (JSONException e) {
throw new RuntimeException(e);
}
JSONObject object = new JSONObject();
try {
object.put("model", "gpt-3.5-turbo");
object.put("messages", arr);
} catch (JSONException e){
e.printStackTrace();
}
RequestBody body = RequestBody.create(object.toString(), JSON);
Request request = new Request.Builder()
.url("https://api.openai.com/v1/chat/completions")
.header("Authorization", "Bearer "+MY_SECRET_KEY)
.post(body)
.build();
client.newCall(request).enqueue(new Callback() {
@Override
public void onFailure(@NonNull Call call, @NonNull IOException e) {
addResponse("Failed to load response due to " + e.getMessage());
}
@Override
public void onResponse(@NonNull Call call, @NonNull Response response) throws IOException {
if (response.isSuccessful()) {
JSONObject jsonObject = null;
try {
jsonObject = new JSONObject(response.body().string());
JSONArray jsonArray = jsonObject.getJSONArray("choices");
String result = jsonArray.getJSONObject(0).getJSONObject("message").getString("content");
addResponse(result.trim());
} catch (JSONException e) {
e.printStackTrace();
}
} else {
addResponse("Failed to load response due to " + response.body().string());
}
}
});
}
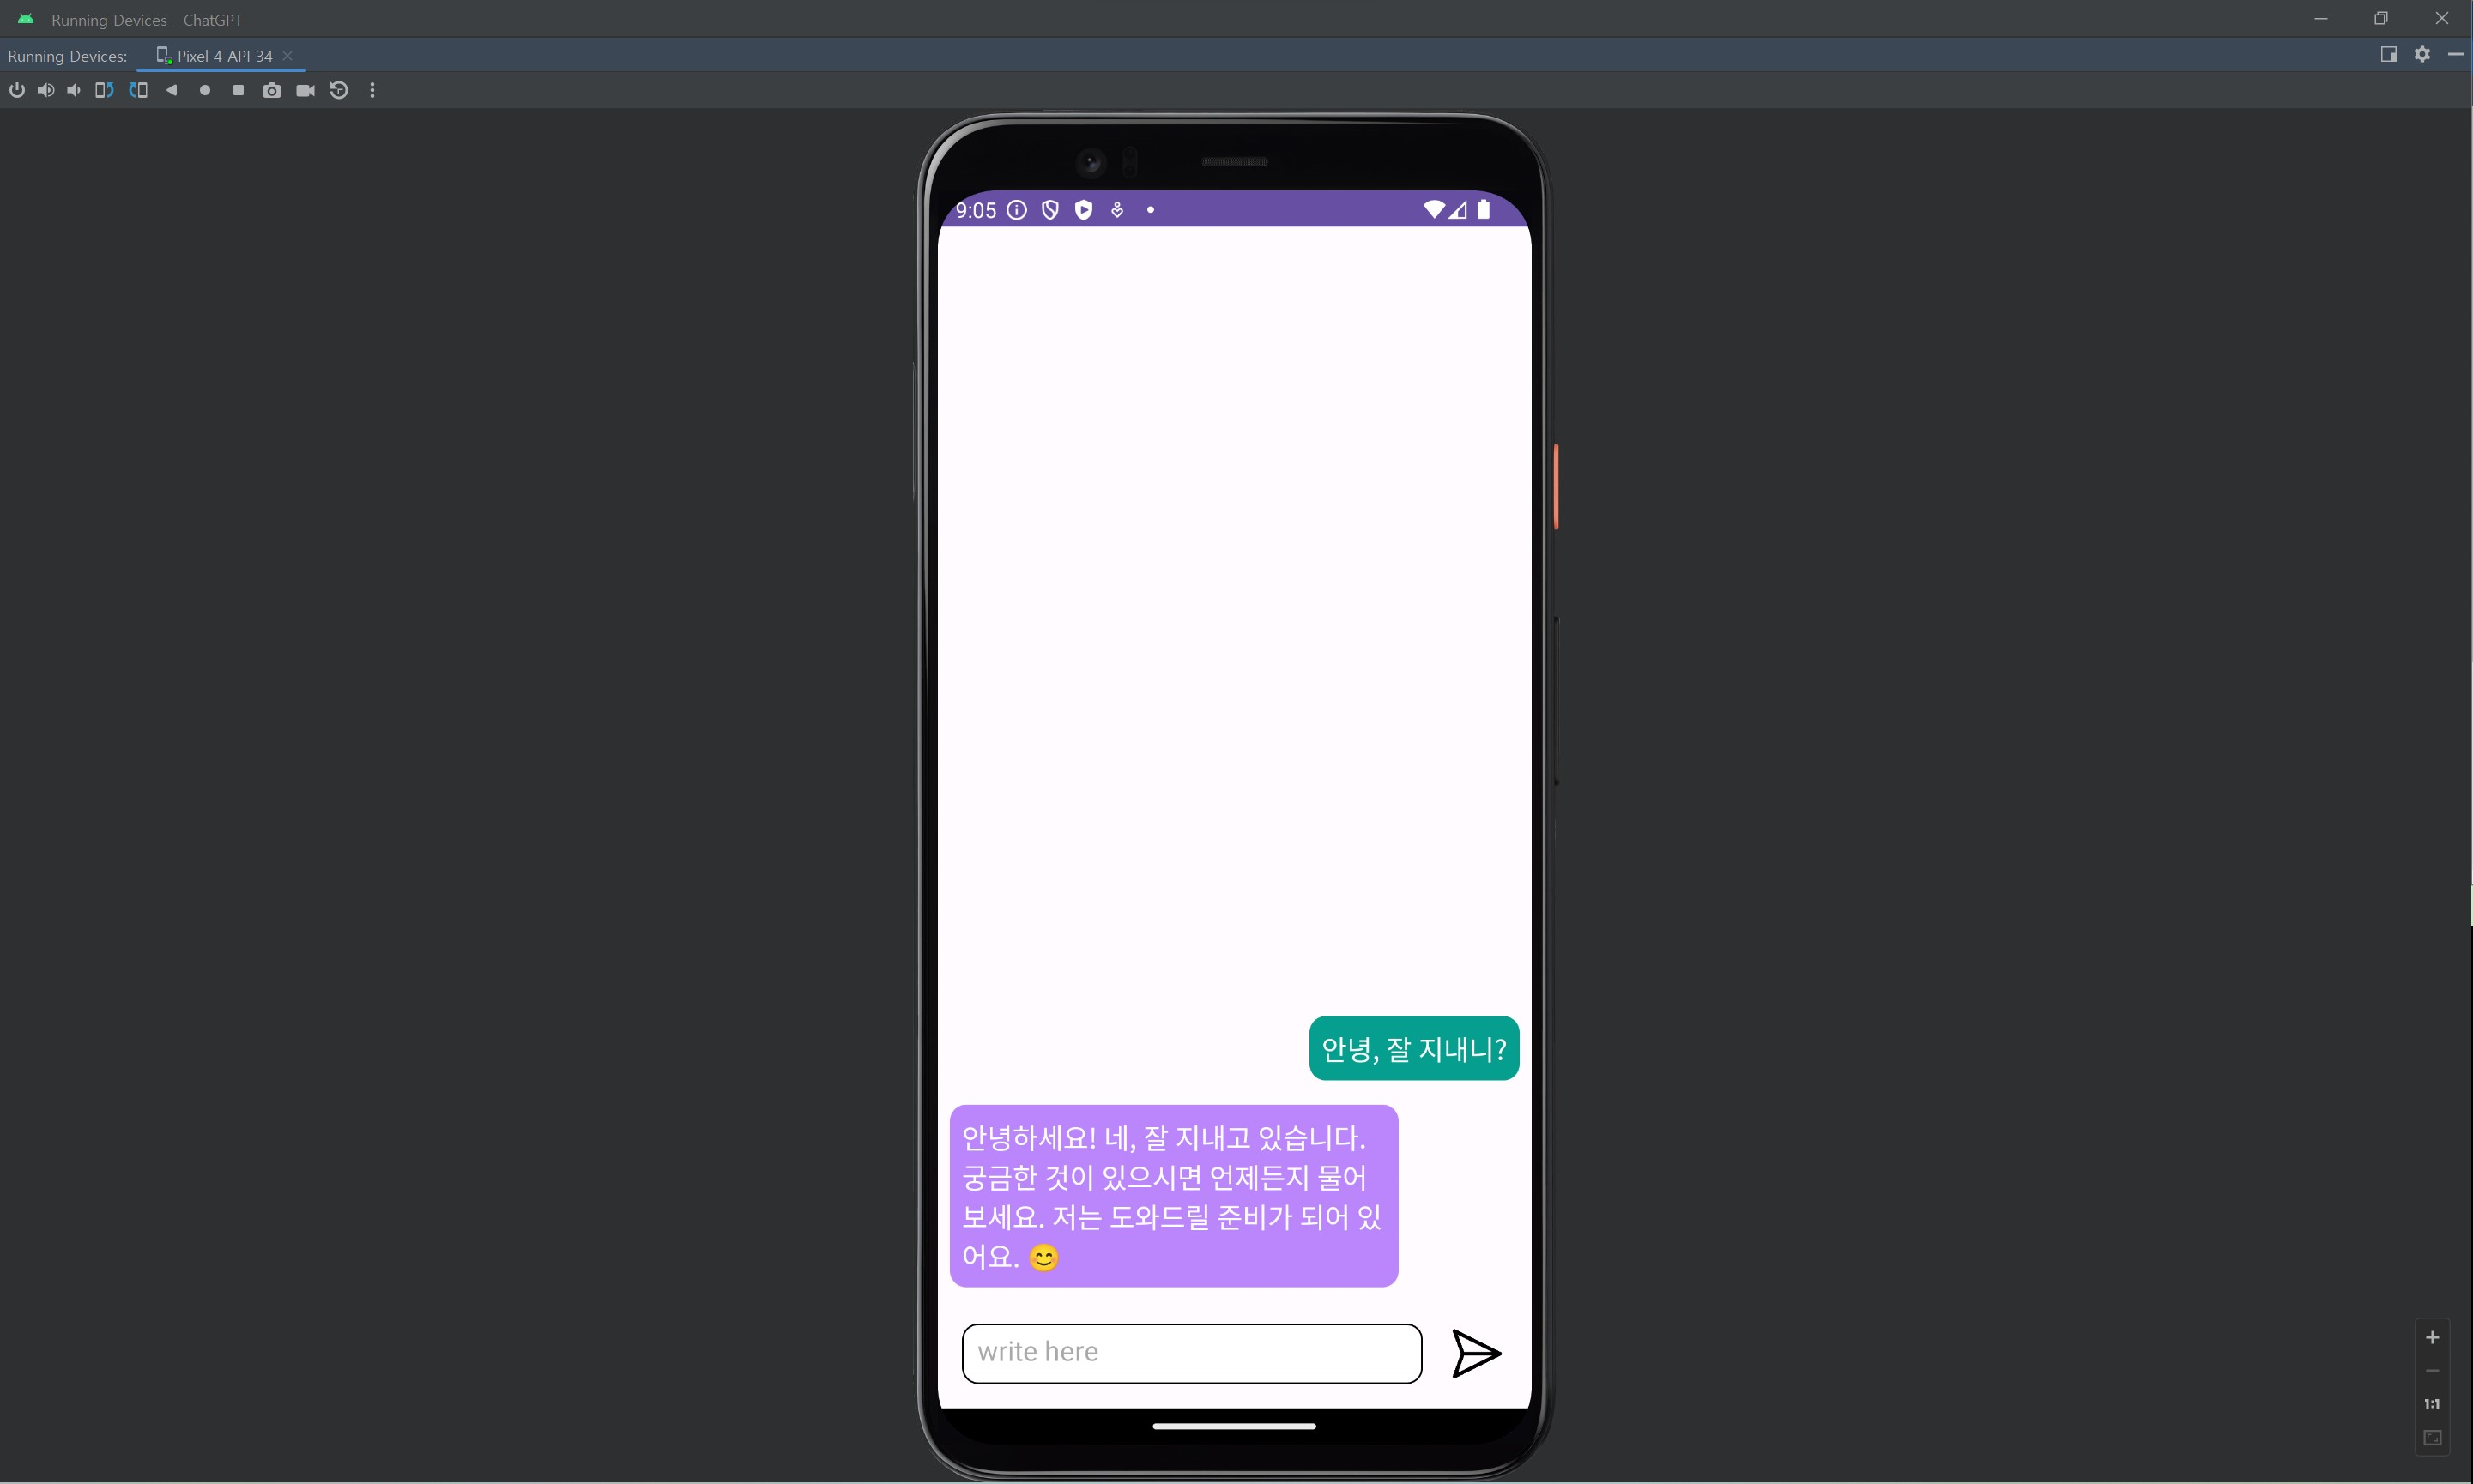
}4. 실행결과
앱을 실행시키면 아래와 같이 작동하게 된다.