필요 사항
'CRUD 게시판 만들기'(https://velog.io/@max9106/series/JHipsterCRUD-%EA%B2%8C%EC%8B%9C%ED%8C%90-%EB%A7%8C%EB%93%A4%EA%B8%B0) 또는 'jhipster entity' 명령어를 사용하여 기본적인 게시판 구조는 완성된 상태로 진행하려고 한다.
DB구조
title(string) | content(string) | writer(string) | date(string) | img_path(string)
로 구성하였다.
model 파일
img.model(webapp - app - shared - model) 파일도 바꿔주어야한다.
이미지 저장하기
CRUD 게시판에 이미지를 저장해보려고 한다. jhipster에서는 jhipster entity 명령어를 사용하면 blob 형식으로 DB에 이미지를 바로 저장하도록 되어있지만, 우리는 파일 자체는 로컬에 저장해두고, 그 경로만 DB에 넣도록 하려고한다.
이미지 저장하기의 flow는 아래와 같다.
add/update html에서 save를 누르면, component의 'save()'를 통해 service.ts의 update나 add로 넘어가고, http.post나 http.put을 통해 resource파일(src-main-java-package-web.rest-resource파일)로 DTO파일과 함께 전달되고, DTO파일을 Service파일에 save하면, DB에 들어가게된다.
front-end
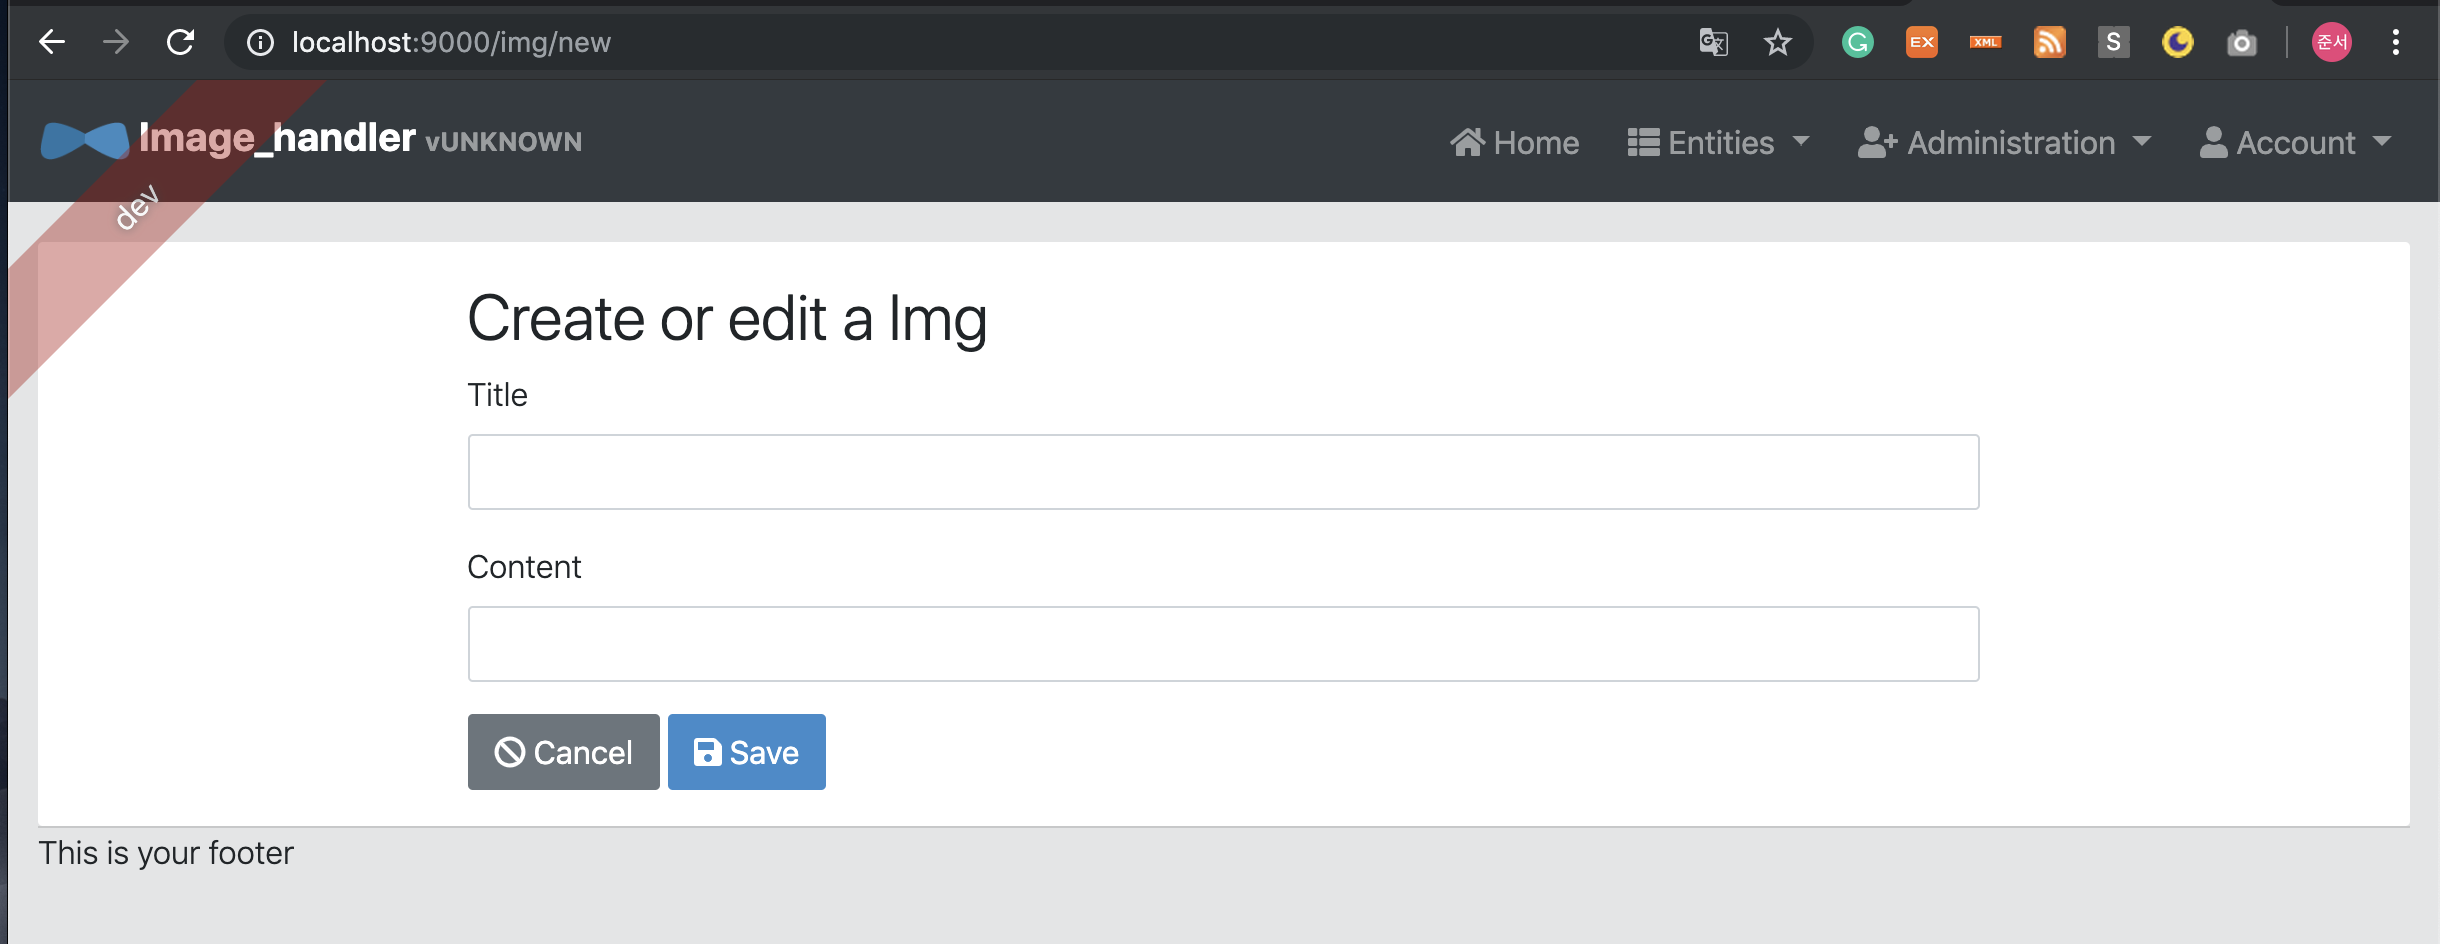
초기 html파일은 아래와 같다.(jhipster entity 명령어 사용시 writer, date, img_path 부분의 html 코드를 지워서 아래와 같은 상태에서 시작하겠다.)

이미지를 업로드 하기 위해 코드를 추가해 줘야한다.
<div class="form-group">
<label class="form-control-label" for="field_image">Image</label>
<div>
<img [src]="'data:' + editForm.get('imageContentType').value + ';base64,' + editForm.get('image').value" style="max-height: 100px;" *ngIf="editForm.get('image').value" alt="uploadImage image"/>
<div *ngIf="editForm.get('image').value" class="form-text text-danger clearfix">
<span class="pull-left">{{editForm.get('imageContentType').value}}, {{byteSize(editForm.get('image').value)}}</span>
<button type="button" (click)="clearInputImage('image', 'imageContentType', 'fileImage')" class="btn btn-secondary btn-xs pull-right">
<fa-icon [icon]="'times'"></fa-icon>
</button>
</div>
<input type="file" id="file_image" (change)="setFileData($event, 'image', true)" accept="image/*"/>
</div>
<input type="hidden" class="form-control" name="image" id="field_image"
formControlName="image"/>
<input type="hidden" class="form-control" name="imageContentType" id="field_imageContentType"
formControlName="imageContentType" />
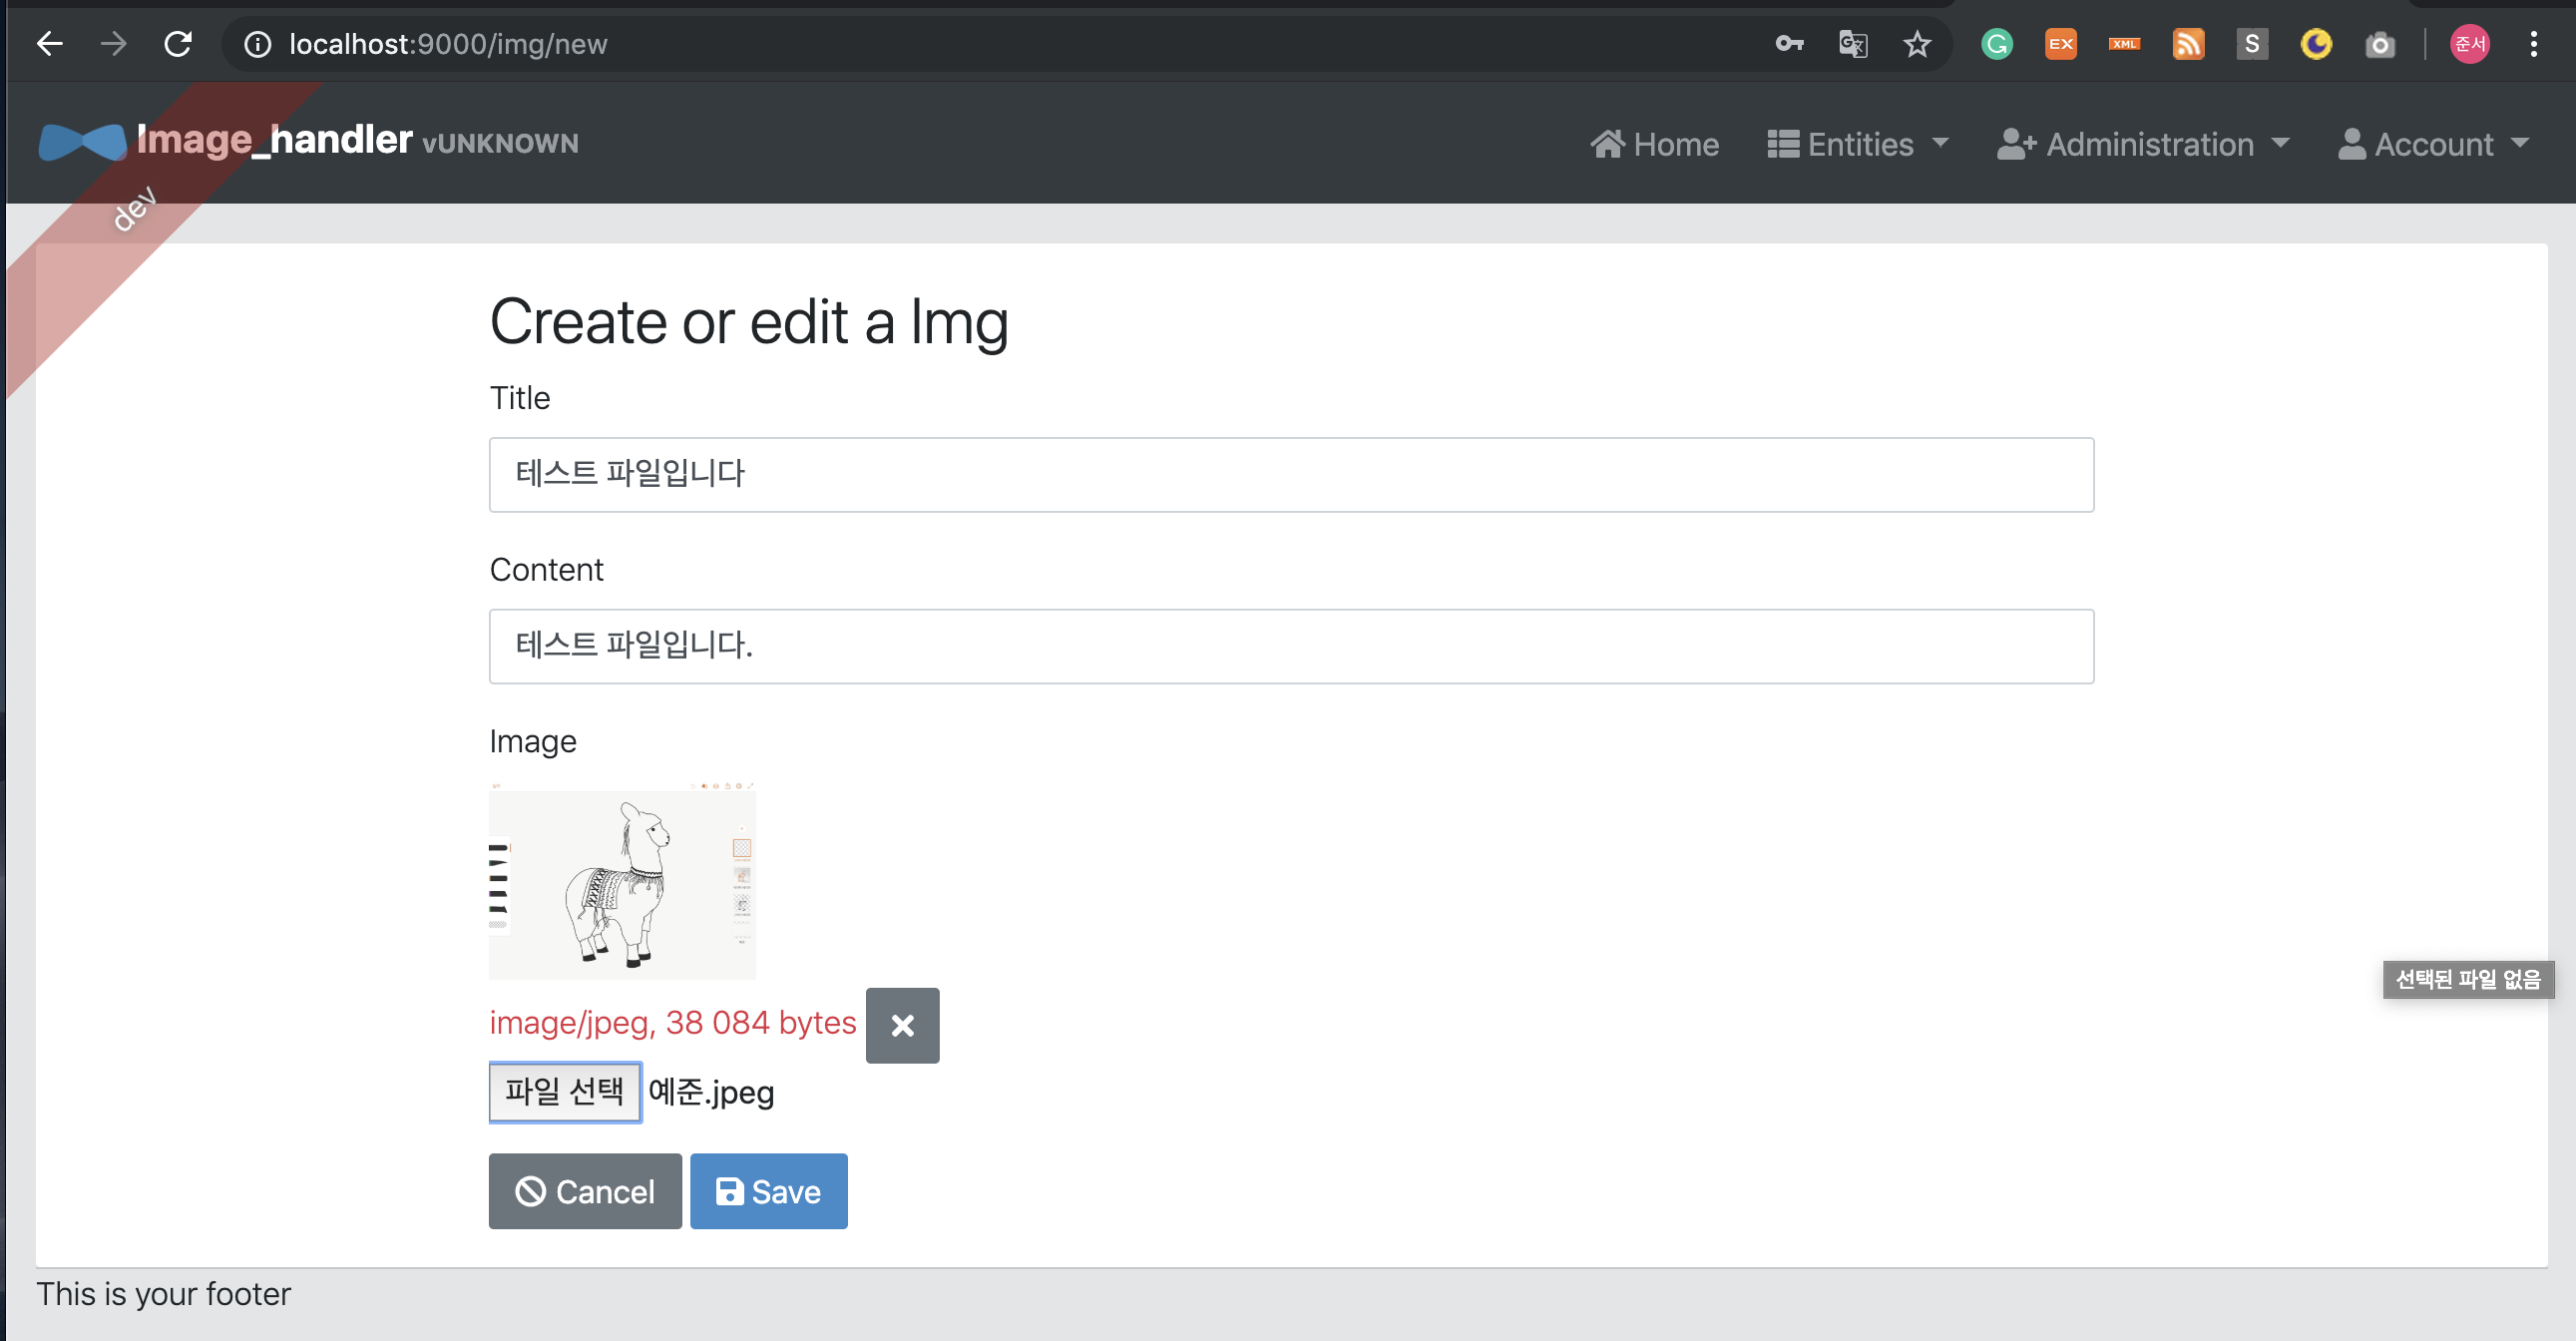
</div>위의 코드를 추가해주면, 실행화면은 아래와 같아진다.
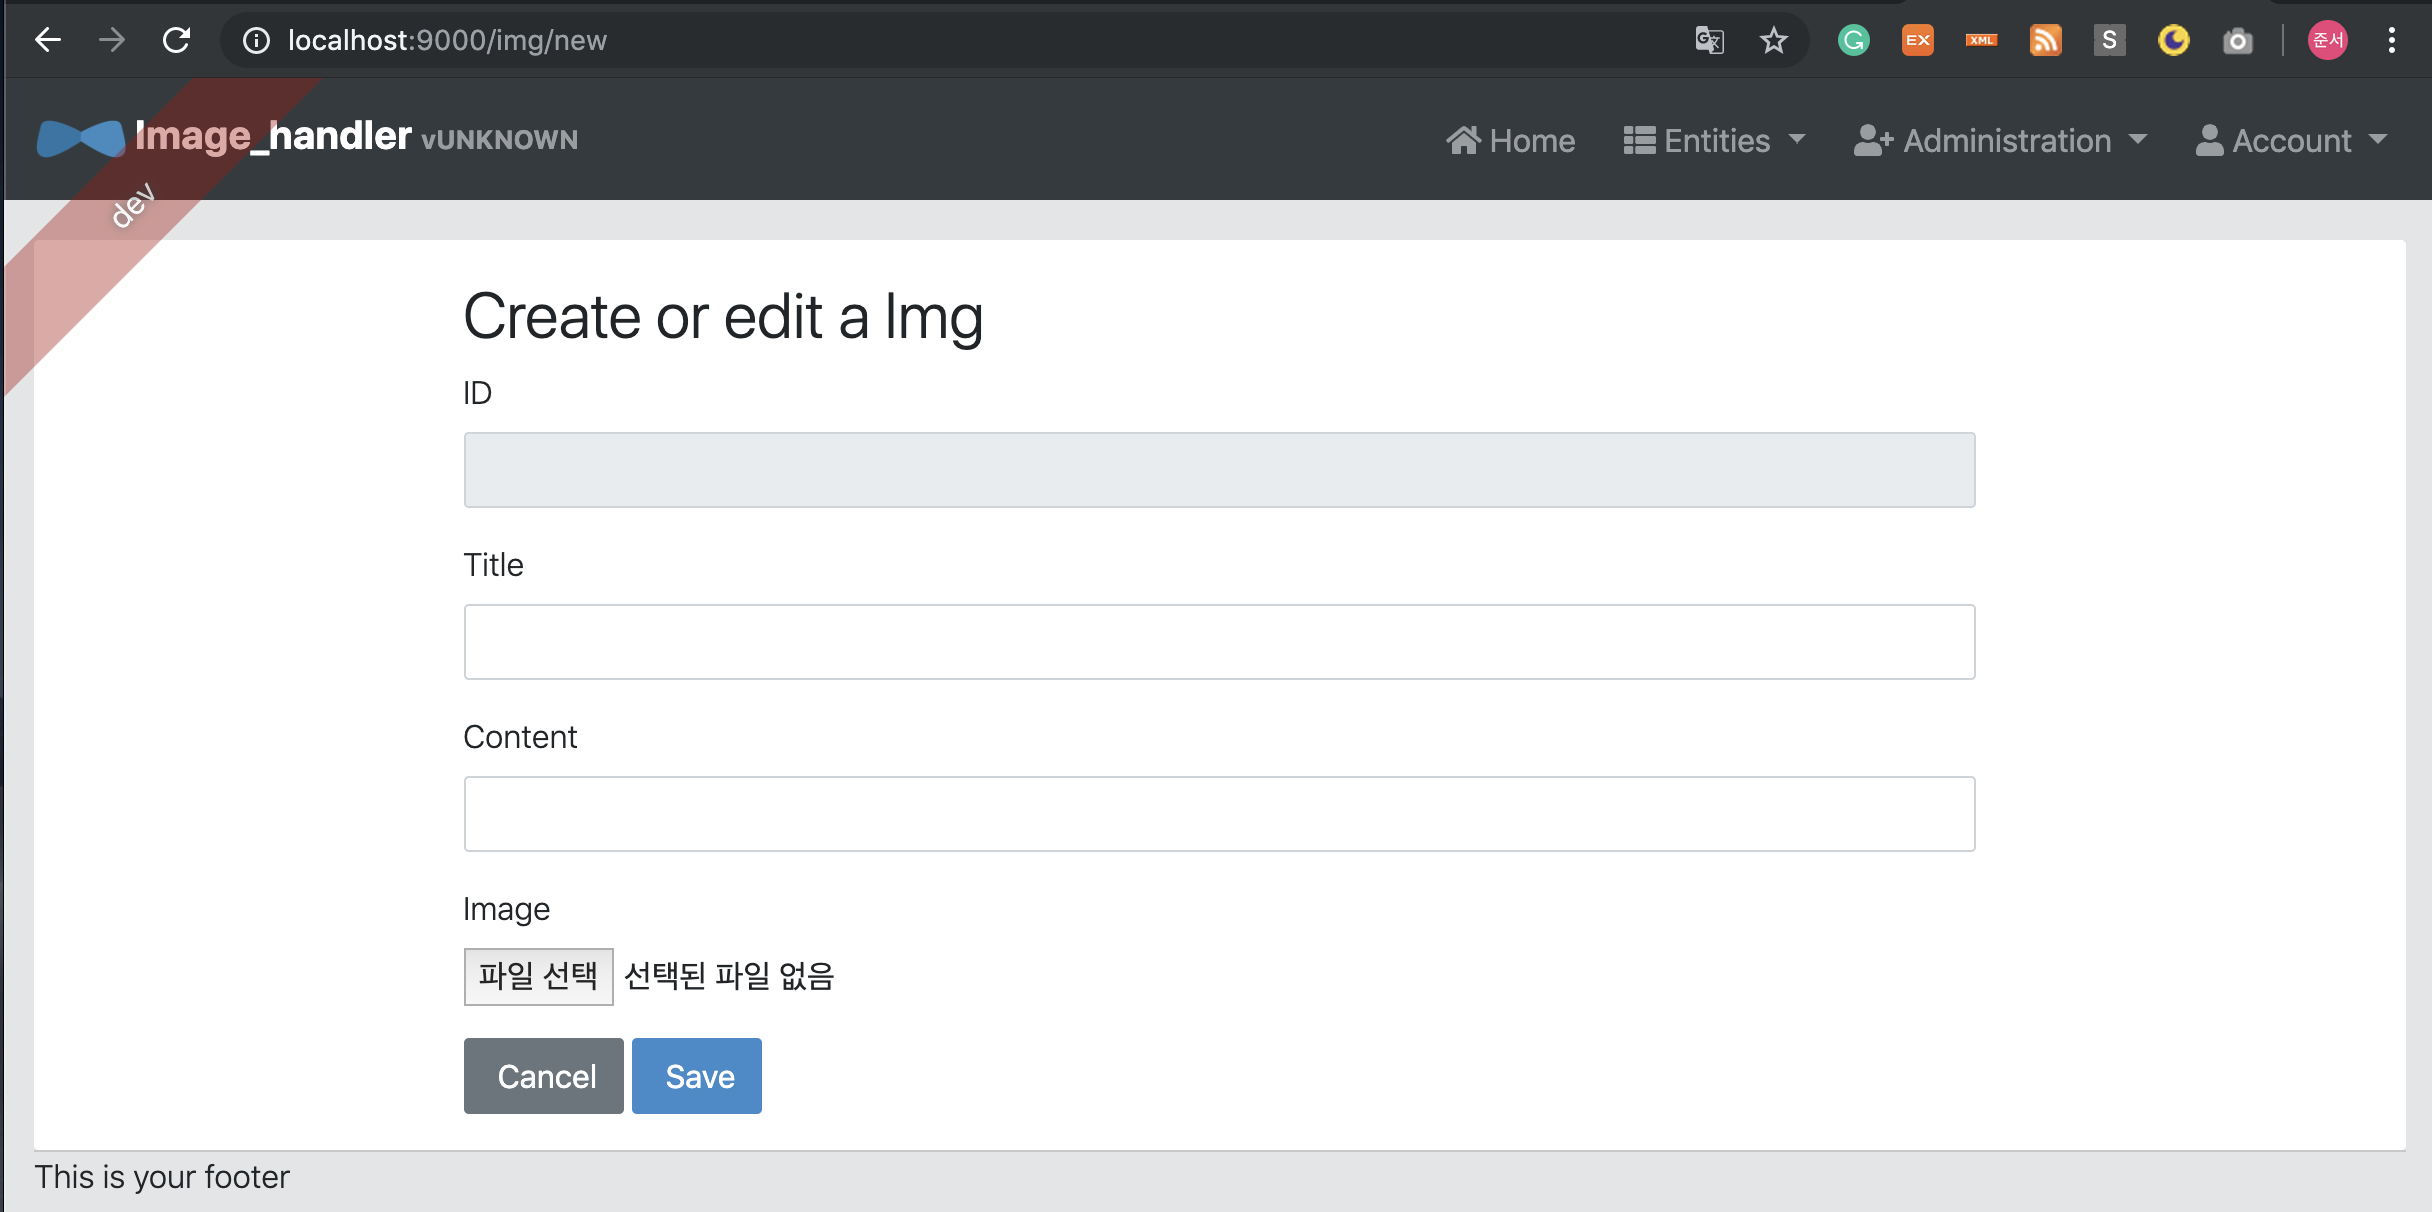
파일 선택 시, image파일을 byte파일로 받아서 전송해줄 것이다.
기존 componenet는 아래와 같다.
import {Component, ElementRef, OnInit} from '@angular/core';
import { HttpResponse, HttpErrorResponse } from '@angular/common/http';
import { FormBuilder, Validators } from '@angular/forms';
import { ActivatedRoute } from '@angular/router';
import { Observable } from 'rxjs';
import { IImg, Img } from 'app/shared/model/img.model';
import { ImgService } from './img.service';
import {JhiAlertService, JhiDataUtils} from "ng-jhipster";

@Component({
  selector: 'jhi-img-update',
  templateUrl: './img-update.component.html'
})
export class ImgUpdateComponent implements OnInit {
  isSaving: boolean;

  editForm = this.fb.group({
    id: [],
    title: [],
    content: []
  });

  constructor(
    protected imgService: ImgService,
    protected activatedRoute: ActivatedRoute,
    private fb: FormBuilder
  ) {}

  ngOnInit() {
    this.isSaving = false;
    this.activatedRoute.data.subscribe(({ img }) => {
      this.updateForm(img);
    });
  }

  updateForm(img: IImg) {
    this.editForm.patchValue({
      id: img.id,
      title: img.title,
      content: img.content
    });
  }

  previousState() {
    window.history.back();
  }

  save() {
    this.isSaving = true;
    const img = this.createFromForm();
    if (img.id !== undefined) {
      this.subscribeToSaveResponse(this.imgService.update(img));
    } else {
      this.subscribeToSaveResponse(this.imgService.create(img));
    }
  }

  private createFromForm(): IImg {
    return {
      ...new Img(),
      id: this.editForm.get(['id']).value,
      title: this.editForm.get(['title']).value,
      content: this.editForm.get(['content']).value
    };
  }

  protected subscribeToSaveResponse(result: Observable<HttpResponse<IImg>>) {
    result.subscribe(() => this.onSaveSuccess(), () => this.onSaveError());
  }

  protected onSaveSuccess() {
    this.isSaving = false;
    this.previousState();
  }

  protected onSaveError() {
    this.isSaving = false;
  }

}
component파일에 아래 코드를 추가해준다.
byteSize(바이트 크기를 리턴)
  byteSize(field) {
    return this.dataUtils.byteSize(field);
  }
clearInputImage(업로드한 파일 취소하기)
  clearInputImage(field: string, fieldContentType: string, idInput: string) {
    this.editForm.patchValue({
      [field]: null,
      [fieldContentType]: null
    });
    if (this.elementRef && idInput && this.elementRef.nativeElement.querySelector('#' + idInput)) {
      this.elementRef.nativeElement.querySelector('#' + idInput).value = null;
    }
}setFileData(업로드한 파일 데이터 세팅)
  setFileData(event, field: string, isImage) {
    return new Promise((resolve, reject) => {
      if (event && event.target && event.target.files && event.target.files[0]) {
        const file = event.target.files[0];
        console.log(file.name);
        if (isImage && !/^image\//.test(file.type)) {
          reject(`File was expected to be an image but was found to be ${file.type}`);
        } else {
          const filedContentType: string = field + 'ContentType';
          const fieldName: string = field + 'Name';
          this.dataUtils.toBase64(file, (base64Data) => {
            this.editForm.patchValue({
              [field]: base64Data,
              [filedContentType]: file.type,
              [fieldName]:file.name,
            });
          });
        }
      } else {
        reject(`Base64 data was not set as file could not be extracted from passed parameter: ${event}`);
      }
    }).then(
      () => console.log('blob added'), // sucess
      this.onError
    );
  }
onError(에러메세지 출력)
protected onError(errorMessage: string) {
this.jhiAlertService.error(errorMessage, null, null);
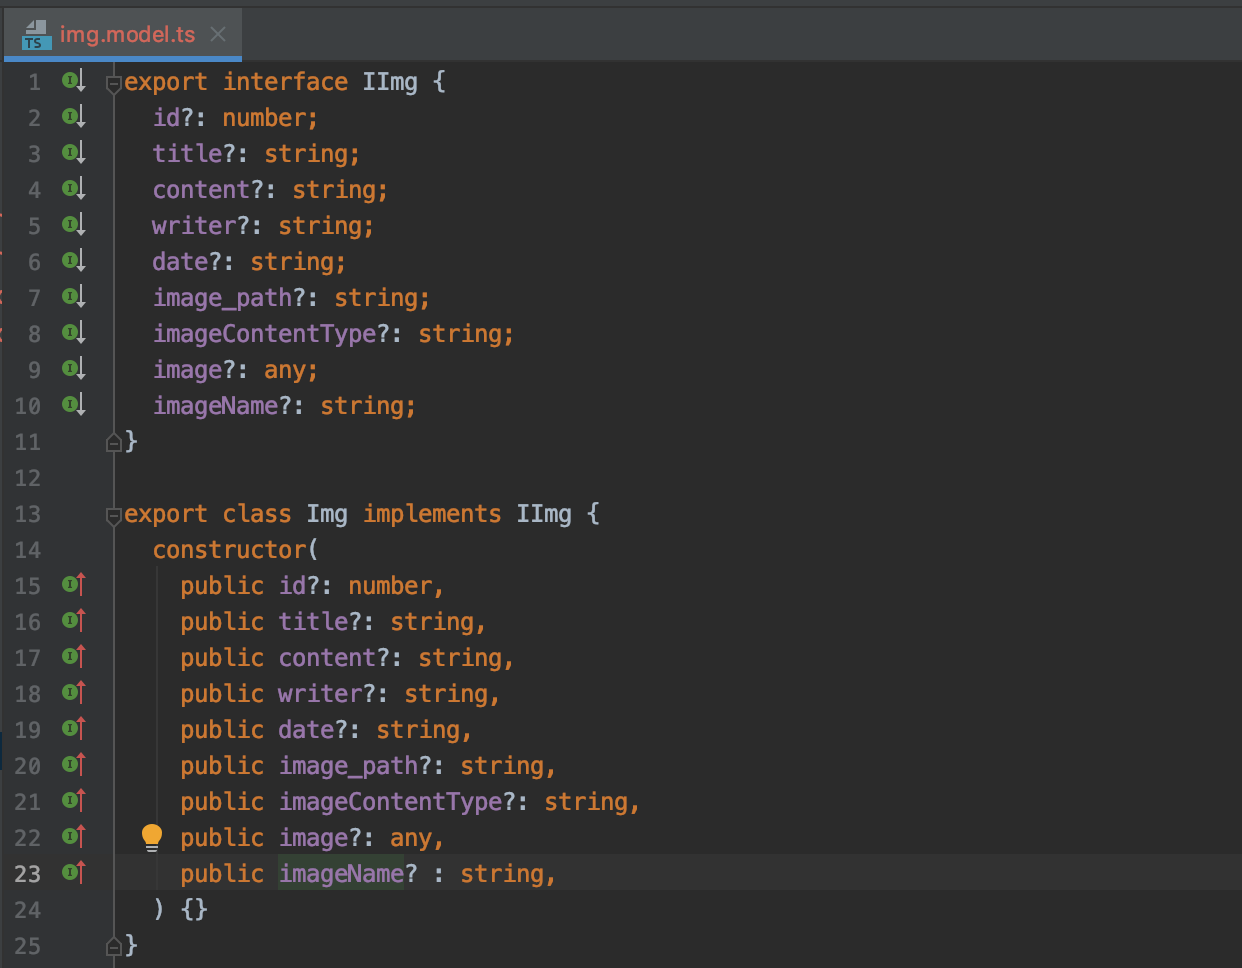
}이미지 바이트 파일을 받아올 image: [], imageContentType: [] 과 imageName: []을 editform에 추가해준다.
//...
  editForm = this.fb.group({
    id: [],
    title: [],
    content: [],
    image: [],  //이미지 바이트 파일
    imageContentType: [], // 이미지 타입(ex. jpeg)
    imageName: [] // 이미지 이름
  });
//...
createFromForm과 updateForm에도 마찬가지로 추가해준다.
createFromForm
  private createFromForm(): IImg {
    return {
      ...new Img(),
      id: this.editForm.get(['id']).value,
      title: this.editForm.get(['title']).value,
      content: this.editForm.get(['content']).value,
      image: this.editForm.get(['image']).value,
      imageContentType: this.editForm.get(['imageContentType']).value,
      imageName: this.editForm.get(['imageName']).value,
    };
  }
updateForm
  updateForm(img: IImg) {
    this.editForm.patchValue({
      id: img.id,
      title: img.title,
      content: img.content,
      image: img.image,
      imageContentType: img.imageContentType,
      imageName: img.imageName
    });
  }
그럼 save를 누르면, 이미지 정보들이 service.ts로 넘어가고, 거기서 resource 파일로 넘어간다
back-end
DTO파일은 초기 DB와 마찬가지로 아래와 같은 구조이다.
package com.mycompany.myapp.service.dto;
import java.io.Serializable;
import java.util.Objects;

public class ImgDTO implements Serializable {

    private Long id;

    private String title;

    private String content;

    private String writer;

    private String date;

    private String image_path;


    public Long getId() {
        return id;
    }

    public void setId(Long id) {
        this.id = id;
    }

    public String getTitle() {
        return title;
    }

    public void setTitle(String title) {
        this.title = title;
    }

    public String getContent() {
        return content;
    }

    public void setContent(String content) {
        this.content = content;
    }

    public String getWriter() {
        return writer;
    }

    public void setWriter(String writer) {
        this.writer = writer;
    }

    public String getDate() {
        return date;
    }

    public void setDate(String date) {
        this.date = date;
    }

    public String getImage_path() {
        return image_path;
    }

    public void setImage_path(String image_path) {
        this.image_path = image_path;
    }

    @Override
    public boolean equals(Object o) {
        if (this == o) {
            return true;
        }
        if (o == null || getClass() != o.getClass()) {
            return false;
        }

        ImgDTO imgDTO = (ImgDTO) o;
        if (imgDTO.getId() == null || getId() == null) {
            return false;
        }
        return Objects.equals(getId(), imgDTO.getId());
    }

    @Override
    public int hashCode() {
        return Objects.hashCode(getId());
    }

    @Override
    public String toString() {
        return "ImgDTO{" +
            "id=" + getId() +
            ", title='" + getTitle() + "'" +
            ", content='" + getContent() + "'" +
            ", writer='" + getWriter() + "'" +
            ", date='" + getDate() + "'" +
            ", image_path='" + getImage_path() + "'" +
            "}";
    }
}
이미지 파일을 다루기 위해서 byte array(image), string(imageName & imagaContentType)과 그것들의 getter & setter 를 추가해준다.
*byte array 선언시 위에 @Lob를 붙여줘야한다.
이제 이미지를 로컬 디렉토리에 저장하고, 그 디렉토리의 경로만 db에 저장해보겠다.
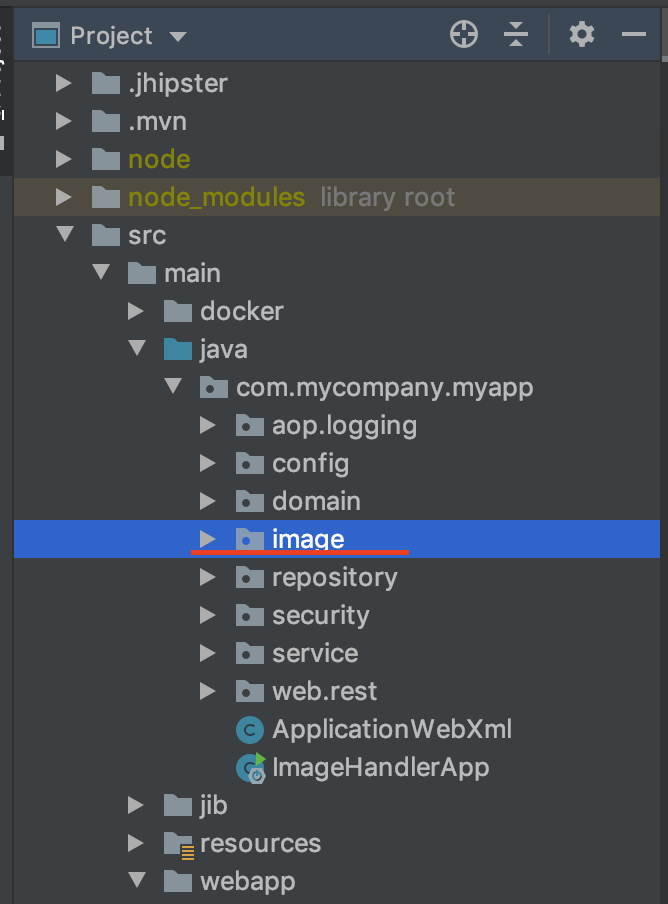
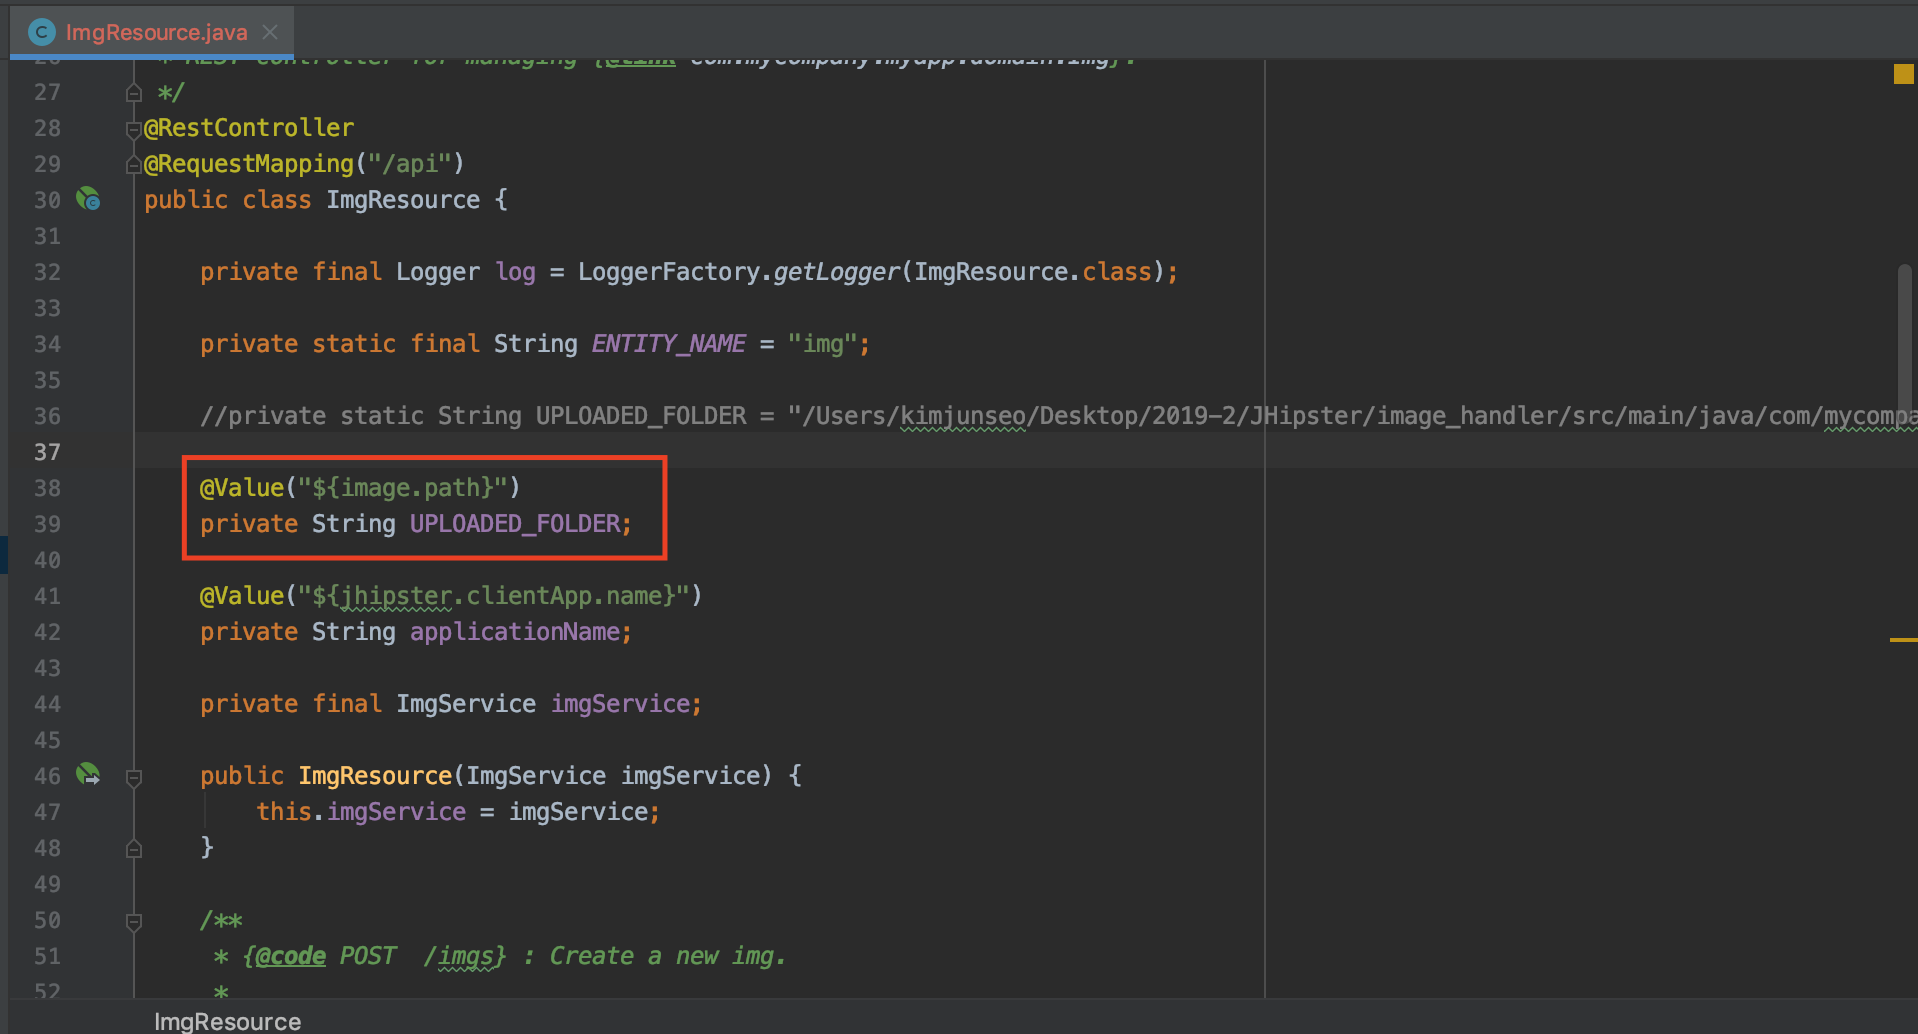
먼저 이미지를 저장할 디렉토리를 로컬에 만든다. 여기서는 src - main - java - package 안에 image 라는 디렉토리를 생성하여 거기에 이미지를 저장해보겠다.
그 디렉토리의 경로를 변수로 저장해주겠다. 글로벌로 사용하기 위해 application.dev에 선언해 준다.
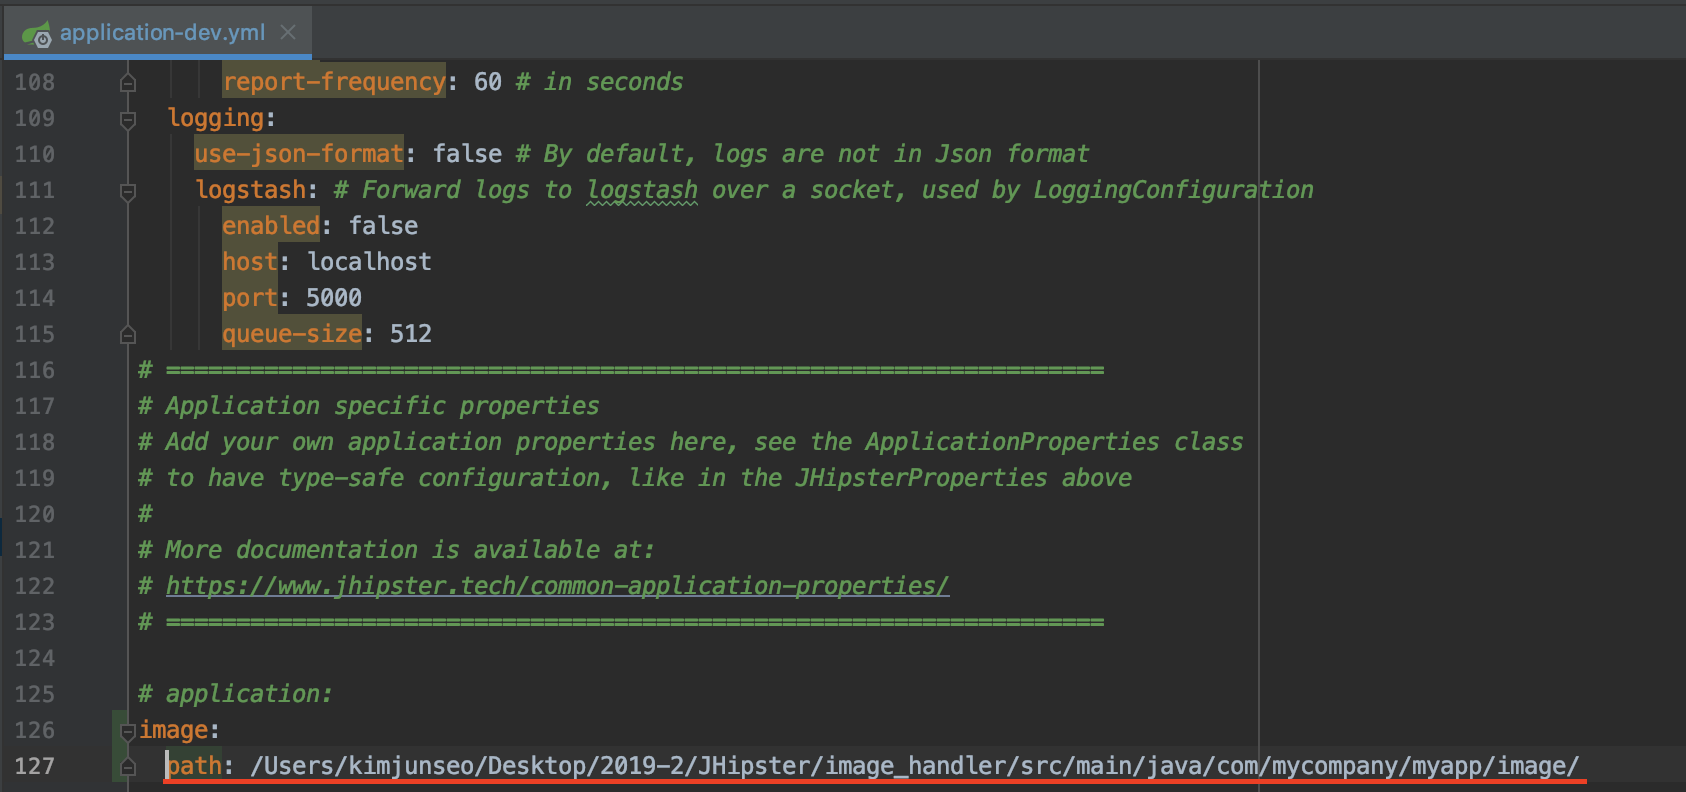
application.dev에 설정한 값을 가져올 땐
@Value()를 사용해서 불러온다.
이제 만들어준 경로에 이미지를 저장해보겠다.
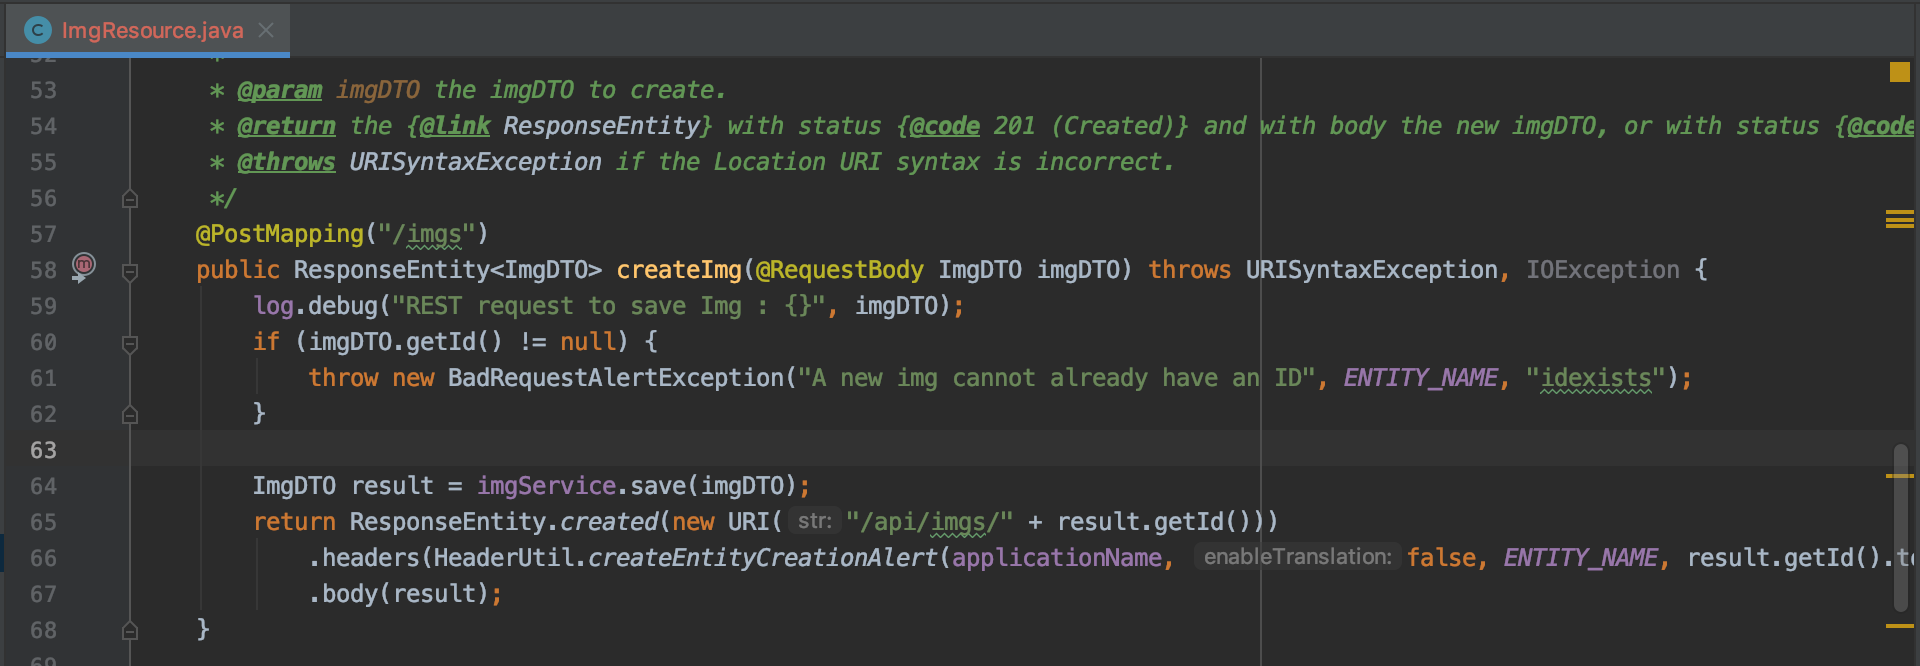
기존 @PostMapping (create시 호출되는 부분) 코드는 아래와 같다.
imgDTO에서 getImage를 통해 바이트 파일로 넘겨줬던 이미지를 불러온다.
byte[] bytes = imgDTO.getImage();
글로벌 변수로 선언해줬던 path와 이미지의 이름을 합쳐줘서 하나의 경로로 만들어준다.
Path path = Paths.get(UPLOADED_FOLDER + imgDTO.getImageName());
만들어준 경로를 이용하여 해당경로에 바이트파일을 저장한다.
Files.write(path, bytes);
현재까지 전체코드는 아래와 같다.
//...
@PostMapping("/imgs")
public ResponseEntity<ImgDTO> createImg(@RequestBody ImgDTO imgDTO) throws URISyntaxException, IOException {
log.debug("REST request to save Img : {}", imgDTO);
if (imgDTO.getId() != null) {
throw new BadRequestAlertException("A new img cannot already have an ID", ENTITY_NAME, "idexists");
}
byte[] bytes = imgDTO.getImage();
Path path = Paths.get(UPLOADED_FOLDER + imgDTO.getImageName());
Files.write(path, bytes);
ImgDTO result = imgService.save(imgDTO);
return ResponseEntity.created(new URI("/api/imgs/" + result.getId()))
.headers(HeaderUtil.createEntityCreationAlert(applicationName, false, ENTITY_NAME, result.getId().toString()))
.body(result);
}
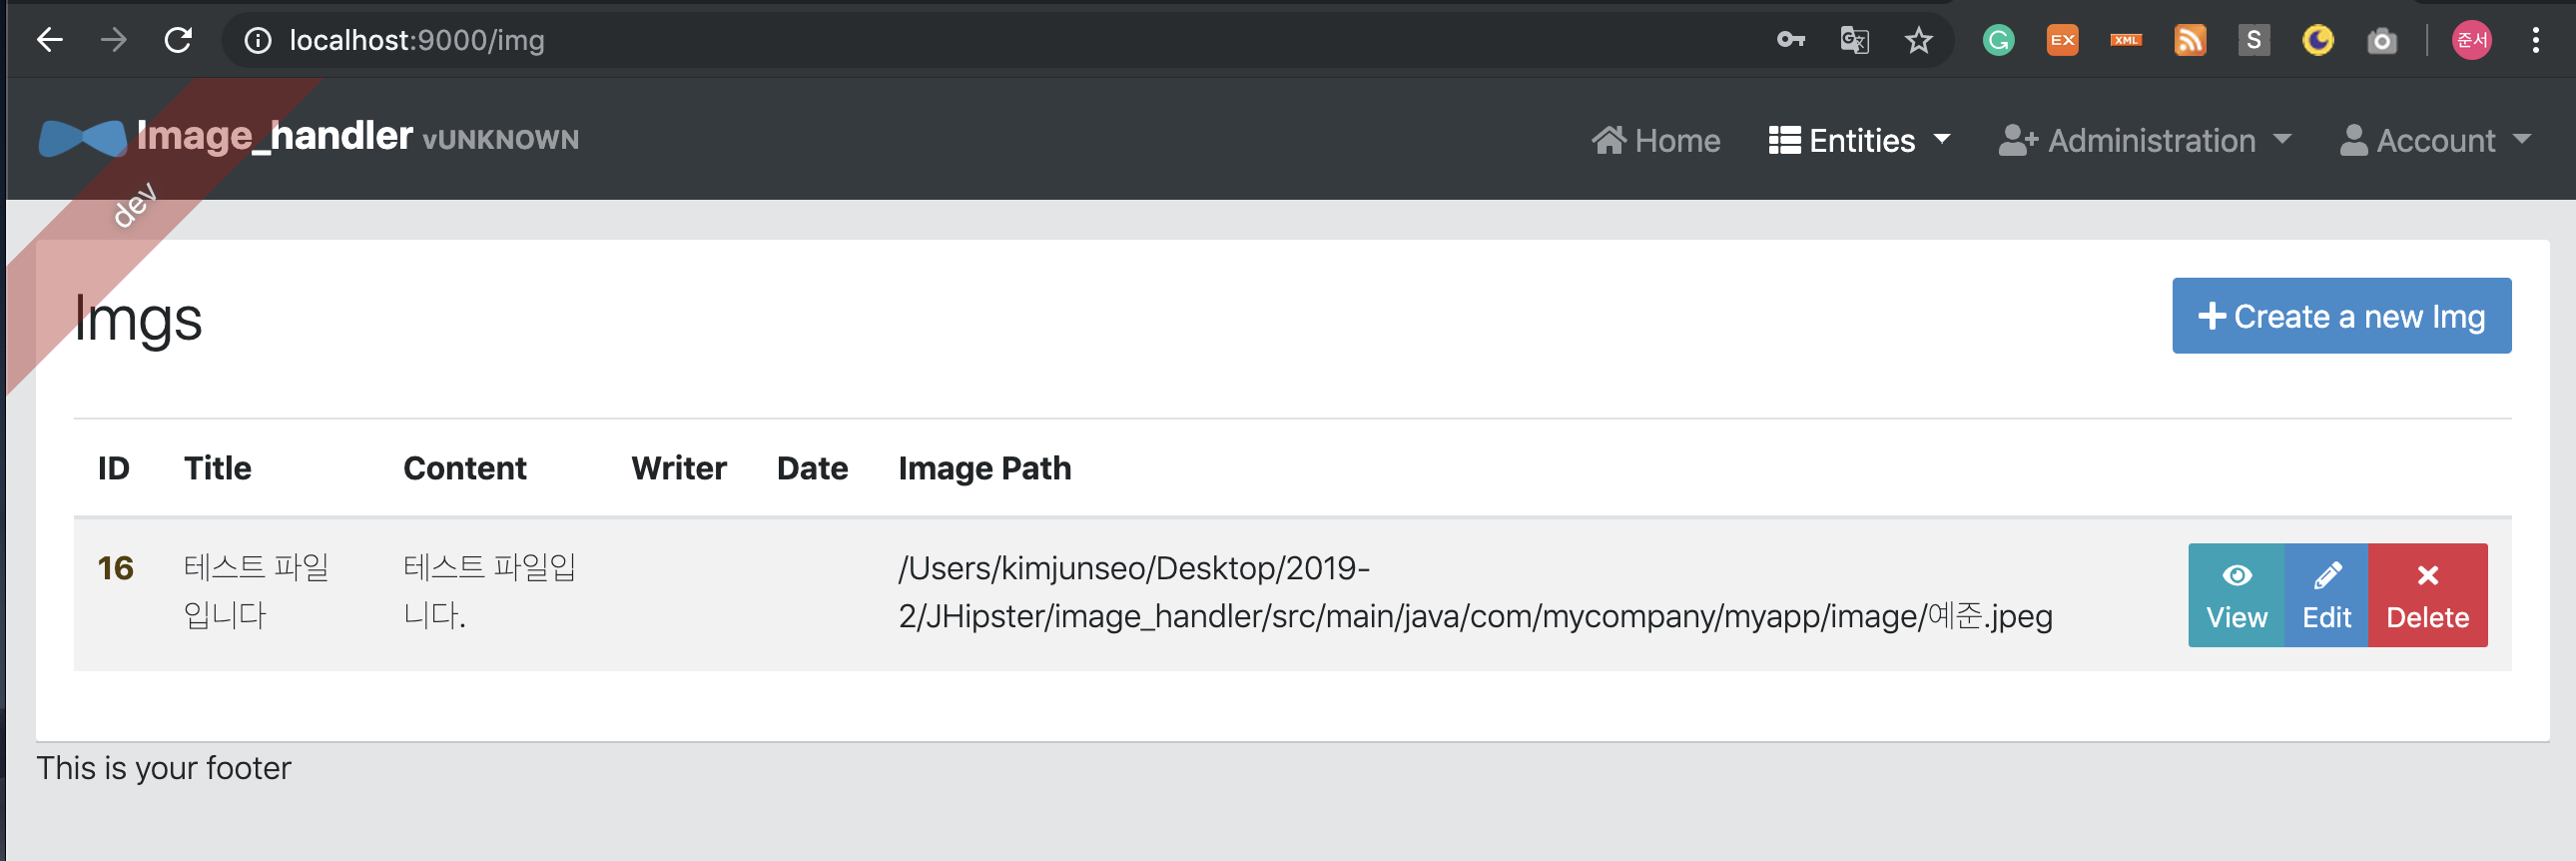
//...이 과정까지 하면, 해당 디렉토리에 업로드한 파일이 저장된다.
이제 이 경로를 DB에 넣어주면 된다.
DB에 정보를 넣을 때는 Service파일의 save를 통해 넣는다. save에는 DTO파일을 넣어준다. 따라서 DTO의 image_path에 이 경로를 setter를 통해 넣어주면 끝이다.
imgDTO.setImage_path(path.toString());
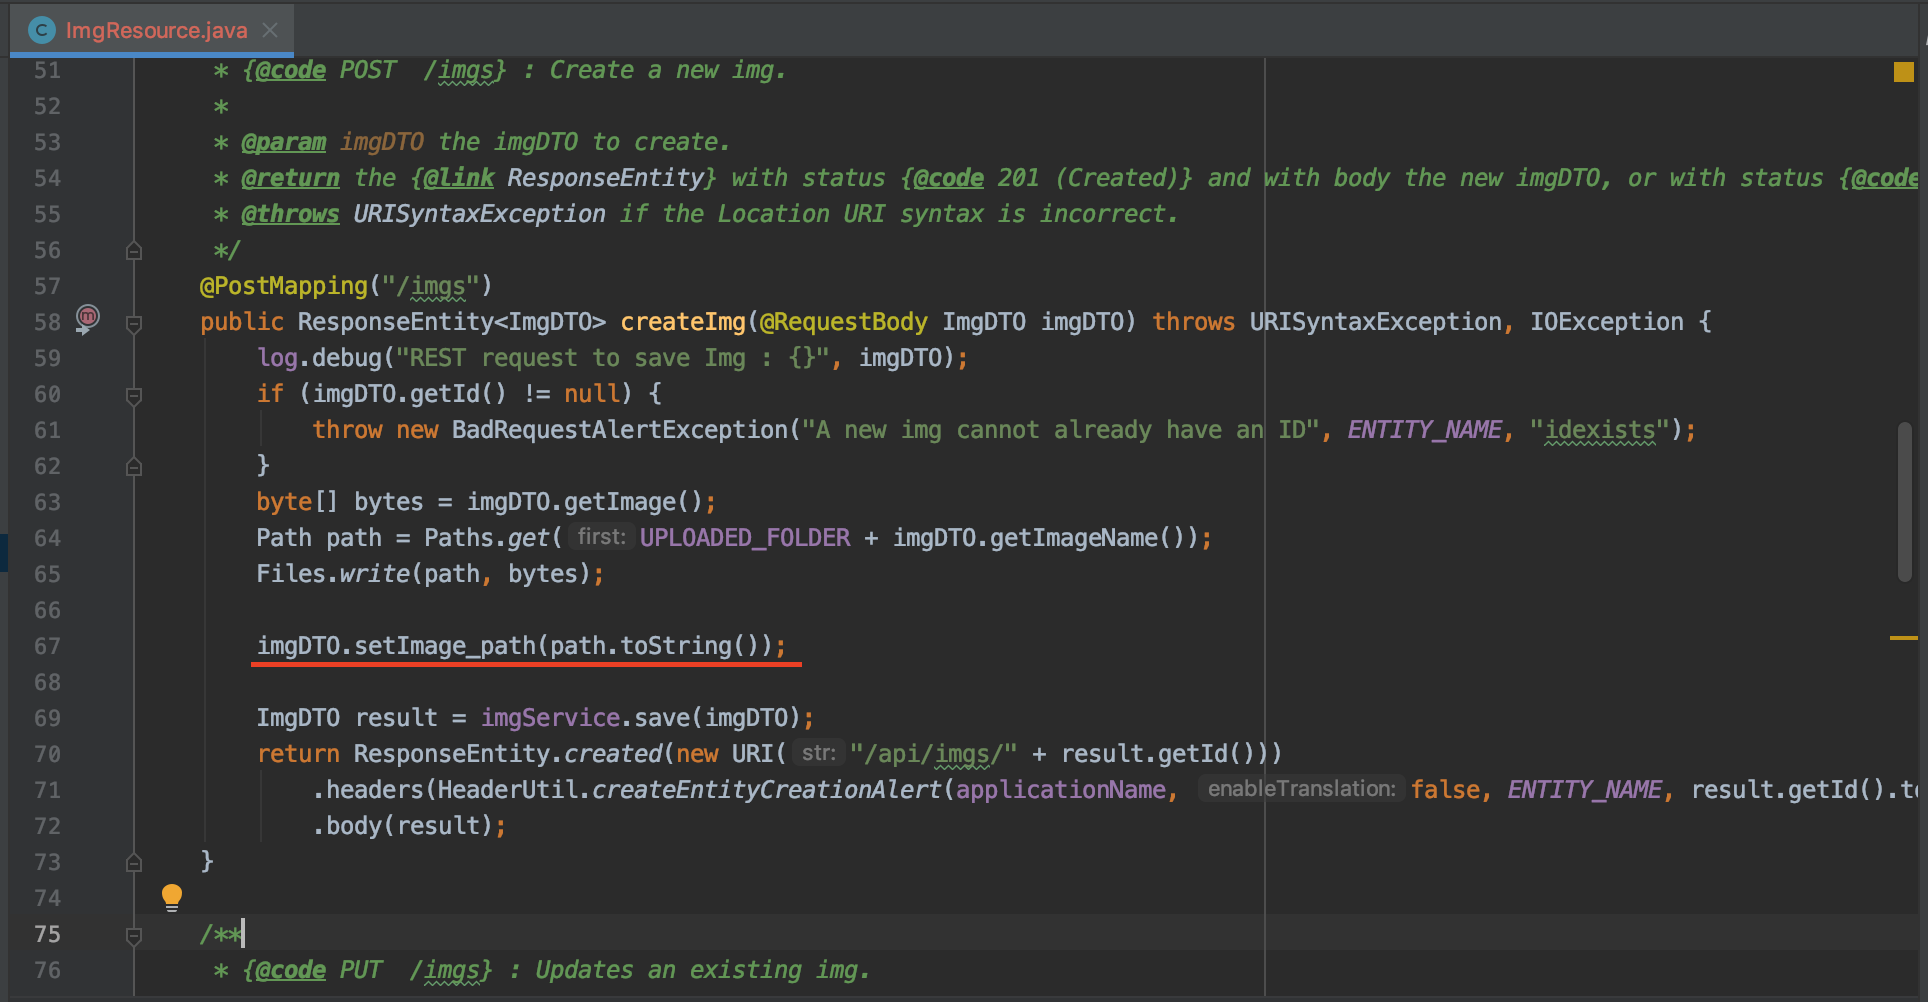
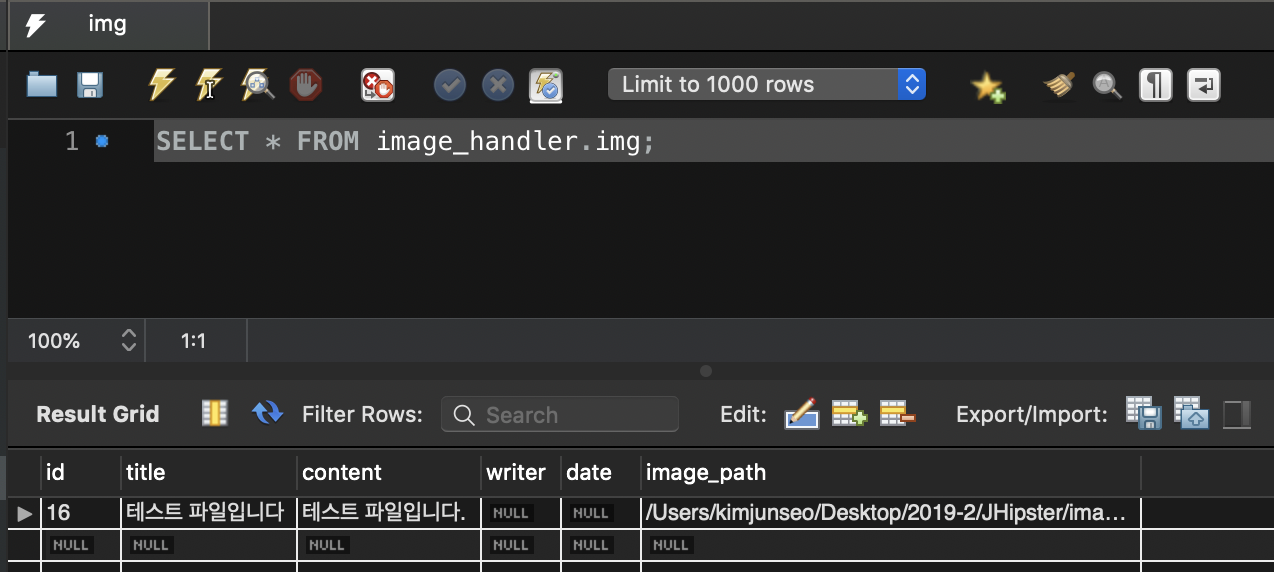
이렇게 하면, 해당 경로가 DB에도 저장된다.
실행시켜보면, 이미지가 잘 저장되고, 경로또한 잘 저장됨을 볼 수 있다.