Spring Framework를 통해 Java 앱 느슨하게 결합하기
Spring Bean 생성하기
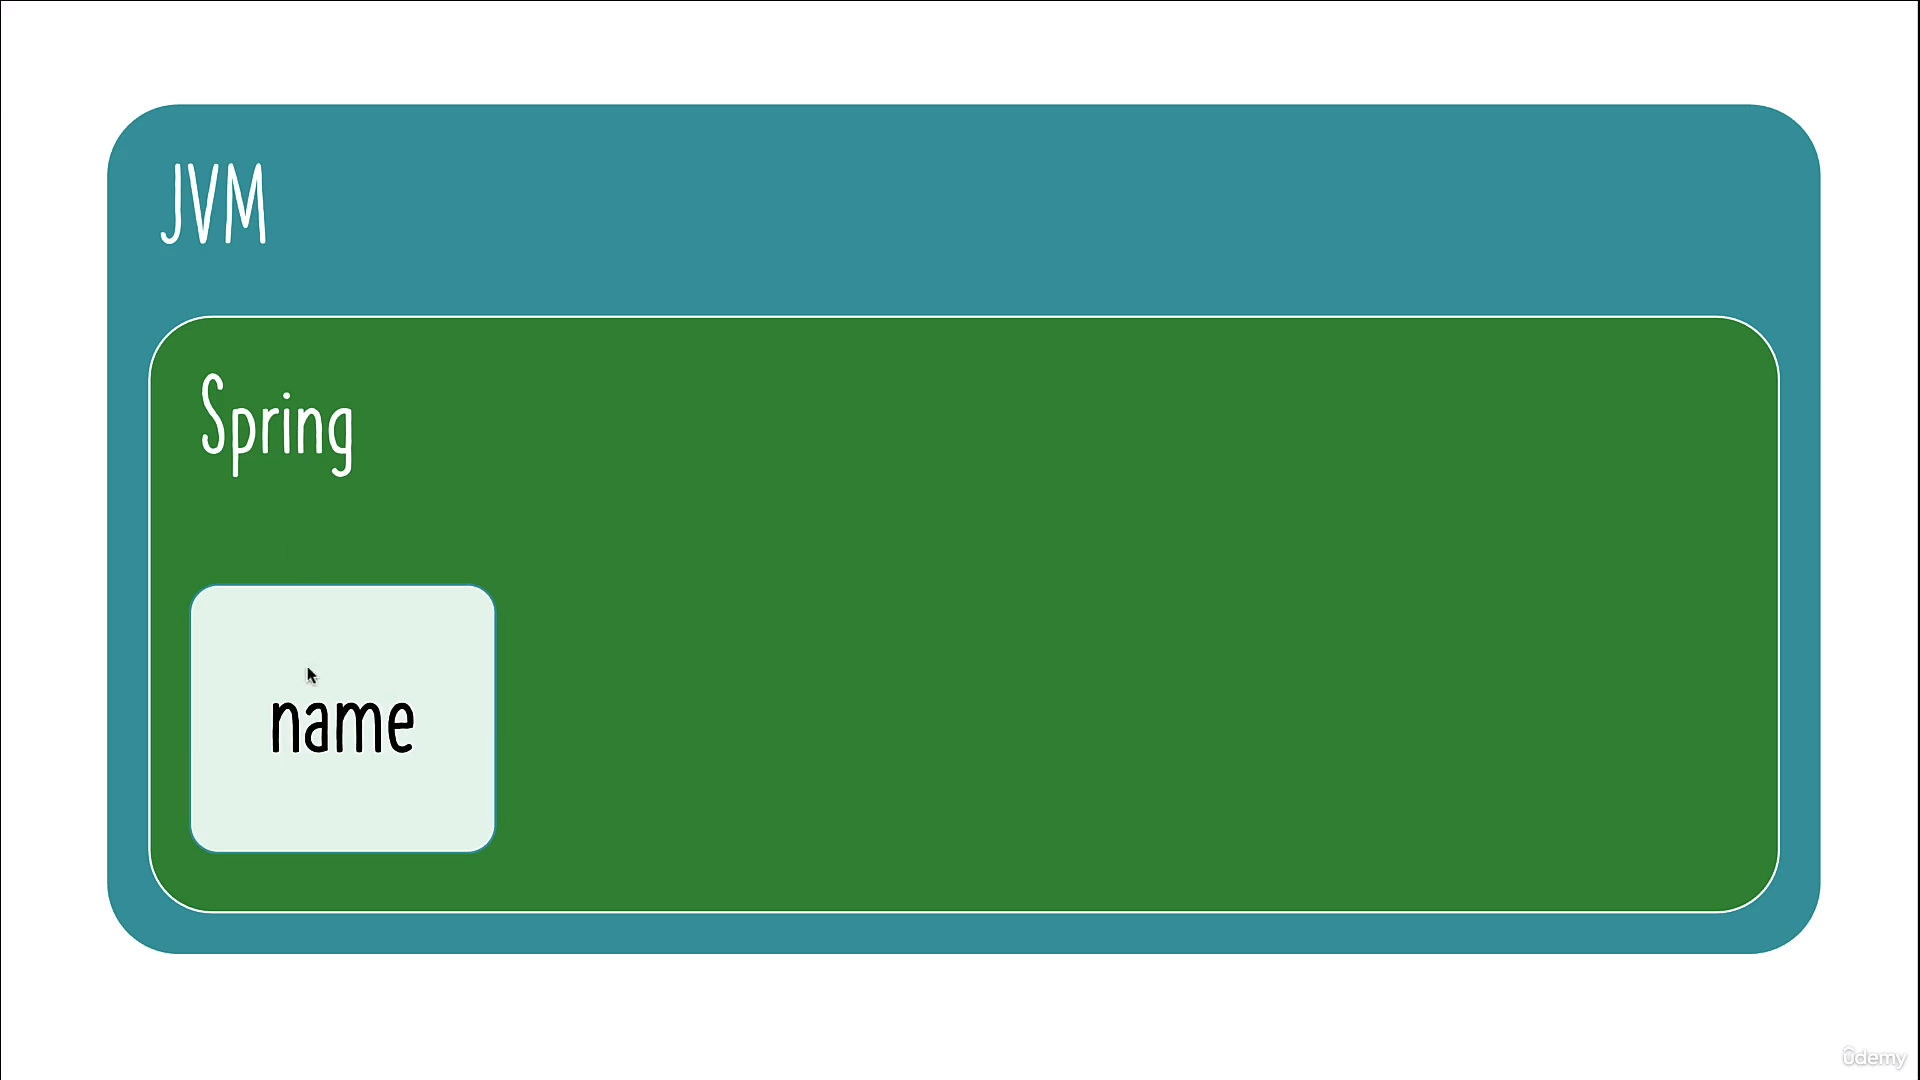
JVM 내부에서 Spring context를 생성하고, name이라는 이름을 가진 Bean을 생성해보려고 한다.
public class App02HelloWorldSpring {

    public static void main(String[] args) {

        // (1)
        AnnotationConfigApplicationContext context = new AnnotationConfigApplicationContext(
                HelloWorldConfiguration.class);

        // (2)

        // (3)
        System.out.println(context.getBean("name"));

    }

}
(1) 제일 먼저 할 일은 Spring Context를 실행시키는 일이다. configuration 클래스를 추가해 spring context를 실행시키고자 한다. AnnotationConfigApplicationContext를 이용해 JVM 안에서 Spring context를 실행시켰다.
@Configuration
public class HelloWorldConfiguration {

    @Bean
    public String name() {
        return "GilDong Hong";
    }

}
(2) Spring으로 관리할 범위를 설정해준다. HelloWorldConfiguration 이라는 클래스를 만들고, @configuration 어노테이션을 달아줬다. 추가로 name()이라는 메서드도 Bean으로 등록해줬다.
(3) Spring이 관리하는 Bean 확인
Bean은 여러 방법으로 확인 가능하다. 여기서는 context.getBean("빈의 이름");으로 확인했다.
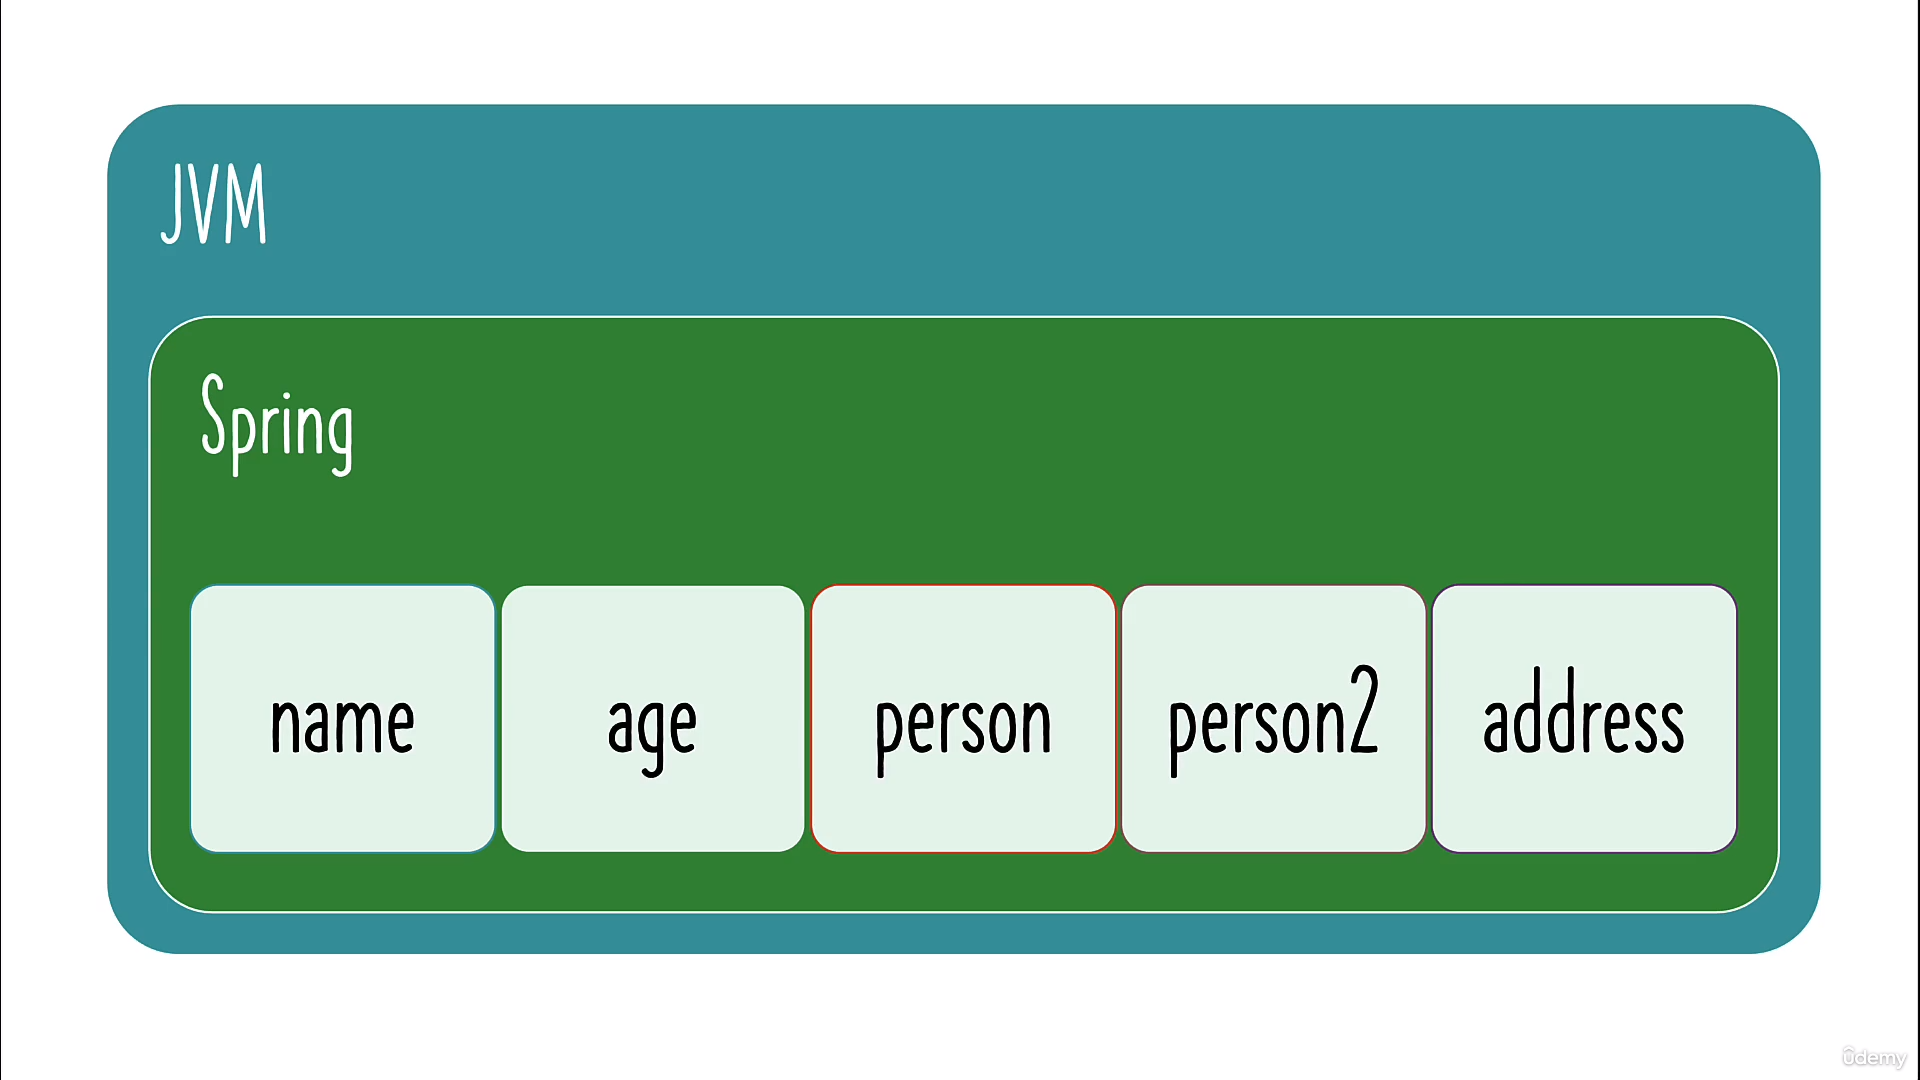
여러 Bean 만들기
record Person(String name, int age) {};		// (1)

record Address(String firstLine, String city) {};

@Configuration
public class HelloWorldConfiguration {

    @Bean
    public String name() {
        return "GilDong Hong";
    }

    @Bean
    public int age() {
        return 15;
    }

    @Bean
    public Person person() {
        return new Person("CheolSoo Kim", 20);
    }

    @Bean(name = "address2")		// (2)
    public Address address() {
        return new Address("Baker Street", "London");
    }

}
당연히 객체도 Bean으로 만들 수 있다.
public class App02HelloWorldSpring {

    public static void main(String[] args) {

        AnnotationConfigApplicationContext context = new AnnotationConfigApplicationContext(
                HelloWorldConfiguration.class);

        System.out.println(context.getBean("name"));	// GilDong Hong
        System.out.println(context.getBean("person"));	// Person[name=CheolSoo Kim, age=20]
        System.out.println(context.getBean("address2"));	// Address[firstLine=Baker Street, city=London]
        System.out.println(context.getBean(Address.class));	// (3) Address[firstLine=Baker Street, city=London]

    }

}
(1) record
Java Bean을 간편하게 생성할 수 있게 함. Getter, Setter, 생성자, equals, hashcode, toString 등을 자동으로 만들어줌. Java 16부터 추가.
(2) Bean 이름 설정
기본적으로 Bean의 이름은 메서드의 이름을 그대로 사용한다. 그래서 제일 위에서 context.getBean("name")으로 name() 메서드를 바로 찾을 수 있었다. 그래도 모종의 이유로 메서드와 Bean의 이름을 다르게 설정해야 할 수 있다. 그럴 때는 Bean 어노테이션의 속성으로 name을 기입해주면 된다. @Bean(name = "설정할 이름"). 이 때는 context.getBean("address")를 실행하면 해당 Bean을 찾을 수 없어 오류가 발생한다.
(3) Bean을 검색하는 방법
Spring이 Bean을 관리하기 시작하면 빈 이름 외에 유형으로도 검색이 가능하다. 예를 들어, context.getBean(Address.class)로도 동일한 결과를 얻을 수 있다. 다만 Address 클래스를 사용하는 빈이 2개 이상이 되면 오류가 발생할 수 있다.
기존 Bean을 활용해 새로운 Bean 생성하기
@Configuration
public class HelloWorldConfiguration {

    @Bean
    public String name() {
        return "GilDong Hong";
    }

    @Bean
    public int age() {
        return 15;
    }

    @Bean
    public Person person() {
        return new Person("CheolSoo Kim", 20, new Address("Main Street", "Utrecht"));
    }

    @Bean
    public Person person2MethodCall() {			// (1)
        return new Person(name(), age(), address());
    }

    @Bean
    public Person person3Parameters(String name, int age, Address address2) {		// (2)
        return new Person(name, age, address2);
    }

    @Bean(name = "address2")
    public Address address() {
        return new Address("Baker Street", "London");
    }

}
(1) 메서드를 직접 호출해 새로운 빈을 생성함
(2) 기존 Bean을 호출해 사용. Bean의 이름을 활용해 가져다 쓰기 때문에 Address의 매개변수는 모두 address2가 된 상태.
