React Native BLE library 비교 (react-native-ble-plx VS react-native-ble-manager)
배경
React Native를 통해 bluetooth를 사용하고자 하는 경우, 가장 대표적으로 알려져 있는 2가지 라이브러리를 비교해보고 알아보고자 한다.
1.react-native-ble-plx(이하 'plx')
react-native-ble-manager(이하 'manager')
BLE 개념 이해
- classic Bluetooth 기술 이후 약 10여년 전에 저전력으로 동일한 기능을 수행할 수 있는 Bluetooth Low Energy(BLE) 기술이 등장
- BLE Communication 기술은 2가지 역할로 나뉨
1.Peripheral
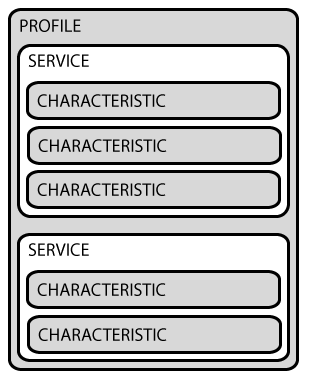
CentralGATT 란?
GATT is an acronym for the Generic Attribute Profile, and it defines the way that two Bluetooth Low Energy devices transfer data back and forth using concepts called Services and Characteristics.
-
Profiledoesn’t actually exist on the BLE peripheral itself, it’s simple a pre-defined collection of Services that has been compiled by either the Bluetooth SIG or by the peripheral designers. -
Servicesare used to break data up into logic entities, and contain specific chunks of data called characteristics. A service can have one or more characteristics, and each service distinguishes itself from other services by means of a unique numeric ID called a UUID, which can be either 16-bit (for officially adopted BLE Services) or 128-bit (for custom services). -
The lowest level concept in GATT transactions is the
Characteristic, which encapsulates a single data point (though it may contain an array of related data, such as X/Y/Z values from a 3-axis accelerometer, etc.).
plx
1. 초기 셋업 및 필수 라이브리 설치
npm install --save react-native-ble-plx
npm install --save react-native-base64
2. 디바이스 scan 시작 & connect
static #bleManager = new BleManager();
...
	this.#bleManager.startDeviceScan(null, null, (error, device) => {

       if (device.id === targetDeviceID) {
         this.#bleManager.stopDeviceScan();
         console.log('scan stopped');

         device
           .connect()
           .then(connectedDevice => {
             return connectedDevice.discoverAllServicesAndCharacteristics();
           })
           .then(preparedDevice => {
             this.#preparedDeviceList[preparedDevice.id] = preparedDevice;

             resolve();
           })
       }
3. characteristics의 value가 변경됨에 따라 변경 값을 가져오기 (feat. monitorCharacteristicForService 함수)
monitorCharacteristicForService함수의 콜백함수 인자 내 characteristic.value를 변환한 값을 직접 정의 updateCallback(원하는 동작 포함) 함수 내의 인자로 계속적으로 전달하여, 실시간 업데이트 값을 표시 할 수 있음
const subscription = await this.#preparedDeviceList[
      deviceID
    ].monitorCharacteristicForService(
      this.#serviceUUID,
      this.#readCharacteristicUUID,
      (error, characteristic) => {
        const valueInBase64 = characteristic.value;
        const valueInString = base64.decode(valueInBase64).trim();
        updateCallback(valueInString);
      },
    );
manager
1. 초기 셋업 및 필수 라이브러리 설치
npm install --save react-native-ble-manager
npm install --save convert-string
npm install --save buffer
(Android)
- 'AndroidManifest.xml' 파일 수정
// file: android/app/src/main/AndroidManifest.xml
...
    <uses-permission android:name="android.permission.BLUETOOTH"/>
    <uses-permission android:name="android.permission.BLUETOOTH_ADMIN"/>
    <uses-permission android:name="android.permission.ACCESS_COARSE_LOCATION" />
...
(iOS)
- 'Info.plist' 파일 수정
In iOS >= 13 you need to add the NSBluetoothAlwaysUsageDescription string key.
2. 최초 App.js 컴포넌트 실행시 useEffect Hooks에 의해 bluetooth 기능 시작 및 EventListener 설정
- 'BleManager.start()'에 의해 블루투스 기능 시작
- 이벤트를 감지해 비동기적으로 실행되는 콜백함수를 사전에 정의하고 컴포넌트가 unmount 되었을 때 실행이 멈추도록 return에서 제거
: peripheral을 discover했을 때
: scan이 stop 했을 때
: characteristic의 value가 update 되었을 때
    bleManagerEmitter.addListener('BleManagerDiscoverPeripheral',
handleDiscoverPeripheral);
    bleManagerEmitter.addListener('BleManagerStopScan', handleStopScan);
bleManagerEmitter.addListener('BleManagerDisconnectPeripheral', handleDisconnectedPeripheral);
    bleManagerEmitter.addListener('BleManagerDidUpdateValueForCharacteristic', handleUpdateValueForCharacteristic);
3. BleManager.scan()으로 디바이스 스캐닝 프로세스 trigger
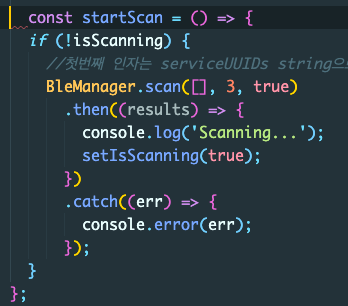
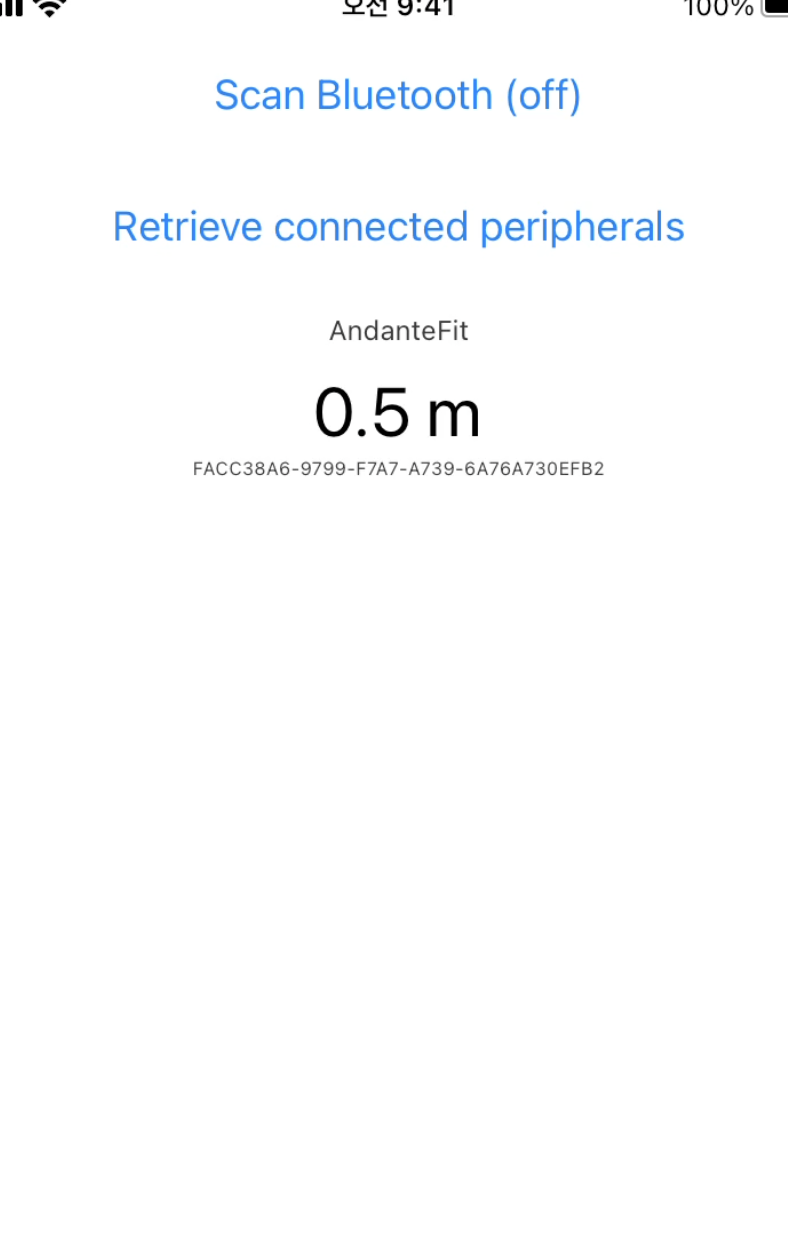
- 'Scan Bluethooth' 버튼 클릭하면 스캔 시작
- 모든 서비스에 대해서, 3초동안, iOS의 allowDuplicates 값은 true로 설정
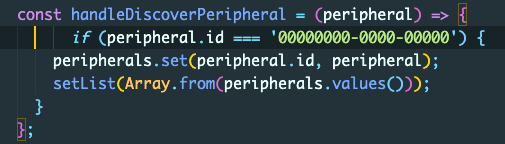
4. 이벤트 리스너의 handleDiscoverPeripheral 함수 실행
- 우리 디바이스의 id가 검색되면, list 변수에 할당 (by setList 함수)
5. 미리 설정된 스캔 시간(3초) 종료 시, 이벤트 리스너의 handleStopScan 함수 실행
6. 리스트의 개별 peripheral 항목 클릭 시, testPeripheral() 함수 실행
- argument는 미리 할당해 놓은 list 변수 내 peprpheral 임
- 단순 통신(read data) 여부 확인만을 위한다면 이 부분 불필요
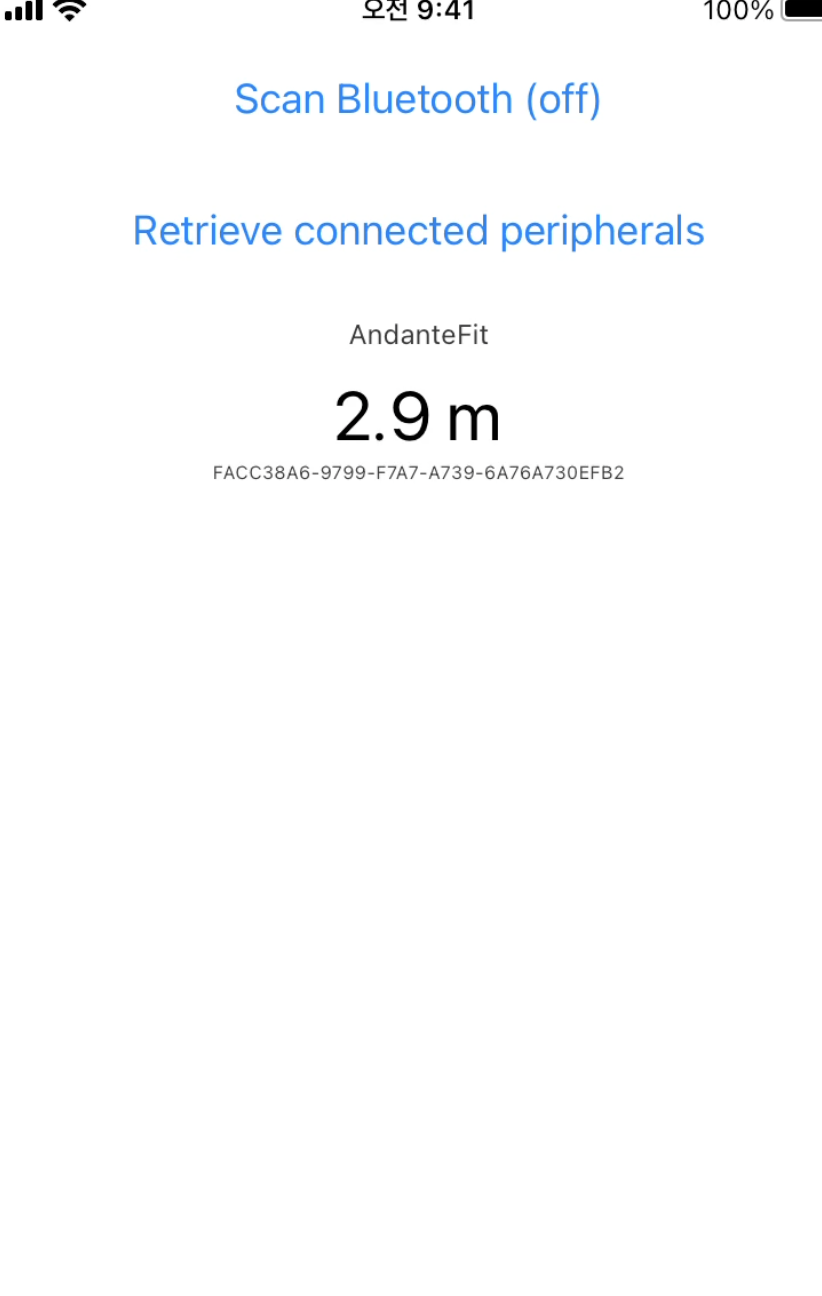
7. (핵심 step) useEffect와 'BleManagerDidUpdateValueForCharacteristic' 이벤트를 활용한 device 값 업데이트 (실제 예시> 거리측정 라이다에서 실시간 변화 거리)
- 컴퍼넌트 최초 mount 시 'BleManagerDidUpdateValueForCharacteristic'의 이벤트 리스너를 콜백 함수와 함께 등록시킴
- 데이터가 변화할 때마다 콜백함수가 호출되며, 콜백함수 내부에서는 device로부터 가져온 데이터를 변환하여 setLoaction으로 location 값을 업데이트하고, UI에서 이를 실시간으로 가져와 보여줌
useEffect(() => {
    BleManager.start({showAlert: true});

    bleManagerEmitter.addListener(
      'BleManagerDiscoverPeripheral',
      handleDiscoverPeripheral,
    );
    bleManagerEmitter.addListener('BleManagerStopScan', handleStopScan);
    bleManagerEmitter.addListener(
      'BleManagerDisconnectPeripheral',
      handleDisconnectedPeripheral,
    );
    bleManagerEmitter.addListener(
      'BleManagerDidUpdateValueForCharacteristic',
      ({value, peripheral, characteristic, service}) => {
        const data = bytesToString(value).substring(3);
        setLocation(data);
        console.log(`Recieved ${data} for characteristic ${characteristic}`);
      },
    );
    }, [])
결론 및 알게된 점
- 두 가지 라이브러리 모두 공통적으로,
devicescan-> deviceconnect-> commnunication(write,read)의 3가지 단계로 나뉨- value의 실시간 업데이트 값을 가져오기 위해서, plx는 built-in 함수인
monitorCharacteristicForService함수를 사용하였고, manager는 이벤트 리스너의 콜백함수를 이용하고 있는 차이가 있음- connect가 된 상태여야만 각 chracteristic에 serviceUUID 등이 부여되어 통신이 가능하고, connect 상태가 아니면 통신 불가 (직접 구현 과정에서 오류 많이 겪음)
- 통신 중 주고 받는 데이터는 일정 형식의 변환이 필요함 (plx에서 base64.decode()나 manager에서 buffer.from())
- 실질적인 동일 구성이지만, connect 전에는
device, connected 되어 communication 가능한 상태는characteristic이라 하는 것으 추측됨