AutoConfigureRestDocs 경로 변경
이전 포스팅에서는 gradle에 경로를 지정해서 빌드시 asciidoctor를 이용한 문서가 만들어 졌는데
ext {
	set('snippetsDir', file("build/generated-snippets"))
}
경로를 지정하는 다른 방법으로 AutoConfigureRestDocs 어노테이션을 테스트하려는 클래스위에 올리면 지정한 위치에 문서가 만들어 진다.
@AutoConfigureRestDocs(outputDir = "target/snippets")예를 들어 아래와 같은 코드로 문서를 만든다면
@WebMvcTest(HomeController.class)
@AutoConfigureRestDocs(outputDir = "target/snippets")
public class WebLayerTest {

	@Autowired
	private MockMvc mockMvc;

	@Test
	public void shouldReturnDefaultMessage() throws Exception {
		this.mockMvc.perform(get("/")).andDo(print()).andExpect(status().isOk())
				.andExpect(content().string(containsString("Hello, World")))
				.andDo(document("home"));
	}
}
지정한 디렉토리에 문서가 만들어지게 된다.
빌드시에 아래와 같은 gradle 설정대로 .adoc파일로 html파일을 만들게 되는데
tasks.named('test') {
outputs.dir snippetsDir
useJUnitPlatform()
}
tasks.named('asciidoctor') {
inputs.dir snippetsDir
dependsOn test
}
bootJar {
dependsOn asciidoctor
copy {
// src/docs/asciidoc == from 경로
from "${asciidoctor.outputDir}"
into 'src/main/resources/static/docs' // /static/docs로 복사!
}
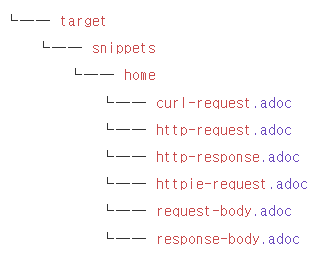
}아래와 같은 스니펫을 이용해서 html문서를 만들게 된다.
.request
include::{snippets}/home/http-request.adoc[]

.response
include::{snippets}/home/http-response.adoc[]
RestDocs 문서화 방법
requestFields 와 responseFields를 이용해서 요청과 응답의 필드 설명을 문서화한다.
this.document = MockMvcRestDocumentation.document("{class-name}/{method-name}",
    requestFields(
        fieldWithPath("field1").description("The first field."),
        fieldWithPath("field2").description("The second field.")
    ),
    responseFields(
        fieldWithPath("field1").description("The first field."),
        fieldWithPath("field2").description("The second field.")
    )
);
pathParameters 는 경로 파라미터 ( users/{id} ) requestParameters는 요청 파라미터를 문서화한다.( 쿼리스트링 )
this.document = MockMvcRestDocumentation.document("{class-name}/{method-name}",
    pathParameters(
        parameterWithName("id").description("The id of the item")
    ),
    requestParameters(
        parameterWithName("query").description("The search query")
    )
);
requestParts 는 멀티파트 요청의 일부를 문서화한다.
this.document = MockMvcRestDocumentation.document("{class-name}/{method-name}",
    requestParts(
        partWithName("file").description("The file to upload")
    )
);links는 HATEOAS 링크를 문서화한다.
this.document = MockMvcRestDocumentation.document("{class-name}/{method-name}",
    links(
        linkWithRel("self").description("Link to the self resource"),
        linkWithRel("next").optional().description("Link to the next page")
    )
);
requestHeaders / responseHeaders - 헤더의 요청이나 응답을 문서화 한다.
this.document = MockMvcRestDocumentation.document("{class-name}/{method-name}",
    requestHeaders(
        headerWithName("Authorization").description("The authorization token")
    ),
    responseHeaders(
        headerWithName("ETag").description("The ETag header")
    )
);
requestCookies - 쿠키를 문서화
this.document = MockMvcRestDocumentation.document("{class-name}/{method-name}",
    requestCookies(
        cookieWithName("sessionId").description("The session Id")
    )
);
hypermedia 는 하이퍼 미디어를 문서화한다.
this.document = MockMvcRestDocumentation.document("{class-name}/{method-name}",
    hypermedia(
        halLinks(), // HAL 형식의 링크를 문서화합니다.
        linkWithRel("self").ignored(), // 특정 링크를 무시합니다.
        embeddedResources() // 임베디드 리소스를 문서화합니다.
    )
);
HATEOAS
RESTful API 디자인의 중요한 원칙 중 하나로 클라이언트가 서버로부터 애플리케이션의 상태에 대한 정보를 받고, 그 상태를 변경하기 위해 필요한 모든 정보를 서버로부터 얻어야 한다는 개념을 말한다.
HATEOAS 원칙을 따른 API문서는 아래와 같다.
{
    "id": 1,
    "name": "John Doe",
    "_links": {
        "self": {
            "href": "http://api.example.com/users/1"
        },
        "update": {
            "href": "http://api.example.com/users/1/update"
        },
        "delete": {
            "href": "http://api.example.com/users/1/delete"
        }
    }
}
HATEOAS를 이용하면 클라이언트는 보다 많은 상태 변경 방법을 알게된다.
Preprocessors 이용해서 예쁘게 문서 만들기
기본에는 아무런 설정없이 기본적인 방법으로 문서를 만들었는데
@ExtendWith({ SpringExtension.class, RestDocumentationExtension.class })
public class MyRestDocs {

    protected MockMvc mockMvc;

    @BeforeEach
    private void setup(WebApplicationContext webApplicationContext,
                       RestDocumentationContextProvider restDocumentation) {
        mockMvc = MockMvcBuilders.webAppContextSetup(webApplicationContext)
                .addFilter(new CharacterEncodingFilter(StandardCharsets.UTF_8.name(), true))
                .apply(MockMvcRestDocumentation.documentationConfiguration(restDocumentation))
                .build();
    }
}
// .. 테스트 코드
andDo(document("{class-name}/{method-name}",
responseFields(
fieldWithPath("status").description("응답 상태"),
fieldWithPath("msg").description("응답 메시지"),
fieldWithPath("data[].id").type(JsonFieldType.NUMBER).description("아이디"),
fieldWithPath("data[].title").type(JsonFieldType.STRING).description("할 일"),
fieldWithPath("data[].done").type(JsonFieldType.BOOLEAN).description("완료 여부")
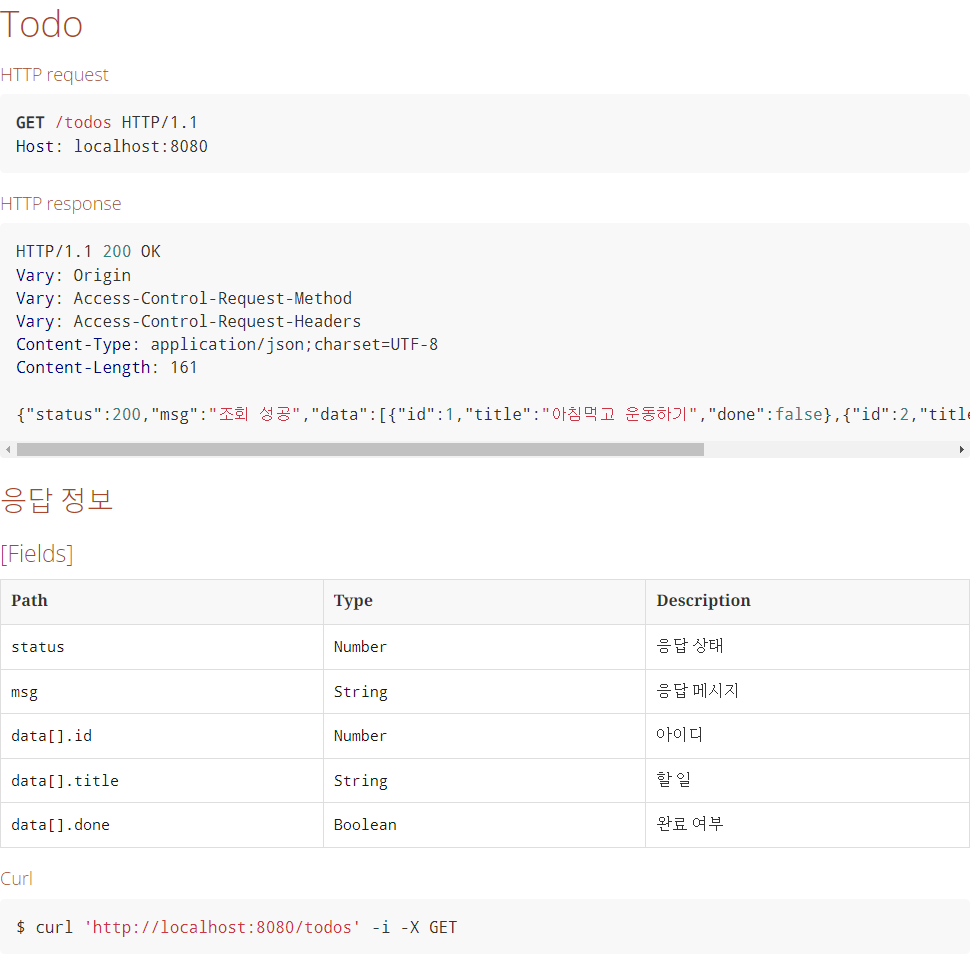
)))이렇게 만들어진 문서는 아래처럼 일자로 늘어진 json 모양이 되어서 한눈에 보기가 어렵다.
Preprocessors를 이용하면 RestDocs를 한눈에 보기 편하게 만들어 준다.
위 코드에서 setup 메소드를 수정한다.
    @BeforeEach
    private void setup(WebApplicationContext webApplicationContext,
                       RestDocumentationContextProvider restDocumentation) {
        this.document = MockMvcRestDocumentation.document("{class-name}/{method-name}",

                preprocessRequest(prettyPrint()
//                        , removeHeaders("Authorization") // 민감한 정보일 경우 문서화 x
//                        , removeHeaders("Set-Cookie")
                ),
                preprocessResponse(prettyPrint()));

        mockMvc = MockMvcBuilders.webAppContextSetup(webApplicationContext)
                .addFilter(new CharacterEncodingFilter(StandardCharsets.UTF_8.name(), true))
                .apply(MockMvcRestDocumentation.documentationConfiguration(restDocumentation))
                // .apply(SecurityMockMvcConfigurers.springSecurity()) // 시큐리티 사용시 활성화
                .alwaysDo(document) // 디폴트 설정
                .build();
    }
modifyUris를 사용할 경우 요청 uri 를 수정할 수 있다.
this.document = MockMvcRestDocumentation.document("{class-name}/{method-name}",
preprocessRequest(modifyUris()
.scheme("https")
.host("api.example.com")
.removePort())
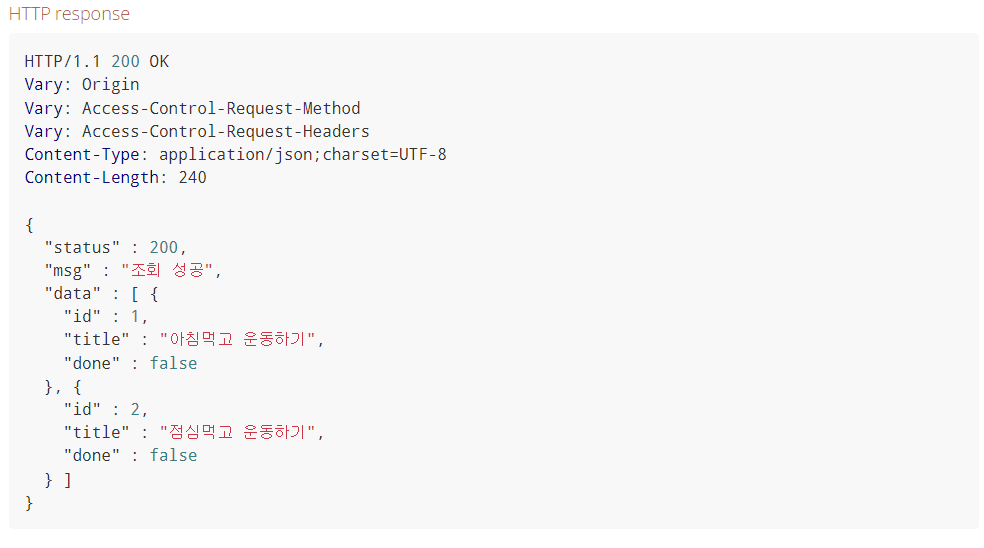
);만들어진 문서는 아래와 같은 모양이 된다.
빌드했을때 이전 빌드 문서를 보는 문제
요약하자면 너무 삽질을 했다 ㅋㅋ 그리고 스프링의 빌드 과정을 좀 더 자세히 알게된 계기가 되었다 .. !
서론을 말하자면 테스트를 작성 후 빌드를 해서 jar 파일을 만들고 로컬서버에서 문서를 확인하는 과정에서 이전에 빌드했던 문서가 화면에 나왔다.
처음에는 그냥 빌드 두번 하면되네 라고 생각했다가 실제 배포를 한다면 테스트 환경에서 빌드는 딱 한번만 될텐데 이전 문서를 보면서 작업할 생각을 하니 .. 중요한 문제라고 생각이 됐다.
그래서 Gradle 스크립트를 잘못 쓴거 같아서 계속 수정하면서 테스트하고 있었는데 사소한 문제였고 스프링의 동작 과정을 자세히 알지 못해서 일어난 일이었다.
스크립트를 보자
configurations {
    asciidoctorExt
}

ext {
    set('snippetsDir', file("build/generated-snippets"))
}

test {
    outputs.dir snippetsDir // outputs - 변경이 감지되면 작업을 실행 ( clean build )
    useJUnitPlatform()
    doLast {  // doLast 는 해당 블록이 종료된 후 실행된다.
        println '테스트 완료'
    }
}

asciidoctor {
    inputs.dir snippetsDir // inputs - 변경 감지
    dependsOn test
    doLast {
        copy {
            from "${asciidoctor.outputDir}"
//            into 'src/main/resources/static'
            into 'build/resources/main/static'
        }
        println '문서화 완료'
    }
}

bootJar {
    dependsOn asciidoctor // dependsOn - 작업 순서를 결정. 먼저 선언하고 의존
}
위 스크립트를 보면 Copy 부분에서 into 'src/main/resources/static' 를 주석했는데 처음에 이 코드를 넣어 놓고 계속 빌드하면서 문서를 봤었다.
이 문제를 해결하다보니 스프링의 빌드 과정을 알게됐는데 스프링은 빌드 또는 Run을 하면 build 디렉토리를 생성하고 기존의 src/main/resources/static 디렉토리의 파일들을 build/resources/main/static 디렉토리 내부로 복사하게 된다.
이때 localhost:8080/index.html 같은 주소로 요청을 하면 스프링이 응답을 하는데 이때 응답하는 파일은 복사한 build 디렉토리 내부의 파일을 응답하게 된다.
기존의 스크립트는 생성한 문서를 build 디렉토리에 복사하지 않고 src 디렉토리에 복사했는데 문서를 삭제하고 처음에 요청을 하면 404를 응답받는 이유도 여기에 있다.
처음 빌드시에는 src 디렉토리에 복사하고 두번째 빌드시에 src 디렉토리를 build 디렉토리에 복사하니 이전 문서를 응답받을 수 있었던 것이다.
스크립트를 into 'build/resources/main/static' 로 수정하고 나니 build 디렉토리에 지금 만든 문서가 들어가게 되고 jar 파일에도 이상없이 들어가게 되었다.