백엔드 개발자로서 프론트와 협업을 하려면 Rest Api 문서를 만들어야 한다.
이전 프로젝트에서는 Flutter를 이용해 프론트개발만 했었는데 이때 Api 문서가 얼마나 중요한지 체감하게 되었다.
프론트는 결국 Api 문서를 이용해서 작업을 진행하게 되고 문서가 없다면 직접 만들어서까지 해야 했다.
이러한 경험을 바탕으로 Api문서의 중요성을 체감했으니 이번에는 테스트코드를 만들기만하면 Api문서가 만들어지는 Spring Rest Docs을 알아보자.
의존성 추가
plugins {
	id "org.asciidoctor.jvm.convert" version "3.3.2"
}

configurations {
	compileOnly {
		extendsFrom annotationProcessor
	}
	asciidoctorExt
}

dependencies {
	asciidoctorExt 'org.springframework.restdocs:spring-restdocs-asciidoctor'
	testImplementation 'org.springframework.restdocs:spring-restdocs-mockmvc'
}

ext {
	snippetsDir = file('build/generated-snippets')
}

test {
	outputs.dir snippetsDir
    useJUnitPlatform()
}

asciidoctor {
	inputs.dir snippetsDir
	dependsOn test
}

bootJar {
	dependsOn asciidoctor
    copy {
        // src/docs/asciidoc == from 경로
        from "${asciidoctor.outputDir}"
        into 'src/main/resources/static/docs'
    }
}org.asciidoctor.jvm.convert는 org.asciidoctor.convert 보다 최신 버전이다.
spring-restdocs-mockmvc 의존성을 추가하면 Rest Docs와 MockMvc 를 함께 사용할 수 있게 된다.
Rest Docs를 이용해서 테스트를 하게 되면 Api 문서가 생성되므로 항상 최신의 Api 문서가 생성됨을 보장한다.
Spring MockMvc를 이용하면 서블릿 컨테이너 없이 Spring Mvc를 동작시켜 빠르게 테스트할 수 있게 만들어 준다.
( 서블릿 컨테이너 역할 : 서블릿 생명주기 관리, http 요청 응답, 멀티스레드, 세션 관리 )
Asciidoctor는 작성된 Api문서를 Asciidoc형식으로 작성해 html이나 pdf로 변환할 수 있게 해준다.
snippetsDir = file('build/generated-snippets')의 역할은 생성된 문서 스니펫들을 저장할 경로를 설정한다.
Gradle이 경로에서 변경된 부분만 변경한다.
test {
	outputs.dir snippetsDir
}

asciidoctor {
	inputs.dir snippetsDir
	dependsOn test
}
useJUnitPlatform으로 JUnit5로 테스트를 실행한다.
테스트를 통해 snippetsDir에 출력을하고 asciidoctor가 스니펫을 이용해서 Api문서를 만든다.
dependsOn test 설정이 있으므로 테스트를 먼저 실행해야 asciidoctor를 사용할 수 있게 된다.
이를 통해 Asciidoctor가 최신의 테스트 결과를 바탕으로 문서를 생성한다는것을 보장한다.
마지막 bootJar 설정을 통해서 Asciidoctor가 만든 문서를 jar에 포함시켜서 빌드하게 된다.
/html5가 없더라도 기본 설정은 html로 만든다.
추상 코드 세팅
모든 테스트코드가 상속하게될 세팅 코드를 작성한다.
여기에 다른 테스트가 실행되기 전에 만들어져야 할 세션이나 토큰을 생성하는 메소드를 넣어두면 테스트하기 편하다.
import org.junit.jupiter.api.BeforeEach;
import org.junit.jupiter.api.extension.ExtendWith;
import org.springframework.restdocs.RestDocumentationContextProvider;
import org.springframework.restdocs.RestDocumentationExtension;
import org.springframework.restdocs.mockmvc.MockMvcRestDocumentation;
import org.springframework.restdocs.mockmvc.RestDocumentationResultHandler;
import org.springframework.restdocs.operation.preprocess.Preprocessors;
import org.springframework.test.context.junit.jupiter.SpringExtension;
import org.springframework.test.web.servlet.MockMvc;
import org.springframework.test.web.servlet.setup.MockMvcBuilders;
import org.springframework.web.context.WebApplicationContext;
import org.springframework.web.filter.CharacterEncodingFilter;

import java.nio.charset.StandardCharsets;

@ExtendWith({ SpringExtension.class, RestDocumentationExtension.class })
public class MyWithRestDoc {
    protected MockMvc mockMvc;
    protected RestDocumentationResultHandler document;

    @BeforeEach
    private void setup(WebApplicationContext webApplicationContext,
                       RestDocumentationContextProvider restDocumentation) {
        this.document = MockMvcRestDocumentation.document("{class-name}/{method-name}",
                Preprocessors.preprocessRequest(Preprocessors.prettyPrint()),
                Preprocessors.preprocessResponse(Preprocessors.prettyPrint()));

        mockMvc = MockMvcBuilders.webAppContextSetup(webApplicationContext)
                .addFilter(new CharacterEncodingFilter(StandardCharsets.UTF_8.name(), true))
                .apply(MockMvcRestDocumentation.documentationConfiguration(restDocumentation))
                // .apply(SecurityMockMvcConfigurers.springSecurity())
                .alwaysDo(document)
                .build();
    }
}
@ExtendWith({ SpringExtension.class})는 JUnit Jupiter의 확장으로 JUnit5의 테스트 설정과 수명주기를 제어하게 된다.
이를 통해 스프링부트의 컨텍스트를 로드, 빈 주입, 테스트 어노테이션을 사용할 수 있게 된다.
Spring Boot 2.1 이상에서는 @SpringBootTest 어노테이션만 사용해도 자동으로 위 확장이 적용된다.
또한 RestDocumentationExtension을 확장해서 Rest Docs를 사용할 수 있게 해준다.
MockMvc를 이용해 요청을 디스패처 서블릿에 보내 테스트를 진행한다.
RestDocumentationResultHandler는 REST Docs 설정을 저장하는 객체이다.
document("{class-name}/{method-name}"를 통해서 테스트된 클래스의 메소드 이름으로 문서가 만들어진다.
시큐리티 환경이 필요하면 주석을 해제하면 된다.
테스트 코드 작성
주소는 /posts , /users 로 기본적인 crud 를 이용한다고 가정한다.
import com.fasterxml.jackson.databind.ObjectMapper;
import org.junit.jupiter.api.Test;
import org.springframework.boot.test.autoconfigure.restdocs.AutoConfigureRestDocs;
import org.springframework.boot.test.context.SpringBootTest;
import org.springframework.http.MediaType;
import org.springframework.test.web.servlet.ResultActions;
import org.springframework.test.web.servlet.request.MockMvcRequestBuilders;
import org.springframework.test.web.servlet.result.MockMvcResultHandlers;
import org.springframework.test.web.servlet.result.MockMvcResultMatchers;
import shop.mtcoding.docapp.MyWithRestDoc;
import shop.mtcoding.docapp.model.post.Post;
@AutoConfigureRestDocs(uriScheme = "http", uriHost = "localhost", uriPort = 8080)
@SpringBootTest
public class PostControllerTest extends MyWithRestDoc {
@Test
public void save_테스트() throws Exception {
// given
String content = new ObjectMapper().writeValueAsString(
Post.builder().title("제목1").content("내용1").build());
// when
ResultActions resultActions = mockMvc.perform(
MockMvcRequestBuilders
.post("/posts")
.content(content)
.contentType(MediaType.APPLICATION_JSON));
// then
resultActions
.andExpect(MockMvcResultMatchers.status().isCreated())
.andExpect(MockMvcResultMatchers.jsonPath("$.id").value(1))
.andExpect(MockMvcResultMatchers.jsonPath("$.title").value("제목1"))
.andExpect(MockMvcResultMatchers.jsonPath("$.content").value("내용1"))
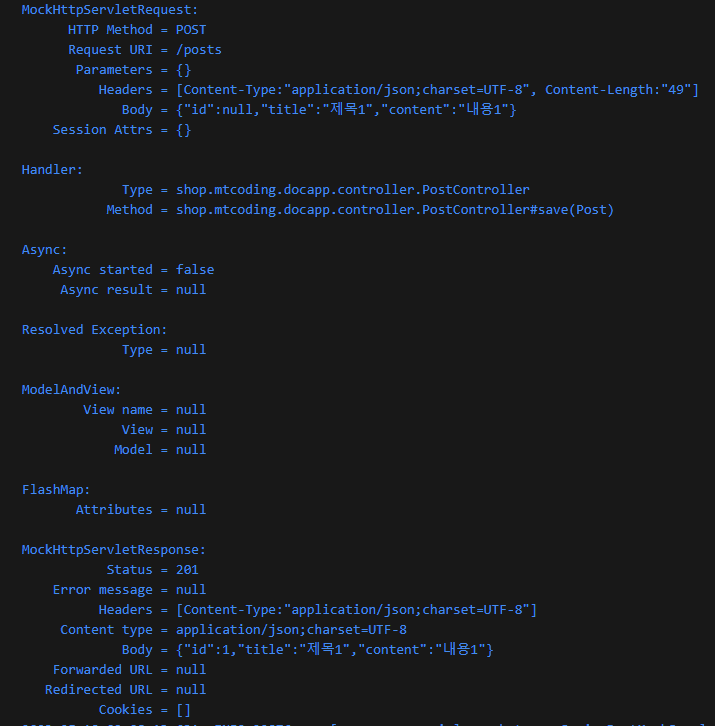
.andDo(MockMvcResultHandlers.print()) // 콘솔에 출력 - 디버깅
.andDo(document);
}
// ..생략
}세팅된 테스트 코드를 상속하여 mockMvc를 사용할 수 있다.
AutoConfigureRestDocs로 문서에 작성되는 기본 설정을 해줬는데 위 코드에서 입력한 설정은 기본 설정으로 안 적어도 무방하다.
테스트가 통과하면 andDo설정으로 디버깅을 하기 위해 콘솔에 출력이 되고 문서 작성이 된다.
문서 추가 설정
또는 테스트 코드에서 다음과 같은 설정을 추가하여 추가 설명을 문서에 추가할 수 있다.
        result.andExpect(status().isOk())
          .andDo(document("persons-update", // (4)
            getDocumentRequest(), // 필수아님
            getDocumentResponse(),  // 필수아님
            pathParameters(
                    parameterWithName("id").description("아이디")
            ),
            requestFields(
                    fieldWithPath("firstName").type(JsonFieldType.STRING).description("이름"),
                    fieldWithPath("lastName").type(JsonFieldType.STRING).description("성"),
                    fieldWithPath("birthDate").type(JsonFieldType.STRING).description("생년월일"),
                    fieldWithPath("hobby").type(JsonFieldType.STRING).description("취미")
),pathParameters를 이용해서 경로의 파라미터 설명을 추가하고 requestFields를 이용해서 입력받아야할 데이터를 문서에 넣을 수 있다.


또한 응답 데이터가 List일 경우 [] 를 앞에 붙인다.
    this.mockMvc.perform(get("/posts")
            .accept(MediaType.APPLICATION_JSON)) // 1
            .andExpect(status().isOk())
            .andDo(document("post-get-all",
                    responseFields( // 2
                            fieldWithPath("[].id").description("Post Id"), // 3
                            fieldWithPath("[].title").description("Post 제목"),
                            fieldWithPath("[].content").description("Post 내용")
                    )
            ));
문서를 html로 호출
./gradlew clean build명령어를 통해서 jar로 빌드하게 되면 위 설정대로 먼저 테스트를 진행하고 문서를 만들고 jar를 빌드하게 된다.
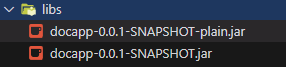
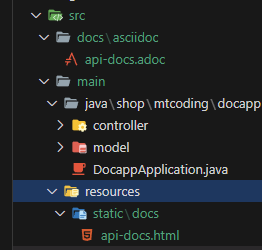
빌드된 파일 내부에 adoc의 확장자로 문서가 만들어졌는데 확인하기 편하게 만들기 위해
http://localhost:8080/docs/문서파일명.html로 쉽게 볼 수 있도록 html로 변환해보자.
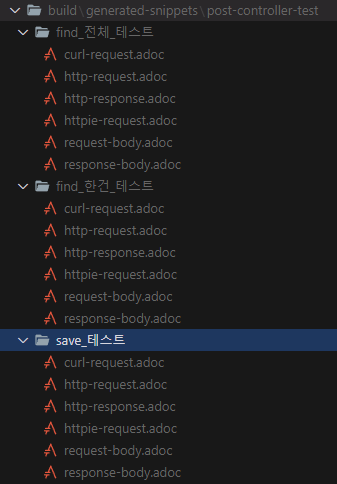
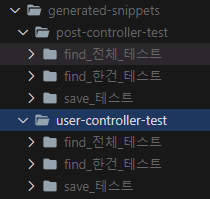
다음과 같은 경로에 폴더를 만들고 *.adoc 파일을 만든다.
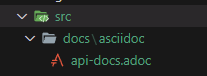
내부에 다음 코드를 넣는다.
ifndef::snippets[]
:snippets: ./build/generated-snippets
endif::[]
:user: user-controller-test
:post: post-controller-test
= Spring REST Docs
:toc: left
:toclevels: 2
:source-highlighter: highlightjs
== 회원
=== 1. 회원가입
===== HTTP request
include::{snippets}/{user}/save_테스트/http-request.adoc[]
===== HTTP response
include::{snippets}/{user}/save_테스트/http-response.adoc[]
===== Curl
include::{snippets}/{user}/save_테스트/curl-request.adoc[]
=== 2. 회원정보
===== HTTP request
include::{snippets}/{user}/find_한건_테스트/http-request.adoc[]
===== HTTP response
include::{snippets}/{user}/find_한건_테스트/http-response.adoc[]
=== 3. 회원목록
===== HTTP request
include::{snippets}/{user}/find_전체_테스트/http-request.adoc[]
===== HTTP response
include::{snippets}/{user}/find_전체_테스트/http-response.adoc[]
== 게시글
=== 1. 게시글등록
===== HTTP request
include::{snippets}/{post}/save_테스트/http-request.adoc[]
===== HTTP response
include::{snippets}/{post}/save_테스트/http-response.adoc[]
===== Curl
include::{snippets}/{post}/save_테스트/curl-request.adoc[]
=== 2. 게시글상세보기
===== HTTP request
include::{snippets}/{post}/find_한건_테스트/http-request.adoc[]
===== HTTP response
include::{snippets}/{post}/find_한건_테스트/http-response.adoc[]
=== 3. 게시글목록보기
===== HTTP request
include::{snippets}/{post}/find_전체_테스트/http-request.adoc[]
===== HTTP response
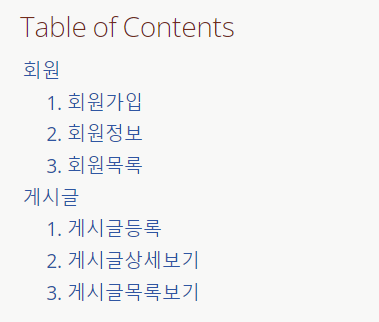
include::{snippets}/{post}/find_전체_테스트/http-response.adoc[]다시 빌드하면 jar 파일이 생성되고 서버를 실행하면 다음 주소로 문서에 접근할 수 있게 된다.
api-docs.html 이 생성되었다.
http://localhost:8080/docs/api-docs.html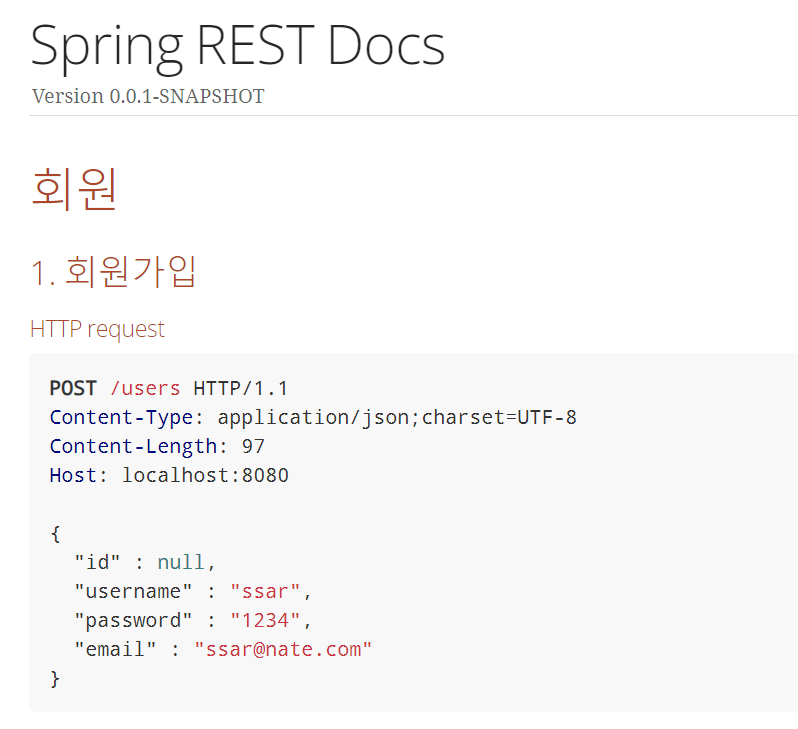
문서의 = 갯수에 따라서 목차가 만들어진다.
래퍼런스 - https://github.com/codingspecialist/Springboot-Gradle-RestDoc
테스트 코드에서 한글때문에 빌드가 안된다면 ?? 다음 추가로 해결했다.
build{
	compileJava.options.encoding = 'UTF-8'
	compileTestJava.options.encoding = 'UTF-8'
}
그리고 프로젝트에 gradle.properties 추가후 다음 코드 입력
org.gradle.jvmargs=-Dfile.encoding=UTF-8