시작하기 앞서 DAO는 자바가 DB에 접근하기 위해 필요한 함수들을 가지고 있는것들을 말한다.
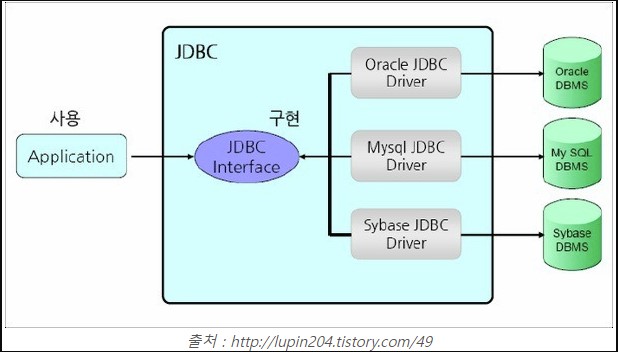
JDBC의 역할
자바에서 DB와 통신을 하기 위해서는 소켓이 필요하다.
통신에는 소켓과 더불어 프로토콜이 필요한데 여러 DB 회사들은 각자 자기만의 프로토콜을 가지고 있다.
그래서 DB가 달라지면 각 DB사가 만든 JDBC driver를 이용해야 한다.
JDBC는 도메인 특화 언어(DSL)라고도 한다.
JDBC를 이용하면 자바와 DB 양쪽에 소켓을 만들고 버퍼를 만든다. 정확히는 DBMS에 소켓을 만든다.
통신을 하기위해서는 중간언어(ex, json)를 사용해야 하는데 JDBC가 이 과정을 해결해준다.
JDBC 는 드라이버를 통해서 DB에 질의를 할 수 있는 메소드를 가지고 있다. ( createStatement() / executeQuery() / .... )
이러한 메소드도 JDBC가 제공하므로 JDBC는 인터페이스(JDBC API)의 역할을 하게 된다.
드라이버는 DBMS를 통해서 DB와 연결하게 되는데 DBMS는 DB와 JDBC를 연결해주므로 미들웨어라고 한다.
DBMS 를 이용하기 위해서는 정해져있는 프로토콜을 이용해야 하는데 이는 JDBC DRIVER가 제공한다.
자바는 JDBC API가 제공해주는 여러 메소드를 호출해서 DB의 프로토콜을 지켜 쿼리를 전달하게 된다.
자바 세팅, DB 세팅
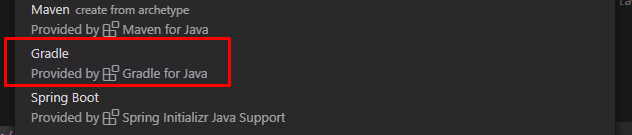
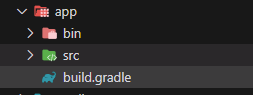
vs code로 자바프로젝트(Gradle)를 만들자

연결할 DB 는 MySQL 을 이용한다
https://mvnrepository.com/artifact/mysql/mysql-connector-java/8.0.30 에서 드라이버 링크를 가져와서
implementation group: 'mysql', name: 'mysql-connector-java', version: '8.0.30'build.gradle로 가서 dependencies에 복사한 링크를 넣는다
dependencies {
    // Use JUnit Jupiter for testing.
    testImplementation 'org.junit.jupiter:junit-jupiter:5.7.2'
    // https://mvnrepository.com/artifact/mysql/mysql-connector-java
    implementation group: 'mysql', name: 'mysql-connector-java', version: '8.0.30'
    // This dependency is used by the application.
    implementation 'com.google.guava:guava:30.1.1-jre'
}
이제 MySQL WorkBench를 실행한다
그 다음 DB를 만든다
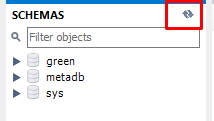
create database metadb; 새로고침을 하면 만들어진 DB가 스키마에 들어온다
use metadb; 를 입력하고 테이블을 만든다
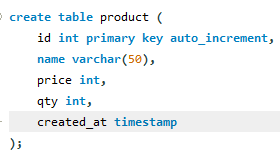
create table product (
	id int primary key auto_increment,
    name varchar(50),
    price int,
    qty int,
    created_at timestamp
);
이제 스프링에서 사용했던 Repository 를 구현해보자
Repository 구현
DB에 연결을 하기 위해서는 커네션이 필요하다
public class DB {
    public static Connection getConnection(){  // 커넥션을 리턴
        Connection conn = null;
        try {
            Class.forName("com.mysql.cj.jdbc.Driver");
            conn = DriverManager.getConnection(
            		"jdbc:mysql://localhost:3306/metadb","root","1234");
            System.out.println("DB 연결성공");
            return conn;
        } catch (Exception e) {
            e.printStackTrace();;
            return null;
        }
    }
    public static void main(String[] args) {
        getConnection();  // DB 연결성공
    }
}
DB.getConnection(); 을 호출하면 커넥션객체를 리턴받을수 있다.
이제 jdbc의 메소드를 이용해서 DB에 쿼리를 날려보자
DB 에 데이터를 넣을 경우를 만들어보자
    private void insert(String name, int price, int qty) throws SQLException {
        // 1 커넥션 객체 만들기
        Connection conn = DB.getConnection();

        // 2 버퍼 접근
        String sql = "insert into product(name, price, qty, created_at) values (?,?,?,now())";
        PreparedStatement pstmt = conn.prepareStatement(sql);

        // 3 물음표 완성
        pstmt.setString(1, name); // 첫번째 물음표에 대입
        pstmt.setInt(2, price);
        pstmt.setInt(3, qty);

        // 4 전송
        // pstmt.addBatch(); // 모든 데이터를 한번에 보낸다
        int result = pstmt.executeUpdate();

        // 5 응답에 대한 처리
        if( result == 1 ){
            System.out.println("insert 되었습니다.");
        }else{
            System.out.println("insert 실패");
        }
       	conn.close();
        pstmt.close();
}insert는 커넥션 객체를 만든 뒤 PreparedStatement의 executeUpdate() 를 이용해서 쿼리를 DB에 날리고 있다.
이렇게 코드를 짰을 경우 커넥션 객체를 매번 만들고 제거하게 된다.
커넥션 객체를 생성할때는 많은 자원이 소모되므로 이렇게 코드를 짜면 안된다.
또한 insert메소드가 끝나면 스택메모리의 데이터는 모두 날아가므로 conn.close(); 와 pstmt.close();는 넣을 필요가 없다.
하지만 초보자는 넣어야 할 경우 실수할 수도 있으므로 필요 하다는것은 알고 있자.
커넥션객체를 매번 생성하면 자원의 소모가 큰데 connection pooling을 이용하면 자원의 낭비를 줄일수가 있다.
connection pooling
커넥션 생성에는 많은 자원이 소모 된다. 그래서 많은 서버들은 서버를 시작할때 생성해야할 여러가지 객체들을 생성한다.
여기에 커넥션 객체도 포함되는데 connection pooling을 이용해서 시스템이 필요한 감당가능한 정도의 커넥션풀을 만들어 둔다.
연결이 끝날경우에 커넥션을 제거하지 않고 사용자만 커넥션에서 연결을 끊고 커넥션을 유지해야
서버 시작시 만들어둔 커넥션들을 재사용하게 되므로 커넥션을 재생성해서 낭비되는 자원소모를 막을 수가 있다.
참고로 서블릿도 request polling을 이용하는데 사용자가 많이 이용 할것 같은 것들 중에서 생성시 자원의 소모가 심한것들은 서버 시작시에 Pool을 만들어서 사용하게 된다.
Pooling을 다르게 표현하면 holder기술이라고도 한다.
앱으로 어떤 정보를 확인할때 미리 데이터가 들어갈 공간을 만들어두고 드래그를 할때 데이터를 바꿔가면서 여러 데이터를 보여주는것을 말하는데 예를들어 유튜브 스크롤을 계속 내려도 새로운 데이터가 비슷한 박스에 담겨서 나오게 되는것 들이다.
PreparedStatement
기존에 자바에서 퀴리문을 이용할때는 Statement를 이용했는데 PreparedStatement 을 이용하면 SQL Injection을 방어할 수 있게 된다.
다음과 같은 sql이 있을때
String sql = "SELECT * FROM user WHERE id ="+id+" AND password="+password;공격하려는 사용자가 id에 "1 OR 1=1 --" 을 입력한다면 sql문은 이렇게 변하게 된다.
SELECT * FROM user WHERE id=1 OR 1=1 -- AND password=1; --은 주석이므로 password 검증이 사라지고 OR 1=1이 있기 때문에 모든 유저 정보가 전부 나오게 된다.
Statement는 이러한 문제점 때문에 SQL Injection에 취약한데 PreparedStatement는 다음의 형식으로 쿼리를 작성하기 때문에
SELECT * FROM user WHERE id = ? AND password = ?; ?를 필드값으로 인식해 하나의 필드값으로 삽입해버려서 "1 OR 1=1 --" 을 입력하면 필드 값으로 넣어 이러한 공격을 막을수 있게 된다.
참고로 PreparedStatement 인덱스는 1부터 시작한다.

다시 돌아와서 커넥션을 재생성 해야 한다는 문제점을 해결 해보자.
객체를 재생성하지 못하도록 싱글톤 패턴을 이용해서 커넥션 객체를 주기도 하는데 이럴 경우 많은 스레드에서 연결이 된다면 문제가 발생할 수 있다.
스프링은 의존성 주입을 이용하는데 앞에서 만든 DB.getConnection() 으로 커넥션 객체를 만들어서 쿼리를 사용할때 주입해보자.
쿼리를 가지고 있는 ProductRepository 를 하나 만들었다.
public class ProductRepository {
    private Connection conn;


    public ProductRepository2(Connection conn) { // 이게 di
        this.conn = conn;

   	// 여기는 여러 쿼리가 있는 메소드의 자리 ( CURD )
    }
}ProductRepository에 커넥션객체를 주입받는 생성자를 만들면 ProductRepository 를 호출하는 곳에서 ( 스프링이라면 컨트롤러 ) 커넥션 객체만 넣고 메소드를 사용하면 원하는 결과를 얻게 된다.
간단히 insert를 만들어 보면 아래와 같다
    public void insert(String name, int price, int qty) throws SQLException {
        String sql = "insert into product(name, price, qty, created_at) values(?,?,?,now())";
        PreparedStatement pstmt = conn.prepareStatement(sql);

        pstmt.setString(1, name);
        pstmt.setInt(2, price);
        pstmt.setInt(3, qty);

        int result = pstmt.executeUpdate();

        if (result == 1) {
            System.out.println("insert 되었습니다");
        } else {
            System.out.println("insert 실패");
        }
        pstmt.close();
    }
DBApp( 컨트롤러의 역할 )에서 DB 와 연결되어 있는 Repository를 사용할 경우에
public class DBApp {
    public static void main(String[] args) throws Exception{
        // 이러한 과정을 스프링이 컴포넌트 스캔으로 자동적으로 해줌

        // 1 커넥션 가져오기
        Connection conn = DB.getConnection();
        // 2 DAO 를 메모리에 올리기
        ProductRepository productRepository =
        	new ProductRepository(conn); // 커넥션을 주입해야함

        productRepository.insert("apple",1000,30); // 쿼리가 작동한다
    }
}
커넥션 객체를 주입해 연결이 됐으므로 쿼리가 DB로 날려진다.
insert 의 결과로 사과가 추가된것을 볼 수가 있다.

지금 ProductRepository 의 insert() 메소드만 호출했는데 쿼리 실행시 에러가 난다던가 여러개의 데이터를 넣을 필요가 있을때 여러개의 insert()를 호출시 중간에서 에러가 나면 처음에 insert는 성공했지만 나중의 insert는 성공하지 않아 데이터의 원자성이 지켜지지 않게 된다.
따라서 트랜잭션처리가 필요한데 로직을 분리하기 위해서 서비스를 만들어야 한다.
서비스 만들기
public class ProductService {

    private ProductRepository productRepository;
    private Connection conn; // 트랜잭션을 처리하기 위해 가져옴

    public ProductService(ProductRepository productRepository, Connection conn) {
        this.productRepository = productRepository;
        this.conn = conn; // 컨트롤러에서 만든 그 커넥션을 가져옴
    }

    // 여러개의 트랜잭션을 처리해아함
    public void 상품등록(String name, int price, int qty) throws SQLException{
        try {
            conn.setAutoCommit(false);
            productRepository2.insert(name, price, qty);
            productRepository2.insert(name, price, qty);
            conn.commit(); // 메모리에 있는 인서트를 커넥션으로 커밋
        } catch (Exception e) {
            try {
                conn.rollback();
            } catch (Exception e1) {
                e1.printStackTrace();
            }
        }
    }
    public void 상품수정(int id, String name, int price, int qty) throws SQLException{
        try {
            productRepository2.updateById(id, name, price, qty);
            conn.commit();
        } catch (Exception e) {
            try {
                conn.rollback();
            } catch (Exception e1) {
                e1.printStackTrace();
            }
        }

    }
    public void 상품삭제(int id) throws SQLException{
        try {
            productRepository2.deleteById(id);
            conn.commit();
        } catch (Exception e) {
            try {
                conn.rollback();
            } catch (Exception e1) {
                e1.printStackTrace();
            }
        }
    }
}
서비스는 ProductRepository 를 의존하게 되어서 메소드를 사용할 수 있게 된다.
트랜잭션 처리에는 커넥션 객체가 제공하는 .setAutoCommit(false); 와 .commcit(); , rollback();을 이용해야 하기 때문에 서비스가 Connection 을 의존하게 된다.
해당 쿼리를 제공하는 메소드를 실행했다가 에러가 나거나 여러개의 메소드를 사용해야 할 경우 서비스에서 트랜잭션 처리를 해야하는데 위처럼 try-catch 를 사용해서 처리하고 익셉션이 발생하면 rollback(); 으로 처음으로 롤백을 해야한다.
코드 정리를 해보자
코드 정리
public class ProductRepository {
    private Connection conn;

    public ProductRepository(Connection conn) { // 이게 di
        this.conn = conn;
    }
    public Product findById(int id) throws SQLException{
        Product product = null;

        String sql = "select * from product where id = ?";
        PreparedStatement pstmt = conn.prepareStatement(sql);
        pstmt.setInt(1, id);

        ResultSet rs =  pstmt.executeQuery();

        while(rs.next()){
            int v1 = rs.getInt("id");
            String name = rs.getString("name");
            int price = rs.getInt("price");
            int qty = rs.getInt("qty");
            Timestamp createdAt = rs.getTimestamp("created_at");
            product = new Product(v1, name, price, qty, createdAt);
            // MyBatis가 이 과정을 해결 해준다.
        }
        return product;
    }

    public List<Product> findAll() throws SQLException{
        List<Product> productList = new ArrayList<>();
        Product product = null;

        String sql = "select * from product";
        PreparedStatement pstmt = conn.prepareStatement(sql);

        ResultSet rs =  pstmt.executeQuery();
        while(rs.next()){
            int v1 = rs.getInt("id");
            String name = rs.getString("name");
            int price = rs.getInt("price");
            int qty = rs.getInt("qty");
            Timestamp createdAt = rs.getTimestamp("created_at");
            product = new Product(v1, name, price, qty, createdAt);
            productList.add(product);
        }
        return productList;
    }

    public void insert(String name, int price, int qty) throws SQLException {
        //  버퍼 접근
        String sql = "insert into product(name, price, qty, created_at) values(?,?,?,now())";
        PreparedStatement pstmt = conn.prepareStatement(sql);

        //  물음표 완성
        pstmt.setString(1, name);
        pstmt.setInt(2, price);
        pstmt.setInt(3, qty);

        //  전송
        int result = pstmt.executeUpdate();

        //  응답에 대한 처리
        if (result == 1) {
            System.out.println("insert 되었습니다");
        } else {
            System.out.println("insert 실패");
        }
        //  최종 마무리
        pstmt.close();
    }

    public void deleteById(int id) throws SQLException {
        String sql = "delete from product where id = ?";
        PreparedStatement pstmt = conn.prepareStatement(sql);
        pstmt.setInt(1, id);

        int result = pstmt.executeUpdate();
        if (result == 1) {
            System.out.println("delete 되었습니다");
        } else {
            System.out.println("delete 실패");
        }
        pstmt.close();
    }
    public void updateById(int id, String name, int price, int qty) throws SQLException {
        String sql = "update product set name = ?, price = ?, qty = ? where = ?";
        PreparedStatement pstmt = conn.prepareStatement(sql);

        pstmt.setString(1, name);
        pstmt.setInt(2, price);
        pstmt.setInt(3, qty);
        pstmt.setInt(4, id);

        int result = pstmt.executeUpdate();
        if (result == 1) {
            System.out.println("update 되었습니다");
        } else {
            System.out.println("update 실패");
        }
        pstmt.close();
    }
}
select 시에 데이터를 담을 모델이 필요하다
public class Product {
    private int id;
    private String name;
    private int price;
    private int qty;
    private Timestamp createdAt;

    public Product(int id, String name, int price, int qty, Timestamp createdAt) {
        this.id = id;
        this.name = name;
        this.price = price;
        this.qty = qty;
        this.createdAt = createdAt;
    }
    public int getId() {
        return id;
    }
    public void setId(int id) {
        this.id = id;
    }
    public String getName() {
        return name;
    }
    public void setName(String name) {
        this.name = name;
    }
    public int getPrice() {
        return price;
    }
    public void setPrice(int price) {
        this.price = price;
    }
    public int getQty() {
        return qty;
    }
    public void setQty(int qty) {
        this.qty = qty;
    }
    public Timestamp getCreatedAt() {
        return createdAt;
    }
    public void setCreatedAt(Timestamp createdAt) {
        this.createdAt = createdAt;
    }

}
컨트롤러의 역할
public class DBApp {
public static void main(String[] args) throws Exception{
// 이러한 과정을 스프링이 컴포넌트 스캔으로 자동적으로 해줌
// 1 커넥션 가져오기
Connection conn = DB.getConnection();
// 2 DAO 를 메모리에 올리기
ProductRepository productRepository = new ProductRepository(conn);
// 3 SERVICE 를 메모리에 올리기
ProductService productService = new ProductService(productRepository, conn); // DBApp 은 컨트롤러의 역할을 한다 서비스를 의존한다
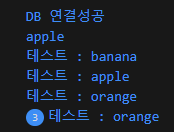
System.out.println(productRepository.findById(2).getName());
List<Product> pl = productRepository.findAll();
for (Product product : pl) {
System.out.println("테스트 : "+product.getName());
}
}
}간단한 결과는